How to Hide or Show Network Icon in Windows 11 File Explorer
The Network icon in Windows 11 File Explorer lets you quickly see and connect to other computers and devices on your home or office network.
Windows 11 usually shows this icon in the navigation pane of File Explorer. You might want to hide it if you prefer a cleaner look or simply don’t use it often.
Learning to hide or show the Network icon is a simple tweak within File Explorer’s settings. This helps you customize your PC’s view to better suit your needs.
Right-click in the empty space below the Network icon in the File Explorer sidebar and select “Show Network” to toggle it. Alternatively, open File Explorer Options, go to the View tab, and check or uncheck “Show Network.
Why hide or show the Network icon in 🪟 Windows 11?
The Network icon in Windows 11 File Explorer helps you quickly find shared computers and devices on your local network, but you might want to hide it to make your sidebar look tidier.
What happens when you are done?
Once you finish, the Network icon will disappear or appear in your File Explorer sidebar. This change is purely visual. Your computer will still maintain its network connection status, and you can still reach network drives if you type their path directly into the address bar.
How to show or hide the Network icon in File Explorer
You can control if the Network icon appears in your Windows 11 File Explorer sidebar. One quick method involves opening File Explorer, then right-clicking in the empty space in the left sidebar and choosing ‘Show Network’ to toggle it on or off.
- Open File Explorer by pressing the Windows Key + E.
- Right-click in the empty space below the Network icon in the left sidebar.
- Select Show Network to either hide or show it.

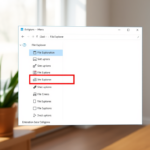
Alternatively, use the Folder Options menu:
- Click the three-dot menu icon at the top of the File Explorer window.
- Select Options.
- On the Folder Options window, click the View tab.
- Look for the setting that says Show Network.
- Check or uncheck the box to show or hide the icon.
- Click OK to save your changes.

Troubleshooting: Why is my network icon missing from the taskbar?
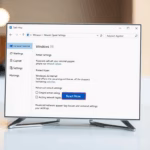
If your network icon isn’t showing up on the Windows 11 taskbar, it’s often because it’s turned off in settings. Check your taskbar settings this way:
- Right-click the taskbar and select Taskbar settings.
- Click Taskbar corner overflow.
- Ensure the toggle for Network is set to On.
If the icon is still missing, your network adapter (the hardware that connects your computer to a network) might be disabled. Open Network & Internet settings and make sure your adapter is enabled.
How to restart Windows Explorer to fix missing icons
Sometimes the Windows 11 UI glitches. Restarting the process can bring back missing icons.
- Press Ctrl+Shift+Esc to open Task Manager.
- Find Windows Explorer in the list.
- Right-click it and select Restart.
Does updating network drivers fix the missing icon issue?
Yes, outdated drivers can cause display issues. Open Device Manager, find your Network Adapter, right-click it, and select Update driver. If that fails, choose Uninstall device and restart your computer to let Windows reinstall it automatically.
Advanced configuration: Registry and Group Policy
Power users have the option to force these settings using the Registry Editor. Be aware: this process requires administrator privileges and can pose risks if not performed correctly.
HKEY_CURRENT_USER\\Software\\Microsoft\\Windows\\CurrentVersion\\Policies\\Explorer
Create a new DWORD value named NoNetHood and set it to 1. This will hide the icon.
Can I remove the network icon from the lock screen?
Yes, for security, you can hide the network icon on the sign-in screen. Note: this requires administrator privileges. Open the Group Policy Editor (gpedit.msc) and navigate to Computer Configuration\\Administrative Templates\\System\\Logon. Enable the policy Remove network connectivity indicator from the lock screen.
Summary
Managing the network icon in Windows 11 is manageable, whether you want to tidy up File Explorer or fix a missing taskbar icon.
Why is my network icon greyed out in 🪟 Windows 11?
A greyed-out icon often means the network adapter is disabled or the driver is malfunctioning. Check your Network Connections in the Control Panel (a system utility for managing hardware and software settings) to ensure the adapter is enabled. If it is, try running the Network Troubleshooter or updating your network adapter drivers to restore full functionality.
Does hiding the network icon disconnect me from the internet?
No, hiding the network icon in File Explorer or the taskbar is purely a visual change. It does not affect your actual internet connection, your network adapter settings, or your ability to browse the web. Your computer will remain connected to your local network and the internet as usual.
How do I reset the network icon in 🪟 Windows 11?
If your network icon is acting strange or missing, you can reset your network settings in Windows 11 to fix it by returning network adapters to their default state.
How to show network icon in 🪟 Windows 11?
In the left sidebar. This allows you to customize all desktop appearance and icon settings. On the right side in the personalization section, click themes. And under the related settings.
Where is my network icon?
In front of the network, you will see a toggle switch. Simply click on the toggle switch to turn it on; the network icon is shown on the taskbar. Once done, you can close the settings window.
How do I bring back the network icon on my taskbar?
And make sure it's toggled on. Go back one step, then under the notification area, click on select which icons appear on the taskbar. Find network in the list.
Why is the internet icon not showing?
If your internet icon isn't showing on the taskbar, it might just be hidden among your other icons. Click the small arrow in the bottom right corner of your screen to see if it's hiding there.
Was this guide helpful?

About the Author
Richard
Tech Writer, IT Professional
Richard, a writer for Geek Rewind, is a tech enthusiast who loves breaking down complex IT topics into simple, easy-to-understand ideas. With years of hands-on experience in system administration and enterprise IT operations, he’s developed a knack for offering practical tips and solutions. Richard aims to make technology more accessible and actionable. He's deeply committed to the Geek Rewind community, always ready to answer questions and engage in discussions.


No comments yet — be the first to share your thoughts!