Why Does Windows 11 Keep Reopening Closed Apps After a Reboot

Windows 11 reopens closed apps after a reboot because a built-in feature saves your open programs during shutdown and launches them again when you sign back in. This behavior is tied to your sign-in info and background settings in Windows 11 version 22H2 and later. It helps you pick up where you left off, but it gets in the way when you want a clean desktop after a restart.
Stopping it takes a few changes in the Settings app, your sign-in options and Task Manager . Work through the sections below in order and test after each one. You may only need the first.
Windows 11 reopens closed apps after a reboot because a built-in feature called “Automatically save my restartable apps and restart them when I sign back in” saves your open programs during shutdown and relaunches them when you sign back in. Turn off this toggle in Settings Accounts Sign-in options Additional settings to stop the behavior.
Disable Sign-in Info to Stop Restarting Apps
Turning off the restartable-apps option stops Windows 11 from reopening your closed apps after a reboot. Windows normally uses your saved account details to finish setting up your PC after a restart, and that is what relaunches the programs that were running before. This setting is per user, so it only affects the account you are signed in to. You do not need administrator rights to change it.
- Press the Windows key and select the gear icon to open Settings.

Windows 11 Start menu with Settings gear icon highlighted. - Click Accounts in the left sidebar.
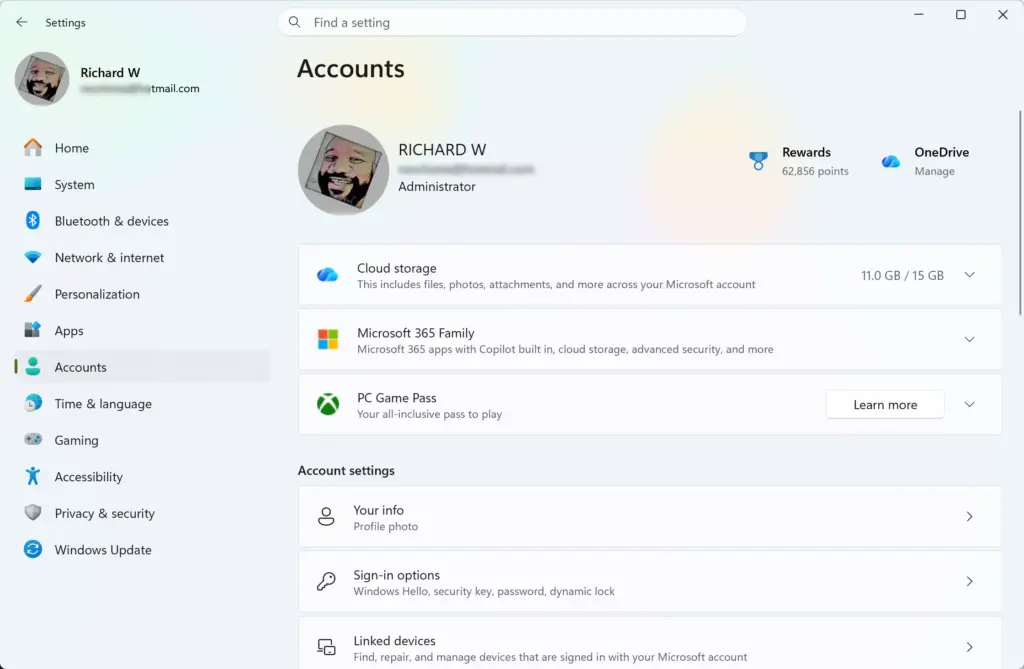
Settings › Accounts - Select Sign-in options from the list of account settings.
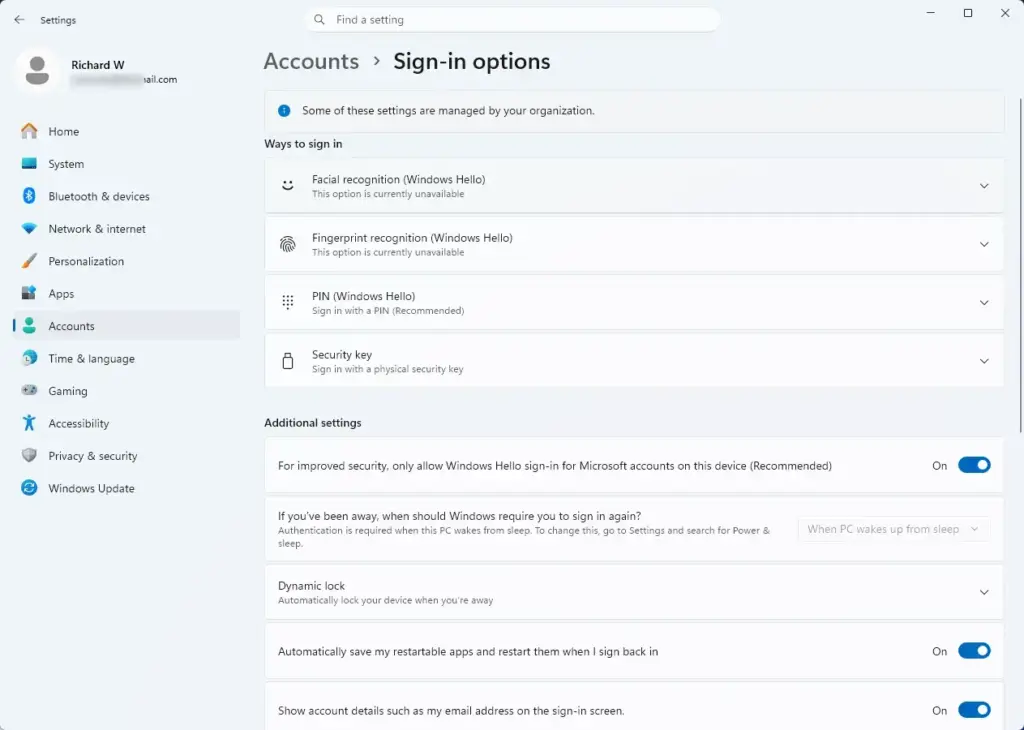
Settings › Accounts › Sign-in options - Scroll down to the Additional settings section.
- Turn off the toggle switch next to Automatically save my restartable apps and restart them when I sign back in. The switch should now read Off.
On a work or school PC, the option may be hidden or locked by your organization’s policy. To undo the change, return to the same spot and switch the toggle back on. No restart is needed to save it, but you will only see the effect on your next reboot.
Use Shut Down Commands Instead of Restart
Using a full shutdown command instead of the standard restart option clears your app session cache. A restart from the Start menu saves your open apps by design, so they come back when the PC starts again. Running a command from a prompt skips that behavior and boots to a fresh desktop. This works on both Home and Pro.
- Press Windows plus X to open the quick link menu, then select Terminal or PowerShell. A prompt window opens.
- Type the command
shutdown /s /f /t 0into the prompt window. - Press Enter to run the full shutdown sequence immediately. Save your work first, because the PC will not wait for you.
Your PC powers off. When you turn it back on and sign in, you should see an empty desktop. There is nothing to undo here, because the command only changes how this one shutdown behaves. If you often forget to use it, the setting in the previous section is the permanent fix.
Adjust Sign-in Options in Settings
Adjusting your Windows Update restart preferences keeps background updates from taking over your reboot and restoring your previous session. Windows often uses your sign-in details to finish installing updates automatically, and that brings back your closed apps. Changing these preferences stops your PC from restarting on its own and relaunching old programs.
Open Settings and go to your update preferences to control how restarts occur.
- Open Settings and click Windows Update in the left sidebar.
- Select Advanced options.
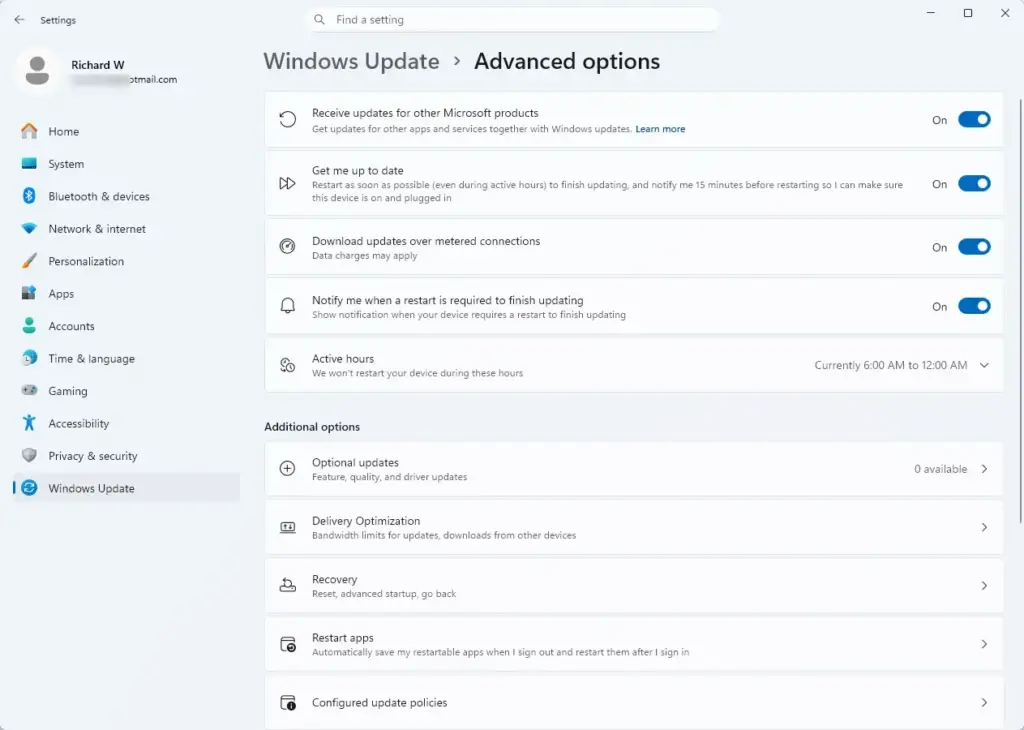
Settings › Windows Update › Advanced options - Turn off the toggle for Automatically restart my device as soon as possible when it's required to install an update. The switch should now read Off.
The wording of this option differs between builds. On some current Windows 11 builds it appears as Get me up to date, and the toggle does the same job. If you cannot find either name, your PC may be managed by an organization, or the option may not be offered on your build. With this off, Windows asks you to schedule restarts instead of doing them for you. To undo it, switch the toggle back on.
Clear Background Apps via Task Manager
Ending stubborn background apps in Task Manager (a tool for monitoring running apps and system performance) stops them from forcing themselves back into your session. Some apps ignore standard shutdown signals and run hidden processes that trigger a relaunch after a reboot. Ending these tasks by hand stops them from loading again in the current session.
- Open Task Manager by pressing Ctrl plus Shift plus Esc.
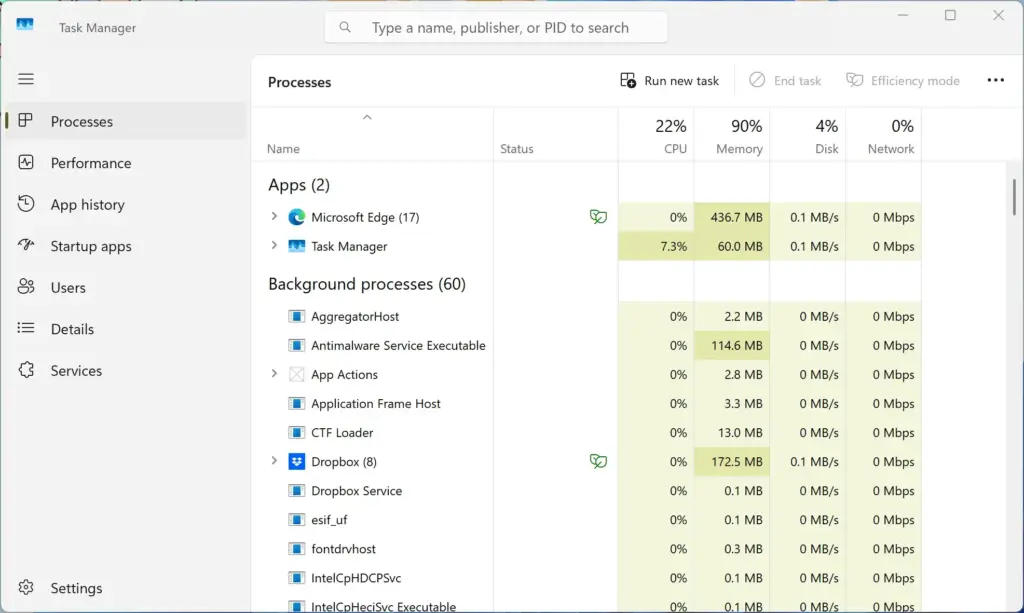
Task Manager - Click the Processes tab in the left menu if it is not already selected.
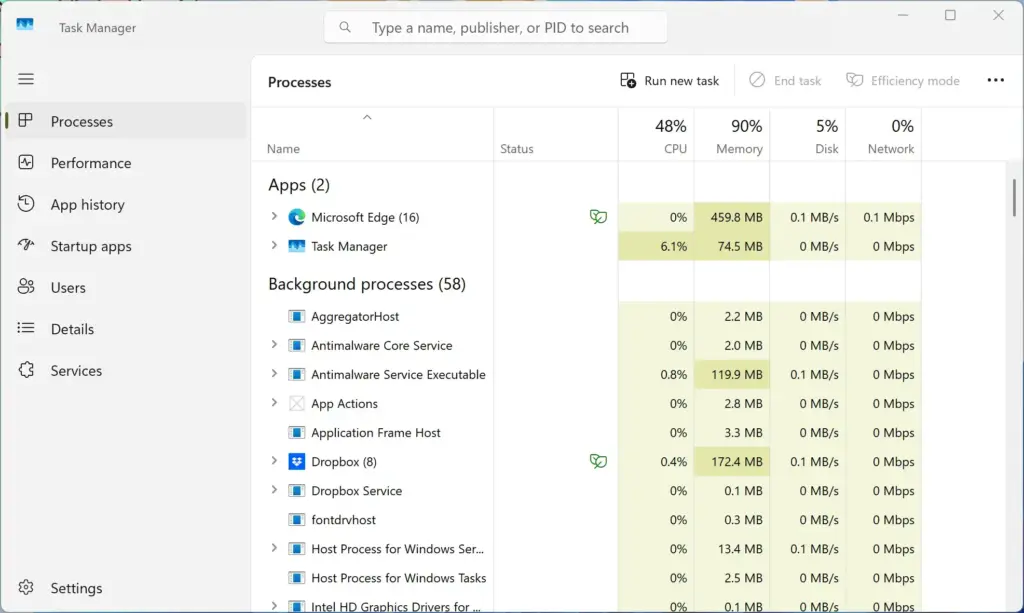
Task Manager › Processes - Review the list of running applications and background processes. Look under Apps and Background processes for anything you closed before the last reboot.
- Right-click any persistent app you want to close and select End task. The app disappears from the list.
Ending the wrong one can close your session or cause unsaved data loss. Ending a task only lasts until the next boot, so use the next section to stop the app from starting at all.
Check Startup Tab for Persistent Software
Checking the startup list in Task Manager helps you find software that overrides Windows behavior and launches on boot. Many modern apps have their own session-restore or "run at login" options that ignore your power settings and appear every time you turn on the PC. Disabling these items stops them from starting with your computer.
- Open Task Manager using Ctrl plus Shift plus Esc.
- Click the Startup apps icon (depicted as a gauge) in the left sidebar. A list of startup items appears with a Status column.
- Locate the application that keeps reopening after every reboot.
- Right-click the application name and select Disable. Its status changes to Disabled.
Disabling an item does not uninstall it. You can start it by hand whenever you like. To reverse the change, right-click the same entry and select Enable. If an app still opens after you disable it, check its own settings for an option such as "launch at startup" or "reopen last session."
What to do next
Once you apply these changes, restart your computer normally. Your desktop should load with only the default system processes running. If an app still returns, go back through the sections above, starting with the sign-in toggle and then the startup list. You can then move on to managing your startup apps further or configuring your taskbar layout.
Have a question about this guide?
Answered by AI from this guide. Good questions may be added to this page — please don't include personal details.
Did this guide fix your problem?

About the Author
Richard
Tech Writer, IT Professional
Richard is a writer at Geek Rewind who turns complex IT tasks into clear, step-by-step guides. He draws on years of hands-on experience in system administration and enterprise IT operations, focusing on Windows, Linux and WordPress: the problems people actually run into, and the fixes that work. His server and WordPress guides come from systems he runs himself. Richard builds and maintains the platform behind Geek Rewind, from its Ubuntu servers and Nginx configuration to its custom WordPress plugins. Many new tutorials start with readers' questions, and he's always glad to answer them in the comments.
No comments yet — be the first to share your thoughts!