Manage Background Apps in Windows 11: A Step-by-Step Guide
Managing background apps in Windows 11 controls which programs can run and do things even when you’re not actively using them.
These background apps can update themselves, send notifications, or sync data without you doing anything. Windows 11 lets you decide which apps get this permission.
You might want to stop apps from running in the background if they use too much battery or you don’t need them to constantly work. For example, an app might sync files or check for new emails even when it’s closed.
Windows 11 gives you specific settings to manage this for each app, helping your PC run more smoothly and save power.
- Always. The app is always allowed to run in the background
- Power optimized (recommended). Windows will decide based on battery needs.
- Never. It won’t run in the background when you’re not actively using the app.
Go to Settings Apps Apps & features, click the three dots next to an app, and select Advanced options. Choose “Never” from the “Let this app run in the background” dropdown to disable it.
How to stop or allow apps to run in the background in 🪟 Windows 11
Windows lets you manage background activity for your apps. You can control what an app does when it’s running in the background and not in use.
Here’s how to change that behavior in Windows 11:
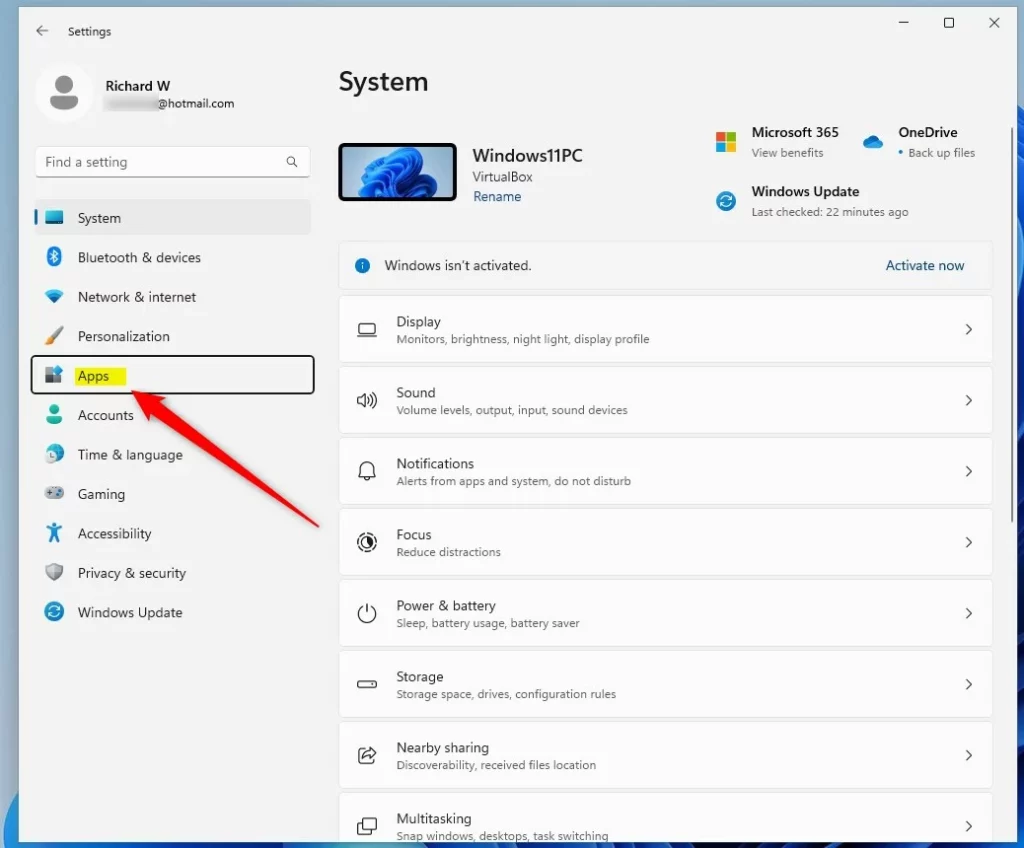
Windows 11 centralizes most settings in one place. You can adjust everything from system configurations to user accounts and Windows updates within the System Settings pane.
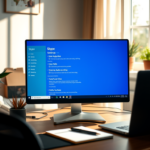
To access System Settings, press the Windows key + I shortcut or click Start then Settings, as shown below:

Alternatively, use the taskbar’s search box to find and open Settings.
The Windows Settings window should appear similar to this image. Within the Settings app, click Apps on the left-hand menu.
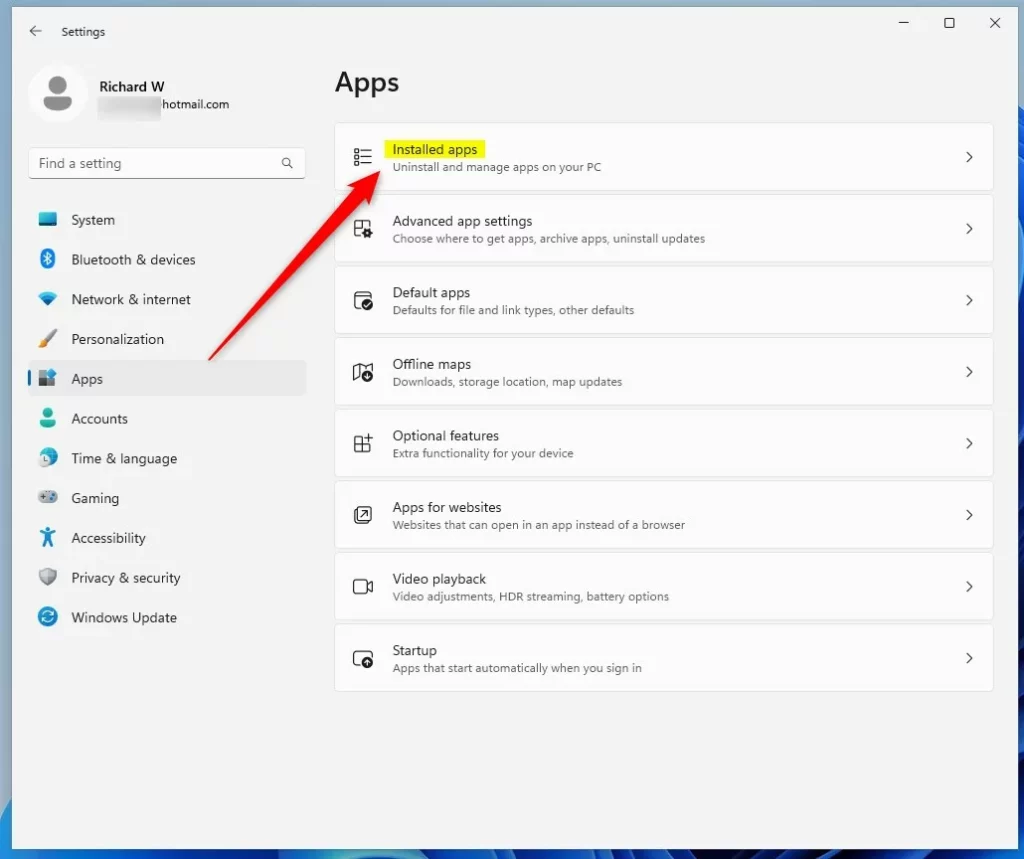
On the right side, select the tile for the Installed app you wish to modify to expand its options.
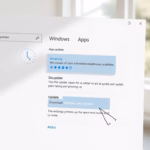
Within the System - Apps - Installed apps settings pane, click the menu (three-dotted) button for the specific Windows app you want to adjust.
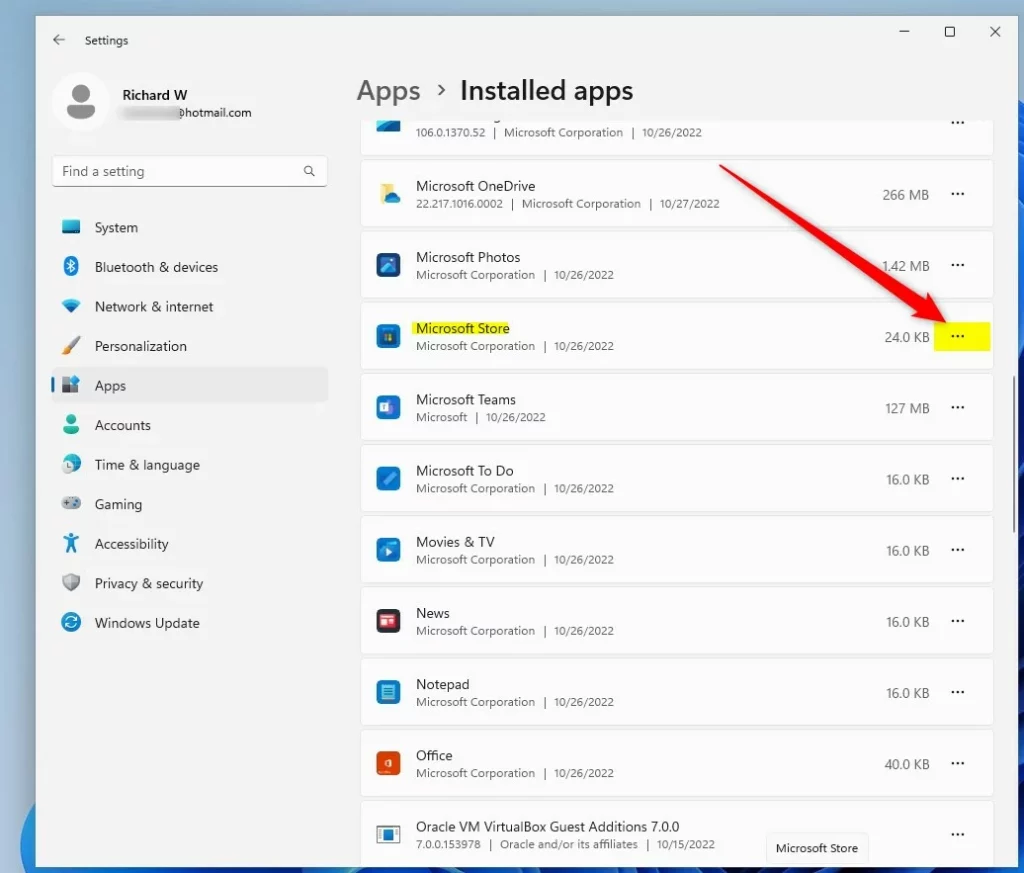
From the menu that appears, select Advanced options, as highlighted here.

On the System - Apps - Installed apps - App name screen, locate the Background apps permissions section. Here, you can choose the desired background activity level for that app.
Always. The app is always allowed to run in the background
Power optimized (recommended). Windows will decide based on battery needs.
Never. When you’re not actively using the app, it won’t run in the background.
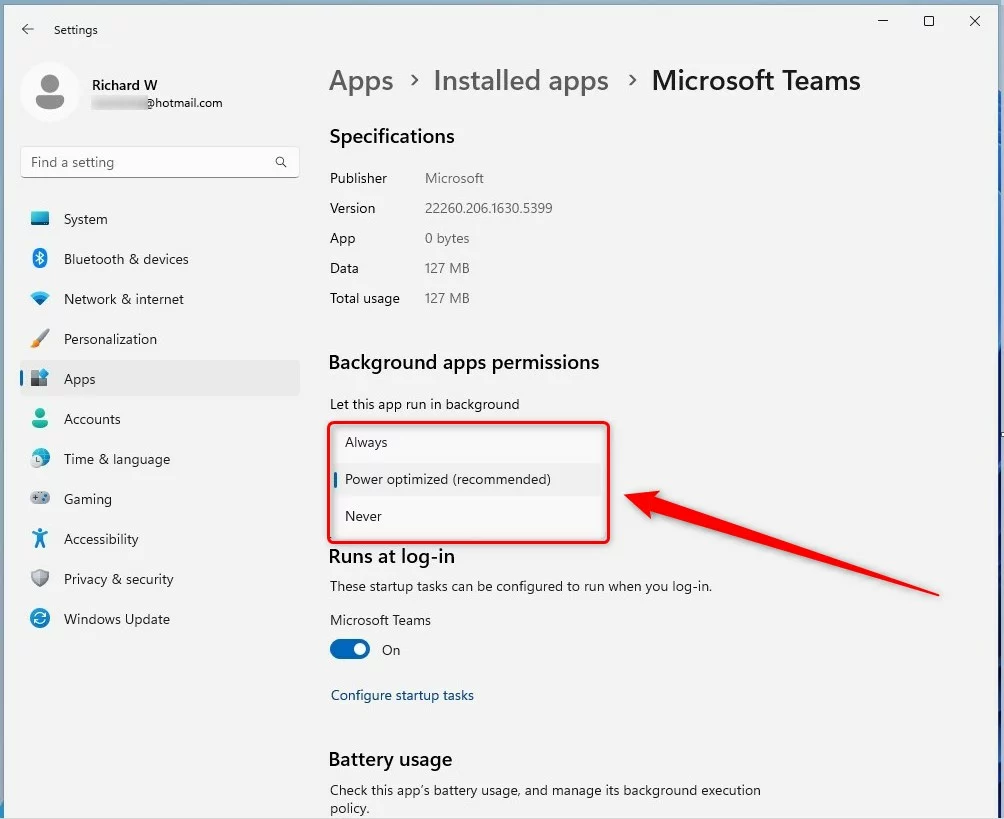
The choice you make will apply to the selected app.
That should complete the process!
Reference:
Conclusion:
- In conclusion, managing background apps in Windows 11 gives you control over app behavior when not in use.
- Following the steps outlined in this article, you can choose whether an app runs in the background based on your preferences and device needs.
- It’s important to note that setting at least one app to “Always” background activity may be necessary for certain essential device functions, such as staying connected and receiving app updates.
These guidelines empower users to optimize their device’s performance and battery usage by customizing background app permissions.
Was this guide helpful?

About the Author
Richard
Tech Writer, IT Professional
Richard, a writer for Geek Rewind, is a tech enthusiast who loves breaking down complex IT topics into simple, easy-to-understand ideas. With years of hands-on experience in system administration and enterprise IT operations, he’s developed a knack for offering practical tips and solutions. Richard aims to make technology more accessible and actionable. He's deeply committed to the Geek Rewind community, always ready to answer questions and engage in discussions.


No comments yet — be the first to share your thoughts!