What to Do When Windows Security Fails to Open After a Security Update

Windows Security fails to open after a security update when a background process gets stuck or system files break. Windows Security is the built-in antivirus program in Windows 10 and 11 that blocks viruses and manages your firewall.
You can fix this problem in 3 to 5 minutes using built-in repair tools. Resetting the app or running a quick command brings your security screen back up right away.
When Windows security fails to open after a security update, you can fix the issue by opening the Settings app, going to Apps and Installed apps, finding Windows Security, clicking the three dots for Advanced options, and clicking the Repair or Reset button.
Step 1Restart Your Computer
A restart clears temporary system memory and forces all background protection services to start fresh. Click the Start button , select the Power icon, and choose Restart to reboot your system completely. Many temporary glitches disappear the moment your PC boots back up.
Many temporary glitches disappear the moment your PC boots back up. A restart clears the computer’s short-term memory and forces all background services to start fresh.
- Click the Start button on your taskbar .
- Click the Power icon.
- Select Restart.
Wait for your computer to turn completely off and back on. Once you reach your desktop, try opening Windows Security again. If it still will not open, move on to the next step.
Step 2Check for Pending System Updates
Checking for pending system updates fixes broken security apps because Microsoft frequently releases quick patch updates to resolve bugs left behind by major installations. Open your Windows Settings app, go to the Windows Update section, and click the check for updates button to let any missing patches install fully on your PC.

- Click the Start button and open the Settings app (the gear icon).
- Click on Windows Update on the left or right side of the window.
- Click the Check for updates button.
If any updates appear, let them download and install completely.
Your computer may need to restart again to finish installing these new files. Once your PC restarts, check if Windows Security opens normally.
Step 3Reset and Repair the Windows Security App
Resetting and repairing the Windows Security app clears out corrupted temporary data and gives the application a fresh start without touching your personal files. Open your system settings, navigate to the installed apps list, and select the advanced options for Windows Security to run the repair tool.
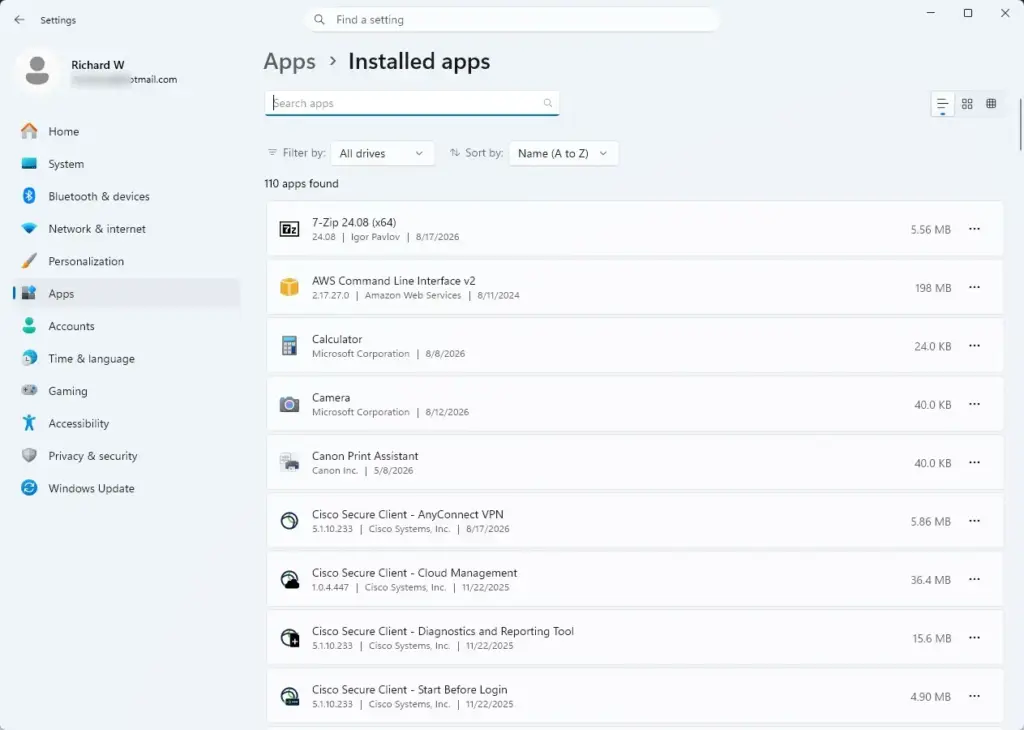
- Open the Settings app from your Start menu.
- Click on Apps in the menu.
- Click on Installed apps (or Apps & features depending on your Windows version).
- Scroll down the list or type "Windows Security" into the search box.
- Click the three small dots next to Windows Security.
- Select Advanced options.
- Scroll down and click the Repair button. Wait a moment to see if the app works.
If the Windows Security app still fails to open, return to the Windows Security app settings screen and click the Reset button. Note: Clicking the Reset button requires administrator privileges and will clear the app data, giving you a clean slate.
After resetting the app, restart your computer and try opening Windows Security again.
Step 4Re-register Windows Security Using PowerShell
Re-registering Windows Security using PowerShell forces your computer to reinstall the security application when standard app resets fail to work. You must run PowerShell with administrator privileges to successfully execute the commands that restore the built-in protection tools on your Windows computer.
You must run PowerShell as an administrator.
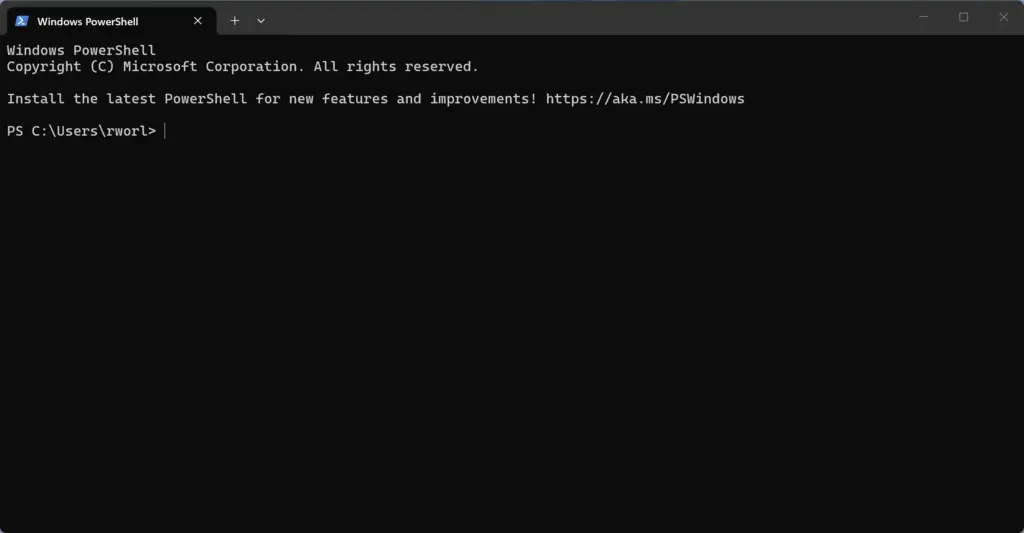
- Click the Start button and type PowerShell in the search box.
- Right-click on Windows PowerShell in the search results and select Run as administrator. A window will ask if you want to allow this app to make changes. Click Yes.
- Carefully copy the following text command:
You should ignore any red text error messages that might pop up while the command runs in the Command Prompt window. You must let the repair process finish completely so the tool can fix all corrupted system files. If you interrupt the process early, the system files might stay broken, and you still will not be able to open Windows Security on your computer.
Close the PowerShell window, restart your computer, and check if Windows Security opens.
Step 5Repair Corrupted System Files
Repairing corrupted system files fixes broken applications like Windows Security by using built-in system tools called SFC and DISM to scan for and replace damaged data. Running these repair commands through an administrator command prompt restores the essential files needed for your security dashboard to launch properly.

- Click the Start button and type cmd in the search box.
- Right-click on Command Prompt and select Run as administrator. Click Yes on the permission prompt.
- Type the following command into the black window:
DISM.exe /Online /Cleanup-image /Restorehealth
- Press Enter. This command downloads fresh system files from the internet to replace any damaged ones. It may take several minutes to reach 100%.
- Next, type this command into the same window:
sfc /scannow
- Press Enter. This tool scans all your protected system files and repairs any broken ones it finds.
Wait for the scan to finish completely.
Once the scan is complete, close the Command Prompt window and restart your computer. Test Windows Security to see if it responds.
Step 6Start and Configure Security Services
Starting and configuring security services ensures that the background tasks required by Windows Security are actively running and not disabled after an update. You can check these essential services by typing services.msc into the run dialog box and making sure the security startup types are set correctly.
You can check the Windows Security services using the built-in Windows settings menu or the Services manager application. To open the Services manager, you press the Windows key plus the R key, type services.msc into the run box, and press enter. Checking these specific background services matters because the Windows Security app relies on them to run properly and keep your computer safe from viruses and malware.

- Press the Windows Key + R on your keyboard to open the Run dialog box.
- Type services.msc into the box and press Enter.
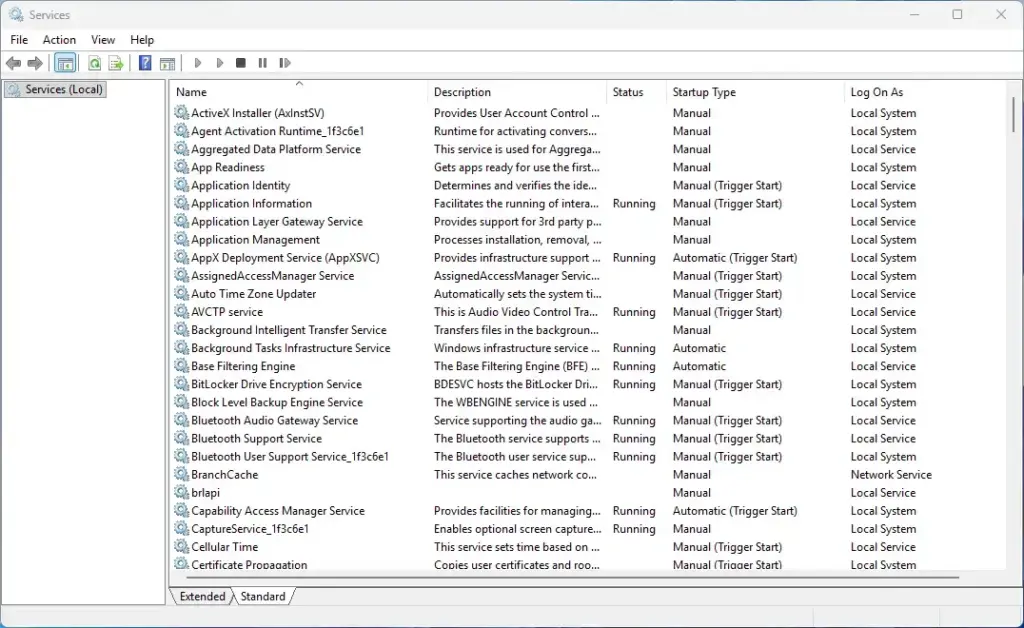
- Scroll down the alphabetical list to look for services related to Windows Security, such as Security Center (or Windows Security Service) and Windows Defender Firewall.
- Right-click on each of these services and select Properties.
- Look at the Startup type dropdown menu. Change it to Automatic.
- Check the Service status. If it says Stopped, click the Start button.
- Click Apply and then OK.
Repeat this process for any core Windows Defender or Security services that are not currently running. Restart your computer afterward.
Step 7Check Registry Settings (Manual GUI Method)
Checking registry settings allows you to fix situations where system configurations accidentally disable Windows Security after an update. You can safely open the Registry Editor to review specific security keys, provided you follow instructions carefully and only touch the exact settings mentioned in this guide.
Note: This step requires administrator privileges. Be very careful to follow these instructions exactly and only touch the settings mentioned.
- Press the Windows Key + R on your keyboard to open the Run dialog box.
- Type regedit into the box and press Enter. Click Yes when the permission prompt appears.
- In the Registry Editor window, use the left sidebar to navigate through the folders. Click the arrow next to HKEY_LOCAL_MACHINE, then click SOFTWARE, then Policies, then Microsoft, and finally click on Windows Defender.
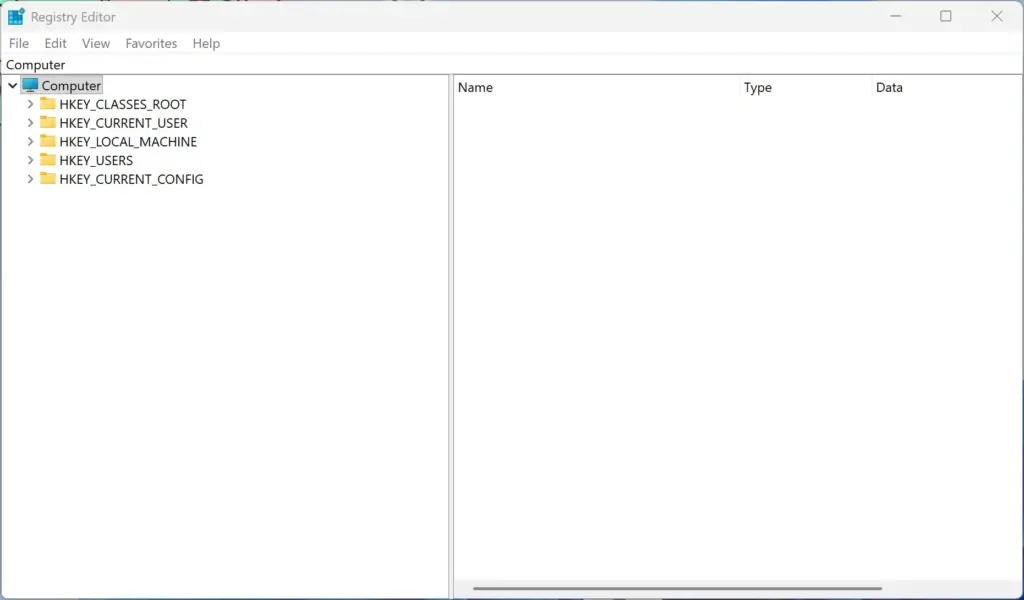
- Look at the main panel on the right side of the screen. Look for a value named DisableAntiSpyware or DisableAntiVirus.
- If either of these values exists and has a data number of 1, double-click on it.
- Change the value data from 1 to 0.
- Click OK.
Close the Registry Editor and restart your computer.
Unique Expert Tip 1: Fixing Group Policy Blocks Caused by Failed Updates
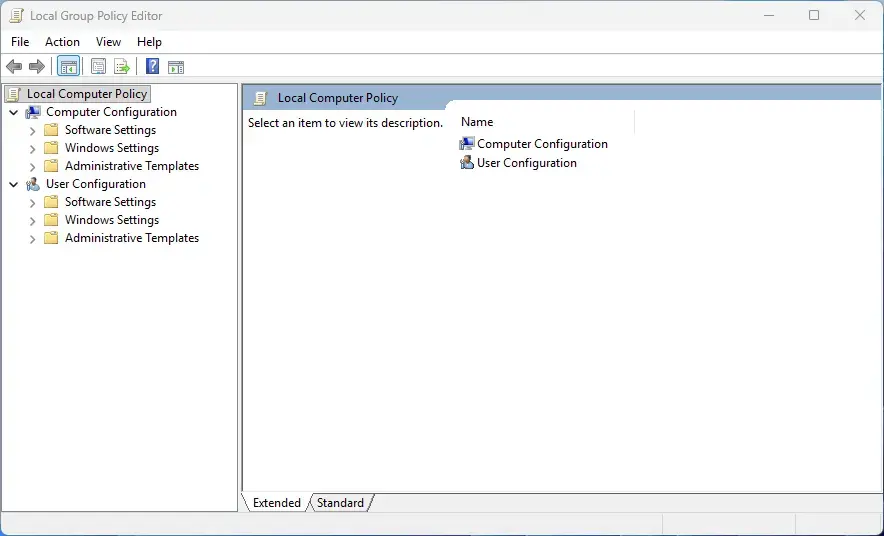
Group Policy blocks happen when a failed update scrambles local settings, making Windows think an administrator turned off security features. Clearing out these jammed policies restores your computer's ability to run the security application without restrictions or error messages.
When Windows Security fails to open after a security update, the Windows Security app blocks itself from opening because the app believes a policy forbids it. You can clear out jammed group policy settings to fix this problem by opening an administrator command prompt.
Note: This step requires administrator privileges.
- Click the Start button, type cmd, right-click Command Prompt, and select Run as administrator.
- Type the following command to delete local policy registry overrides that often get stuck after bad updates:
RD /S /Q "%WinDir%\System32\GroupPolicy"
- Press Enter.
- Type this second command to clear Group Policy Users settings:
RD /S /Q "%WinDir%\System32\GroupPolicyUsers"
- Press Enter.
- Finally, type this command to force Windows to update and reapply your default policies:
gpupdate /force
Press Enter and wait for the process to complete successfully.
Restart your computer. This clears away any phantom administrative blocks left behind by the update and lets Windows Security open normally.
Unique Expert Tip 2: Dealing with Third-Party Antivirus Conflicts After Updates
Dealing with third-party antivirus conflicts involves fixing software clashes that happen when major system updates disrupt the handoff between Windows Security and programs like Norton, McAfee, or Avast. Uninstalling or properly updating your third-party security software usually clears up this confusion and brings your main dashboard back.
Major Windows security updates frequently break the connection between your security software and the operating system. A Windows update might reinstall default Windows security states, causing a fierce conflict between your third-party antivirus software and the built-in Windows Defender files. This silent software conflict locks up the Windows Security app, leaving you unable to open it.
Here is how to resolve this unique conflict:
- Open your third-party antivirus software from your system tray (the bottom right corner of your screen near the clock).
- Check for software updates within your antivirus program. Third-party vendors often release quick patches right after a major Windows update to restore compatibility.
- If updating your antivirus does not work, temporarily uninstall the third-party antivirus program using its official removal tool.
- Restart your computer.
- Check if Windows Security opens successfully now that the competing software is gone.
If Windows Security opens fine, you can reinstall your third-party antivirus or choose to stick with the robust built-in Windows Security protection.
What to Do If Nothing Else Works: In-Place Upgrade
Performing an in-place upgrade fixes deep operating system corruption that prevents Windows Security from opening when standard repair tools fail. This installation process refreshes your core system files while safely keeping all of your personal documents, photos, and installed apps intact on your computer.
Instead of wiping your computer and starting over with a clean install, you can perform an "in-place upgrade." This process reinstalls the core Windows operating system files while keeping all your personal files, installed apps, and user settings right where they are.
- Go to the official Microsoft website and download the Windows installation media tool for your specific Windows version.
- Open the downloaded tool and choose Upgrade this PC now.
- Follow the on-screen instructions and make sure you select the option to Keep personal files and apps.
- Let the installation run. Your computer will restart several times during this process.
Once the upgrade finishes, your system files will be completely refreshed, and Windows Security will work properly once again.
Summary
Try reopening Windows Security now that you have completed these repair steps.
Was this guide helpful?

About the Author
Richard
Tech Writer, IT Professional
Richard is a writer at Geek Rewind who turns complex IT tasks into clear, step-by-step guides. He draws on years of hands-on experience in system administration and enterprise IT operations, focusing on Windows, Linux and WordPress: the problems people actually run into, and the fixes that work. His server and WordPress guides come from systems he runs himself. Richard builds and maintains the platform behind Geek Rewind, from its Ubuntu servers and Nginx configuration to its custom WordPress plugins. Many new tutorials start with readers' questions, and he's always glad to answer them in the comments.



No comments yet — be the first to share your thoughts!