What to Do When Windows Update Gets Stuck Checking for Updates

Windows Update freezing on checking for updates stops your PC from installing critical security patches on Windows 10 and Windows 11. This frustrating stall happens when temporary system cache files get corrupted or core update services stop responding in the background.
Fixing this issue takes only a few minutes using built-in tools like the Command Prompt to clear out broken update files and restart the background services that handle downloads.
When Windows Update gets stuck checking for updates, run the built-in troubleshooter by opening Settings, going to System, selecting Troubleshoot, clicking Other troubleshooters, and choosing the Run button next to Windows Update. You can also clear space on your main hard drive or restart background update services.
Why Does Windows Update Get Stuck?
Temporary update files stored on your hard drive become corrupted, or a previous installation gets interrupted. When this happens, the update system gets confused and loops endlessly while trying to read the broken files, causing the whole process to freeze completely on your screen.
Basic Checks Before You Start
Basic checks before you start fixing a stuck Windows Update include testing your internet connection to make sure it is working and plugging your laptop into a wall outlet. Windows often pauses downloads and stalls the update process if your internet drops out or your laptop battery gets too low to finish the job safely.
- Check your internet connection: Make sure your Wi-Fi or ethernet cable is working properly. Try opening a web page in your browser to confirm.
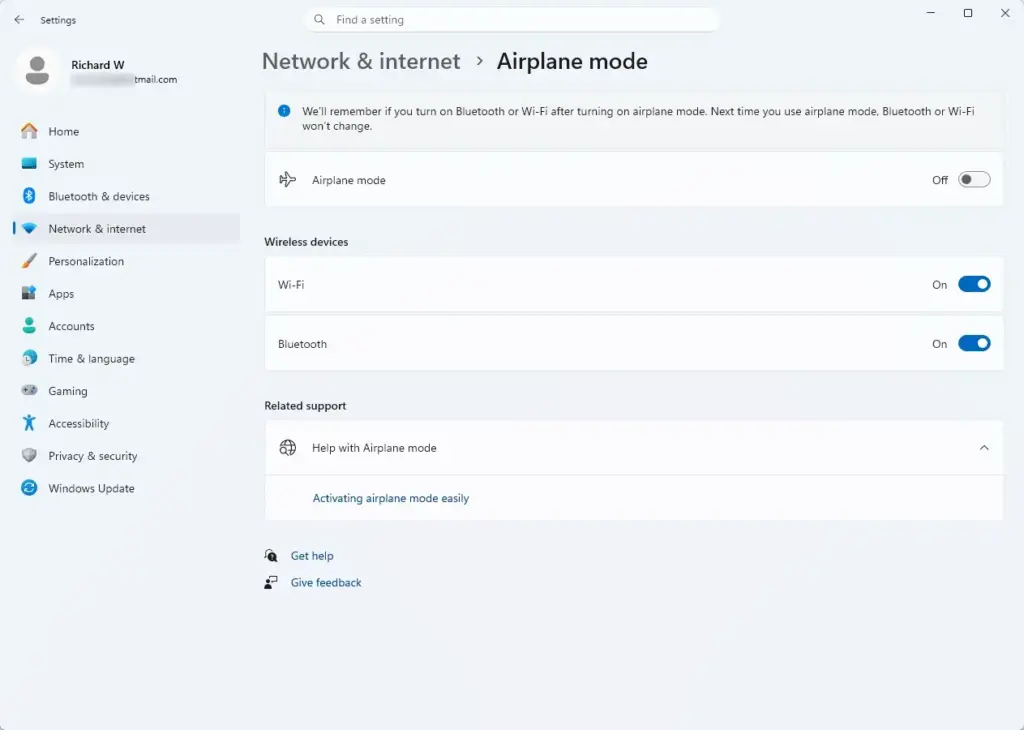
- Plug in your laptop: If you are using a laptop, plug it into a wall outlet. Windows may pause updates if the battery is low.
- Disconnect extra devices: Unplug any non-essential hardware like external hard drives, printers, or USB flash drives. These can sometimes interfere with the update process.
- Check your date and time: Make sure your computer shows the correct date, time, and time zone. Incorrect time settings can block secure connections to Microsoft servers.
Step-by-Step Solutions to Fix Stuck Updates
Step 1Run the Built-in Windows Update Troubleshooter
Let Windows find and fix common errors by running the built-in troubleshooter. You can open this tool by going to your Windows settings , selecting the system or update menu, and choosing the troubleshooter option from the list to let Windows scan for problems.
- Click the Start button and open the Settings app (the gear icon).

- Go to System (or Update & Security on Windows 10), then select Troubleshoot.
- Click on Other troubleshooters (or Additional troubleshooters).
- Find Windows Update in the list and click the Run (or Run the troubleshooter) button.

- Follow any instructions on the screen and restart your computer when the process finishes.
Step 2Make Sure You Have Administrator Access
Having administrator access is required because Windows will not let standard user accounts install system updates or change core settings. If you share your computer with others, you must sign out and log back into the main administrator account on your PC before trying to run updates again.
Step 3Free Up Disk Space
Freeing up disk space on your main hard drive is necessary because Windows needs plenty of room to download and unpack update files. If your drive is almost full, the update process will fail or freeze completely until you clear out some unnecessary temporary files to give the system enough breathing room.
- Open the Settings app and go to System, then Storage.
- See how much free space you have available. If your drive is nearly full, click on Temporary files.
- Select the types of unnecessary files you want to remove, such as previous Windows installations or items in your recycle bin.
- Click the Remove files button to clear up space, then try running Windows Update again.
Step 4Restart Key Windows Services
Restarting key Windows services fixes update issues by resetting the background programs that handle system downloads when they stop responding. You can do this by opening the Services app from your Windows search bar, finding the Windows Update service in the list, and restarting it to clear out any frozen tasks.
- Press the Windows Key, type Services in the search bar, and click on the Services app.
- Scroll down the list to find a service named Windows Update.
- Right-click on Windows Update and select Stop. If it is already grayed out, move to the next step.
- Next, find a service named Background Intelligent Transfer Service (BITS), right-click it, and select Stop.
- Start both services again by right-clicking each one and selecting Start.
Step 5Clear the Windows Update Cache
Clearing the Windows Update cache forces your computer to delete damaged temporary files and download fresh, clean copies of the update. You can accomplish this by opening the command prompt as an administrator and stopping the active update services before deleting the old cache folders that are causing the freeze.
- Type Command Prompt in your Windows search bar, right-click it, and choose Run as administrator.

- Type the following command to stop the update service and press Enter:
net stop wuauserv
- Type the following command to stop the background transfer service and press Enter:
net stop bits
- Open File Explorer and navigate to C:\Windows\SoftwareDistribution.
- Select all the files and folders inside the SoftwareDistribution folder and delete them. (If Windows says a file is in use, restart your computer and try these steps again).
- Go back to the Command Prompt window, type the following command to restart the update service, and press Enter:
net start wuauserv
- Type the following command to restart the background transfer service and press Enter:
net start bits
- Restart your computer and check for updates once more.
Step 6Update Third-Party Drivers
Outdated hardware drivers can sometimes conflict with new Windows updates. Visit your computer manufacturer's official website (such as Dell, HP, Lenovo, or ASUS) or use their dedicated support software to check for and install the latest drivers for your hardware, especially your graphics card and network adapter.
Unique Angles and Expert Tips for Stubborn Updates
If you have tried all the standard steps and your computer is still stuck checking for updates, here are two advanced expert methods that often solve the most stubborn update loops.
Advanced Tip 1: Resetting System Components with the Media Creation Tool
Resetting system components with the Media Creation Tool helps when normal update methods fail completely by refreshing your system files without losing your personal files and apps. You can download this official tool from Microsoft's website and run an in-place upgrade to repair your broken update system when standard fixes do not work.
Instead of doing a full factory reset, you can download the Windows installation tool from Microsoft's official website while using another computer, or directly on your PC if your browser works. Running an in-place upgrade replaces corrupted system components with fresh files while keeping your documents, pictures, and installed software completely safe. This approach bypasses broken update states entirely.
Advanced Tip 2: Manually Installing the Stuck Update Package
Manually installing the stuck update package lets you bypass the broken automated screen by downloading the file directly from Microsoft's public archive. You need to check your settings for the specific KB number of the failing update and search for it online to download and install it by hand.
- Go to Settings, Update & Security, and look at the specific KB number (Knowledge Base number, which looks like KB1234567) of the update that is failing or stuck.
- Open your web browser and visit the official website called the Microsoft Update Catalog (catalog.update.microsoft.com).
- Type your KB number into the search box and press Enter.
- Find the correct version for your specific computer architecture (usually 64-bit) and click the Download button.
- Once the file finishes downloading, double-click it to install the update manually. This completely bypasses the automated checking screen that was giving you trouble.
Summary
What to do next
You should now see updates downloading normally or be able to install packages without freezing. If your computer stalls again during a future patch, run the update troubleshooter or clear the temporary cache folders first.
[Note: This step requires administrator privileges.] [Note: This step requires administrator privileges.] [Note: This step requires administrator privileges.]Was this guide helpful?

About the Author
Richard
Tech Writer, IT Professional
Richard is a writer at Geek Rewind who turns complex IT tasks into clear, step-by-step guides. He draws on years of hands-on experience in system administration and enterprise IT operations, focusing on Windows, Linux and WordPress: the problems people actually run into, and the fixes that work. His server and WordPress guides come from systems he runs himself. Richard builds and maintains the platform behind Geek Rewind, from its Ubuntu servers and Nginx configuration to its custom WordPress plugins. Many new tutorials start with readers' questions, and he's always glad to answer them in the comments.


No comments yet — be the first to share your thoughts!