How to Clear Windows 11 Font Cache When Fonts Appear Blurry

Clearing the Windows 11 font cache fixes blurry text, unreadable fonts, and missing characters by deleting damaged font index files stored in the operating system. Windows 11 keeps a map of the available typefaces in temporary files so text loads faster. These files often break after an unexpected shutdown, a bad software install, or adding and removing fonts.
When the cache breaks, you might see square boxes instead of letters, jagged web text, or apps that crash when you open menus. Deleting the corrupted files forces Windows to rebuild a fresh, clean list of every installed font on your drive. Nothing is lost: your fonts stay installed, and the cache is rebuilt on the next start. The steps are the same on Windows 11 Home and Pro, but you need an administrator account.
Open services.msc, stop Windows Font Cache Service and Windows Presentation Foundation Font Cache 3.0.0.0, then navigate to 📁C:\
Stopping Font Cache Services
Before you clear the cache, stop two services: Windows Font Cache Service and Windows Presentation Foundation Font Cache 3.0.0.0. You do this in the Services snap-in.
- Open the Start menu, type
services.msc, and press Enter. This opens Services, a tool that manages background system programs. You need administrator privileges to stop a service. If you are signed in with a standard account, Windows will ask for an administrator password. - Scroll down the list until you find Windows Font Cache Service. The list is sorted by name, so it sits among the entries starting with “W”.
- Right-click Windows Font Cache Service and select Stop. The Status column should go blank, which means the service is no longer running.
- Scroll to Windows Presentation Foundation Font Cache 3.0.0.0. This service optimizes font performance for desktop apps.
- Right-click Windows Presentation Foundation Font Cache 3.0.0.0 and select Stop.
- If a service is already stopped, Stop will be greyed out. In that case, move straight on to clearing the files.
Leave the Services window open. You will not need to change the startup type. Both services start again on their own when you restart the PC.
Locating and Deleting Font Cache Files
The cache files live in a protected folder named FontCache under the LocalService profile. You need to delete the .dat cache files there so Windows 11 builds a fresh, uncorrupted cache. Keep the two services stopped while you do this.
Open File Explorer and delete the cache files with these steps:
- Open File Explorer, the default file management app in Windows, from the taskbar or by pressing Windows Key + E.
- Click the address bar at the top, paste
C:\Windows\ServiceProfiles\LocalService\AppData\Local, and press Enter. This directory holds protected local service data. If Windows says you do not currently have permission to access the folder, click Continue and approve the administrator prompt. - Find the folder named FontCache and open it. You should see a list of cache files.
- Select all files that begin with
FontCache-and end with the.dator.logextension. Select only these font cache data files. Deleting other system files by mistake can make software unstable. - Press the Delete key on your keyboard to remove the selected files.
- If Windows says a file is still in use, one of the font services is still running. Go back to the Services window, make sure both services show as stopped, and try again.
You may also find additional font cache data in C:\Windows\System32\FNTCACHE.DAT. Go to that file path in File Explorer, right-click FNTCACHE.DAT, and select Delete. This file stores global GDI (Graphics Device Interface) font mapping data and is separate from the LocalService profile. If the file is not there, skip this step.
Restarting Your Computer and Verifying the Fix
Restarting is also what brings the two font services back, so do not skip it. Once your PC boots back up, open an app with plenty of text, such as Notepad or your web browser, to check whether the blurry rendering is gone.
- Open the Start menu, click the Power icon, and select Restart. Choose Restart rather than Shut down. With Fast Startup on, a shutdown does not fully reload system services.
- Wait for the sign-in screen and sign in. During startup, Windows notices the missing cache files and builds a new version from your currently installed fonts. The first launch of some apps may feel slightly slower while this happens.
- Open a text-heavy application such as Notepad or Microsoft Word. Check that menus, toolbars, and your web browser show clean text with no artifacts or missing characters.
There is nothing to undo here. If the problem remains, the cache was probably not the cause, so continue with the troubleshooting section below.
Automating Font Cache Clearing with PowerShell
If you clear the font cache often, PowerShell can stop the service and delete the locked .dat files in a few commands. This saves you from opening File Explorer and digging through hidden system folders each time. It does the same job as the manual steps above.
To run the commands safely, open PowerShell with administrative rights.
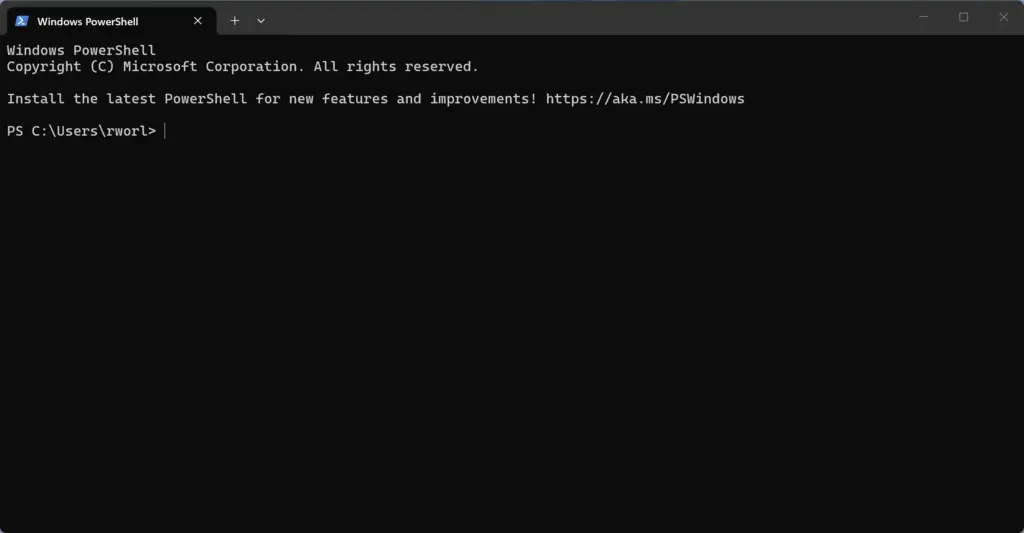
- Open the Start menu, type
powershell, right-click Windows PowerShell, and select Run as administrator. Click Yes if User Account Control asks for permission. The window title should include "Administrator". Without administrator rights, the commands will fail with an access denied error. - Type the following command to stop the font cache service and press Enter:
Stop-Service -Name "FontCache3.0.0.0" -Force - Type the following command to remove the primary font cache file and press Enter:
Remove-Item -Path "C:\Windows\System32\FNTCACHE.DAT" -ErrorAction SilentlyContinue - Type the following command to clear the LocalService font cache directory files and press Enter:
Remove-Item -Path "C:\Windows\ServiceProfiles\LocalService\AppData\Local\FontCache\FontCache-*.dat" -Force -ErrorAction SilentlyContinue - Restart your computer to finish the process and regenerate the cache files.
If a command reports that a file is in use, check that the services are stopped, as described in the Services section above. Then run the command again.
Advanced Troubleshooting for Persistent Font Rendering Issues
If clearing the cache does not help, the problem may lie in damaged system files, a bad font file, or your display scaling settings. The built-in repair tools are the next thing to try.
To check for system file corruption, run the Deployment Image Servicing and Management tool and then the System File Checker. Open an elevated command prompt (search for Command Prompt, then choose Run as administrator). Run DISM.exe /Online /Cleanup-image /Restorehealth, wait for it to finish, and then run sfc /scannow. The second command scans and repairs damaged core Windows files. These scans can take a while, so let them finish and restart afterward if either tool reports that it repaired something.
Next, check your installed fonts. Open Settings and go to Personalization Fonts. A damaged or badly formatted OpenType or TrueType font file can cause rendering failures across the whole interface. Remove any third-party fonts you added recently. To remove one, click it in the list and then click Uninstall. Restart and see whether the glitch is gone. That tells you whether a specific font file was the cause. You can reinstall the fonts you want to keep one at a time to find the bad one.
What to do next
With the font cache cleared and your system restarted, text should look crisp across menus and apps. If certain apps still show distorted characters, check your display scaling under Settings System Display, where the Scale option sets how large text and apps appear. You can also search the Start menu for Adjust ClearType text and run the ClearType Text Tuner. Some older apps render blurry text at scaling levels above 100%, even when the font cache is healthy.
Frequently asked questions
How to clear clear font cache?
Stop the Windows Font Cache Service and Windows Presentation Foundation Font Cache 3.0.0.0 in services.msc. Then delete the files in the FontCache folder under ServiceProfiles, LocalService, AppData, Local, inside your Windows folder. Restart your PC. Windows rebuilds the cache on startup, and your installed fonts stay where they are. You need an administrator account.
My PC font looks weird. How can I fix it?
Clear the font cache. Corrupted cache files often cause blurry or odd-looking text. Stop the Windows Font Cache Service in services.msc, delete the contents of the FontCache folder in the LocalService AppData location inside your Windows folder, then restart. If the font still looks wrong, reinstall it from Settings Personalization Fonts
How do I flush the cache on 🪟 Windows 11?
To flush the font cache on Windows 11, stop the Windows Font Cache Service and Windows Presentation Foundation Font Cache 3.0.0.0 in services.msc. Then delete the files in the FontCache folder in the LocalService AppData location and restart your PC. Windows rebuilds the cache at startup. You need an administrator account.
How to clear text cache?
Windows has no single text cache you can clear. The closest fix for blurry or broken on-screen text is clearing the font cache. Stop the Windows Font Cache Service in services.msc, delete the files in the FontCache folder, then restart your PC. Windows rebuilds the cache when it starts.
Still have a question?
Answered by AI from this guide. Good questions may be added to this page — please don't include personal details.
Did this guide fix your problem?

About the Author
Richard
Tech Writer, IT Professional
Richard is a writer at Geek Rewind who turns complex IT tasks into clear, step-by-step guides. He draws on years of hands-on experience in system administration and enterprise IT operations, focusing on Windows, Linux and WordPress: the problems people actually run into, and the fixes that work. His server and WordPress guides come from systems he runs himself. Richard builds and maintains the platform behind Geek Rewind, from its Ubuntu servers and Nginx configuration to its custom WordPress plugins. Many new tutorials start with readers' questions, and he's always glad to answer them in the comments.
No comments yet — be the first to share your thoughts!