How to Install Custom Fonts on Windows 11
Installing custom fonts on Windows 11 lets you use unique text styles in your documents and design projects.
A font is a set of letters, numbers, and symbols that gives text its specific look, and Windows 11 makes it easy to add new ones.
You can find thousands of free fonts online, with popular sites like Google Fonts offering a wide selection. Many fonts come in a zipped file, which you’ll need to open first.
Once extracted, you can install font files directly into the 📁C:\Windows\Fonts folder on your PC. This makes the font available in almost all your programs, like Word or Photoshop.
Download font files, then right-click and select “Install” or “Install for all users.” Alternatively, open Settings, go to Personalization, select Fonts, and drag your font files into the designated area.
Install or uninstall fonts on 🪟 Windows 11
As mentioned, you can download and install custom fonts from the internet on Windows 11. This process takes only a few clicks.
To install a font, navigate online and download it. For this guide, we downloaded our custom font from fonts.google.com.
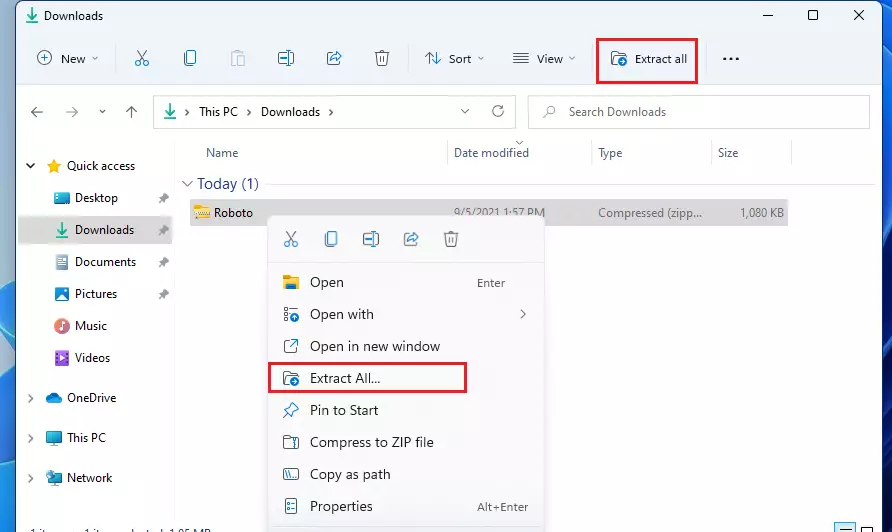
Once the font is downloaded, locate the zipped file in your Downloads folder using File Explorer. Then right-click and select ‘Extract All’ from the context menu (the options that appear after right-clicking), or use the toolbar to extract it.
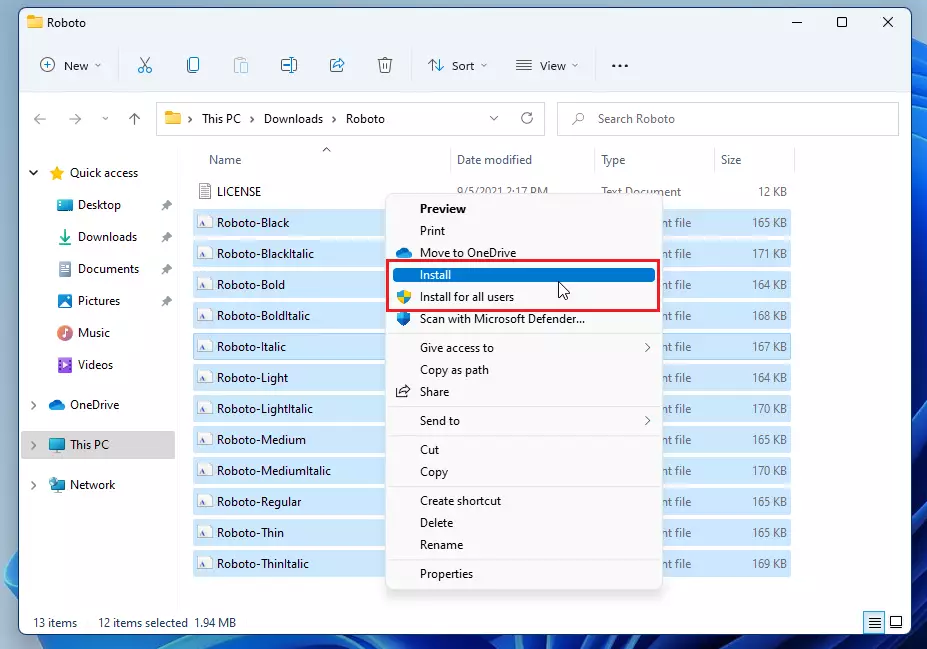
After extracting the zipped file, open the extracted folder and select all the font files. Then right-click and select the Show more option on the context menu, as shown below.

On the next context menu, choose to install it for yourself or all users on the system. If you install it for yourself, the fonts will only be available to your user account.
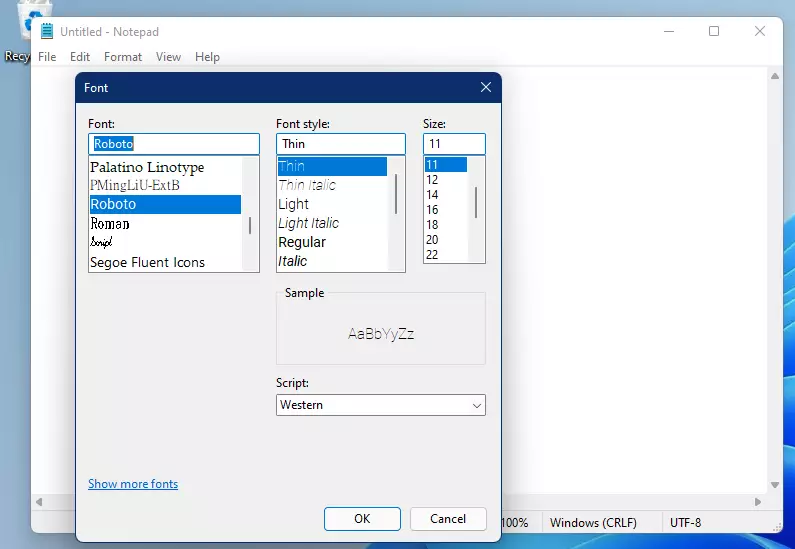
Once installed, the fonts should appear in your applications and be ready for use when formatting documents.
Manage and delete fonts on 🪟 Windows 11
Now that you have installed a custom font, you can manage it through the System settings.
Windows 11 centralizes most of its settings. From system configurations and user management to Windows updates, everything is accessible within the System Settings pane.
To access System Settings, you can press the Windows key + I shortcut or click on Start ==> Settings, as illustrated below:

Alternatively, use the search box on the taskbar to find and open Settings.
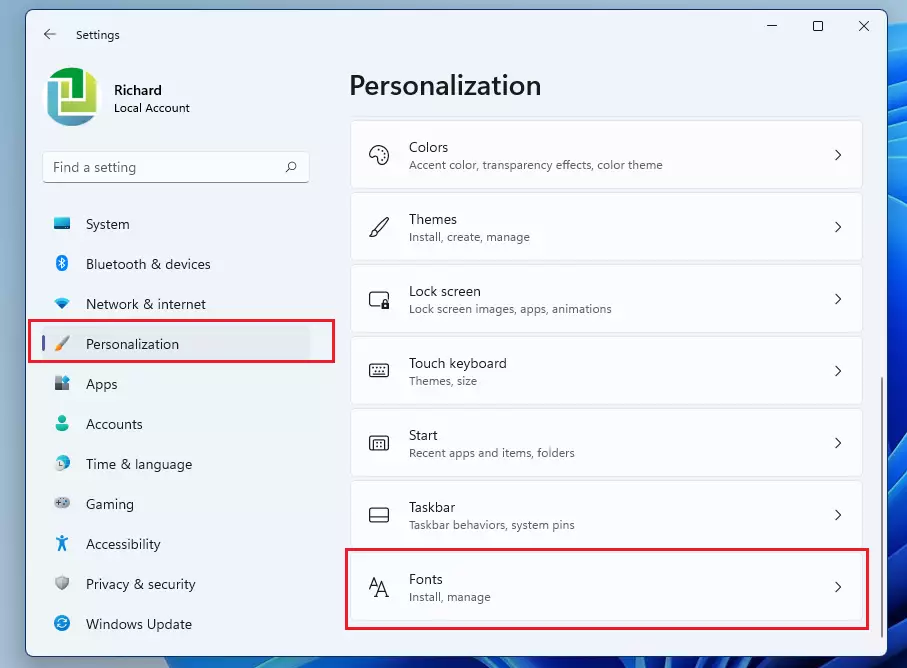
Within Windows Settings, click Personalization, then select Fonts on the right pane of your screen, as depicted below.
In the Fonts settings pane, you can search for your installed fonts and select them.
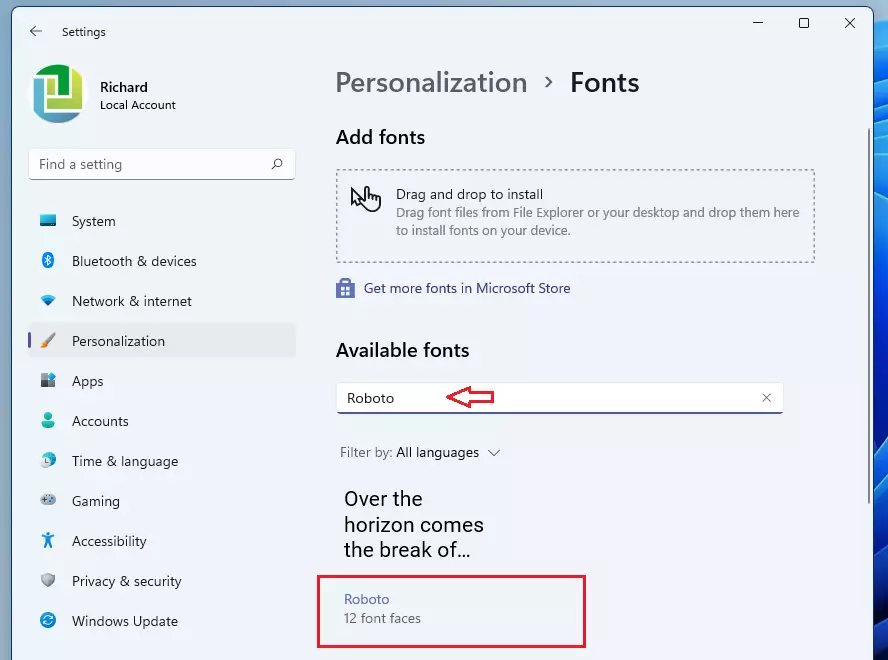
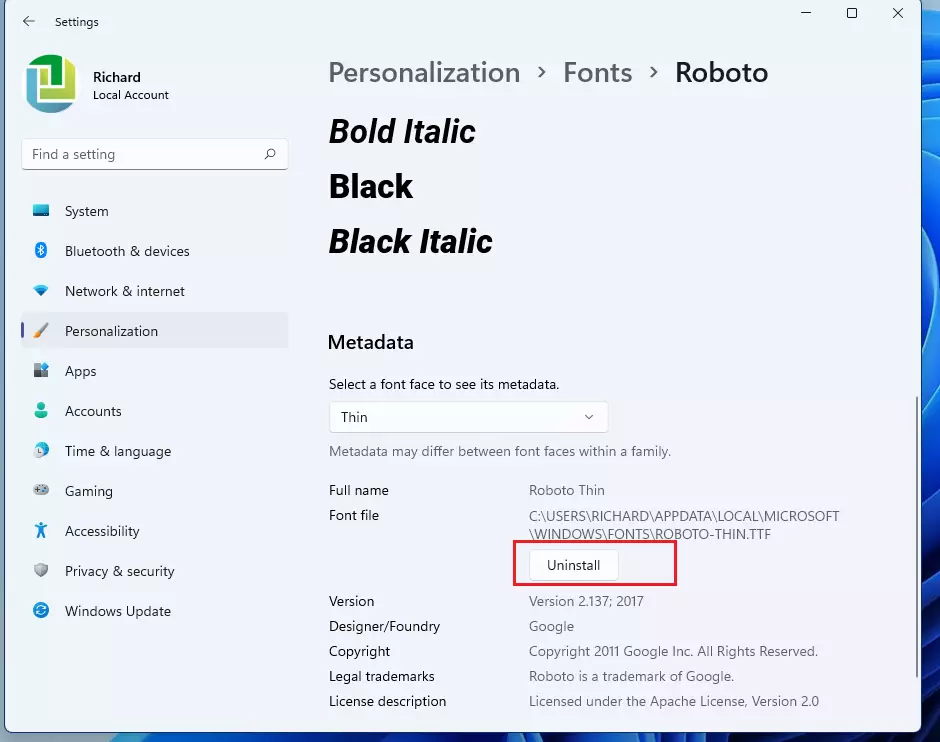
This is also where you can manage and uninstall your installed fonts.
That’s it!
Conclusion:
- Custom fonts enhance the visual appeal of documents and applications in Windows 11.
- Installing fonts is a straightforward process that only requires a few clicks.
- Users can manage and uninstall fonts easily through the System Settings.
- Utilizing diverse fonts can improve creativity and personalization in digital projects.
- Regularly explore new font options from websites like Google Fonts to keep your typography fresh.
Was this guide helpful?

About the Author
Richard
Tech Writer, IT Professional
Richard, a writer for Geek Rewind, is a tech enthusiast who loves breaking down complex IT topics into simple, easy-to-understand ideas. With years of hands-on experience in system administration and enterprise IT operations, he’s developed a knack for offering practical tips and solutions. Richard aims to make technology more accessible and actionable. He's deeply committed to the Geek Rewind community, always ready to answer questions and engage in discussions.


[…] Fonts you install are saved in the C:WindowsFonts folder. You can also add fonts by dragging font files into that folder. […]
[…] If you want to learn more about fonts on Windows 11, check out this easy guide on how to install fonts in Windows 11. […]