How to Remove All Local Copies of Phone Files on Windows 11

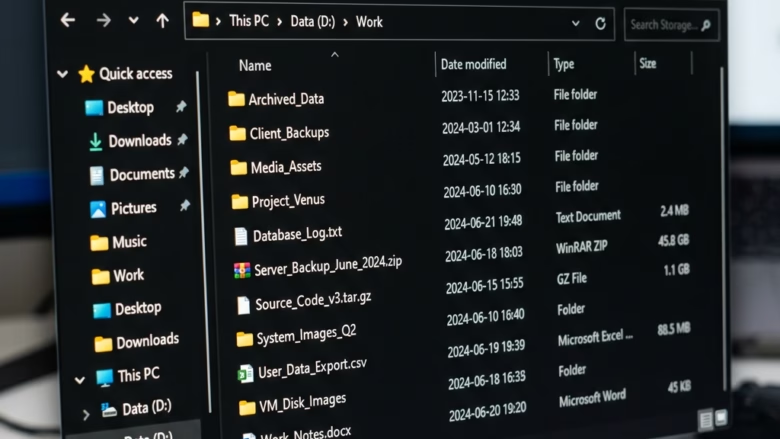
Removing local copies of phone files on Windows 11 means deleting the hidden cache that the Link to Windows app (a tool that mirrors your phone photos and documents on your PC screen) leaves behind. Windows saves temporary copies of these files on your hard drive, and over time they can take up gigabytes of storage.
Clearing this cache deletes the extra files from your computer and does not touch anything on your phone. The job has two parts: stop Windows from listing your phone in File Explorer , then delete the cached files by hand. It works the same on Windows 11 Home and Pro.
Open Settings Bluetooth & devices Mobile devices Manage devices, find your phone, and turn off “Show mobile device in File Explorer ”. Then open File Explorer, navigate to 📁C:\
What happens when you remove local copies?
When you remove the local copies, they are deleted from your Windows 11 PC only. The original files on your phone are not affected, and your phone’s storage stays exactly as it was.
The one thing to know is that Windows may download copies again if you keep using the link between the two devices. If the cache fills up again later, repeat the steps below.
Step 1Stop File Explorer from Showing Your Phone
Start by stopping File Explorer from showing your phone. This keeps Windows from listing your mobile device in the sidebar and from pulling in new copies of its files. You change it in the main Windows Settings app. The menu names below are for current Windows 11 builds. On an older, un-updated build, the Mobile devices page may be missing, so run Windows Update first.
- Open Settings. Click the Start button , then click the gear icon. You can also press Win+I. The Settings window opens.
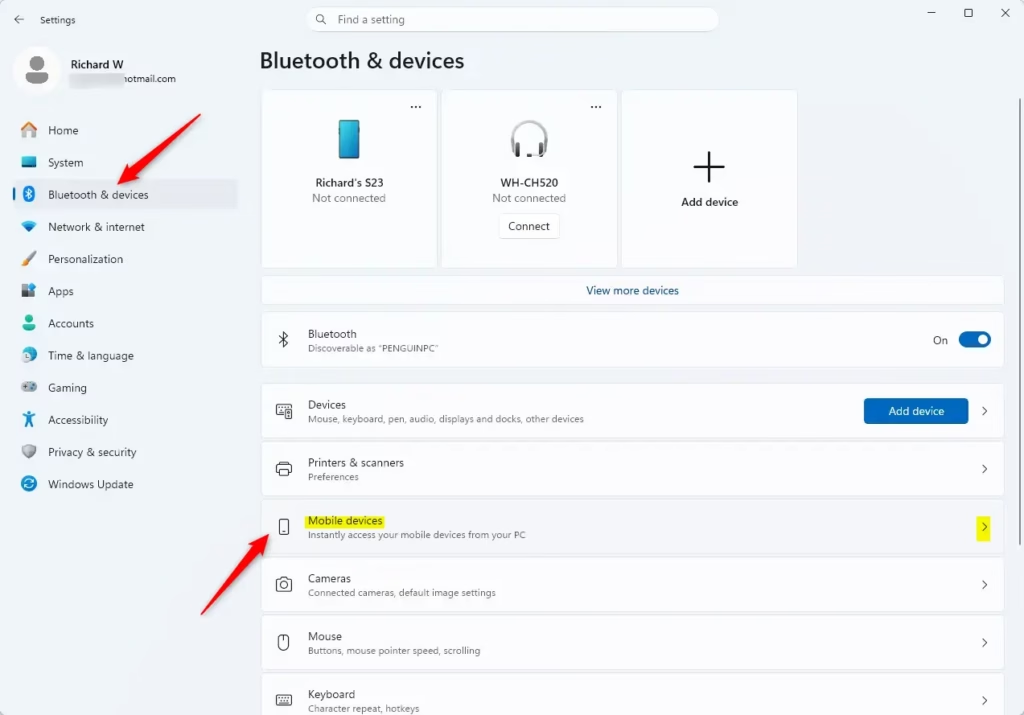
- Go to Mobile devices. Click Bluetooth & devices in the left menu, scroll down, and click Mobile devices. You should see the Mobile devices page with an option to manage your devices.
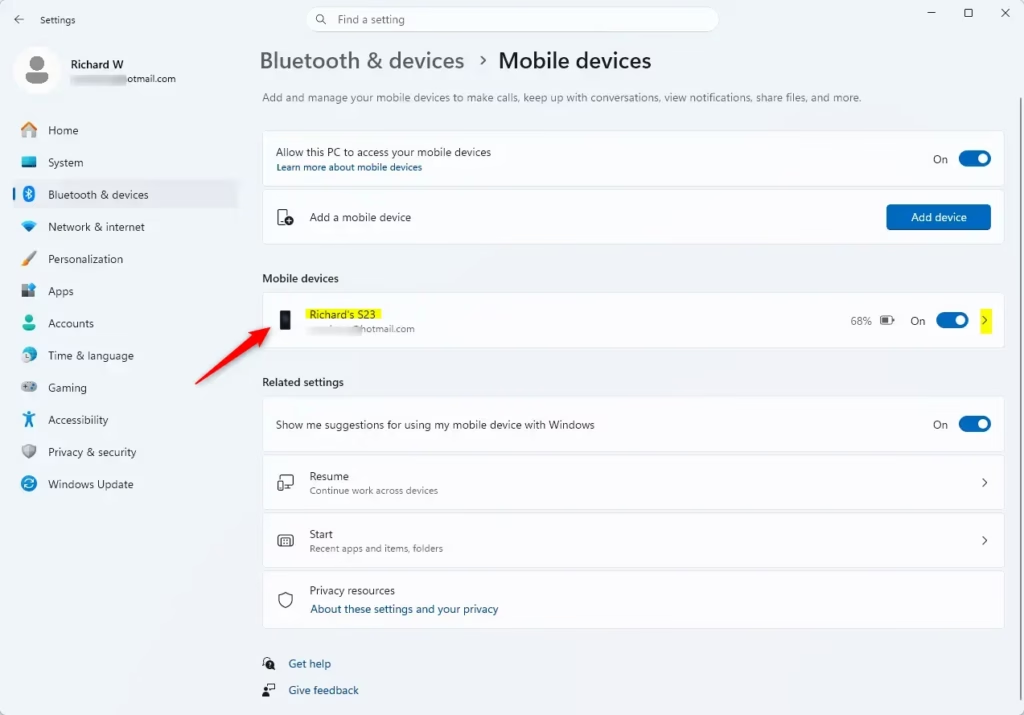
- Manage your devices. Under Mobile devices, click Manage devices. A list of the phones linked to your PC appears.
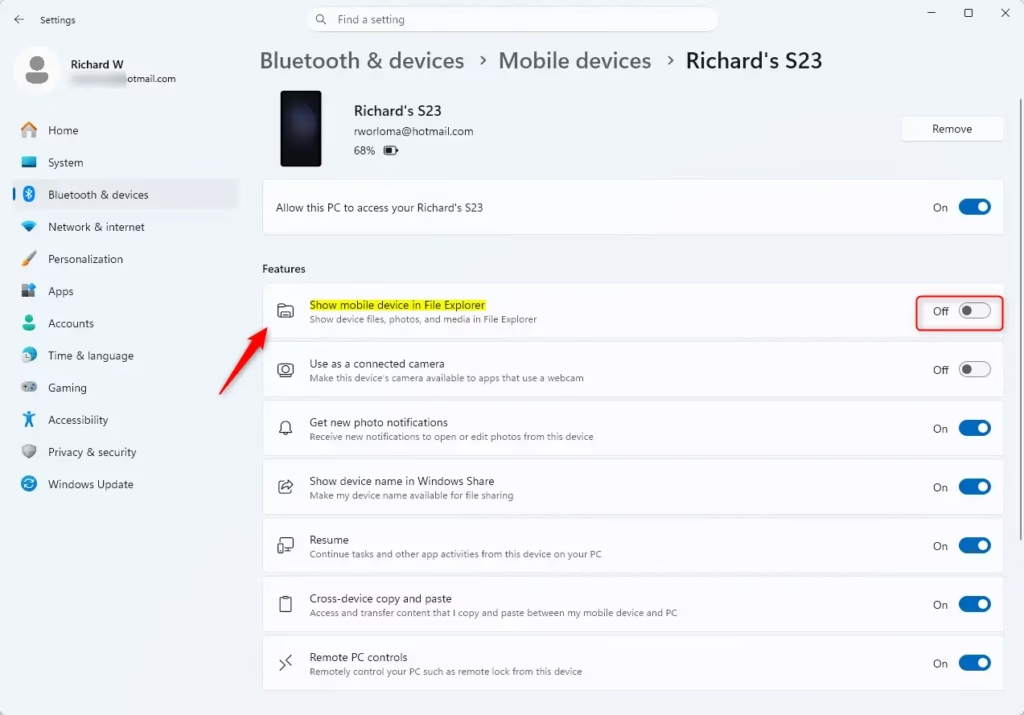
- Turn off File Explorer access. Find your phone in the list and look for the option “Show mobile device in File Explorer” (this is the setting that lets Windows see your phone’s files). Click the switch next to it to turn it Off. Your phone no longer shows up directly in File Explorer .
You do not normally need to restart. If your phone still appears in File Explorer , close the File Explorer window and open it again. To undo the change, come back to the same screen and switch the option back On.
This setting is for each phone individually.
If you can't tell the phones apart, check the device names in the list against the names you gave your phones.
Step 2Find and Delete Local Phone Files
Next, find and delete the leftover phone files that Windows 11 saved to your computer. This frees up hard drive space after you disconnect your mobile device. You can reach the folder quickly by typing its path into the File Explorer address bar. Before you start, close the Link to Windows app (also called Phone Link) if it is open. Otherwise it may hold some files in use and block you from deleting them.
- Open File Explorer. Click the folder icon on your taskbar or press Windows key + E. A File Explorer window opens.
- Go to the CrossDevice folder. Click the File Explorer address bar, type the following path, and press Enter:Code
C:\Users\<your username>\CrossDevice - Important: You need to replace
<your username>with your actual Windows username. You can find your username by looking at the folder names inC:\Users\. If File Explorer says it can't find the path, the folder doesn't exist on your PC, which means no cached phone files are stored there. - Look at the files and select what to delete. Inside the
CrossDevicefolder, you will see files and folders copied from your phone. You might see folders named after your phone or after dates. Look through them first. Then select the files or folders you want to remove. To select several items, hold down the Ctrl key while clicking each one. - Delete the selected items. Press the Delete key on your keyboard, or right-click the selected items and choose Delete. The items disappear from the folder and move to the Recycle Bin.
- Empty the Recycle Bin. Deleted files keep using disk space until the Recycle Bin is emptied. Find the Recycle Bin icon on your desktop, right-click it, and choose Empty Recycle Bin. Confirm if Windows asks. Your free space should now go up when you check it in File Explorer.
If you would rather skip the Recycle Bin, select the items and press Shift + Delete. Windows then deletes them permanently after a confirmation prompt, and you can't get them back.
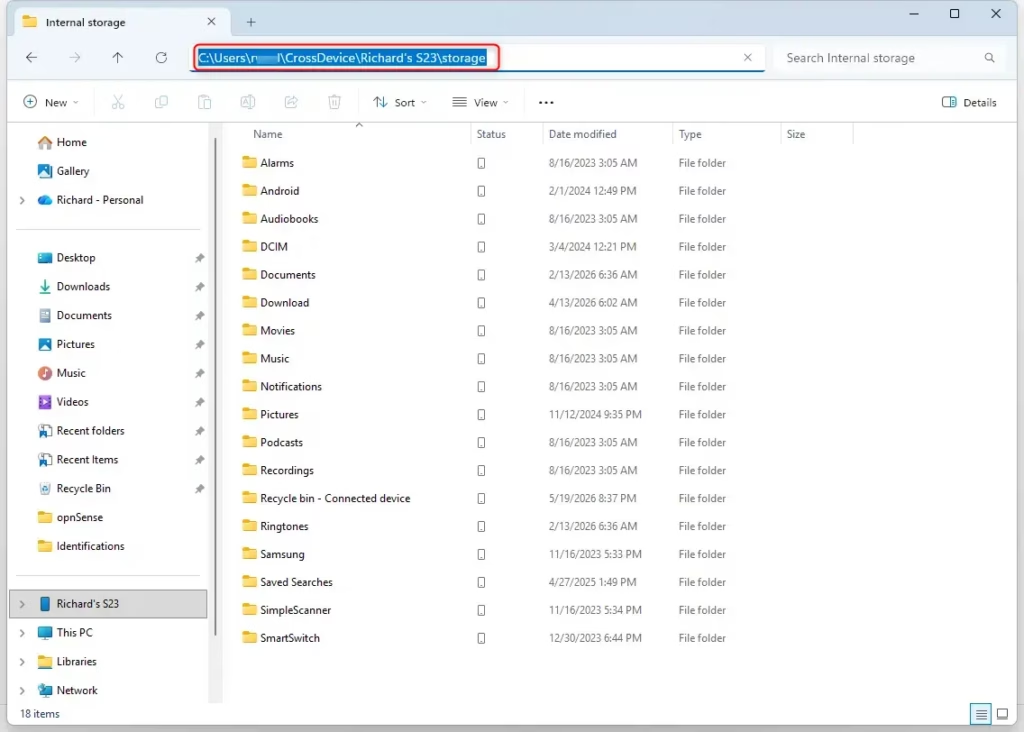
C:\Users\<your username>\CrossDevice folder on your PC and NOT from your phone.Once you empty the Recycle Bin, these files are gone from your computer. The files on your phone will stay there.
Reference:
Summary
This guide showed you how to remove local copies of phone files from your Windows 11 computer. First you stop File Explorer from showing your phone. Then you delete the cached files from a specific folder and empty the Recycle Bin to get the space back.
Have a question about this guide?
Answered by AI from this guide. Good questions may be added to this page — please don't include personal details.
Did this guide fix your problem?

About the Author
Richard
Tech Writer, IT Professional
Richard is a writer at Geek Rewind who turns complex IT tasks into clear, step-by-step guides. He draws on years of hands-on experience in system administration and enterprise IT operations, focusing on Windows, Linux and WordPress: the problems people actually run into, and the fixes that work. His server and WordPress guides come from systems he runs himself. Richard builds and maintains the platform behind Geek Rewind, from its Ubuntu servers and Nginx configuration to its custom WordPress plugins. Many new tutorials start with readers' questions, and he's always glad to answer them in the comments.
No comments yet — be the first to share your thoughts!