How to Show or Hide Fonts in Windows 11

This guide explains how to show or hide fonts on your Windows 11 computer.
Open Settings, go to Personalization, then Fonts. Click the three dots next to a font and choose Hide or Show. Alternatively, navigate to C:WindowsFonts in File Explorer, right-click a font file, and select Hide or Show.
Why hide fonts?
Your computer can end up with hundreds of fonts over time. This makes it tough to find the ones you actually use in programs like Microsoft 365 or Adobe. Hiding fonts keeps your workspace tidy and can boost performance by reducing the number of active items your applications need to load.
What happens when you hide a font?
Hiding a font prevents Windows from displaying the font in application font menus. The font file still exists on your hard drive at 📁C:\Windows\Fonts. Users can later unhide the font if they decide to use it again.
Show or Hide Fonts in Settings
Windows 11 allows you to easily show or hide fonts using the Settings app. Hiding fonts helps declutter application font lists when you have many installed. To hide a font, find it in Fonts settings, click the three dots next to the font name, and select ‘Hide’. To show a hidden font, follow the same steps and select ‘Show’.
2. Select Personalization on the left, then click Fonts.
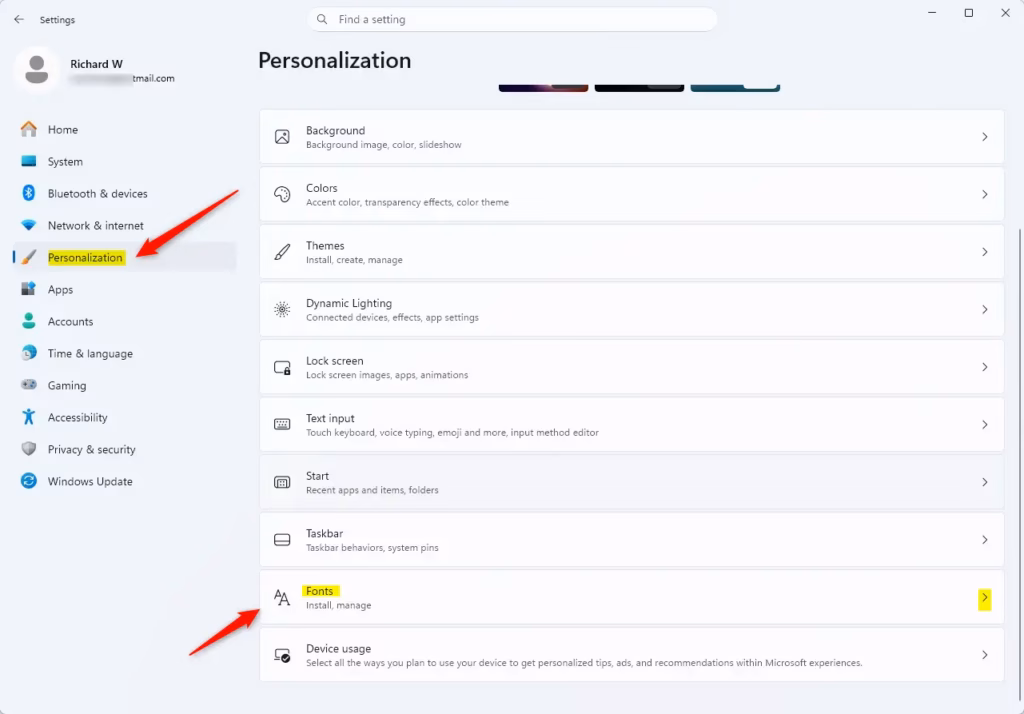
After selecting Personalization on the left and clicking Fonts, locate the specific font file. Click the three dots next to the font name, then choose either “Hide” to make the font unavailable for applications or “Show” to make it visible and usable again.


Manage Fonts via File Explorer
Open File Explorer (the application you use to browse your files and folders) and navigate to C:\Windows\Fonts. Right-click any font file and choose Hide or Show from the menu.

Unhide All Fonts (Registry Method)
1. Press ⊞ Win+R, type regedit, and press Enter.
2. Navigate to: HKEY_CURRENT_USER\Software\Microsoft\Windows NT\CurrentVersion\Font Management
On the right side, right-click the ‘Inactive Fonts’ entry and select ‘Delete’ to restore all your hidden fonts.
Troubleshooting Font Visibility
If a font you expect to see in apps like Word or Notepad isn’t showing up, check if it’s accidentally hidden in Windows 11’s font settings.
Does hiding a font delete it from my computer?
No, hiding a font does not delete it. The file remains stored in your system folders. It simply removes the font from the list of available options in your software programs. You can restore its visibility at any time using the same settings menu where you hid it.
Why do hidden fonts still show up in Adobe or Office apps?
Even after you hide fonts in Windows 11, some programs like Adobe or Office might still show them because they use their own font lists or caches.
Was this guide helpful?
0% of readers found this helpful (1 votes)

About the Author
Richard
Tech Writer, IT Professional
Richard, a writer for Geek Rewind, is a tech enthusiast who loves breaking down complex IT topics into simple, easy-to-understand ideas. With years of hands-on experience in system administration and enterprise IT operations, he’s developed a knack for offering practical tips and solutions. Richard aims to make technology more accessible and actionable. He's deeply committed to the Geek Rewind community, always ready to answer questions and engage in discussions.


No comments yet — be the first to share your thoughts!