What to Do When Windows 11 Stuck on Checking for Updates During Setup

Windows 11 setup can freeze on the “Checking for updates” screen when the PC loses its internet connection, or when the connection is too slow for the update check to finish. The screen then sits on a loading wheel and you cannot finish installing Windows 11.
The fixes below are ordered from quickest to most involved. Disconnecting the network, unplugging extra devices or restarting the PC often forces setup past the loading screen. Try them in order and stop as soon as setup moves again.
Windows 11 setup freezes on “Checking for updates” when your internet connection is poor, too slow, or drops during the download. Disconnect your Ethernet cable or turn off Wi-Fi temporarily to force setup past the loading screen, wait 1–2 minutes, then reconnect after Windows installs. If that doesn’t work, unplug all USB devices except your mouse, keyboard and monitor, then restart setup.
Why Is 🪟 Windows 11 Stuck on “Checking for Updates”?
During setup, Windows tries to download the latest system files and drivers from Microsoft’s servers. If that download stalls, the “Checking for updates” screen never moves on. Most freezes come down to a slow connection, busy update servers, or a hardware driver conflict that interrupts the first network check.
The usual causes are:
- Poor or unstable internet connections during the setup phase.
- Temporary server outages on Microsoft’s end.
- Corrupted installation files on your installation USB drive.
- Hardware drivers that Windows cannot automatically recognize or install without help.
You usually can’t tell which cause you have just by looking at the screen. Start with the quickest workarounds below, because they cost you nothing and often get the installation moving again.
Method 1Give It Time and Check Your Internet Connection
Before you change anything, give setup time to finish. Interrupting a download that is still working only sets you back.
- Wait at least 30 to 45 minutes on the "Checking for updates" screen.
- Watch your PC's drive activity light, if it has one. A blinking light means the computer is still reading or writing data, so leave the installation running.
- If the light stays off or solid for the whole wait, treat the setup as frozen and move on to the next fix.
Many laptops and newer desktops with SSDs have no drive light. In that case, rely on the time limit alone. Don't restart the PC before it has passed.
If you are on Wi-Fi, check that your router is working. A weak signal is a common reason setup screens hang indefinitely. Move the PC closer to the router, or restart the router and let it reconnect. Then give setup a few more minutes to recover.
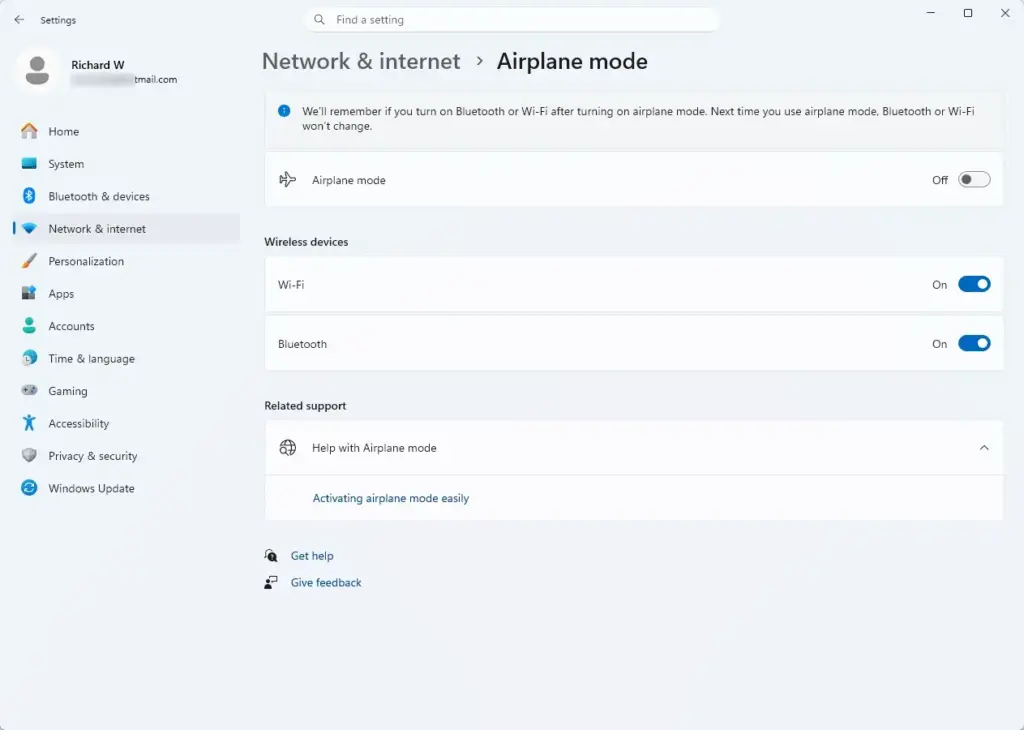
If possible, unplug your Ethernet cable or disconnect from Wi-Fi temporarily. With no network, setup can't keep waiting on the update servers, so it often gives up the check and moves on.
- Unplug the Ethernet cable from the PC. On Wi-Fi, switch off the wireless connection, or turn off the router for a minute if you can't disconnect from the PC itself.
- Wait about a minute.
- Check whether the screen advances. You should see setup continue to the next step instead of the loading wheel.
If nothing changes after a few minutes, leave the network disconnected and try the next fixes. You can reconnect once Windows is installed and run updates from the desktop.
Method 2Disconnect All Non-Essential USB Devices
Disconnecting all non-essential USB devices can fix a setup stuck on checking for updates. Setup stops searching for drivers for external hardware, so there are fewer places for it to hang. Extra monitors, printers, webcams and external hard drives are the usual culprits. Leave only your mouse, keyboard and main display connected, and you remove those conflicts from the network check.
- Shut down the PC if it is frozen. Use the power button method in the restart section below if it won't respond.
- Unplug every USB device from your computer.
- Leave only your basic mouse, keyboard and monitor plugged in.
- Restart your computer and start the setup process again.
If you are installing from a USB flash drive, leave that drive plugged in. It is the one device setup needs.
Once Windows 11 finishes installing and you reach your main desktop screen, plug your other accessories back in one by one. If a device causes a problem, you will know which one it is.
Method 3Bypass Network Connection During Setup
Bypassing the network connection during setup is the most reliable way past the checking for updates screen when Microsoft's servers fail. The Shift and F10 keys open a command prompt window. From there you can enter one command to skip the internet requirement and finish setting up offline.
- When you are stuck on the "Checking for updates" screen or the network connection screen, press the Shift and F10 keys together. A black command prompt window opens. On some laptops you need to hold the Fn key as well (Fn + Shift + F10).
- Click inside the black window to make sure it is active.
- Type the following exact command and press Enter:
start ms-cxh:localonly
Your computer will restart automatically. If the command prompt reports that the command isn't recognized, your Windows 11 version may have removed it. Use the other fixes in this guide instead.
When setup starts over and asks you to connect to a network, you will see a new option that says "I don't have internet." Click that option.
Continue setting up Windows with a local account. This is a restricted offline account, not a Microsoft account. Once you reach your desktop, connect to your Wi-Fi or plug in Ethernet. Then run updates normally from Settings Windows Update You can sign in with a Microsoft account later if you want one.
Method 4Force Restart and Rerun Setup
Holding the power button turns the PC off. Unplugging the power cord for sixty seconds then clears the temporary memory, so the installation starts fresh.
- Press and hold the physical power button for about 10 seconds, until the screen goes black and the computer turns completely off.
- Unplug the power cord for 60 seconds. This clears the computer's temporary memory.
- Plug the power back in and turn the computer on.
On a laptop, unplug the charger. If the battery is removable, take it out for the same 60 seconds.
After the restart, Windows 11 should either pick up the installation where it left off or restart the setup wizard from the beginning. Either result is fine. A restart clears out the temporary glitches that cause setup to freeze on the checking for updates stage for more than 30 minutes. Only use a forced shutdown when the screen is truly stuck, because cutting power mid-install can sometimes force setup to start over.
Method 5Recreate Your Installation USB Drive
If setup keeps freezing on the update screen, the installation files on your USB drive may be corrupted or outdated. Making a new installation drive fixes this. Use another working computer to download the official Media Creation Tool and write it to a blank flash drive. That gives you clean, up-to-date files.
- Use another working computer to download the official Windows 11 Media Creation Tool from Microsoft's website.
- Plug in a blank USB flash drive with at least 8 gigabytes of space. The tool erases everything on the drive, so copy off anything you want to keep first.
- Run the tool and follow the on-screen steps to put a fresh copy of Windows 11 on the flash drive.
- Plug the new USB drive into your problem computer and start the installation from scratch.
Make sure you use a freshly downloaded Windows 11 ISO, version 23H2 or later. Brand-new installation files make setup much less likely to hang during updates. Old installers can freeze the update screen for hours, sometimes over 2 hours on a standard network setup. A fresh installer replaces those outdated files.
Disable Secure Boot and TPM Temporarily in BIOS
Treat this as a last resort. In some cases, strict security checks conflict with setup's initial verification and cause the freeze. Turning off Secure Boot temporarily in your motherboard's BIOS can get you past that stage. Secure Boot and the Trusted Platform Module (TPM) can both be involved, but leave the TPM alone unless nothing else works. Windows 11 setup requires a TPM, and turning it off can make setup stop on a requirements error.
You can turn Secure Boot off just long enough to finish setup, then turn it back on afterwards.
- Restart your computer and immediately tap the key that opens your BIOS settings. The key depends on the manufacturer. Common ones are Del, F2, F10, F12 and Esc, and the startup screen often shows which one to press.
- Look for a tab named Security, Boot or Advanced. Names and layouts vary between manufacturers.
- Locate the setting for Secure Boot and temporarily turn it off.
- Save your changes and exit the BIOS. Look on the screen for a hint such as F10 for Save and Exit.
The PC restarts. If you can't find a Secure Boot option, your motherboard may hide it or use a different name. Check the manufacturer's manual.
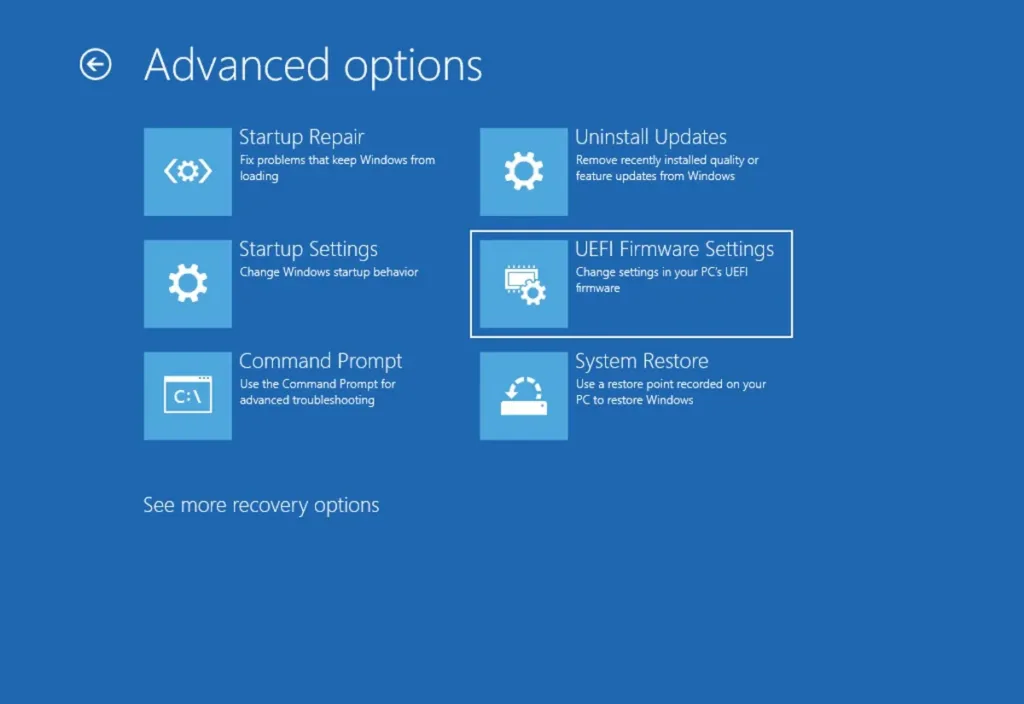
Let the computer boot back into the Windows 11 setup and finish the installation. Then return to the BIOS the same way, find the Secure Boot setting and turn it back on to keep your system protected. Save and exit again. Windows should start normally.
Microsoft requires internet access and an update check during setup so that critical security patches and necessary hardware drivers are installed straight away. This protects a brand-new system from known vulnerabilities before you reach the desktop for the first time. If you skip the check with any of the methods above, run Windows Update as soon as you are online.
Summary
A Windows 11 setup stuck on checking for updates usually clears with simple steps: waiting for slow downloads, unplugging extra USB devices and bypassing the internet requirement. If those fail, you can restart the PC fully, recreate a faulty USB drive or, as a last resort, adjust Secure Boot. Use the order in this guide, and once Windows is installed, connect to the internet and run Windows Update.
Was this guide helpful?

About the Author
Richard
Tech Writer, IT Professional
Richard is a writer at Geek Rewind who turns complex IT tasks into clear, step-by-step guides. He draws on years of hands-on experience in system administration and enterprise IT operations, focusing on Windows, Linux and WordPress: the problems people actually run into, and the fixes that work. His server and WordPress guides come from systems he runs himself. Richard builds and maintains the platform behind Geek Rewind, from its Ubuntu servers and Nginx configuration to its custom WordPress plugins. Many new tutorials start with readers' questions, and he's always glad to answer them in the comments.
No comments yet — be the first to share your thoughts!