How to Enable or Disable DLNA Streaming on Windows 11
DLNA streaming on Windows 11 lets you easily share media like photos, music, and videos with other devices on your home network.
DLNA, which stands for Digital Living Network Alliance, is a way for different gadgets to talk to each other over your Wi-Fi. This means devices like your smart TV, gaming console, or phone can find and play content stored on your PC.
When you turn on DLNA streaming, your Windows 11 computer becomes a server for your media. You can then watch movies on your TV or listen to music through your stereo without needing cables.
You get to decide exactly which folders on your PC are shared, so you’re always in control of what others can see.
To enable DLNA streaming, open Control Panel, go to Network and Sharing Center, and select “Media streaming options” to turn it on. To disable it, return to the same menu and click “Block All.
How to Enable or Disable Media Streaming
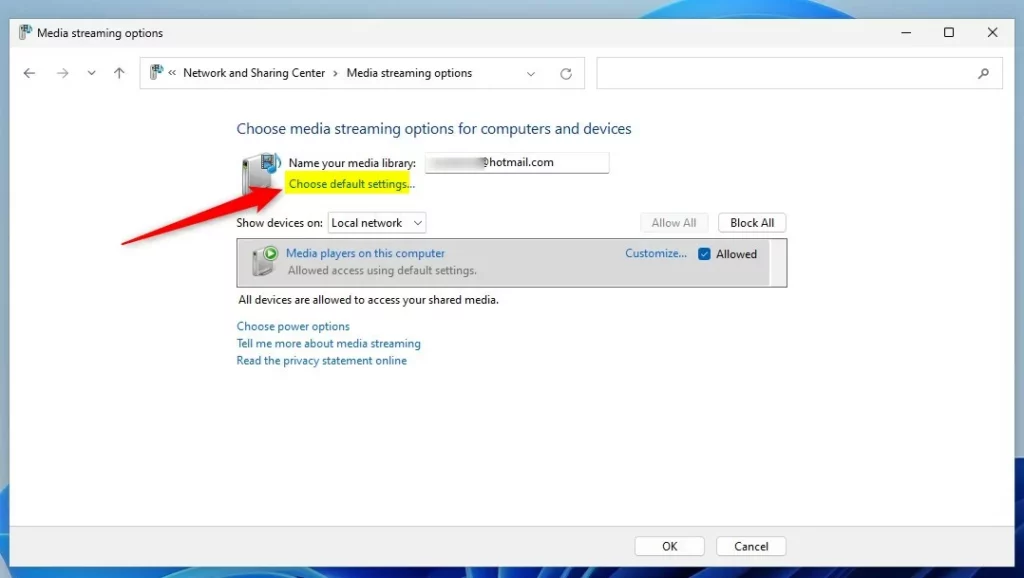
You can turn DLNA streaming on or off in Windows 11 through the Control Panel’s network settings. This lets you share media files like music and videos with other devices on your home network. To find these settings, open the Control Panel and navigate to Network and Sharing Center, then select Media streaming options.
Once the window opens, follow this path:
To get there, navigate: Control Panel > Network and Internet > Network and Sharing Center > Media streaming options
In the settings window, click the button that says "Turn on media streaming."

Be careful: turning this on changes your Windows Defender Firewall settings. Only do this on a network you trust, like your home network.
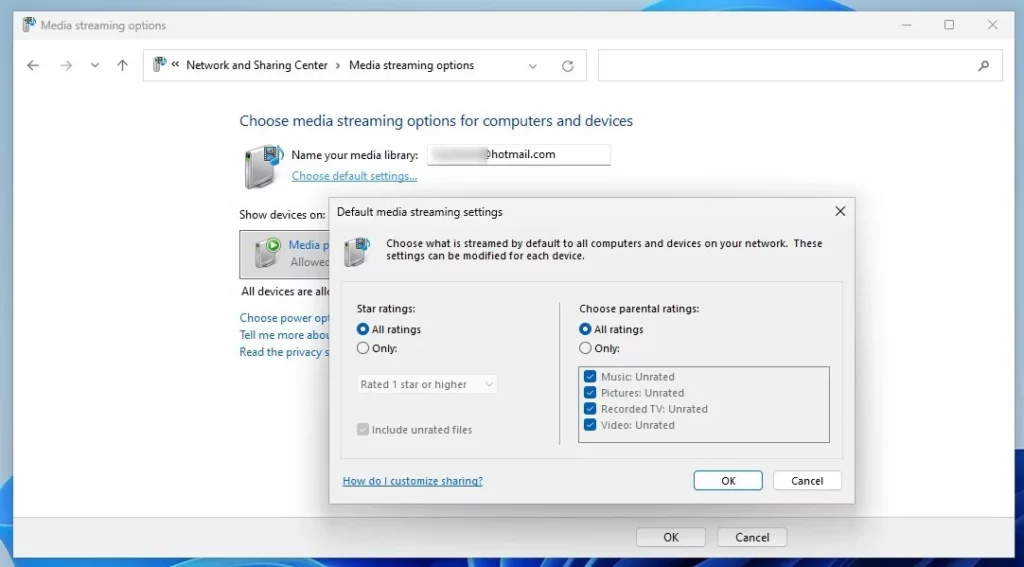
By default, your computer shares files from your Music, Pictures, Recorded TV, and Videos folders.
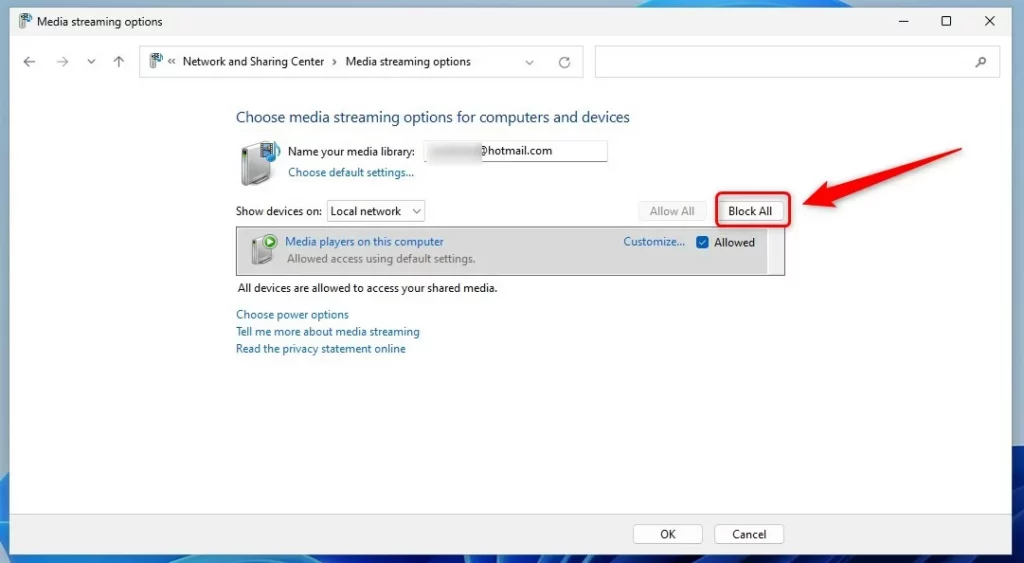
To turn off DLNA streaming, go back to the Media Streaming Options menu and click the "Block All" button. Blocking all devices prevents any other computers or devices on your network from accessing media files on your Windows 11 PC.
Troubleshooting DLNA Connection Issues
If your DLNA streaming isn't working on Windows 11, check a few common things first. Make sure your PC and TV are on the same network, your network is set to 'Private' in Windows, and the SSDP Discovery service (which helps devices find each other) is running.
Verifying SSDP Discovery
Press the Windows key and R together, type services.msc, and then press Enter. Locate "SSDP Discovery" in the list. Ensure the status is "Running." If not, right-click it and select "Start."
Configuring Windows Defender Firewall
Note: This step requires admin privileges.
Sometimes the firewall blocks the WMP network sharing service. Open Windows Defender Firewall with Advanced Security. Ensure that the "Windows Media Player Network Sharing Service" is set to 'Allowed' for Private networks.
Using PowerShell for Management
Note: This step requires admin privileges.
You can also manage services using PowerShell. Open it as an administrator and use this command to start the discovery service:
Start-Service SSDPSRV
Third-Party Media Server Alternatives
If Windows Media Player is too limited, consider alternatives like Plex or Universal Media Server. These offer better codec support and a more modern interface for streaming media to smart TVs.
Summary
DLNA streaming on Windows 11 lets you easily share photos, music, and videos with other devices on your home network. You can manage these settings through the Control Panel or other tools, but remember to turn it off when you're on a public network to keep your files safe.
Why is my DLNA server not showing up on my TV?
This usually happens if your network is set to Public instead of Private, or if the SSDP Discovery service is stopped. Ensure your PC and TV are on the same subnet and that your firewall is not blocking the Windows Media Player Network Sharing Service.
Is DLNA streaming secure?
DLNA media streaming, designed for home networks without modern encryption, is not secure for public Wi-Fi. Always disable DLNA media streaming when you are away from your home network to prevent unauthorized access to your personal media files by other users on the same network.
Does 🪟 Windows 11 have a DLNA server?
Digital Living Network Alliance (DLNA) media streaming allows a Windows 11 computer to serve as a media server, which means you can share media files, such as pictures and music, with compatible devices like speakers or smart TVs.
Is DLNA obsolete?
While newer technologies exist, DLNA is still useful for offline sharing, offering privacy and control over your media content.
What is the best DLNA app for streaming?
For Android users, BubbleUPnP is the best DLNA app for Android. It lets you browse and stream media from DLNA servers (like your PC or NAS) and cast to renderers such as smart TVs or Chromecast.
Was this guide helpful?

About the Author
Richard
Tech Writer, IT Professional
Richard, a writer for Geek Rewind, is a tech enthusiast who loves breaking down complex IT topics into simple, easy-to-understand ideas. With years of hands-on experience in system administration and enterprise IT operations, he’s developed a knack for offering practical tips and solutions. Richard aims to make technology more accessible and actionable. He's deeply committed to the Geek Rewind community, always ready to answer questions and engage in discussions.


[…] previously showed you how to turn on or off DLNA media streaming in Windows 11. When DLNA is off or disabled, Windows will not receive media from other computers and […]