This article explains how to enable or disable services in Windows 11.
In Windows, applications and some functions have services that run in the background, usually without a user interface or GUI.
Some of the core Windows operating systems run services. File Explorer, printing, Windows Updates, Windows Search, and others are powered and controlled by services.
By design, some services start automatically when Windows starts. Others are also designed to only start on demand. Few services will start when triggered or delayed until after all other services are started.
Some services also have dependent or child services. When you stop a parent service, the child or dependent service will also be stopped. Enabling a parent service might not necessarily allow a child or dependent service.
These are some of the basic information you need to know about Windows services.
Services startup types in Windows 11
As mentioned above, services are essential for Windows to function smoothly. However, there might be times when you’ll need to turn service on or off on demand manually.
These are the different ways services are started in Windows:
- Automatic – A service in this state will always start at boot time when Windows starts.
- Automatic (Delayed Start) – A service in this state will start just after boot time when other important services are started.
- Automatic (Delayed Start, Trigger Start) – A service in this state will start after boot when specifically triggered by other services or apps.
- Manual (Trigger Start) – Services in the state will start when specifically triggered by other services or apps, or when “too many services are running all the time.”
- Manual – Manual service states allow Windows to start a service only on demand or when a user or service is started manually, especially with user interactions.
- Disabled – This setting will stop a service from starting, even if needed.
To see how a start starts, stops, or changes, continue below.
How to enable services in Windows 11
Now that you know the different startup types for Windows services, let’s see how it’s done.
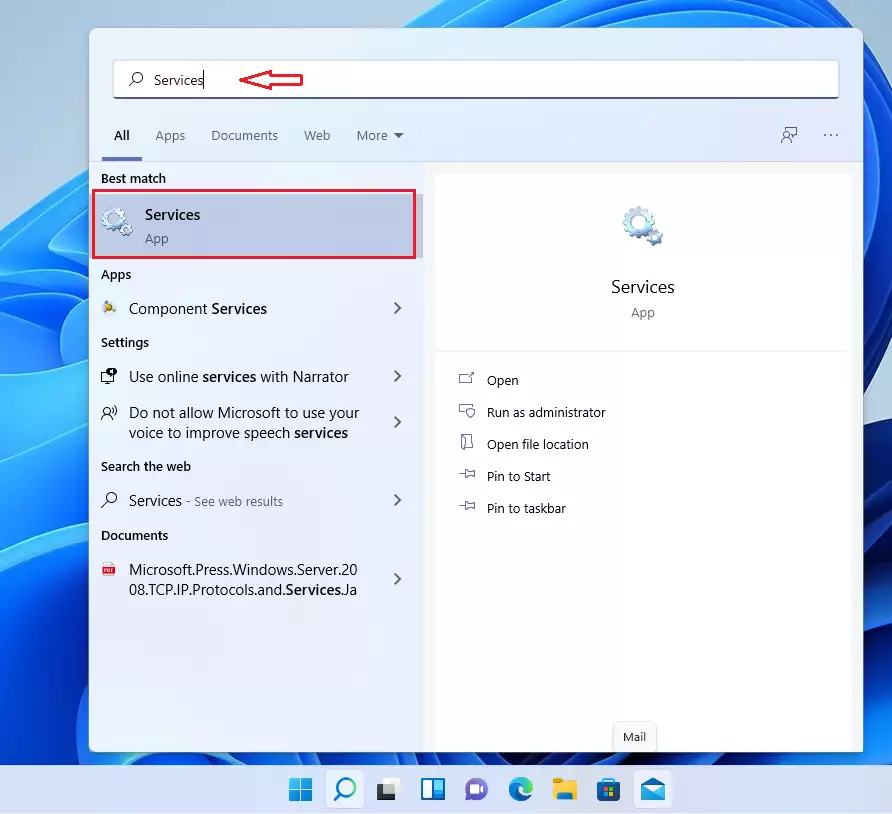
First, start the services app. You can do that in many ways: One way is to click the Start button, then search for Services, under Best match, and select Services App as highlighted below,
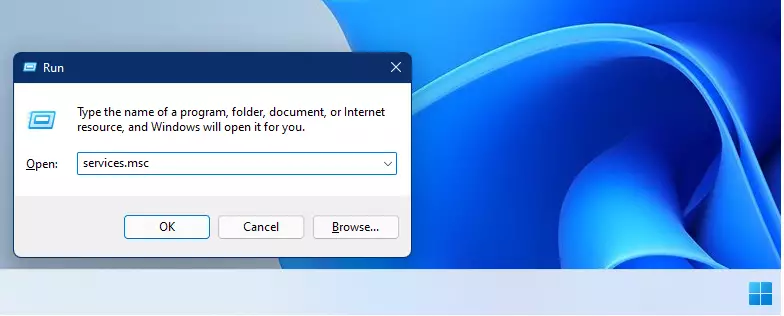
Alternatively, press the Windows key + R on your keyboard to open the Run command box. Then, type the commands below and press Enter.
services.msc
Once the Services app opens, you should see a screen similar to the one below.
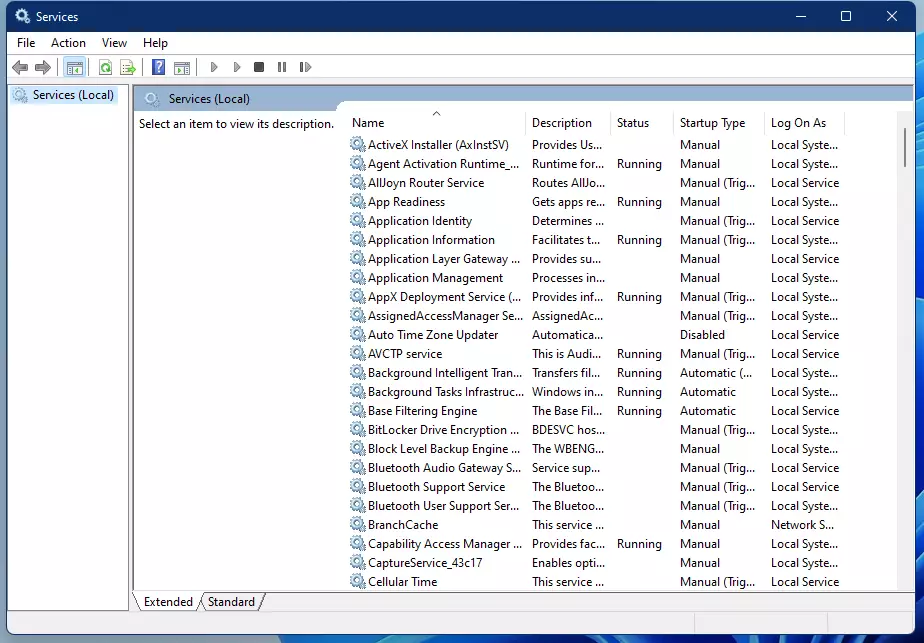
It would be best if you were signed in as an administrator to turn services on and off.
To change a service startup type, double-click on the service you want to turn on or off to open its properties page.
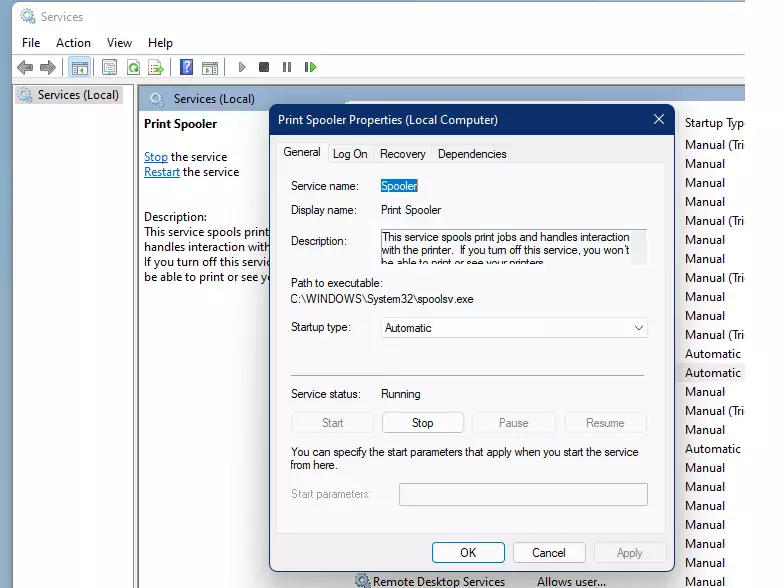
On the service properties windows, you can change the service startup type to Automatic or Automatic (Delayed Start).
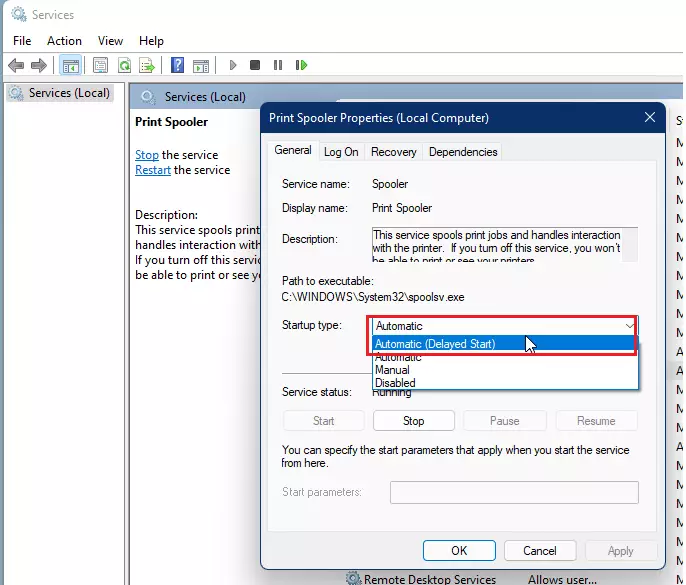
Click the Apply button, then OK to apply your changes and exit the properties window.
You can restart your computer to start the service when Windows boots, or click the Start button under Service status to start the service immediately.
How to turn off a service in Windows 11
If you want to turn off a service, open the service properties window and click the Stop button.
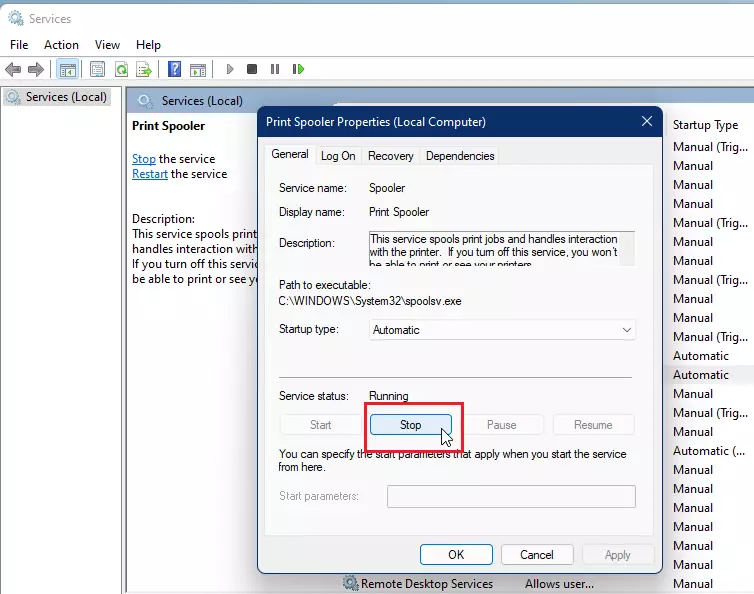
Next, change the service Startup type to Disabled or Manual and click the Apply button. Then, click OK to apply your changes and exit the service properties window.
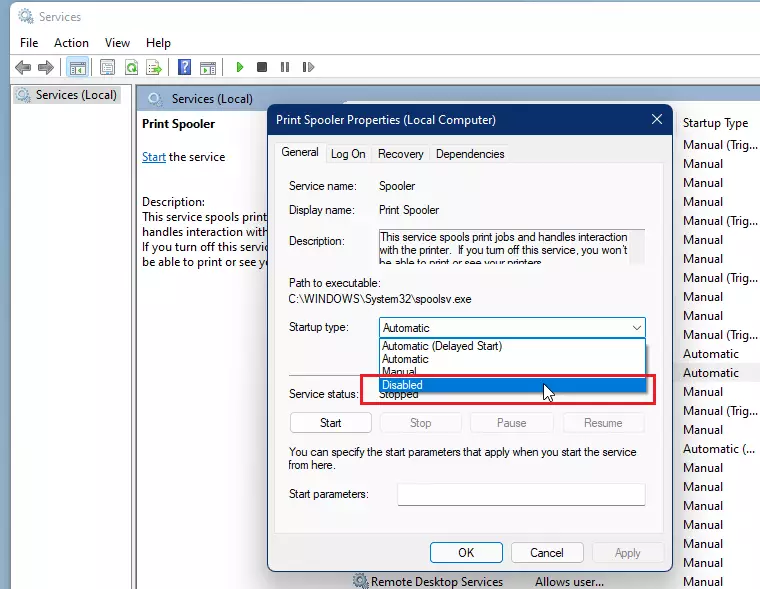
How to enable or disable a service from the command prompt in Windows 11
The same steps can be done from the Command Prompt with a few commands. First, you’ll want to open the Command Prompt as administrator.
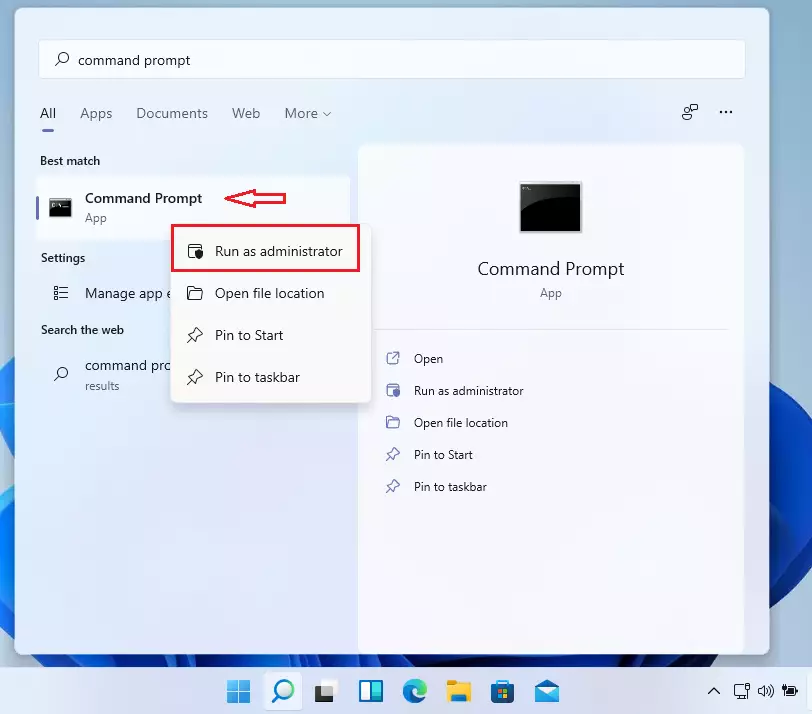
Then run the commands below to enable the service:
Automatic:
sc config "service name" start=auto
Automatic (Delayed Start)
sc config "service name" start=delayed-auto
Stop and disable a service:
sc stop "service name" && sc config "service name" start=disabled
Manual:
sc config "service name" start=demand && sc start "service name"
Replace the service name with the name of the service you want to turn on or off
That should do it!
Conclusion:
In summary, managing services in Windows 11 is essential to optimize performance and enhance user experience. Here are the key takeaways:
- Understanding service startup types helps configure them effectively.
- You can easily enable or disable services through the Services app or Command Prompt.
- Running services in Automatic enhances efficiency, while Manual settings can save resources.
- Always use caution when altering service configurations to avoid system instability.
- Regularly revisiting your service settings can help maintain the peak performance of your Windows 11 system.

Leave a Reply