
This article explains how to enable BitLocker drive encryption on Windows 11.
BitLocker protects your computer’s data, ensuring only authorized users can access it. Access will be denied if someone attempts to use your BitLocker-enabled computer without proper authentication.
BitLocker is a built-in encryption tool that encrypts the entire drive where your data is stored, protecting your files and folders from unauthorized access.
Even if someone gains physical access to your computer, they will not be able to read your files without the proper authentication.
Note that BitLocker isn’t available on Windows 11 Home Edition.
Turn on the Device Encryption
If you’re not currently signed in as an administrator, sign in to Windows with an administrator account (you may have to sign out and back in to switch accounts).
Also, a Trusted Platform Module (TPM) chip is now required to use BitLocker drive encryption. Without a TPM chip in your computer, you may be unable to use BitLocker without a workaround.
Here’s how to turn on BitLocker on compatible devices.
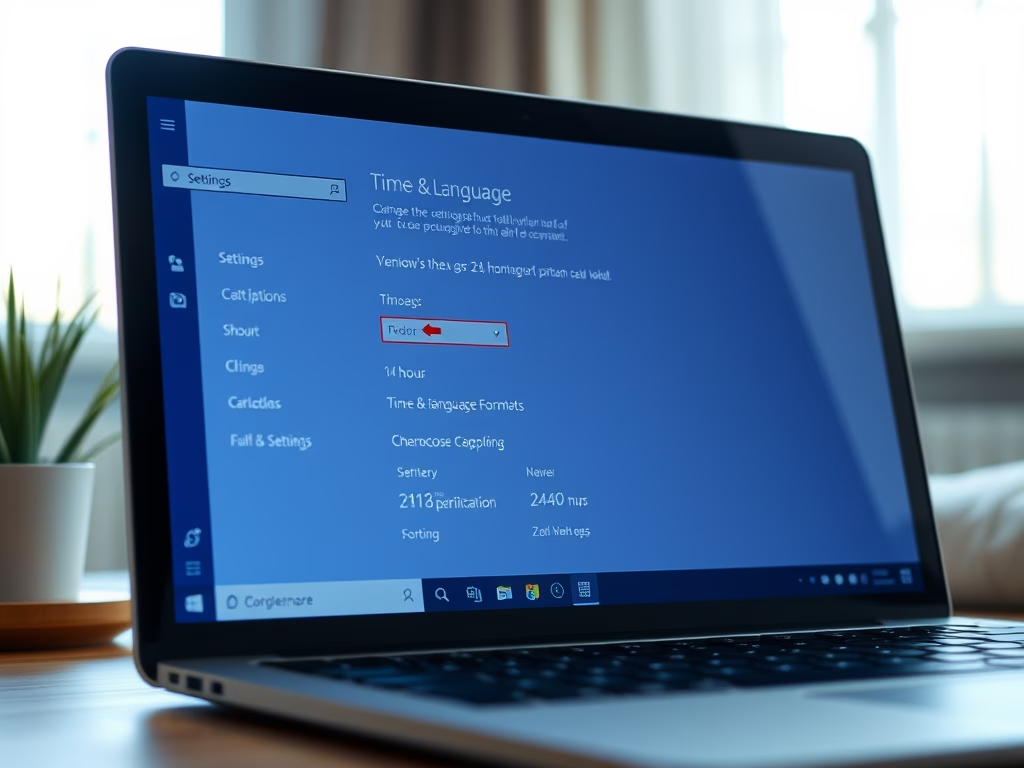
First, open the Windows Settings app.
You can do that by clicking on the Start menu and selecting Settings. Or press the keyboard shortcut (Windows key + I) to launch the Settings app.
When the Settings app opens, click the Privacy & security button on the left. Then, select the Device encryption tile on the right and toggle the switch button to On.
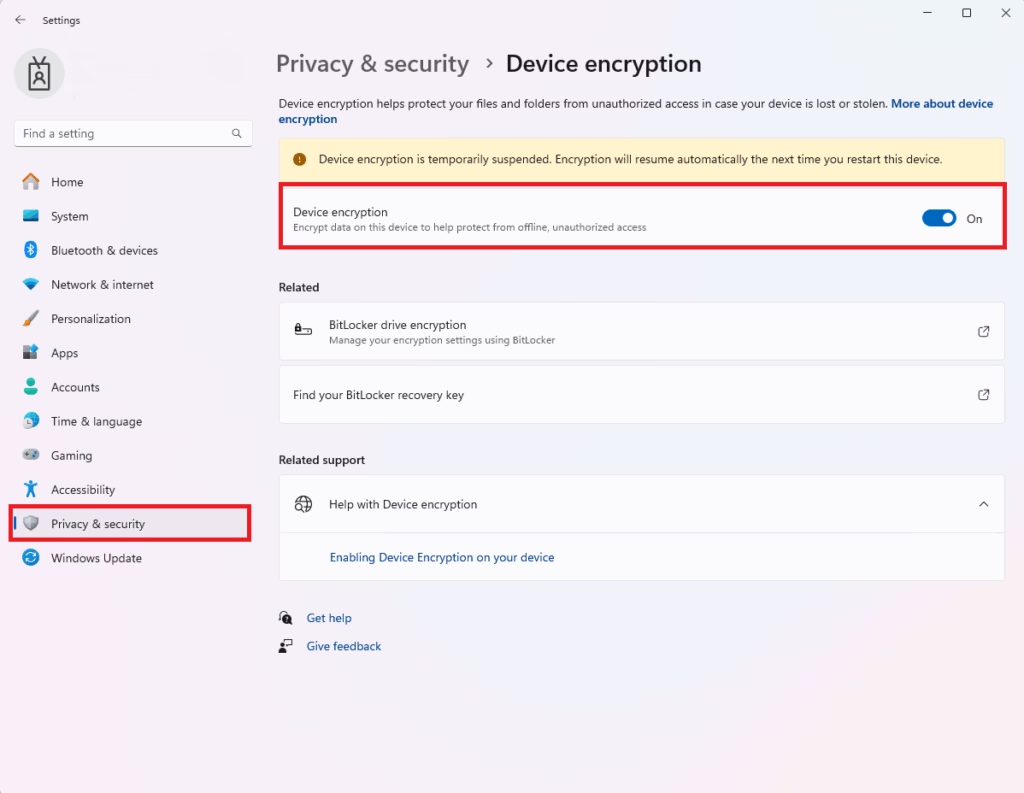
BitLocket will be turned on.
Turn on BitLocket on an incompatible device
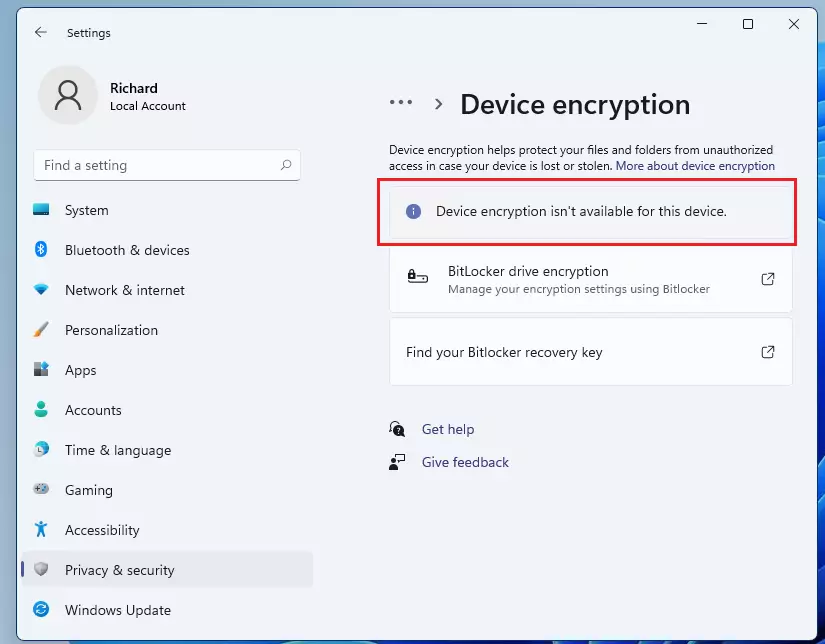
If your PC does not have a TPM chip, follow the instructions below for a workaround to install BitLocker.
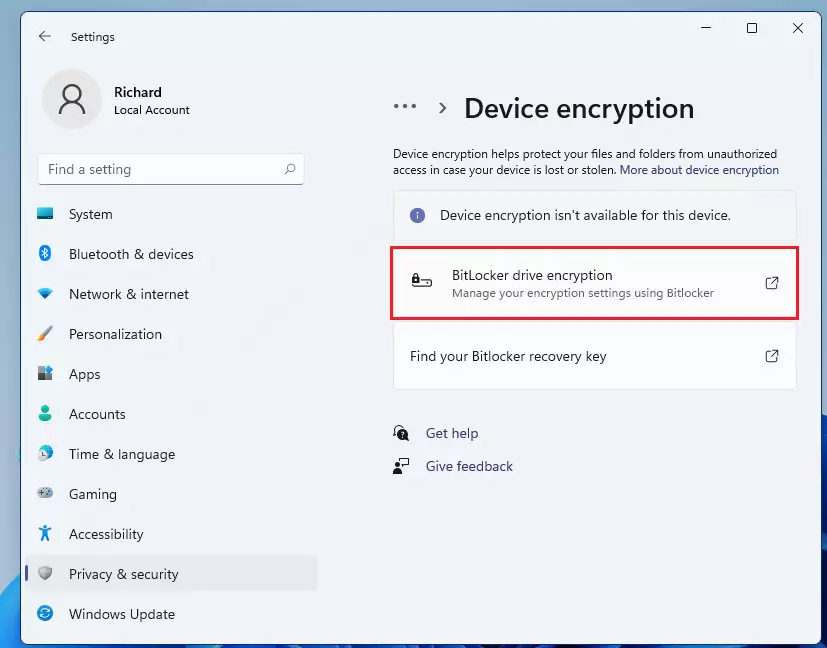
If you see the message “Device encryption isn’t available for this device,” then the TPM chip isn’t available for your device, and you won’t be able to use BitLocker without a workaround we’ll show you below.
If the highlighted message above is not visible, click the BitLocker drive encryption link in the image to encrypt your drive.
Use Standard Encryption
If your computer does not support Windows device encryption, you might be able to use standard BitLocker encryption instead.
Since TPM is required in Windows 11, use this workaround to get around that requirement.
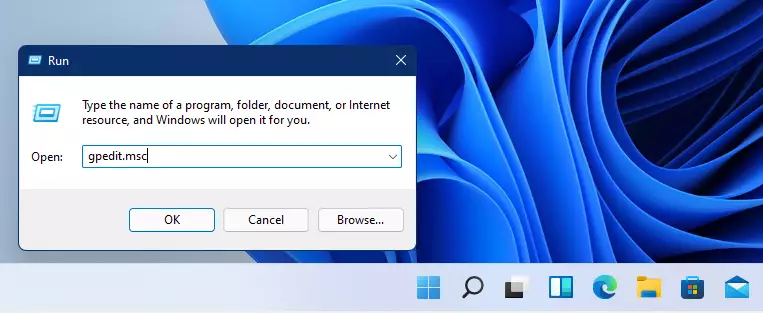
Click on Start, begin typing Run, or use Windows search and search for Run. Then open the Run app.
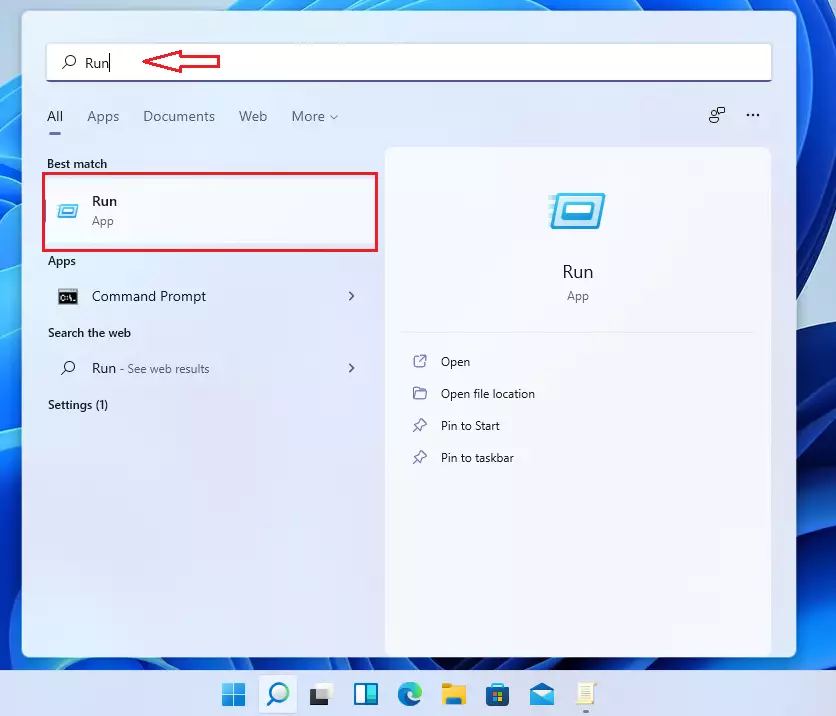
When the Run app opens, type the command below in the box and press Enter.
gpedit.msc
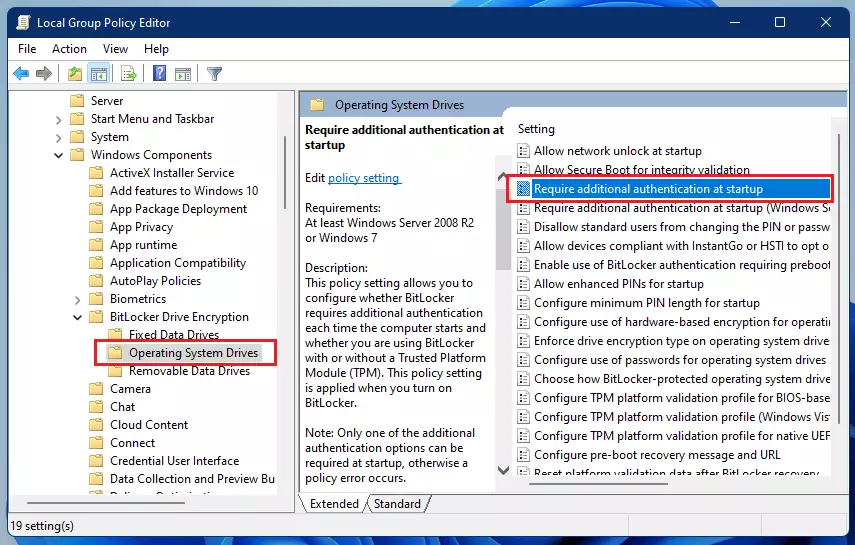
When the Group Policy Editor opens, navigate to the path below:
Local Computer Policy > Computer Configuration > Administrative Templates > Windows Components > BitLocker Drive Encryption > Operating System Drives
Then open the open setting “Require additional authentication at startup” highlighted.
Then select the box next to Enabled to enable and check the box to Allow BitLocker without compatible TPM (requires a password or a startup key on a USB flash drive).
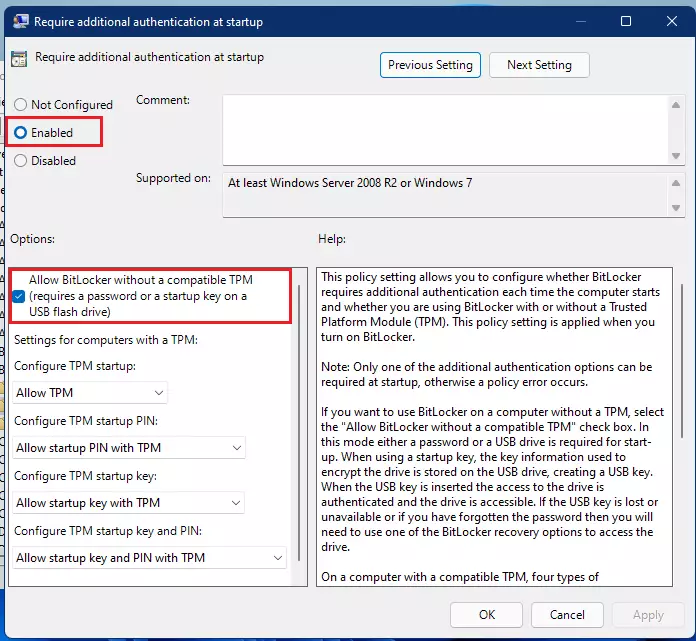
Exit, and you’re ready to use BitLocker without the TPM module.
Now, continue where we left off above, and go to System Settings –> Privacy & Security –> Drive encryption.
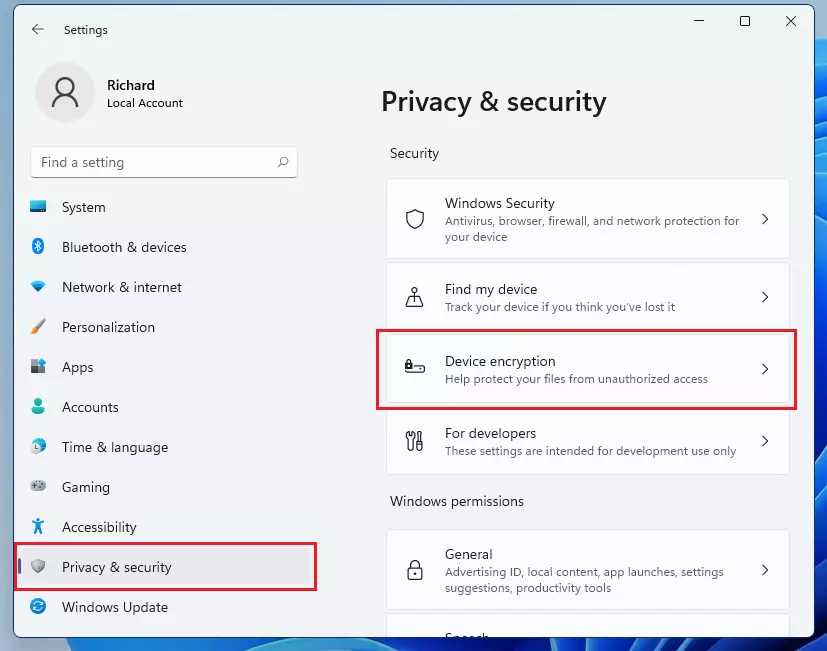
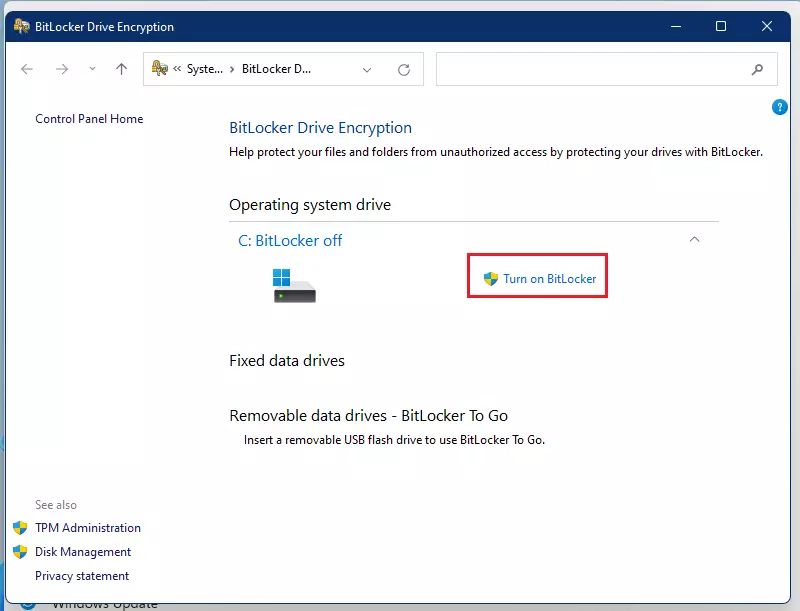
On the Drive encryption settings page, click on BitLocker drive encryption.
Next, click the link to Turn on BitLocker, as highlighted in the image below.
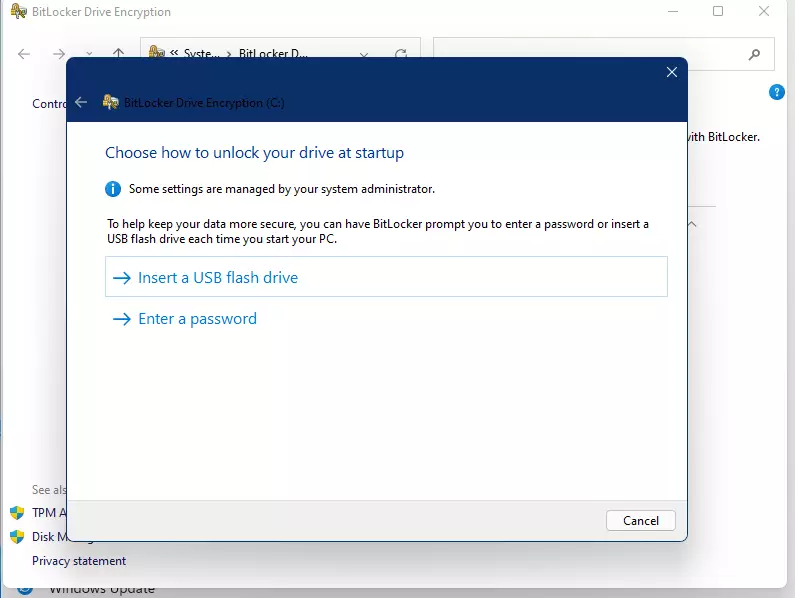
If you don’t have a TPM module, you’ll be prompted to insert a USB flash drive or enter a password each time you boot up the computer.
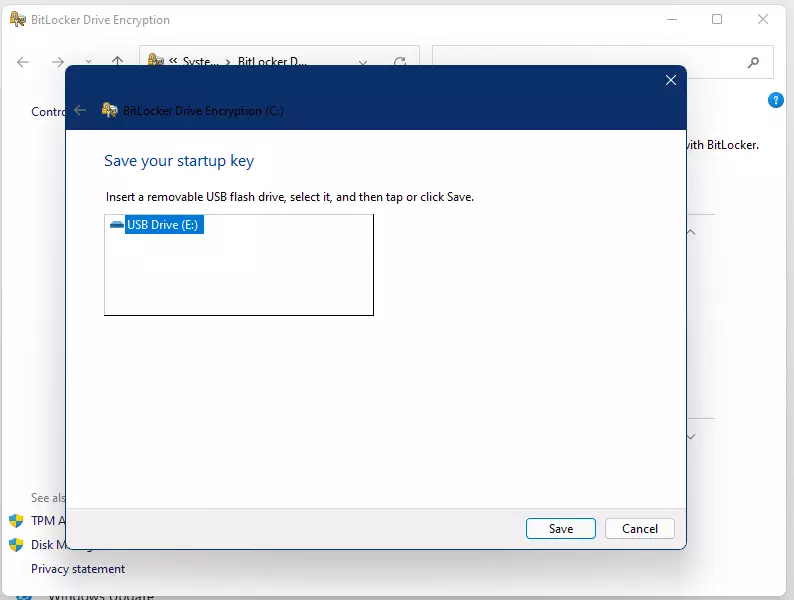
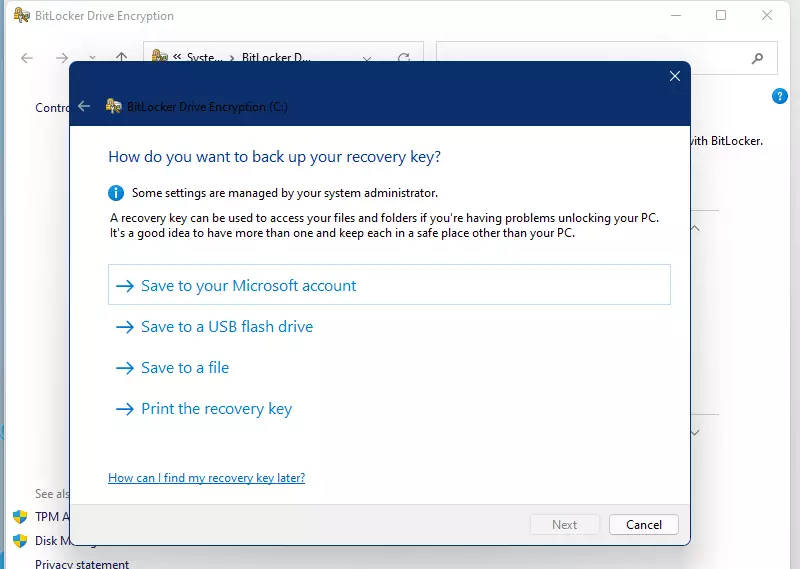
Insert and select the drive to save the key and continue.
You’ll also be asked to save a recovered key somewhere. This recovery key is important for restoring your machine, so print and save it online or somewhere secure.
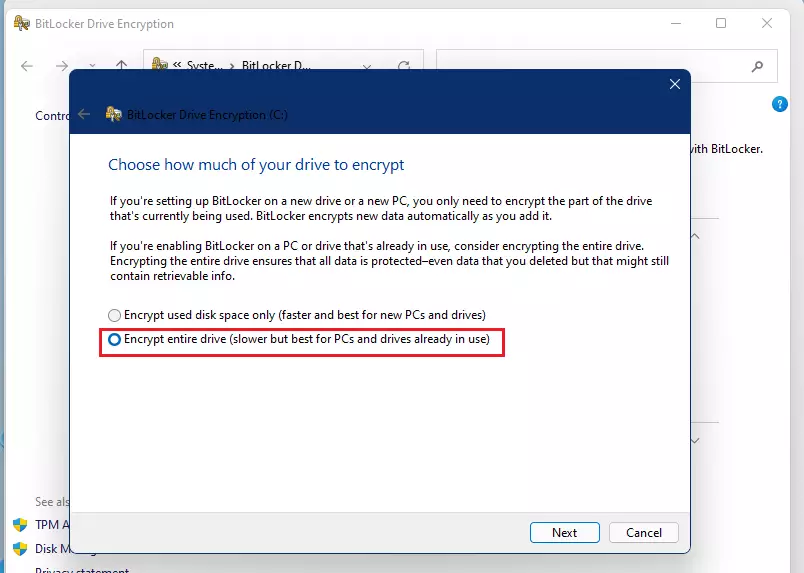
Finally, encrypt the entire drive.
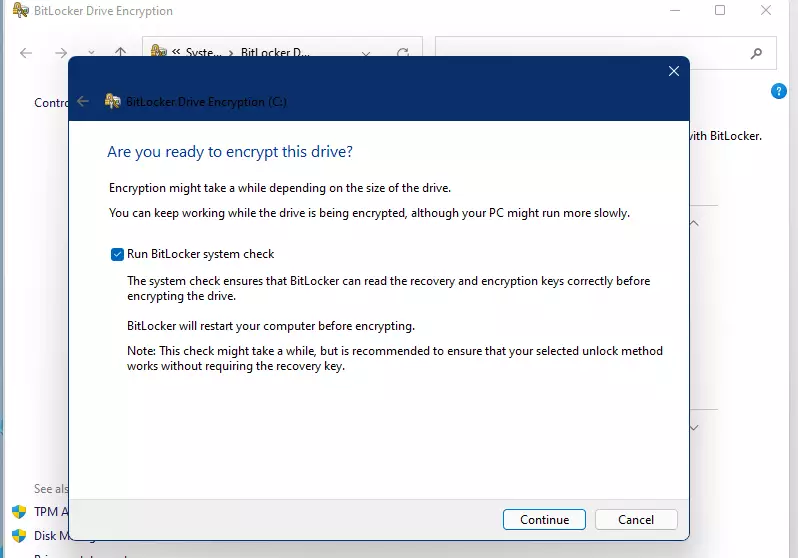
Complete the wizard, and you’re done.
When your PC starts up, you need to either enter your password or insert the USB flash drive you provided. If you cannot provide the password or the USB drive, BitLocker will not be able to encrypt your drive. As a result, you won’t be able to boot into your Windows system or access your files.
Note: It isn’t available on Windows 10 Home Edition.
Conclusion:
- BitLocker drive encryption is a crucial security feature available for Windows 11 Professional and Enterprise editions, ensuring data protection against unauthorized access.
- Enabling Device Encryption is straightforward on compatible devices with a TPM chip, providing an easy way to safeguard your information.
- Users with incompatible devices can still utilize standard BitLocker encryption by following a workaround that allows encryption without a TPM.
- It is essential to keep your recovery key in a secure location, as it is critical for accessing your system if you forget your password or lose your USB flash drive.
- Regularly reviewing and managing your drive encryption settings can enhance your data security and overall system protection.

Leave a Reply