How to Change BitLocker Password in Windows 11

Changing your BitLocker password in Windows 11 is straightforward using either File Explorer or the Control Panel.
BitLocker is a Windows feature that locks down your computer’s drive to protect your files. It encrypts everything, making sure nobody can read your data if your PC is lost or stolen.
You typically need a password or a USB drive to get into your encrypted drive. You must know your current BitLocker password to set a new one.
Updating this password regularly is a good security habit for keeping your important information safe.
Right-click the BitLocker-encrypted drive in File Explorer, select “Show more options,” then “Change BitLocker password.” Enter your old password, then your new password twice to confirm. Alternatively, use the Control Panel under System and Security.
How to Change Your BitLocker Password
Here’s how you can change your BitLocker password in Windows 11. You have three options; pick the one that feels most comfortable for you.
1Change Password Using File Explorer
- Open File Explorer. Click the folder icon on your taskbar or press ⊞ Win+E on your keyboard.
- Find the drive that is protected by BitLocker. It will have a lock icon.
- Right-click on that drive. Choose “Show more options”. Click “Change BitLocker password”.
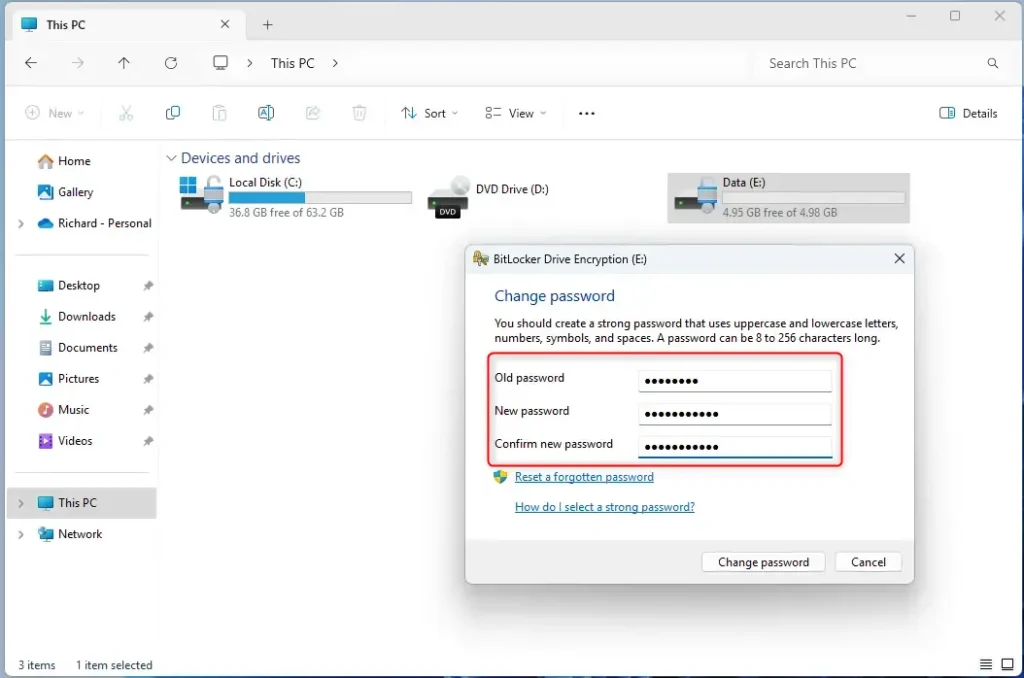
- A window will pop up. Type your old password. Then enter your new password twice to confirm.
- Click “Change password” to finish.
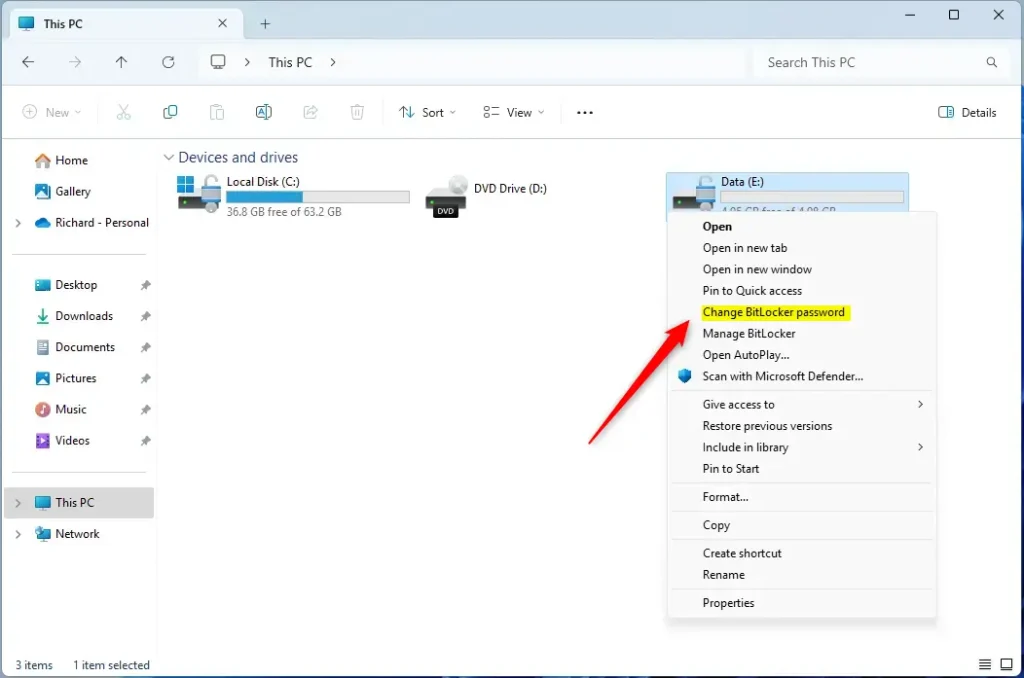
Changing your BitLocker password in Windows 11 via File Explorer is quite accessible. Open File Explorer, locate the BitLocker-encrypted drive (marked with a lock icon), then right-click it and select ‘Change BitLocker password’ to start.
Changing your BitLocker password in Windows 11 via File Explorer is quite accessible. Open File Explorer, locate the BitLocker-encrypted drive (marked with a lock icon), then right-click it and select ‘Change BitLocker password’ to start.
2Change Password Using Control Panel
- Open Control Panel. Type “Control Panel” in the Start menu search and click it.
- Go to System and Security → BitLocker Drive Encryption.
- Find the drive you want to change the password for. Click “Change password”.
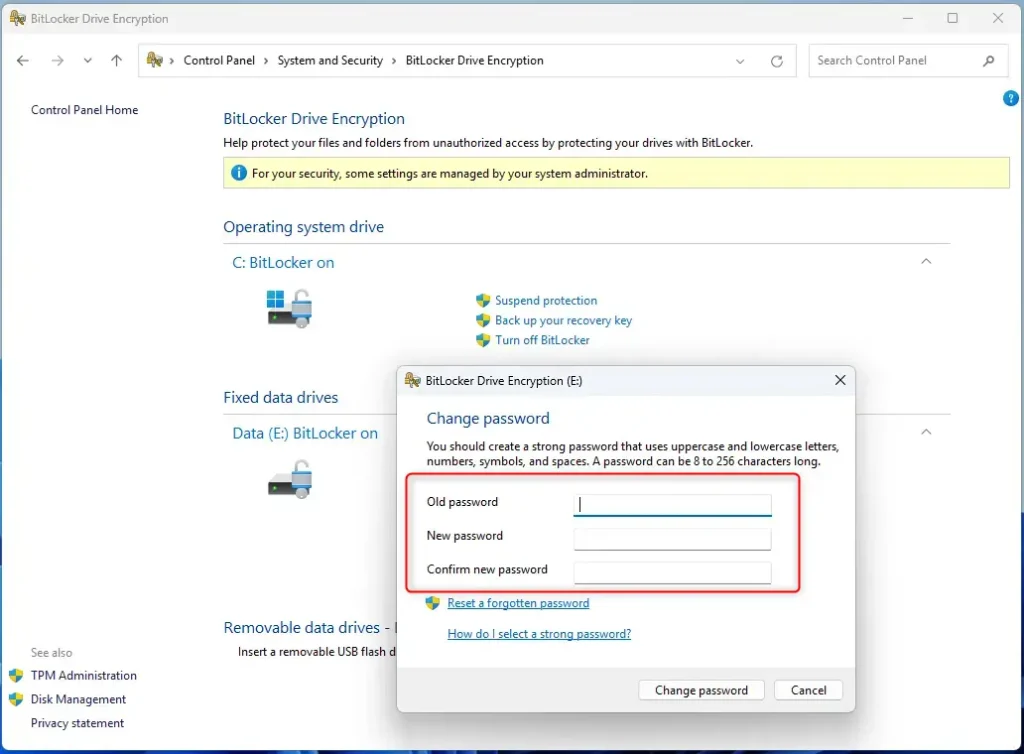
- Enter your old password. Then enter your new password twice. Click “Change password” to apply.
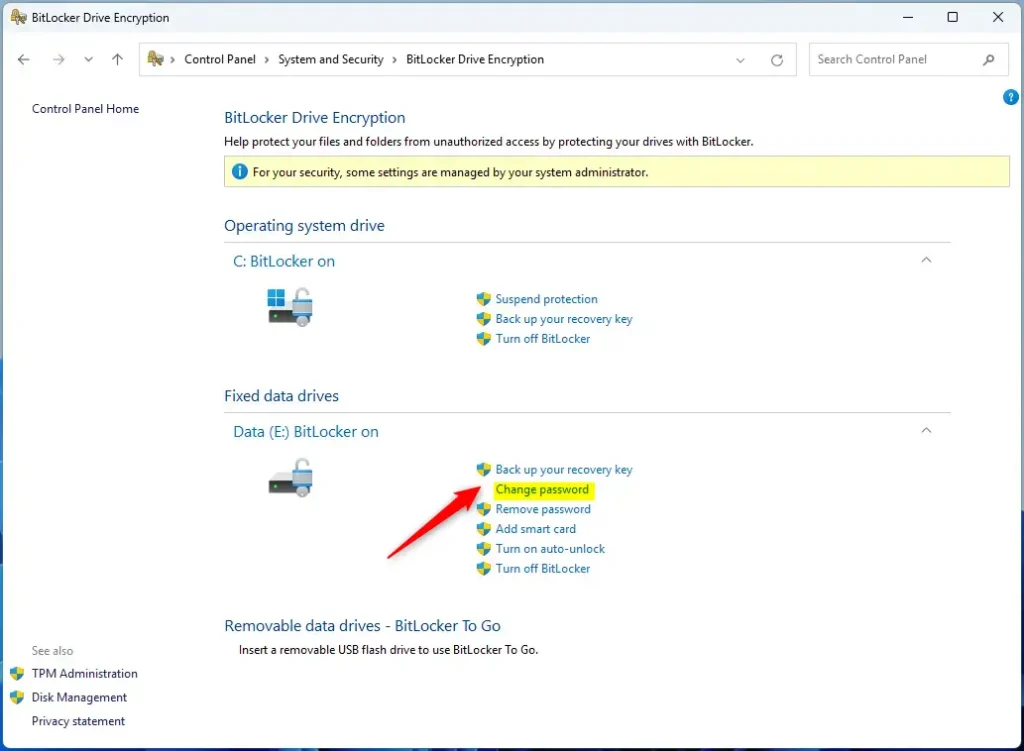
You can also change your BitLocker password in Windows 11 using the Control Panel. Access ‘System and Security’ from the Control Panel, then navigate to ‘BitLocker Drive Encryption’. Select the drive you wish to update and click ‘Change password’ to input your old and new details.
You can also change your BitLocker password in Windows 11 using the Control Panel. Access ‘System and Security’ from the Control Panel, then navigate to ‘BitLocker Drive Encryption’. Select the drive you wish to update and click ‘Change password’ to input your old and new details.
3Change Password Using Windows Terminal
If you prefer using commands, you can change your BitLocker password in Windows 11 with the Windows Terminal. Open Windows Terminal as an administrator and use a specific command, making sure to replace the placeholder with your actual drive letter, to quickly update your password.
If you like using commands, this method might be for you.
- Open Windows Terminal as an administrator. Search for “Windows Terminal” in Start. Right-click it. Select “Run as administrator”.
- Type the following command and press Enter. Replace
E:with your drive letter:
manage-bde -changepassword E:
- When prompted, enter your old password. Then enter your new password twice.
- Press Enter to finish.
Summary
- Changing your BitLocker password helps keep your data safe.
- You can change the password using File Explorer, Control Panel, or Windows Terminal.
- Make sure your drive is unlocked before starting.
- Use a strong, unique password that you can remember.
- Changing your password regularly gives extra protection.
Changing your BitLocker password in Windows 11 is important for keeping your data secure. You have three main ways to do this: using File Explorer, the Control Panel, or Windows Terminal. Always make sure your drive is unlocked before you start and choose a strong password you can remember.
Was this guide helpful?

About the Author
Richard
Tech Writer, IT Professional
Richard, a writer for Geek Rewind, is a tech enthusiast who loves breaking down complex IT topics into simple, easy-to-understand ideas. With years of hands-on experience in system administration and enterprise IT operations, he’s developed a knack for offering practical tips and solutions. Richard aims to make technology more accessible and actionable. He's deeply committed to the Geek Rewind community, always ready to answer questions and engage in discussions.


No comments yet — be the first to share your thoughts!