How to Take a Screenshot in Windows 11

- 7 ways to do it
- Needs administrator rights
- Includes a restart or sign-out
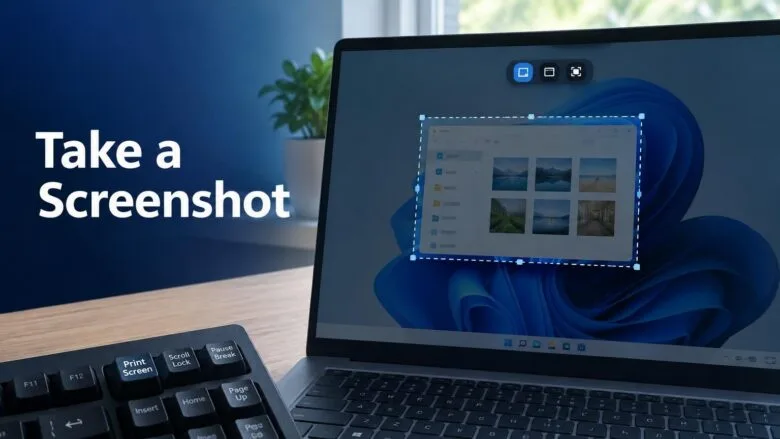
Press Win+Shift+S to capture part of your screen. The screen dims, and you drag a box around the area you want. Windows saves the picture either to the clipboard (the temporary memory that holds copied items) or to a file.
Windows 11 has several other screenshot methods, including Print Screen, Windows + Print Screen, Alt + Print Screen, the Snipping Tool app and Xbox Game Bar. This guide starts with the fastest method, then covers each alternative, where the files go, and what to check when a shortcut does nothing. None of the steps need administrator rights, and they work the same on Windows 11 Home and Pro.
Press Win+Shift+S to take a screenshot on your PC. The screen dims and a toolbar appears, where you choose Rectangle, Freeform, Window or Full screen, then drag or click the area you want. The image is copied to the clipboard, so you can paste it with Ctrl+V or click the notification to save it as a PNG file.
The Quickest Way to Take a Screenshot on a PC
This method shows how to take a screenshot on a PC and choose exactly what it captures. When you finish, the image sits on your clipboard, ready to paste or save.
- Display the content you want to capture. Close or move anything private, such as notifications or open email.
- Press Win+Shift+S. The screen dims and a small toolbar appears at the top center.

- Choose a capture mode on the toolbar. Hover over each icon to see its name: Rectangle, Freeform, Window and Full screen.
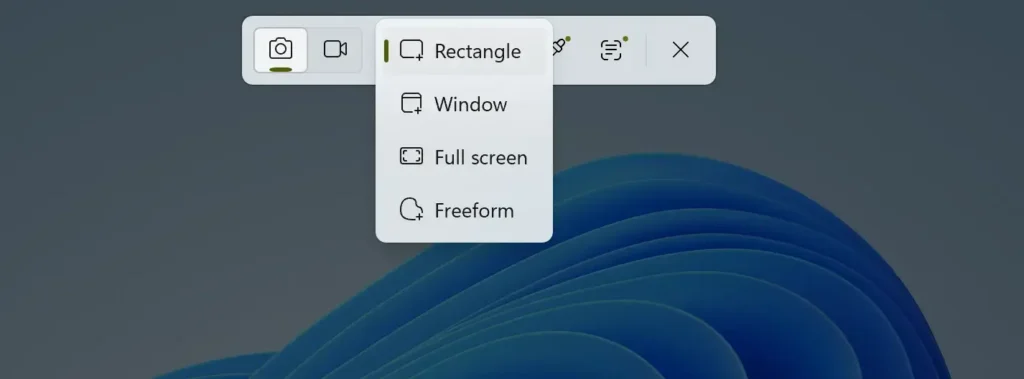
- Drag across the area you want. With Window, click the window instead. With Full screen, the capture happens as soon as you pick the mode.
- Release the mouse button. A notification appears at the bottom right of the screen and the image is copied to the clipboard.
- Click the notification to open the image in Snipping Tool. Skip this step if you only want to paste the image.
- Click the Save as icon in Snipping Tool, name the file, and click Save. The default format is PNG.
To paste the screenshot without saving it first, open an app such as Paint, Word or an email message and press Ctrl+V. The image appears at once, which also confirms it is on the clipboard. Press Esc at any point while the screen is dimmed to cancel the capture.
The selection modes are covered in more depth in the guide to capturing a selected area in Windows 11.
Screenshot Shortcuts at a Glance
Each shortcut does something different. Use this list to pick the one that fits.
- Print Screen: copies the whole screen to the clipboard, or opens the screen capture toolbar, depending on a setting covered below.
- Windows + Print Screen: saves the whole screen as a PNG file in your Screenshots folder.
- Alt + Print Screen: copies only the window you are using to the clipboard.
- Win+Shift+S: opens the capture toolbar so you can pick an area, a window or the full screen.
- Windows + Alt + Print Screen: saves a screenshot of the active game or app through Xbox Game Bar.
- Power + Volume down: captures the screen on a tablet or a device with no keyboard.
On many laptops, the key is labeled PrtScn or PrtSc and shares a key with another function. If the shortcut does nothing, hold the Fn key as well, for example Fn + Win+PrtSc.
Other Ways to Take a Screenshot in 🪟 Windows 11
Method 1Save the Whole Screen as a File (Windows + Print Screen)
This method captures everything on your screen and saves it as an image file without any extra steps. It is the best choice when you need a file straight away.
- Display what you want to capture.
- Press Windows + Print Screen. The screen dims for a moment, which tells you the capture worked.
- Open File Explorer by pressing Win+E.
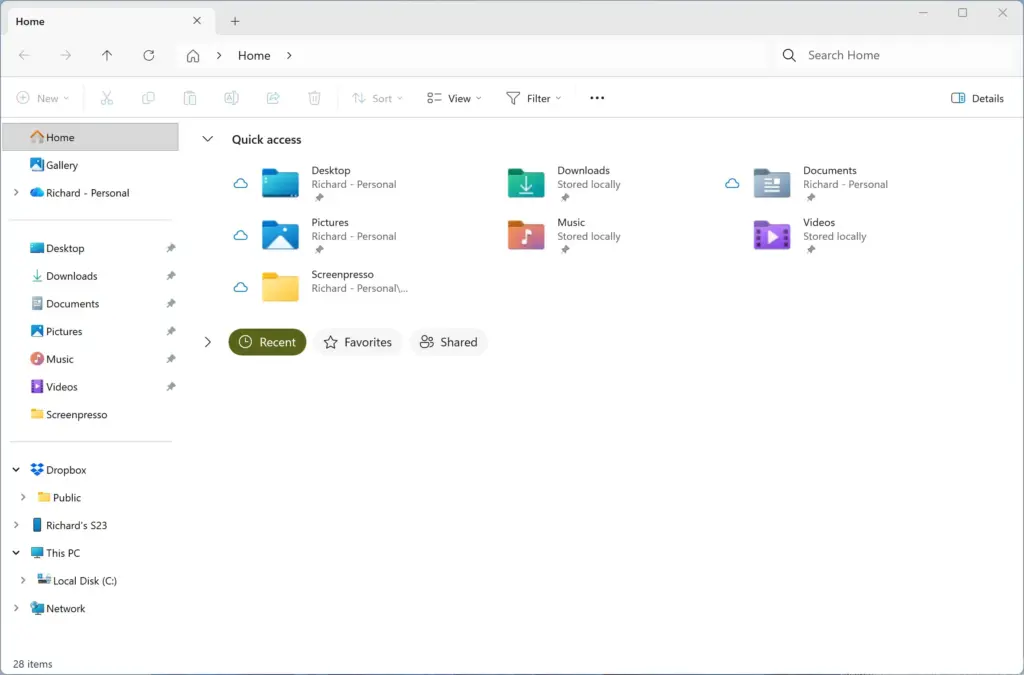
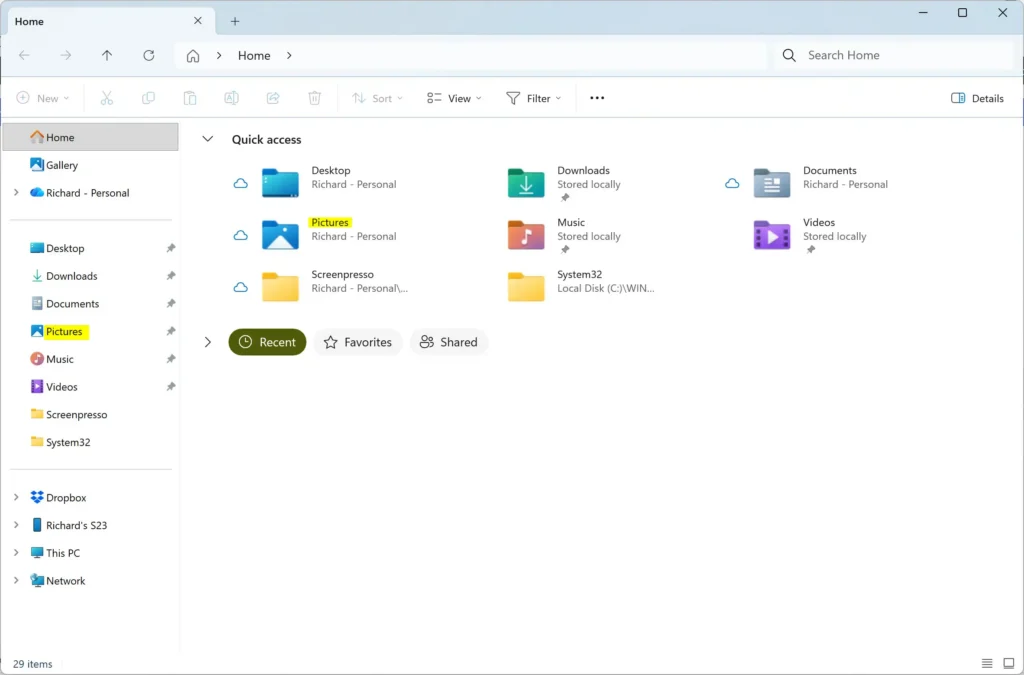
File Explorer - Click Pictures in the left pane, then open the Screenshots folder.
File Explorer
Your screenshot is the newest file in your Pictures\Screenshots folder. Windows names files Screenshot (1), Screenshot (2) and so on. If the numbers get out of order or you want them to start again, see how to reset the screenshot index counter in Windows 11.
Method 2Copy the Whole Screen (Print Screen)
Print Screen on its own copies the entire screen to the clipboard, so you can paste it into a document or chat. It does not create a file.
- Press Print Screen. Nothing visible happens on a PC that uses the clipboard behavior.
- Open the app where you want the image, such as Paint, Word or an email.
- Press Ctrl+V. The screenshot appears in the document or message.
On some Windows 11 PCs, Print Screen opens the capture toolbar from the previous section instead. This depends on a setting. To check it, open Settings Accessibility Keyboard and look for the toggle named Use the Print screen button to open screen capture.
Turn it on to get the toolbar, or off to copy the whole screen straight to the clipboard. If you cannot find this toggle, your build of Windows 11 may not include it.
Method 3Capture One Window (Alt + Print Screen)
Alt + Print Screen copies only the window you are working in. It leaves out the taskbar, other windows and the desktop background.
- Click the window you want to capture so it is active.
- Press Alt + Print Screen. The image goes to the clipboard.
- Open an app such as Paint or Word.
- Press Ctrl+V to paste the window image.
The screen does not dim or flash for this shortcut. If the pasted image shows the wrong thing, click the window again and repeat, because Windows captures whichever window is active, meaning the one you clicked last.
Method 4Use the Snipping Tool App
The Snipping Tool app gives you the same capture modes as Win+Shift+S, plus a delay timer and basic editing. Use it when you need to open a menu or tooltip that disappears when you click away.
- Open the Start menu and type Snipping Tool.
- Press Enter to open the app.
- Click the mode selector in the toolbar and choose Rectangle, Window, Full screen or Freeform.
- Click the clock icon to set a delay of 3, 5 or 10 seconds if you need time to open a menu. Your version of the app may label this differently.
- Click New. The screen dims, or the delay countdown starts.
- Capture the area. The image opens in the Snipping Tool window.
- Click the Save as icon to keep it as a file, or the Copy icon to put it on the clipboard.
In the editing window you can crop, draw on the image with a pen or highlighter, and add other markup before you save. Snipping Tool can also save every capture automatically. To change where those files go, see how to change the Snipping Tool screenshot folder in Windows 11.
Method 5Capture a Game with Xbox Game Bar
Xbox Game Bar (a built-in overlay for capturing games and apps) takes screenshots of full-screen games, where other tools can capture a black screen. It saves the image as a file.
- Open the game or app you want to capture.
- Press Windows + Alt + Print Screen. A short message confirms that the screenshot was saved.
- Press Win+G to open the Game Bar overlay if you want to find the file.
- Click Show all captures in the Capture widget to see your screenshots.
Game Bar usually saves captures to the Captures folder inside your Videos folder. If Game Bar does not respond, open Settings Gaming Xbox Game Bar and make sure it is turned on. To store screenshots and game clips somewhere else, read how to change where screenshots and game clips are saved in Windows 11.
Method 6Take a Screenshot on a Tablet
A Windows 11 tablet, or a 2-in-1 (a laptop whose screen detaches from the keyboard), has no Print Screen key. Press the Power button and the Volume down button together.
- Display the content you want to capture.
- Press the Power button and the Volume down button together.
- Release both buttons. The screen dims briefly.
- Open File Explorer, click Pictures, then open Screenshots.
This combination works on Surface tablets. Other makers may use a different one, so check your device’s manual if nothing happens. You can also swipe in from the screen’s edge to open the on-screen keyboard, or use Win+Shift+S through an attached keyboard.
Method 7Capture a Web Page in Microsoft Edge
Microsoft Edge has its own capture tool that grabs a section of a web page or the entire page, including parts you would need to scroll to see. This helps when the page is longer than your screen. The guide to taking a screenshot using Microsoft Edge walks through the steps.
Where 🪟 Windows 11 Saves Your Screenshots
Where a screenshot ends up depends on how you took it. The table below shows the usual results.
- Print Screen and Alt + Print Screen: clipboard only. Paste the image into an app and save it from there.
- Win+Shift+S: clipboard first. Save it from Snipping Tool if you need a file.
- Windows + Print Screen: a PNG file in Pictures\Screenshots.
- Windows + Alt + Print Screen: a file in the Captures folder inside Videos.
Screenshots on More Than One Monitor
With two or more displays, Print Screen and Windows + Print Screen capture all of them in one wide image. That is rarely what you want.
To capture a single monitor, press Win+Shift+S and drag a rectangle over that screen only. Alternatively, click a window on that monitor and press Alt + Print Screen. Both options leave the other displays out of the image.
Screenshot Shortcut Not Working
If a screenshot shortcut does nothing, check the following in order.
- Hold the Fn key with the shortcut. Many laptops need Fn + PrtScn, and some have an Fn Lock key that reverses this.
- Check where the image went. Win+Shift+S and Print Screen put the picture on the clipboard, so nothing appears in a folder until you paste and save.
- Open Settings Accessibility Keyboard and check the Use the Print screen button to open screen capture toggle. It changes what Print Screen does.
- Look in OneDrive\Pictures\Screenshots if the file is missing from Pictures\Screenshots.
- Close apps that take over the key, such as other capture tools or cloud storage programs, and try again.
- Restart the PC if the shortcuts stopped working after an update or a long uptime.
On a work or school PC, an administrator may have restricted capture tools through a policy. This guide cannot tell which restrictions apply to your device. If the shortcuts still fail after these checks, ask your IT department.
What to Do Next
If your screenshots land in a folder you do not like, change the destination with the steps for changing where screenshots and game clips are saved. To keep Snipping Tool captures separate, set its own folder using the Snipping Tool folder guide. Capturing a rectangle, a window or a freeform shape is covered in more detail in the post on taking a screenshot of a selected area.
Frequently asked questions
How do I take a screenshot?
Press Win+Shift+S and drag a box around the part of the screen you want. The screen dims while you select, and the image copies to the clipboard, so you can paste it with Ctrl+V into Paint, Word, or an email. Click the notification to open it in Snipping Tool and save it as a file.
How to take a screenshot on hp?
On most HP laptops and desktops, press Win+Shift+S to take a partial screenshot. Some HP models also have a Print Screen key, often labeled PrtSc, that copies the full screen to the clipboard. Press Windows + PrtSc to save the full screen as a PNG file in the Screenshots folder in Pictures.
How do you take a screenshot?
Press Win+Shift+S on Windows 11 to capture part of the screen, or press Print Screen to copy the whole screen. Paste the result with Ctrl+V into an app. To save a whole-screen capture as a file, press Windows + Print Screen, and the image is saved to the Screenshots folder in Pictures.
How to screenshot on 🪟 Windows 11?
On Windows 11, press Win+Shift+S to open the capture bar at the top of the screen. The screen dims while you choose. Drag to select the area you want, and the image copies to the clipboard. Paste it with Ctrl+V, or click the notification to open it in Snipping Tool and save it.
How do I take a screenshot on this device?
On a Windows PC, press Win+Shift+S and drag over the area you want. The screen dims while you select. Paste the image with Ctrl+V, or click the notification to save it as a file in Snipping Tool. To capture the whole screen and save it automatically, press Windows + Print Screen.
How to take a screen shot on 🪟 Windows 11?
Press Win+Shift+S to take a screenshot of part of the screen on Windows 11. Drag a box around the area you want, and the picture copies to the clipboard. Paste it with Ctrl+V, or click the notification to open it in Snipping Tool and save it as a file.
Still have a question?
Answered by AI from this guide. Good questions may be added to this page — please don't include personal details.
Did this guide fix your problem?

About the Author
Richard
Tech Writer, IT Professional
Richard is a writer at Geek Rewind who turns complex IT tasks into clear, step-by-step guides. He draws on years of hands-on experience in system administration and enterprise IT operations, focusing on Windows, Linux and WordPress: the problems people actually run into, and the fixes that work. His server and WordPress guides come from systems he runs himself. Richard builds and maintains the platform behind Geek Rewind, from its Ubuntu servers and Nginx configuration to its custom WordPress plugins. Many new tutorials start with readers' questions, and he's always glad to answer them in the comments.
No comments yet — be the first to share your thoughts!