How to Rename a Storage Pool in Windows 11

Renaming a storage pool in Windows 11 takes just a few clicks inside the main settings panel, letting you give your combined drives a custom label so finding your files is much faster. Storage spaces in Windows 11 group two or more physical hard drives together into a single virtual drive to protect your files from drive failure or expand your storage capacity.
Open Settings , navigate to System, then Storage, and click Storage Spaces. Select your storage pool, click Rename, enter the new name, and click OK. Alternatively, use the Set-StoragePool command in PowerShell.
What is a Storage Pool?
What is a Storage Pool?
Virtual drives appear when multiple smaller hard drives pool their capacity together in Windows. Duplicate copies of files reside across these combined disks, ensuring data survives even if an individual drive fails.
Why Rename a Storage Pool?
Why Rename Your Storage Pool?
Unique designations help locate specific volumes rapidly during routine maintenance or multi-drive management tasks.
How to Rename a Storage Pool Using Windows Settings
You can rename a storage pool using Windows Settings by opening the Storage menu and editing the properties of your drive group. This method works best if you prefer using the graphical interface instead of command-line tools to update your drive labels and keep your computer organized.
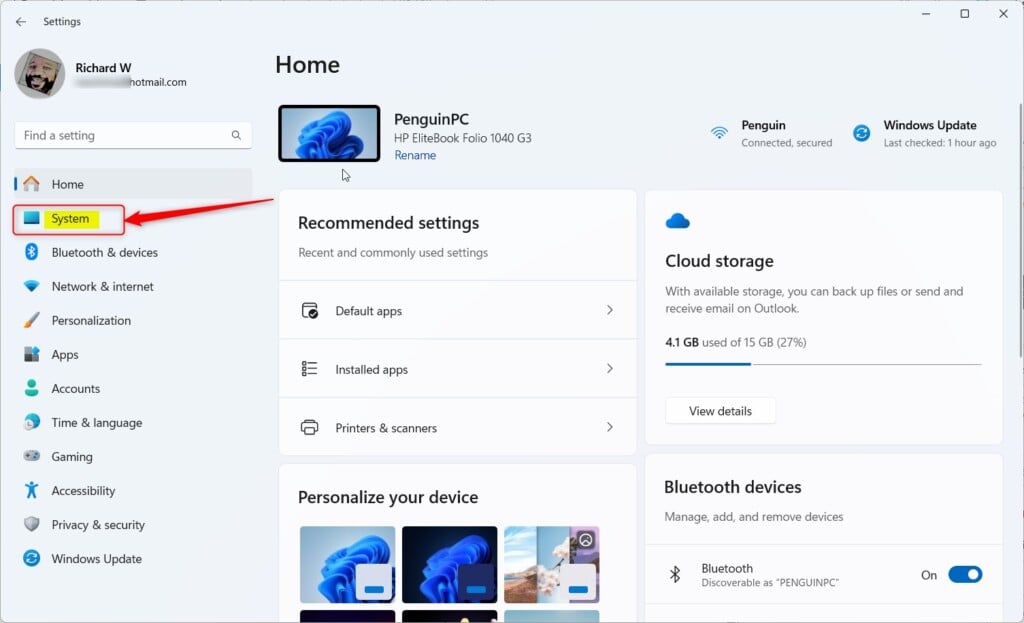
The Settings app provides a graphical interface for updating volume titles. Navigating through system menus leads directly to the renaming controls. Open Settings, go to System, then Storage, and follow the steps to change the name.
- Click the Start menu and select Settings, or
- Press Windows key + I on your keyboard.
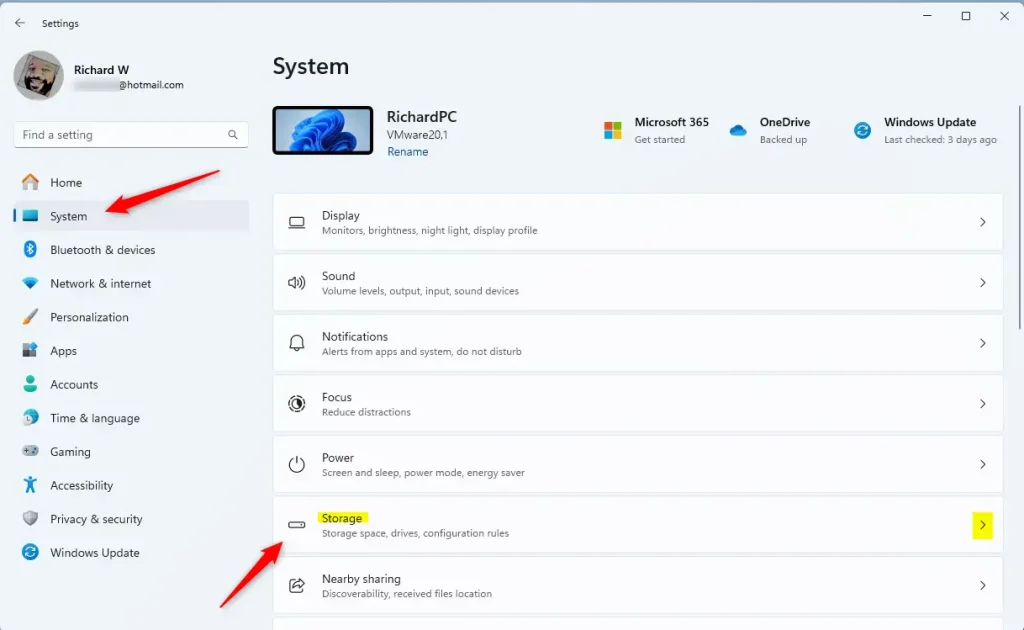
- In Settings, click System on the left side.
- Click on Storage on the right side.
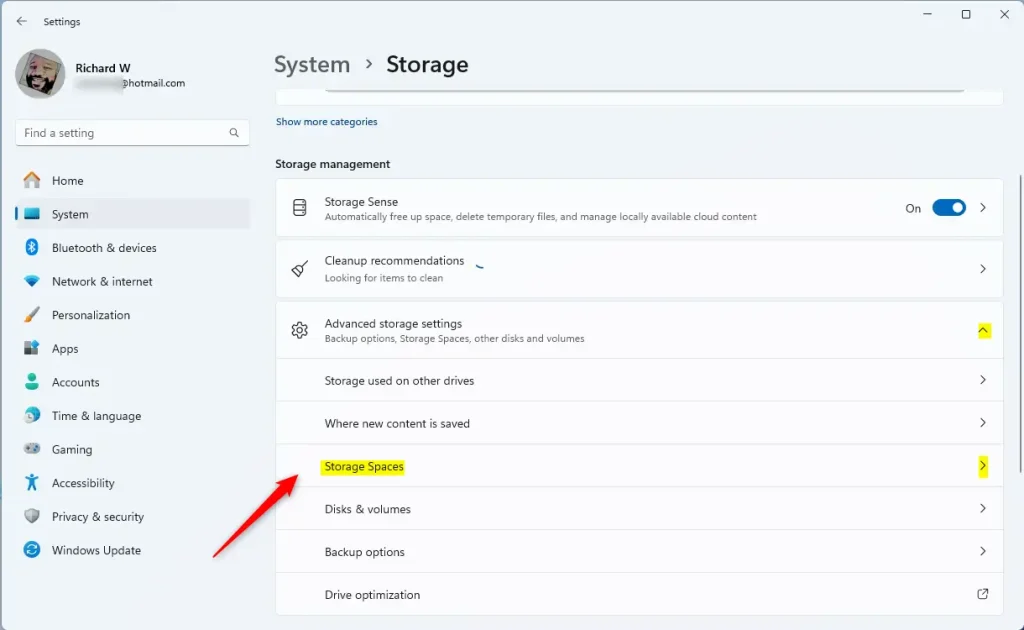
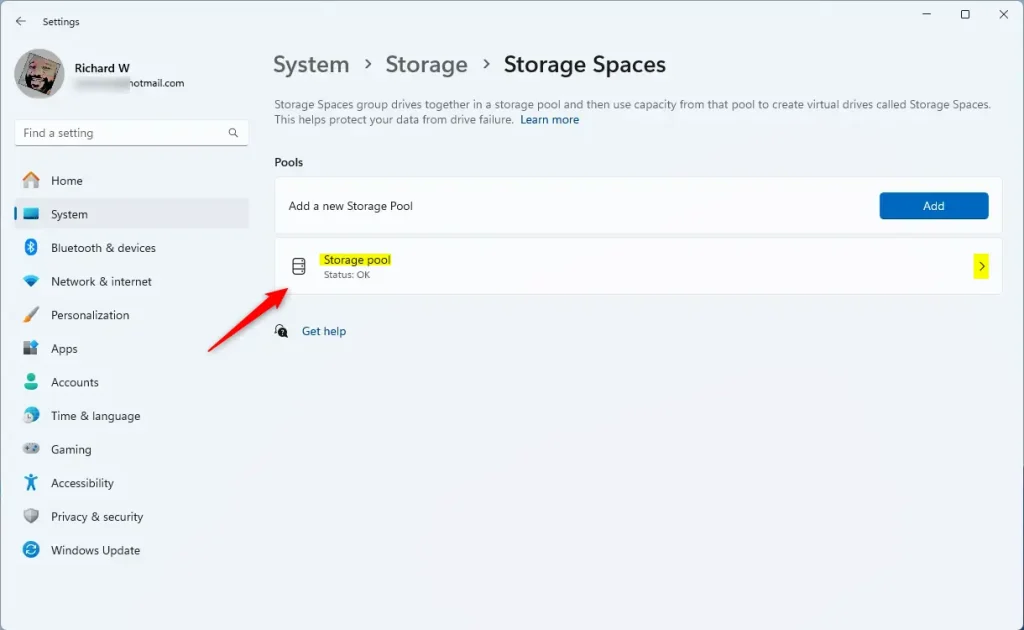
- Scroll down and expand Advanced storage settings, then click Storage Spaces.
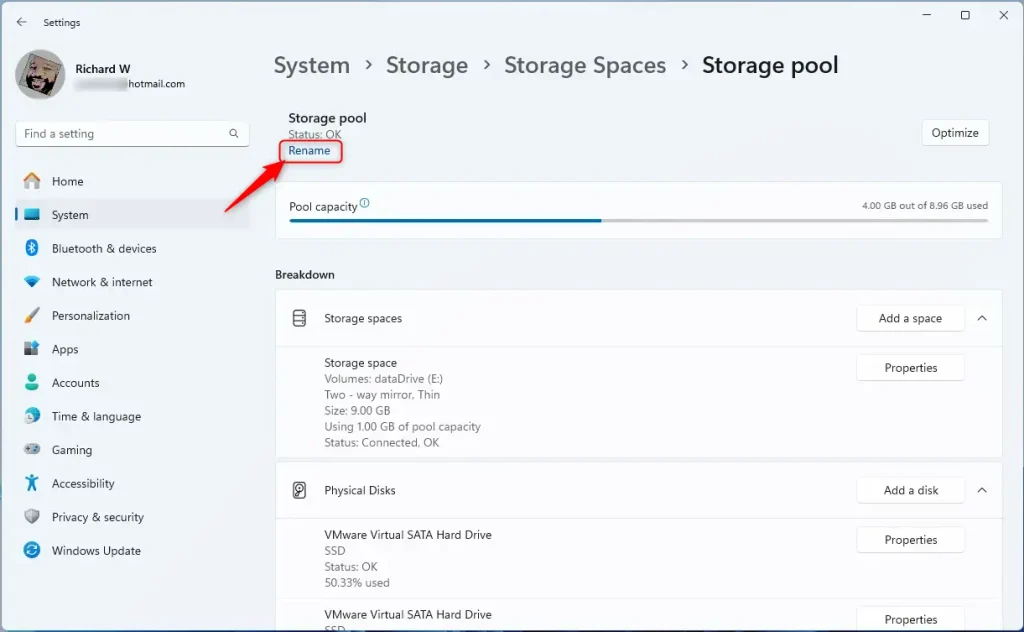
- Click on your storage pool to open its details.
- Click the Rename link.
- Type the new name you want for your storage pool.
- Click OK to save the new name.
Here are some images to help you follow these steps:
How to Rename a Storage Pool Using PowerShell
You can rename a storage pool using PowerShell by running an administrative command that updates your drive group name instantly. This method requires opening the command-line tool with administrator rights and works well if you want a fast way to change your volume labels without clicking through menus.
Command-line utilities offer an alternative method for modifying volume properties. Launch PowerShell with administrative rights before running the command to update the name.
Open PowerShell as Administrator (Admin privileges required):
- Right-click the Start button and select Windows Terminal (Admin) or Windows PowerShell (Admin).
Get-StoragePoolSet-StoragePool -FriendlyName "CurrentPoolName" -NewFriendlyName "NewPoolName"For example, if your pool is currently named 'Storage pool' and you want to rename it to 'MyNewStoragePool', run this command:
Set-StoragePool -FriendlyName "Storage pool" -NewFriendlyName "MyNewStoragePool"The command executes instantly, applying the updated label to the selected storage volume.
Summary
Renaming a storage pool helps you keep your multi-drive setup organized and easy to manage over time. You can use either the Windows Settings app or PowerShell to change your drive names depending on which tool you find easier to work with.Summary
Clear labeling keeps multi-drive configurations organized and simplifies ongoing data maintenance. Administrators overseeing multiple machines benefit immensely from consistent naming conventions. Both graphical menus and command-line tools accomplish this modification successfully.- Renaming your storage pool helps keep your storage organized and easy to manage.
- You can rename it through the Windows Settings app or by using PowerShell commands.
- This is especially helpful if you have multiple storage pools or manage other users' computers.
- For more details on creating and managing storage pools, check out this Storage Pool creation guide.
Was this guide helpful?

About the Author
Richard
Tech Writer, IT Professional
Richard is a writer at Geek Rewind who turns complex IT tasks into clear, step-by-step guides. He draws on years of hands-on experience in system administration and enterprise IT operations, focusing on Windows, Linux and WordPress: the problems people actually run into, and the fixes that work. His server and WordPress guides come from systems he runs himself. Richard builds and maintains the platform behind Geek Rewind, from its Ubuntu servers and Nginx configuration to its custom WordPress plugins. Many new tutorials start with readers' questions, and he's always glad to answer them in the comments.




No comments yet — be the first to share your thoughts!