How to Delete a Storage Pool in Windows 11

A storage pool in Windows 11 combines several physical drives into one pool through the Storage Spaces feature. You carve virtual drives, called storage spaces, out of that pool. Deleting the pool erases every file stored in it and permanently destroys all the storage spaces tied to it. Windows has no undo for this and no recycle bin for it.
Before you start
- Copy everything you want to keep from the pool’s virtual drives to another location, such as an external drive or a drive that is not part of the pool. Do not rely on the pool to hold the only copy.
- Open each virtual drive in File Explorer and check that the copy finished and the files open.
- Close any program that is using files on the pool. An open file can make the deletion fail.
- Sign in with an administrator account. Windows asks for administrator approval before it lets you change a pool.
Storage Spaces is available in both Windows 11 Home and Pro, so the steps are the same for both editions.
Open Storage Spaces
- Open the Start menu .
- Type Storage Spaces.
- Select the Storage Spaces result to open it. You should see a window listing your storage pool, the virtual drives (storage spaces) in it, and the physical drives it uses.
If you prefer the Settings app, you can also reach the same feature from Settings System Storage Advanced storage settings Storage Spaces The layout differs a little between the two windows, but the idea is the same.
Steps to Delete a Storage Pool in 🪟 Windows 11
To delete a storage pool in Windows 11, you need to open the main system settings, navigate to your storage spaces, and remove the pool from there. This process erases all the drives and data grouped inside that specific pool, so make sure you have saved everything important before you start.- Open Settings : Click the Start button and select Settings, or press Win+I on your keyboard.
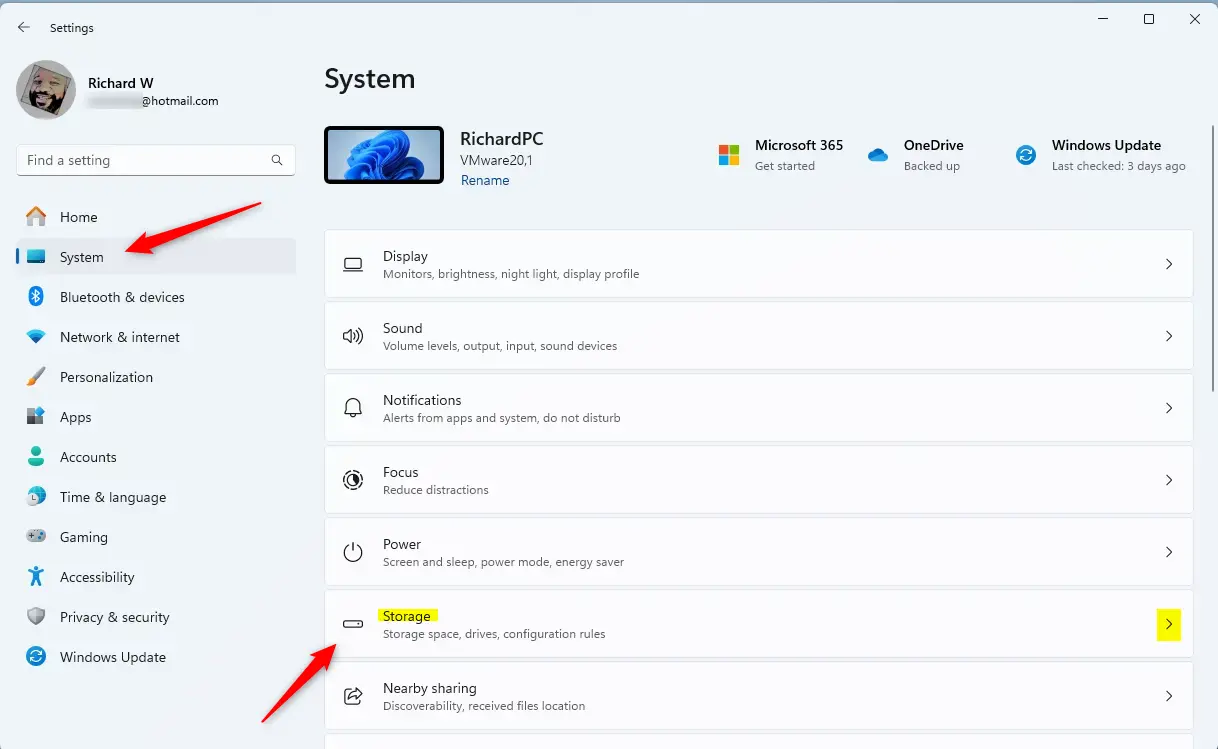
Windows 11 Settings app with System and Storage options highlighted. - Go to Storage Spaces: In the Settings window, click System on the left side, then click Storage on the right.
Scroll down and click Advanced storage settings to expand it, then select Storage Spaces.
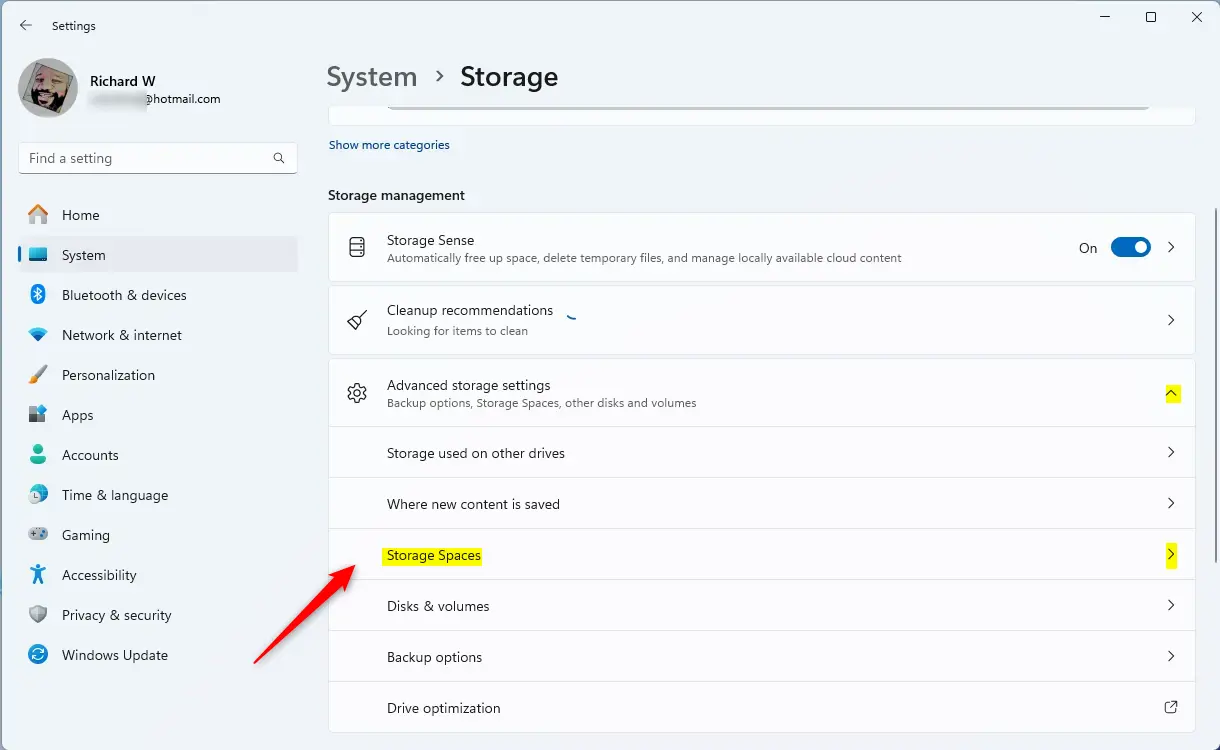
Storage Spaces tile in Settings app - Find Your Storage Pool: Click the Storage Pool you want to delete to open its details.
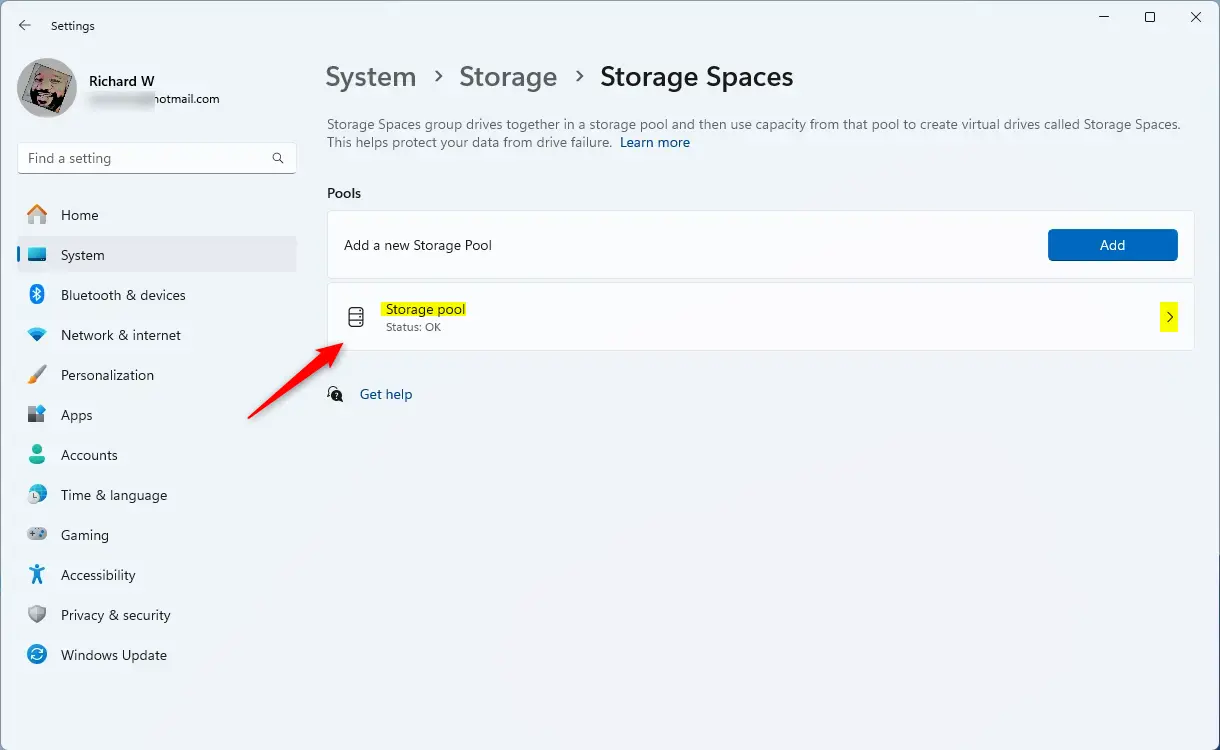
Storage Pool tile in Windows - Delete All Storage Spaces: Inside the Storage Pool, you need to delete each Storage Space first. Select each one and delete it. (You cannot delete the pool until all spaces inside are removed.)
- Delete the Storage Pool: After removing all Storage Spaces, scroll down to Additional options, select the Storage Pool, and click the Delete button.
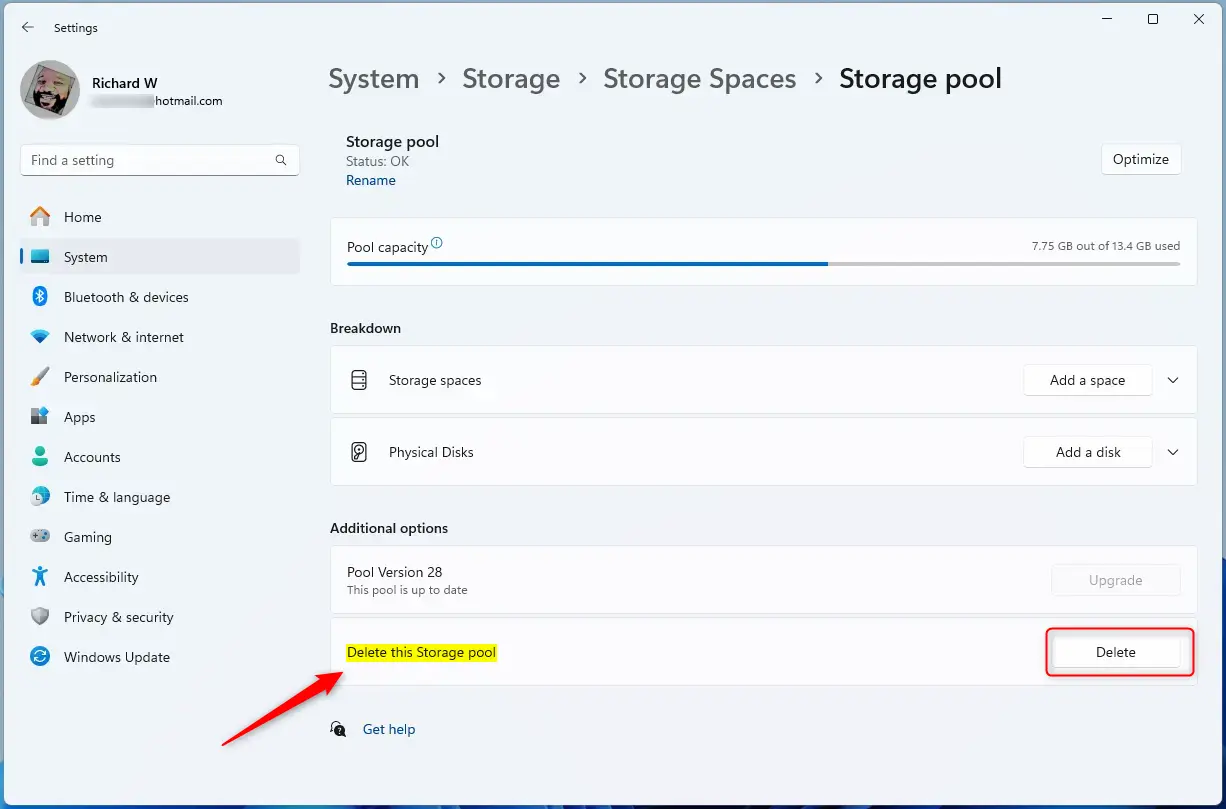
Delete storage pool on Windows - Confirm Deletion: A pop-up will appear asking if you want to delete the Storage Pool permanently. Click Delete storage pool to confirm.
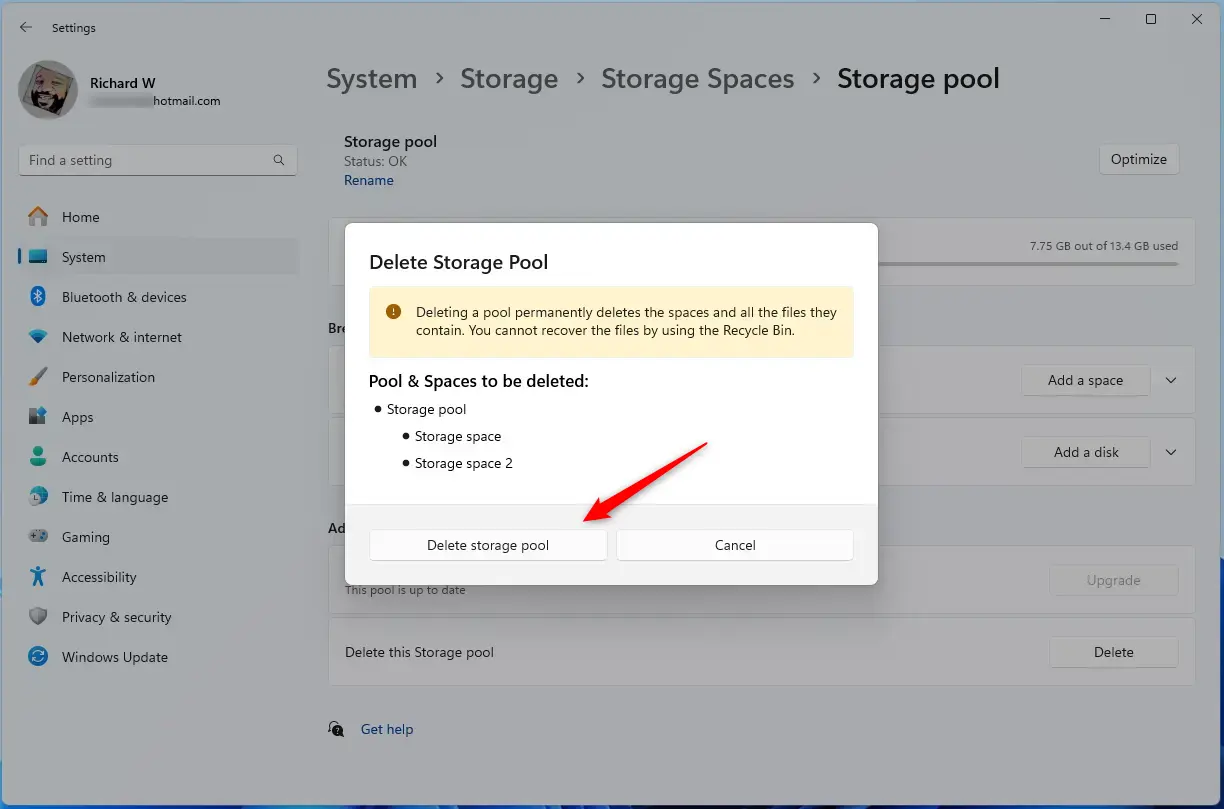
Delete storage pool confirmation on Windows - Finish: Close the Settings app. Your Storage Pool and all its Storage Spaces are now deleted.
Important Tips
- Deleting a Storage Pool removes all stored files permanently — make sure to back up anything important.
- Always delete all Storage Spaces inside the pool before deleting the pool itself.
- Be certain you no longer need the Storage Pool or its files before deleting it.
Skipping these precautions can lead to permanent data loss and errors that make it harder to reuse your hard drives later.
Delete the storage spaces, then the pool
- If the window offers a Change settings button, select it and approve the administrator prompt. The delete options are then available.
- Find the storage space (virtual drive) listed under the pool. Select Delete next to it and confirm. Repeat for every storage space in the pool. The pool cannot be deleted while it still contains one.
- Once the pool has no storage spaces left, select Delete pool next to the pool and confirm. The pool and its virtual drives disappear from the list.
Fix whichever applies and try again. A restart is not normally needed, but if a drive stays busy, restarting the PC and trying again often clears it.
After the pool is gone
The physical drives are released and show up as unallocated, empty space. To reuse one, open Disk Management, initialize the disk if prompted, then create a new volume and format it. Once a drive is formatted, it appears in File Explorer like any other drive.
Have a question about this guide?
Answered by AI from this guide. Good questions may be added to this page — please don't include personal details.
Did this guide fix your problem?

About the Author
Richard
Tech Writer, IT Professional
Richard is a writer at Geek Rewind who turns complex IT tasks into clear, step-by-step guides. He draws on years of hands-on experience in system administration and enterprise IT operations, focusing on Windows, Linux and WordPress: the problems people actually run into, and the fixes that work. His server and WordPress guides come from systems he runs himself. Richard builds and maintains the platform behind Geek Rewind, from its Ubuntu servers and Nginx configuration to its custom WordPress plugins. Many new tutorials start with readers' questions, and he's always glad to answer them in the comments.
No comments yet — be the first to share your thoughts!