How to Connect or Disconnect Storage Spaces in Windows 11

What Is Storage Spaces?
Storage Spaces is a Windows 11 feature that lets you combine multiple hard drives or SSDs into one large virtual drive. Think of it like merging several storage containers into one big unit. This makes managing your storage much easier and gives you more control.
Why Use Storage Spaces?
- Group multiple drives together into one storage pool
- Add more drives to your pool whenever you need extra space
- Create virtual drives inside the pool
- Rename and organize your storage spaces
What Happens When You Create a Storage Space?
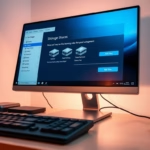
Windows 11 Storage Spaces appears as a new drive in File Explorer , similar to existing drives you use. When you disconnect a Storage Space, your files remain intact; the drive simply hides temporarily. You can reconnect the Storage Space later to access your data again.
Disconnecting a Storage Space in Windows 11 temporarily hides the drive from your computer's view, but it does not delete files. Users can reconnect the Storage Space later to access previously stored data. This process protects files or fixes storage problems without any loss of information.
How to Connect or Disconnect a Storage Space in 🪟 Windows 11
Connecting or disconnecting a Storage Space in Windows 11 is a straightforward process found within the Settings app. You need to go to System, then Storage, and finally Advanced storage settings to see and manage your Storage Spaces directly on your computer.
- Open the Settings app by clicking the Start menu and selecting Settings. Or press
Windows key + Ion your keyboard. - In Settings, click System on the left side.
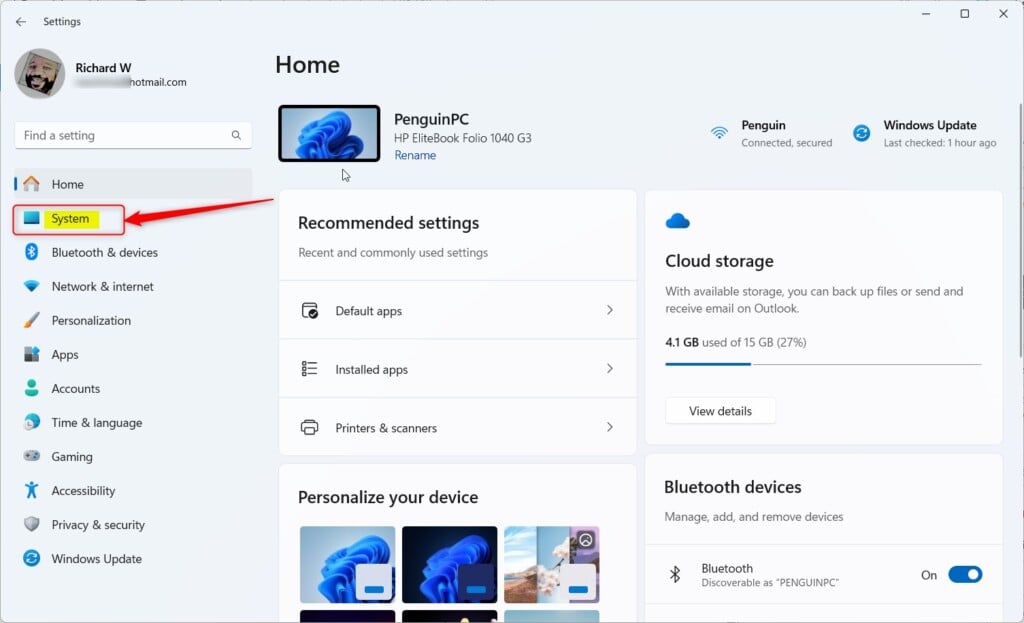
Windows 11 System button in Settings - On the right side, click Storage.
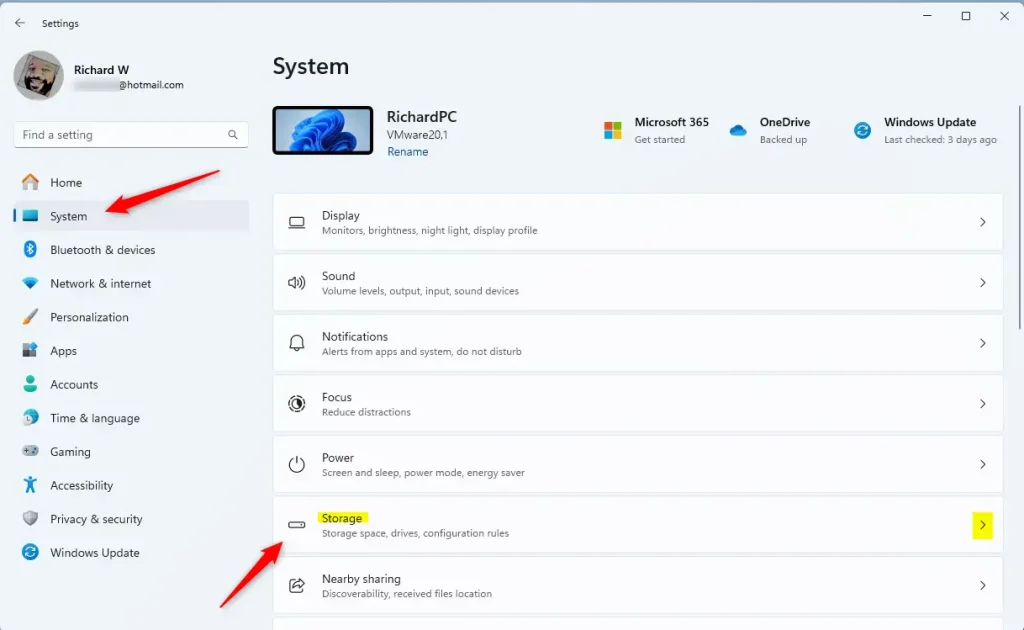
Windows 11 Settings app with System and Storage options highlighted. - Scroll down and expand Advanced storage settings, then click Storage Spaces.
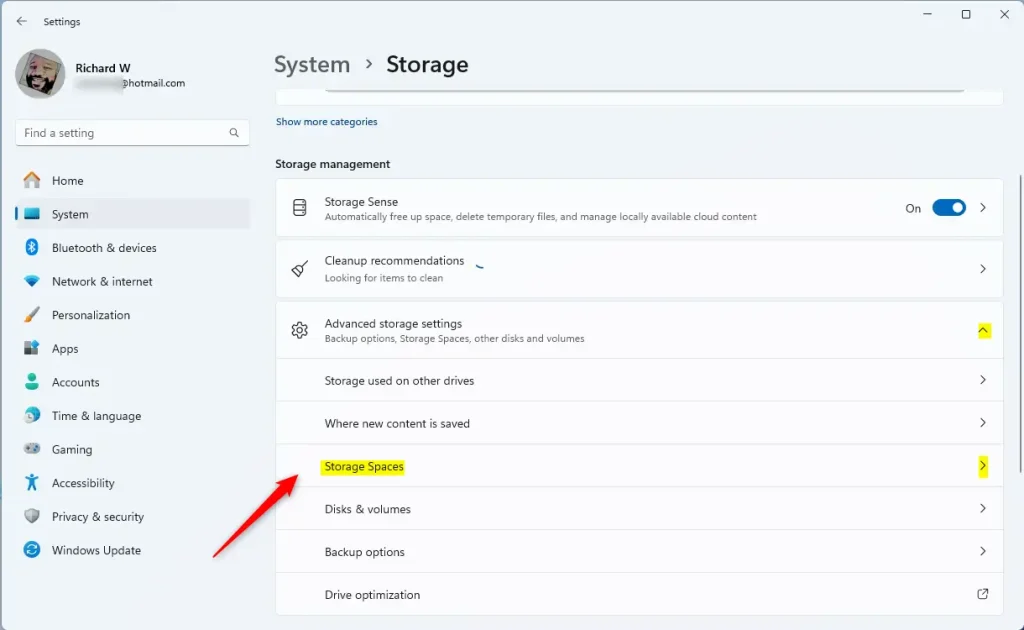
Windows 11 Storage Spaces tile - Click on the Storage pool you want to manage.
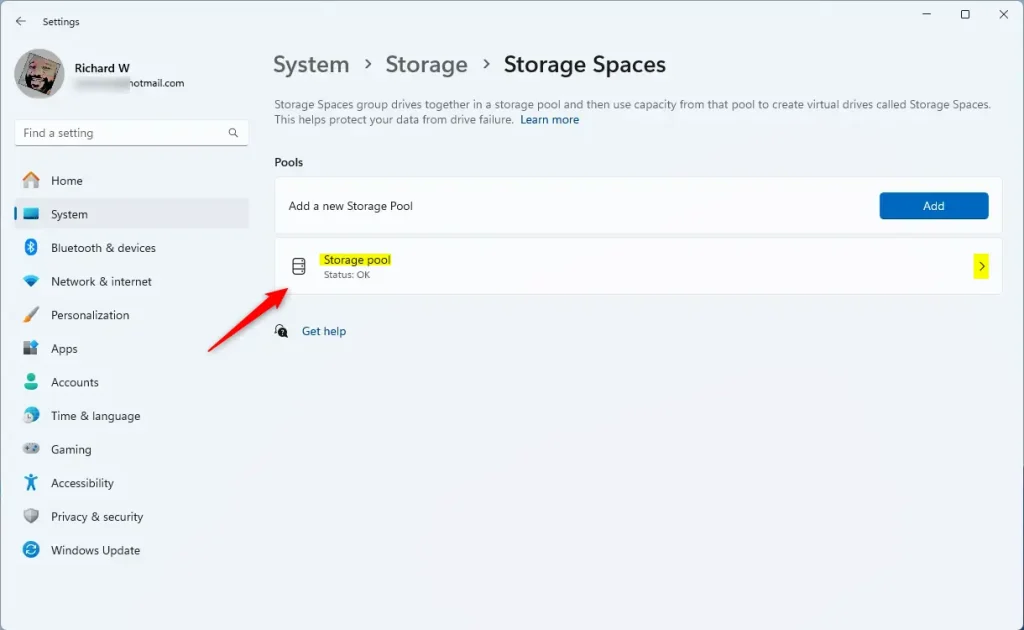
Windows 11 storage pool tile - Find the Storage Space you want to connect or disconnect, then click Properties.
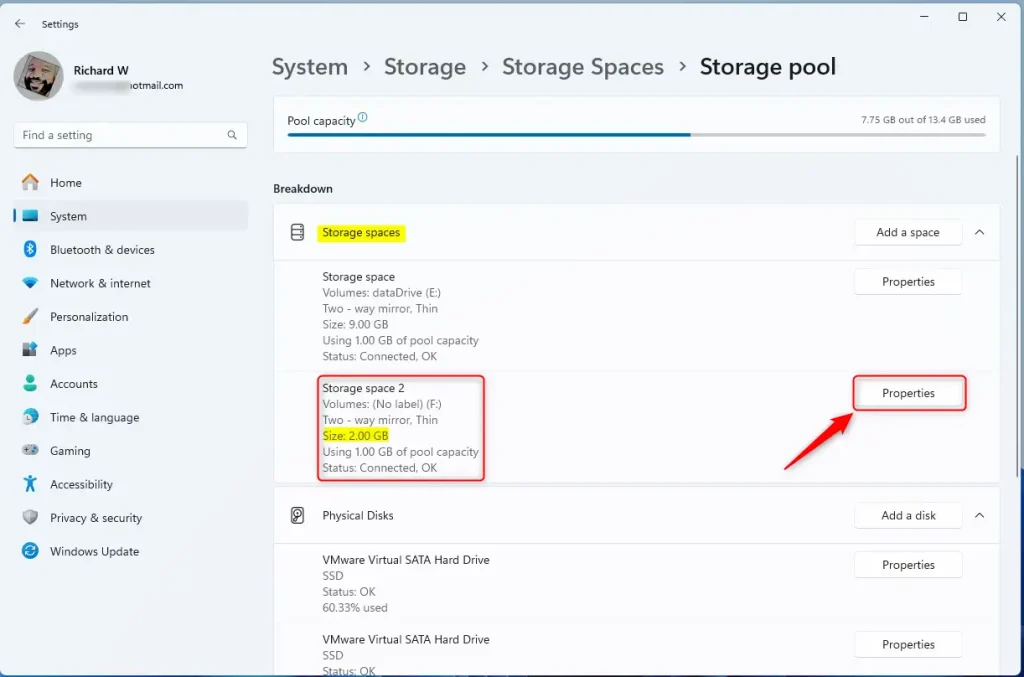
Storage space properties - In the Properties window, you’ll see if the Storage Space is connected or disconnected. To hide it, click Disconnect. To show it again, click Connect.
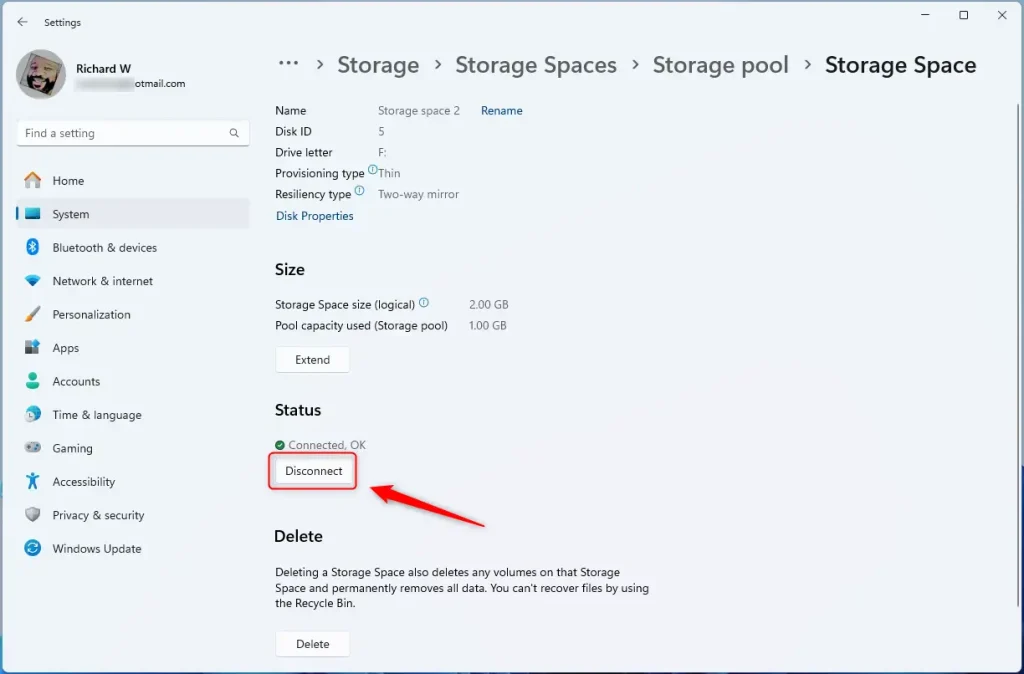
Storage space disconnect button - Close the Settings app when you’re finished.
Summary
Windows 11 Storage Spaces lets you combine several hard drives into one big virtual drive, making file management simpler. This feature gives you better control over all your storage, offering more flexibility in how you group and access your important data.
Storage Spaces uses a feature that makes managing computer storage easier and gives users more flexibility with their files. This feature allows users to group multiple hard drives into a single virtual drive, offering better data protection and storage capacity management for over 100 terabytes of data.
Windows Storage Spaces virtual drives can be hidden or shown using the Settings app. This method protects files or helps fix storage issues without deleting data. Users can easily manage virtual drive visibility.
Want to learn more? Check out this helpful guide: How to Create a New Storage Pool with Storage Spaces on Windows 11.
Was this guide helpful?

About the Author
Richard
Tech Writer, IT Professional
Richard is a writer at Geek Rewind who turns complex IT tasks into clear, step-by-step guides. He draws on years of hands-on experience in system administration and enterprise IT operations, focusing on Windows, Linux and WordPress: the problems people actually run into, and the fixes that work. His server and WordPress guides come from systems he runs himself. Richard builds and maintains the platform behind Geek Rewind, from its Ubuntu servers and Nginx configuration to its custom WordPress plugins. Many new tutorials start with readers' questions, and he's always glad to answer them in the comments.


No comments yet — be the first to share your thoughts!