How to Delete Guest Accounts in Windows 11

Deleting a guest account in Windows 11 removes a temporary visitor profile that lets other people sign in to your PC. This action stops strangers from opening your personal files and frees up valuable disk space on your hard drive.
Windows 11 version 22H2 and newer lets you clear out these unwanted profiles in a few clicks using either the Settings app or the Computer Management tool.
To delete a temporary user account in Windows 11, go to Settings Accounts Family & other users Click the account name, then select Remove and confirm. Alternatively, use the command prompt: type net user username /delete, replacing username with the account name.
Understanding Guest Accounts in 🪟 Windows 11
Windows 11 lacks a traditional built-in Guest account like older versions. Standard user accounts serve as alternatives for temporary visitors instead.
Why remove guest accounts?
Unused accounts consume disk space and create security vulnerabilities. Removing dormant accounts keeps the system clean and secure.
What happens when you are done?
Deleting an account strips it completely from the login screen. All files, photos, and settings associated with that user vanish permanently from the hard drive. Warning: Always back up any important data from the user’s folder before proceeding, as this action cannot be undone.
How to Delete a User Account via Settings
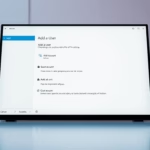
You can delete guest account Windows 11 profiles directly through the Settings app if you have an administrator account. Open Settings, go to Accounts, and select Family & other users to find the profile you want to remove. Click the account name and choose Remove to delete the user and all their saved files from your PC completely.
- Open the Start menu and select Settings.
- Go to Accounts, then click on Family & other users.
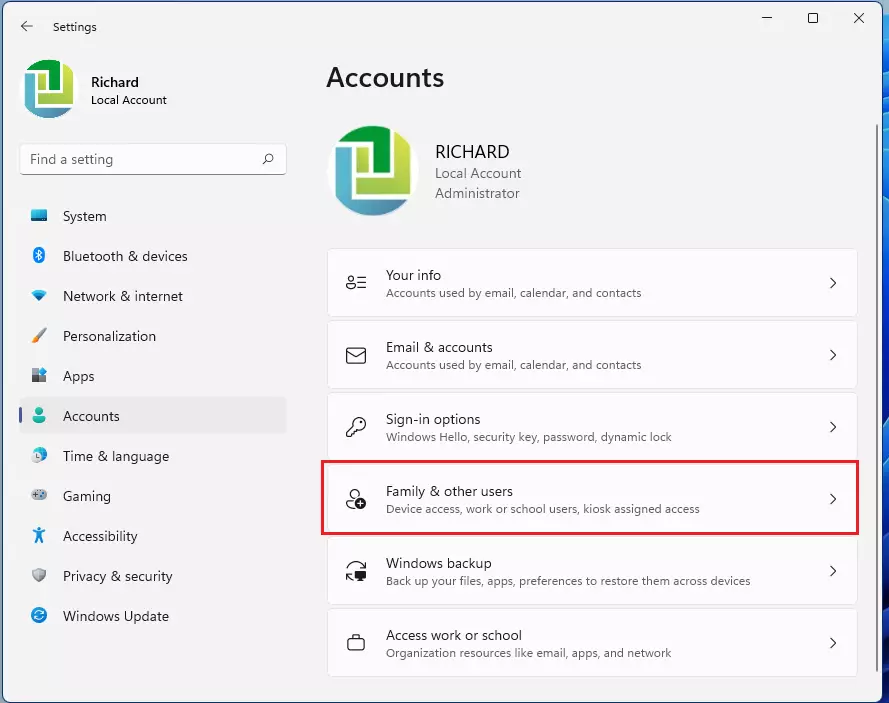
- Look under the Other users section.
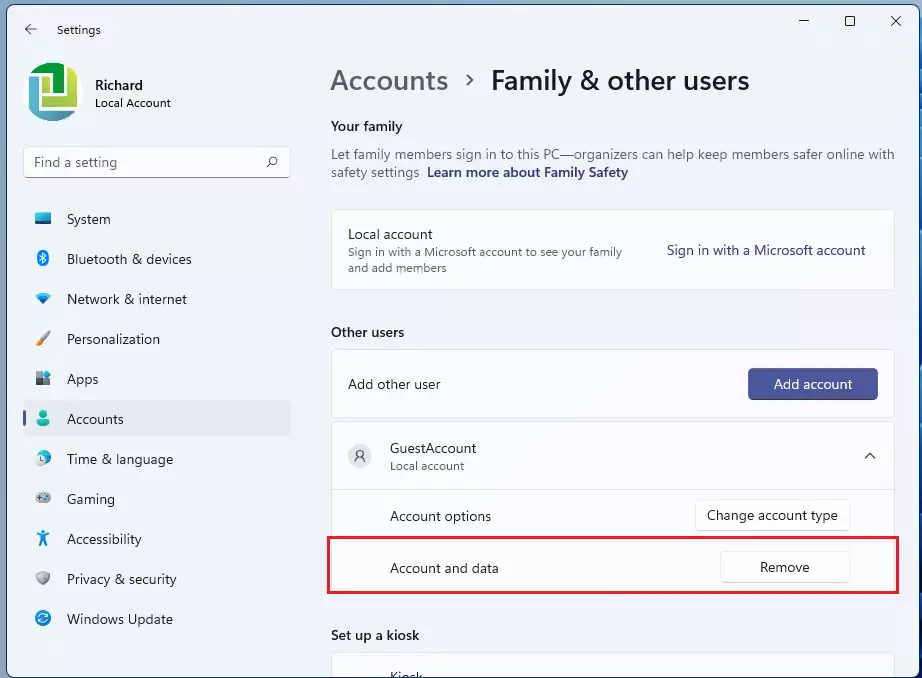
- Click on the account name you want to remove to expand the menu.
- Click the Remove button.
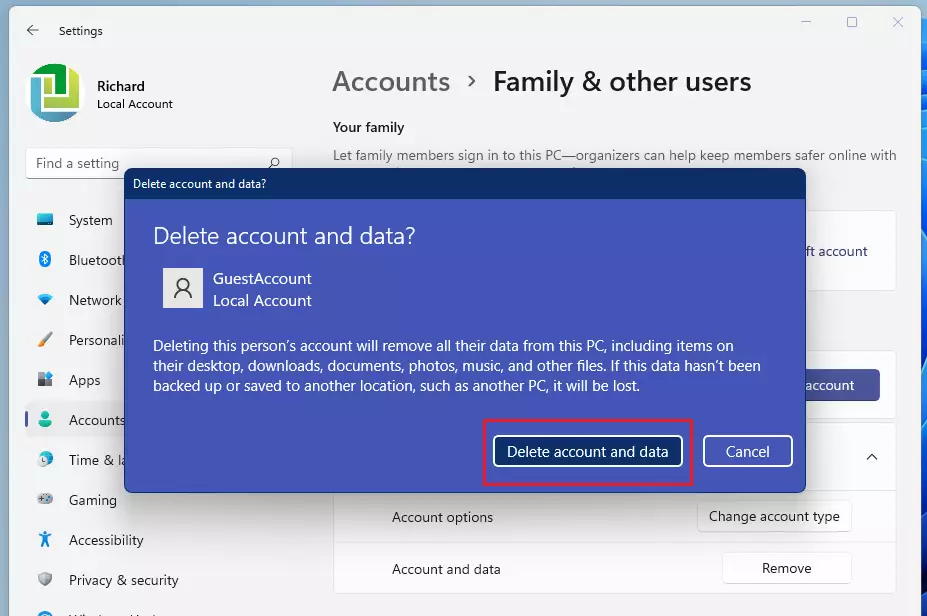
- A prompt will appear. Click Delete account and data to confirm.
How to Delete an Account Using Command Prompt
You can use Command Prompt to delete a user account quickly by running a short command with administrator rights. Search for cmd in the Start menu, right-click the result to run it as an administrator, and type the net user command followed by the exact account name to remove the profile instantly.
Or use Command Prompt for a faster cleanup. Search for 'cmd' in the Start menu, right-click the result, and choose 'Run as administrator.'
Type the command below and hit Enter:
net user username /delete
Substitute 'username' with the exact name of the account targeted for removal. This command strips the user profile from the system entirely.
Advanced Troubleshooting: Removing Stuck Accounts
Settings app deletions occasionally fail. This usually happens when the User Profile Service (a background process managing user data) encounters an error or leftover registry entries persist.
Using Local Users and Groups (Pro Version Only)
Windows 11 Pro users can access the lusrmgr.msc tool (local user manager). Press Win + R, type lusrmgr.msc, and hit Enter. Navigate to Users, right-click the account, and select Delete.
Registry and Folder Cleanup
Lingering files in the registry and the Users folder may require manual cleanup after account deletion to purge all traces from Windows 11.
Summary
Temporary local accounts vanish via the Settings app or Command Prompt. Microsoft omits a native Guest account from this OS edition.
Was this guide helpful?

About the Author
Richard
Tech Writer, IT Professional
Richard is a writer at Geek Rewind who turns complex IT tasks into clear, step-by-step guides. He draws on years of hands-on experience in system administration and enterprise IT operations, focusing on Windows, Linux and WordPress: the problems people actually run into, and the fixes that work. His server and WordPress guides come from systems he runs himself. Richard builds and maintains the platform behind Geek Rewind, from its Ubuntu servers and Nginx configuration to its custom WordPress plugins. Many new tutorials start with readers' questions, and he's always glad to answer them in the comments.


No comments yet — be the first to share your thoughts!