How to Hide Users on Windows 11 Sign-in Screen
Hiding users on the Windows 11 sign-in screen stops specific account names from showing up, preventing unwanted access.
The Windows Registry is a powerful tool that holds settings for your PC. By changing a specific setting here, you can control which user accounts appear when you boot up your computer.
This method lets you hide local accounts, like the built-in Administrator account, if it’s visible on the login screen. It does not affect Microsoft accounts.
Edit the Windows Registry by navigating to WinlogonSpecialAccountsUserList and creating a DWORD value for the username, setting its data to 0. This hides the user from the sign-in screen without deleting data.
Why Hide Users on 🪟 Windows 11?
You can hide specific user accounts from the Windows 11 sign-in screen to make your computer more private and secure. This prevents unwanted people from seeing which accounts are available to log in, adding a basic layer of security by keeping certain usernames out of sight. The hidden account still works normally, but you’ll need to know its name to sign in.
Hiding usernames on the Windows 11 sign-in screen adds a layer of security by obscuring the list of available accounts on your system, making it harder for unauthorized individuals to see who might be on your computer.
User accounts hidden from the Windows 11 sign-in screen remain fully functional but no longer appear visually. You must type the username manually to log in to these hidden accounts.
Before You Begin: Safety First
Method 1Using the Registry Editor (Advanced)
Using the Registry Editor is an advanced way to hide users on Windows 11, letting you make specific changes to how Windows behaves. This method involves editing a special Windows file that controls system settings. While it's powerful, you need to be careful when making changes in the Registry Editor as mistakes can affect your computer's performance.
- Press
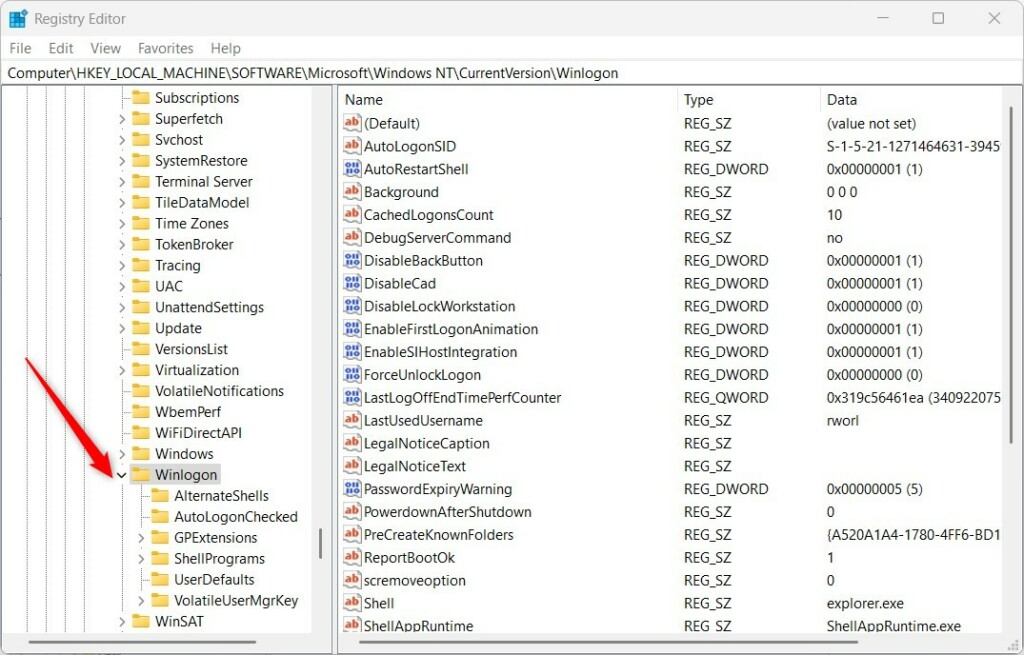
Win + R, typeregedit, and press Enter. - Navigate to:
HKEY_LOCAL_MACHINE\SOFTWARE\Microsoft\Windows NT\CurrentVersion\Winlogon - If the
SpecialAccountskey does not exist underWinlogon, right-clickWinlogon, select New > Key, and name itSpecialAccounts. - Inside
SpecialAccounts, create another key namedUserList. - Right-click in the right pane of
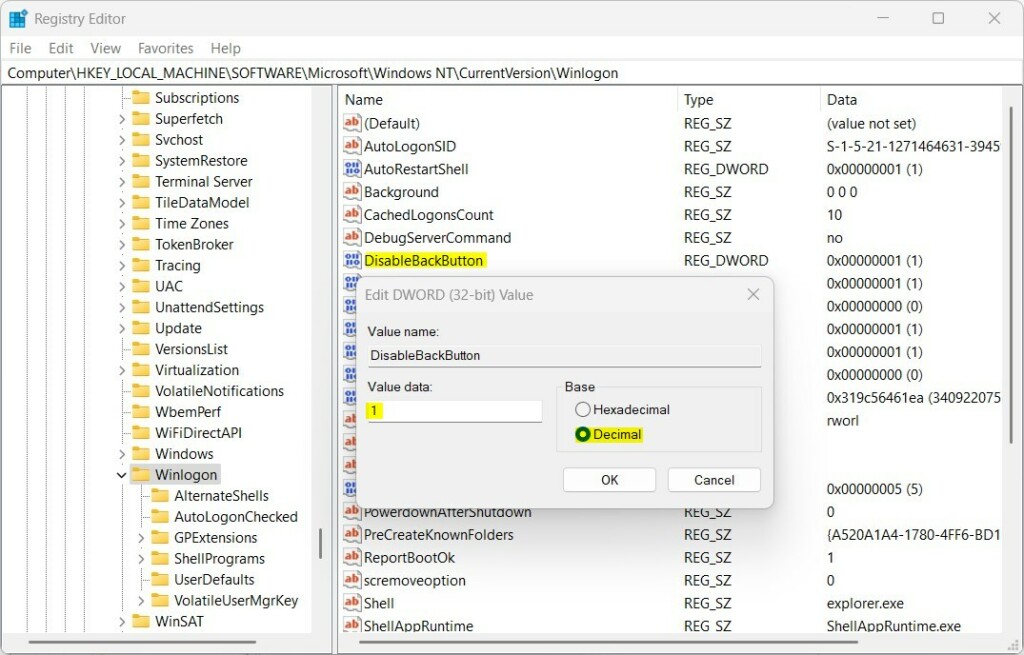
UserList, select New > DWORD (32-bit) Value. - Name the DWORD exactly as the username you wish to hide (e.g.,
GenericUser). - Double-click the new DWORD and set the
Value datato0.
Downloadable Registry File
You can automate this by saving the following code as a .reg file:
Windows Registry Editor Version 5.00

[HKEY_LOCAL_MACHINE\SOFTWARE\Microsoft\Windows NT\CurrentVersion\Winlogon\SpecialAccounts\UserList]
"GenericUser"=dword:00000000
Method 2Using Group Policy Editor (Pro/Enterprise Only)
gpedit.msc. [Admin privileges required]- Press
Win + R, typegpedit.msc, and hit Enter. - Go to
Computer Configuration > Windows Settings > Security Settings > Local Policies > Security Options. - Find
Interactive logon: Do not display last signed-inand set it to Enabled.
Summary
To hide users on Windows 11, you can use tools like the Registry Editor to keep your sign-in screen tidy and secure.
Does hiding a user account delete the data inside it?
No, hiding a user account on Windows 11 does not delete any of its files or data; the account simply becomes hidden from the sign-in screen.
Can I still log into a hidden account?
Yes, you can still log into a hidden account. Because the account is not deleted, it remains active. When you reach the sign-in screen, you will need to select the option to sign in with a different user and manually type the exact username and password to gain access.
Why does the registry path not exist on my 🪟 Windows 11 version?
If a registry path like SpecialAccounts does not exist, it simply means the key has not been created yet. Windows does not create these keys by default. You can safely create the keys manually by right-clicking the parent folder and selecting New Key to build the required path structure.
Was this guide helpful?
100% of readers found this helpful (1 votes)

About the Author
Richard
Tech Writer, IT Professional
Richard, a writer for Geek Rewind, is a tech enthusiast who loves breaking down complex IT topics into simple, easy-to-understand ideas. With years of hands-on experience in system administration and enterprise IT operations, he’s developed a knack for offering practical tips and solutions. Richard aims to make technology more accessible and actionable. He's deeply committed to the Geek Rewind community, always ready to answer questions and engage in discussions.


[…] display name in Windows refers to the full name of an account shown on the Sign-in screen, Start Menu, and Settings. This name can differ from the username used to sign in to the […]
[…] can turn Voice Access on or off from the lock screen using the accessibility menu on the Lock screen. Or you can have it start automatically every time by checking the setting “Start voice […]