How to Identify Windows 11 Account Type

- 12 steps
- Needs administrator rights
- Includes a restart or sign-out
Windows 11 has two main account types: Administrator and Standard. Administrator accounts have full control. They can install apps, change system settings and manage other users. Standard accounts have fewer permissions, which protects the PC from accidental or unwanted changes.
Checking your account type takes only a few clicks in the Settings app. Knowing which type you use also explains why some apps or system tweaks ask for extra permission, or ask you for an administrator password, before they run.
Navigate to Settings, click Accounts, then select Your info to view your account name and type, indicating if it’s a Microsoft or Local account with Administrator or Standard privileges.
What happens when done?
When you finish the steps below, the screen shows two things. It shows whether the profile is a Local account or a Microsoft account. It also shows whether you have Administrator or Standard permissions. With both facts you know what you can change on the PC and what needs an administrator.
How to check your account type in Settings
Your account type decides whether you can install software and change system settings. The quickest check is in the Settings app. Open the Accounts section and read the profile details at the top of the page. They show whether you have Administrator or Standard access, and whether you sign in with a Local or a Microsoft account.
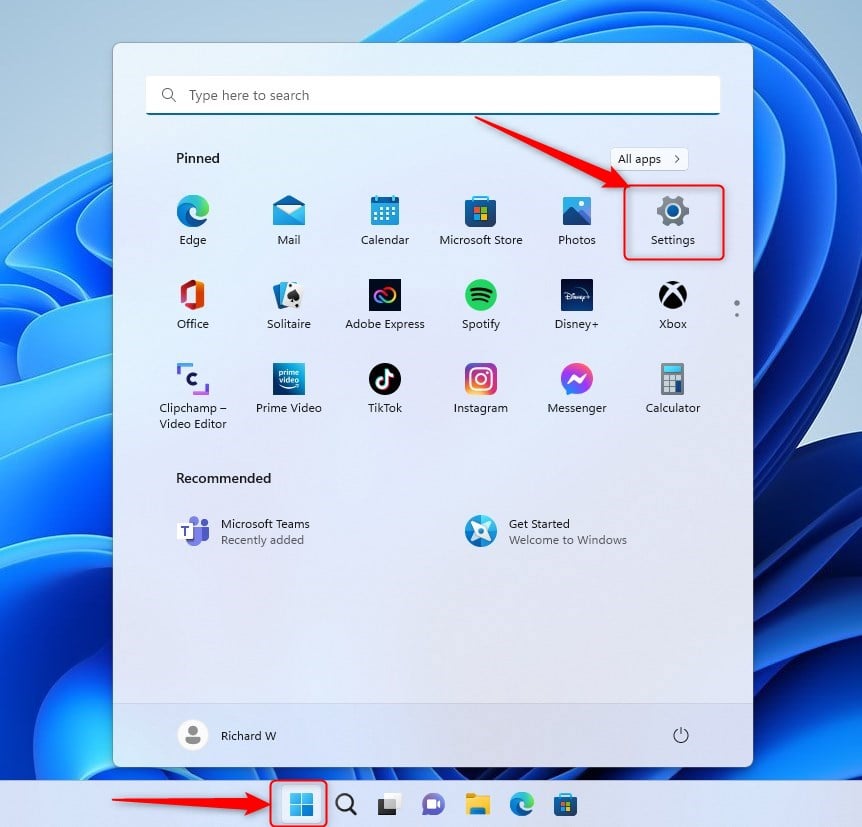
- Click the Start button, then select Settings. The Settings app opens.
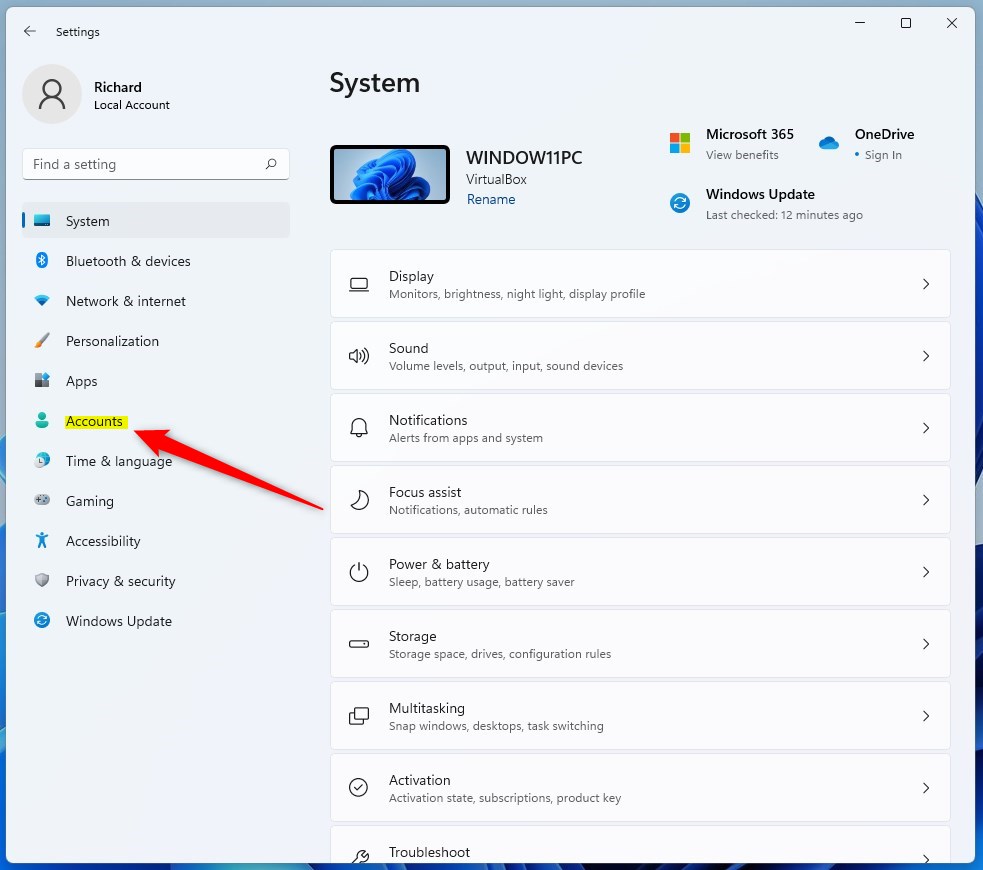
- In the Settings app, click Accounts in the left menu. The Accounts page opens on the right.
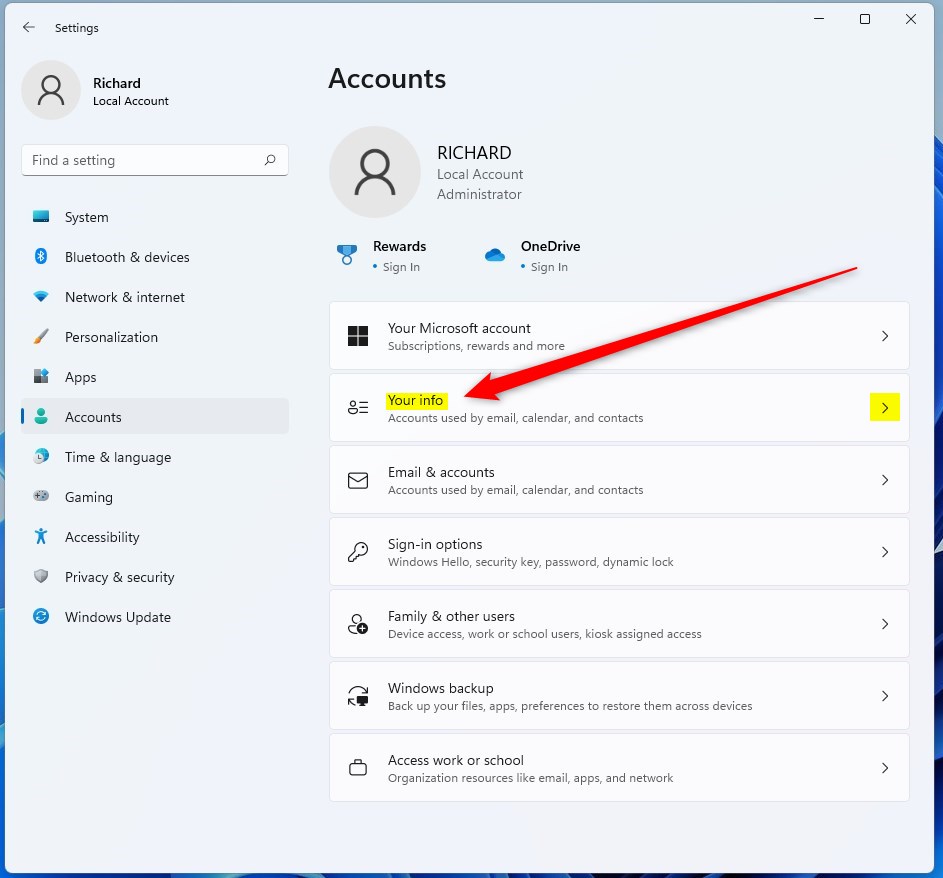
- On the Accounts page, click the Your info tile. The details for the account you are signed in with appear.
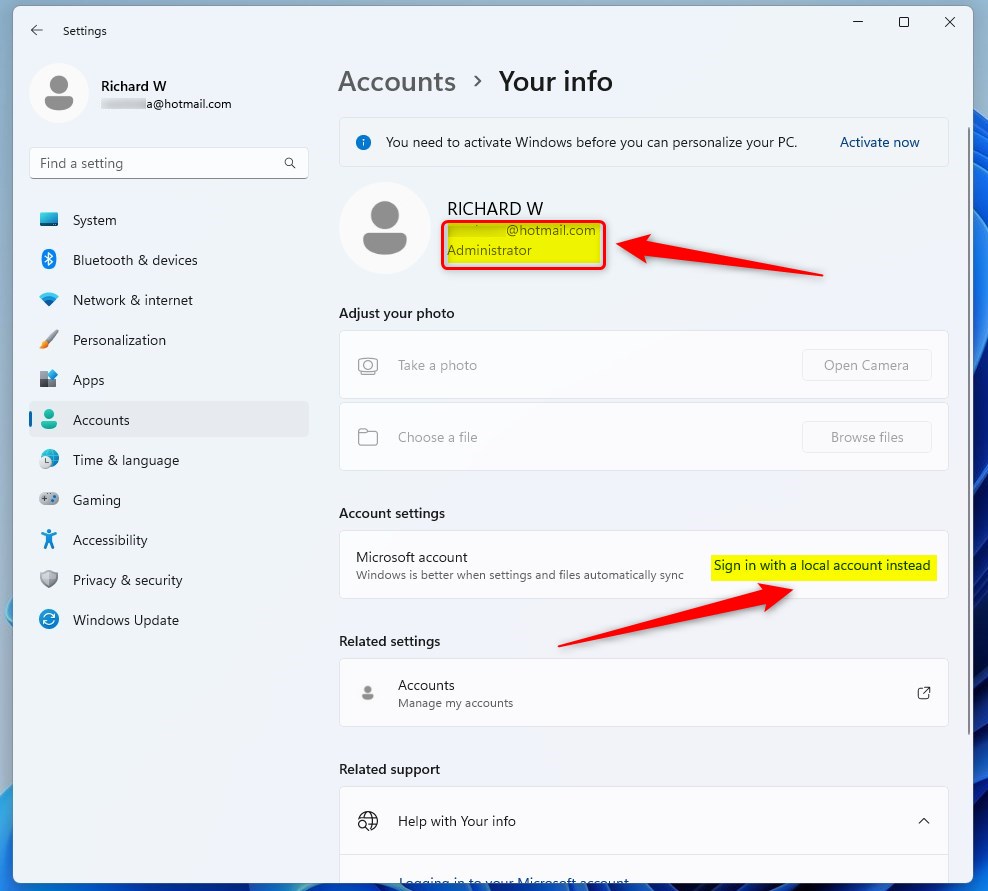
- On the Your info page, look at the top. Your profile picture and account name are shown, with the account details under the name. An administrator is labeled Administrator. If you don’t see that label, treat the account as Standard. You can confirm it by signing in with an administrator account and checking Accounts Other users.
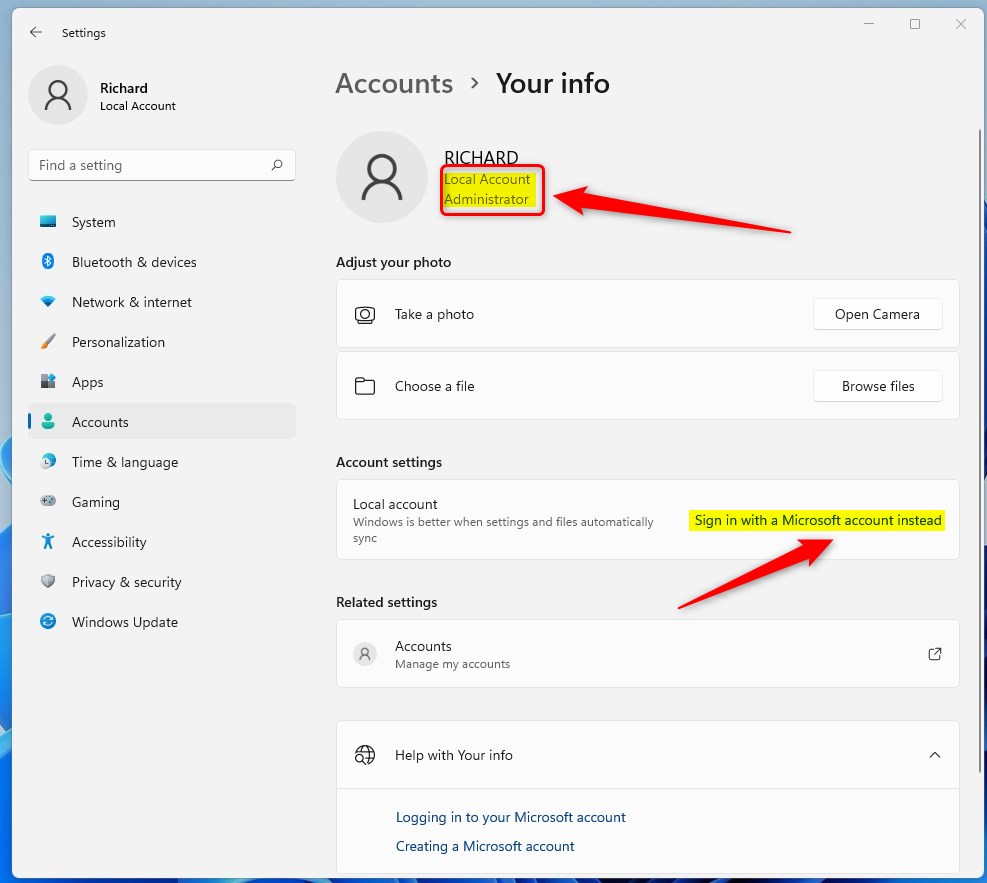
The same page tells you whether the account is Local or Microsoft. A Local account shows the label Local account. It also shows a link, Sign in with a Microsoft account instead. If you see an email address under your name, you are using a Microsoft account. Don’t click the link just to look. It starts the process of switching the account over.
Difference between Standard and Administrator accounts
A Standard user can do most daily tasks, such as browsing the web, reading email, working in documents and using installed apps. An Administrator has elevated privileges. An administrator can install software, change system settings and manage other user accounts.
Using a Standard account for daily work is good security practice. If malware or a bad click tries to change the system, it needs administrator approval first. When a task does need more rights, Windows asks for an administrator password, so you don’t have to sign out.
How to change your account type (Requires Admin Privileges)
You can switch an account between Standard user and Administrator in the Settings app. You must be signed in with an administrator account to do it. A Standard account can’t change account types. This lets you give another person full control of the computer, or take away their ability to install apps and change system settings.
Keep at least one administrator account on the PC. Otherwise nobody can make system-level changes later. The change is reversible. Repeat the steps and choose the other type.
- Open Settings and click Accounts.
- Click Other users. On some Windows 11 versions this page is called Family & other users. A list of the other accounts on the PC appears.
- Select the account you want to change. The entry expands and shows its options.
- Click Change account type. In the window that opens, choose either Administrator or Standard User from the dropdown menu, then click OK.
You don’t need to restart the PC. The person whose account you changed should sign out and back in so the new permissions apply fully.
How to check via Command Prompt
Command Prompt, the built-in Windows terminal, is another way to check account status. It is useful if Settings is hard to reach or you prefer the keyboard. You don’t need to run it as administrator just to read this information.
- Press the Windows key.
- Type cmd in the search box.
- Press Enter. A Command Prompt window opens with a blinking cursor.
- Type the command shown in the code block below and press Enter. Windows prints a list of details for the account.
net user genericuser
In the results, find the Local Group Memberships line. If it lists Administrators, the account is an administrator. If it lists only Users, the account is Standard.
Summary
Knowing your Windows 11 account type helps with system security and management. The Settings app and Command Prompt both let you tell Local accounts from Microsoft accounts and check your permission level. Changing another account's type requires administrator privileges. That protects the system from unauthorized changes.
Have a question about this guide?
Answered by AI from this guide. Good questions may be added to this page — please don't include personal details.
Did this guide fix your problem?

About the Author
Richard
Tech Writer, IT Professional
Richard is a writer at Geek Rewind who turns complex IT tasks into clear, step-by-step guides. He draws on years of hands-on experience in system administration and enterprise IT operations, focusing on Windows, Linux and WordPress: the problems people actually run into, and the fixes that work. His server and WordPress guides come from systems he runs himself. Richard builds and maintains the platform behind Geek Rewind, from its Ubuntu servers and Nginx configuration to its custom WordPress plugins. Many new tutorials start with readers' questions, and he's always glad to answer them in the comments.
[…] Local accounts will use the user name as a display name by default. […]
[…] password reset disk can only be created for a local account, not a Microsoft […]