How to Delete Guest Accounts in Windows 11

Deleting a guest account in Windows 11 removes a temporary visitor profile that lets other people sign in to your PC. It stops strangers from opening your personal files and frees up disk space.
On Windows 11 version 22H2 and newer, you can clear out these unwanted profiles in a few clicks. You can use the Settings app or the Computer Management tool. Both are covered below, along with a Command Prompt option and what to check afterwards.
To delete a temporary user account in Windows 11, go to Settings Accounts Family & other users Click the account name, then select Remove and confirm. Alternatively, use the command prompt: type net user username /delete, replacing username with the account name.
Understanding Guest Accounts in 🪟 Windows 11
Windows 11 has no built-in Guest account like older versions of Windows did. If you see an account called “Guest” on your sign-in screen, someone created it by hand, or an older upgrade or a third-party tool left it behind. Standard user accounts are the usual substitute for temporary visitors, and they are what you will be deleting in most cases.
Before you start, you need to be signed in with an administrator account. Standard accounts cannot remove other users. You also cannot remove the account you are currently signed in to, so sign in as a different administrator if needed.
Why remove guest accounts?
Unused accounts take up disk space. Each one also adds a possible way in, especially if it has a weak password or none at all. Removing accounts nobody uses keeps the system clean and shrinks the number of doors someone could try.
It is worth doing a check of your accounts every few months, particularly on a PC that guests, kids or coworkers have used.
What happens when you are done?
Deleting an account removes it from the sign-in screen. All files, photos and settings that belong to that user are deleted from the hard drive. This cannot be undone.
To back up, sign in as an administrator, open File Explorer and go to the Users folder on your C: drive. Copy the Documents, Desktop, Pictures and Downloads folders from that user's folder to an external drive or another location. If you delete the account by mistake, you can create a new one, but the old files will not come back unless you have this copy.
How to Delete a User Account via Settings
If you have an administrator account, the Settings app is the easiest way to remove a profile. It works the same on Windows 11 Home and Pro. Deleting this way removes the user and all their saved files from your PC.
- Open the Start menu and select Settings. The Settings window opens.
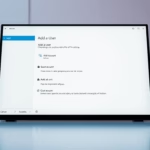
- Go to Accounts, then click on Family & other users. On some newer builds this page is simply called Other users. You should now see a list of accounts on the PC.
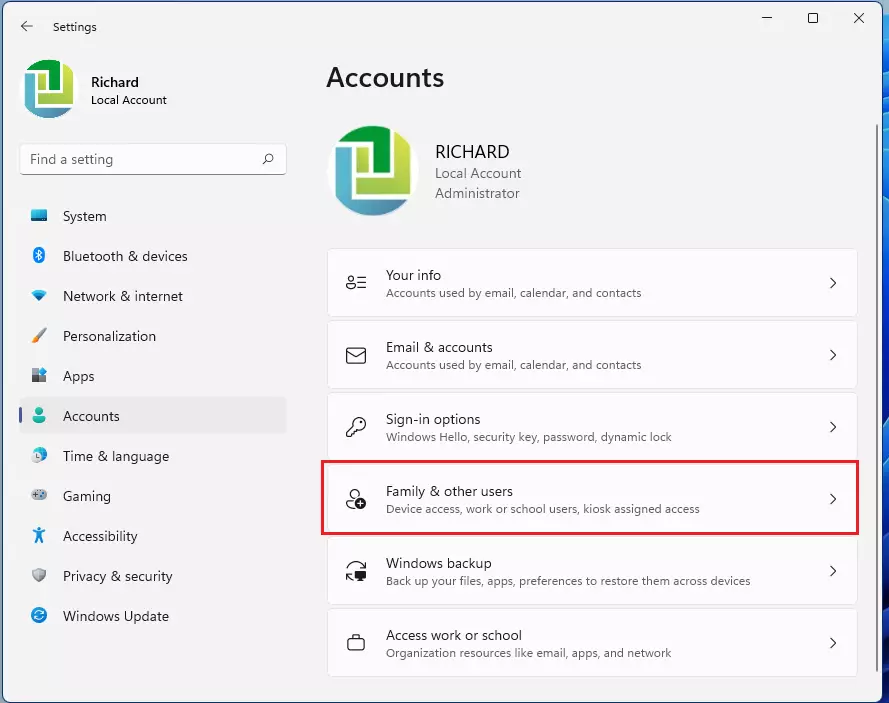
- Look under the Other users section. Guest or visitor accounts are listed here by name. If the account you want is not listed, it may be a hidden or system account, so use the Computer Management method further down.
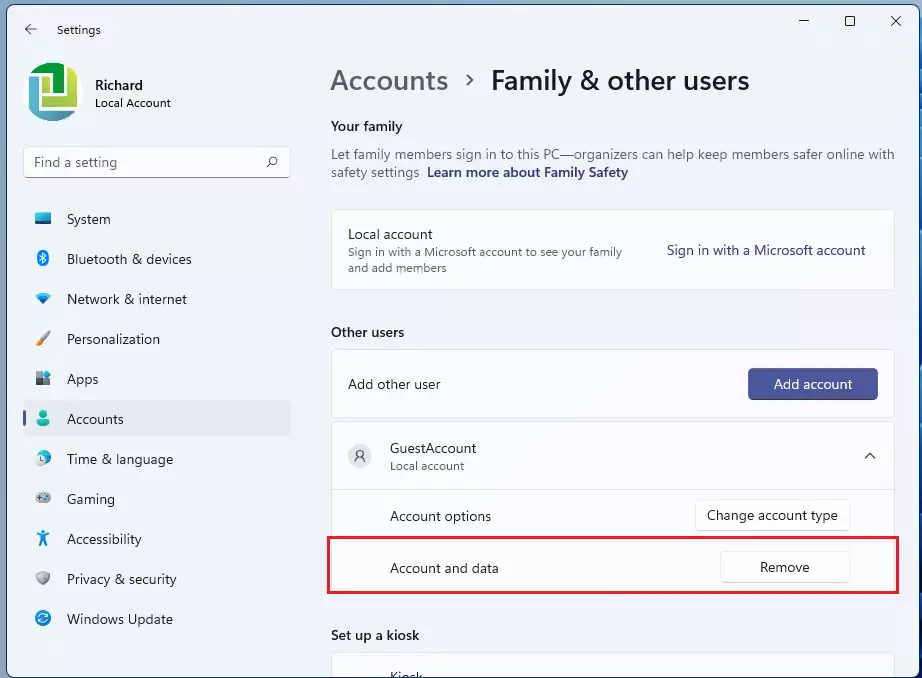
- Click on the account name you want to remove to expand the menu. Buttons for that account appear underneath it.
- Click the Remove button. If the button is greyed out or missing, check that you are signed in as an administrator and that the account you picked is not the one you are using right now.
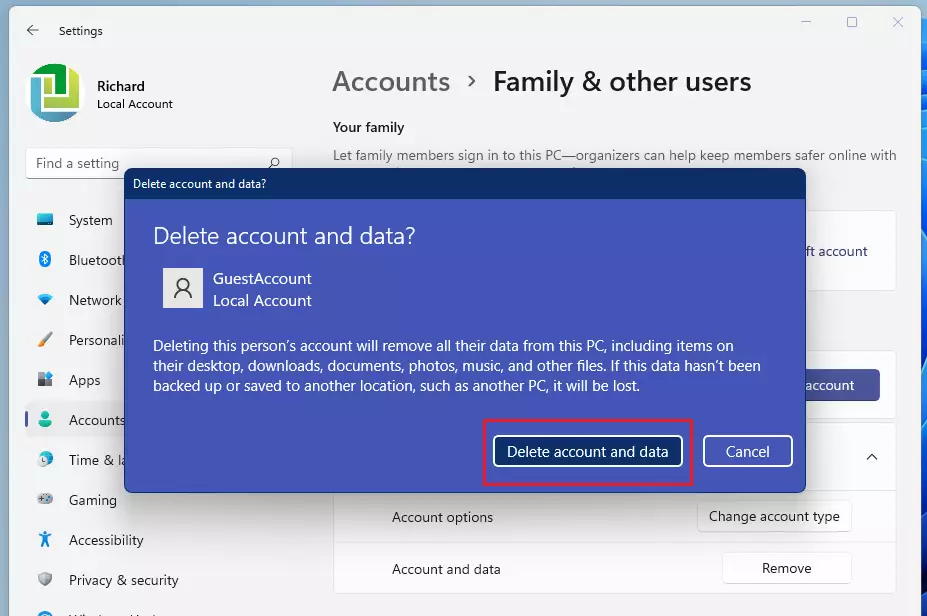
- A prompt will appear and warn you that the account and its data will be deleted. Click Delete account and data to confirm. The account disappears from the list, and from the sign-in screen the next time it appears. No restart is needed.
How to Delete an Account Using Command Prompt
You can use Command Prompt to delete a user account quickly by running a short command with administrator rights. It uses the net user command followed by the exact account name. This is handy if the Settings page is slow or you are removing several accounts.
- Search for cmd in the Start menu.
- Right-click the result and choose Run as administrator. Click Yes if User Account Control asks for permission. A Command Prompt window opens with "Administrator" in the title bar.
- Type the command below and press Enter:
net user username /delete
Replace "username" with the exact name of the account you want to remove. If the name contains spaces, put it in quotation marks. Check the spelling carefully, because a typo may target a different account. When it works, Command Prompt tells you the command completed successfully, and the account is gone from the sign-in screen.
Be aware that this command removes the account itself. It may leave the user's profile folder behind in the Users folder on your C: drive. If you want that space back, delete the leftover folder by hand, as described in the cleanup section below. Sign the account out first if it is still logged in, or the command may not work.
Advanced Troubleshooting: Removing Stuck Accounts
Deleting from the Settings app sometimes fails. This usually happens when the User Profile Service (a background process that manages user data) hits an error, or when leftover registry entries stay behind. You may see the Remove button do nothing, or the account may reappear after a restart.
Try these steps in order:
- Restart the PC and try again. This clears most stuck sessions.
- Make sure the account is signed out. If another user is still logged in, sign them out from the Start menu or Task Manager.
- Try the Command Prompt method above or the Computer Management method below.
Using Local Users and Groups (Pro Version Only)
Windows 11 Pro, Enterprise and Education users can use the lusrmgr.msc tool (the local user manager). It is not available on Windows 11 Home, so Home users should stick with Settings or Command Prompt.
- Press Win + R to open the Run box.
- Type
lusrmgr.mscand press Enter. The Local Users and Groups window opens. - Click Users in the left pane. The list of accounts appears in the middle.
- Right-click the account and select Delete. Confirm the warning. The account vanishes from the list.
Like the Command Prompt method, this removes the account but may not delete its profile folder.
Registry and Folder Cleanup
After you delete an account, lingering files in the registry and the Users folder may need manual cleanup to remove all traces from Windows 11. The folder is the easy part. Open File Explorer, go to the Users folder on your C: drive, and look for a folder named after the deleted account. If you have already backed up anything you need, you can delete it.
Registry entries are a different matter. Editing the registry by hand can break Windows if you delete the wrong thing, so only do it if the account keeps reappearing or you hit errors, and create a restore point first. In most cases, deleting the leftover folder is all you need.
Summary
Temporary local accounts are easy to remove with the Settings app or Command Prompt. Windows 11 does not include a native Guest account, so anything with that name was added by someone or something else. Back up any files first, use Settings for the simplest route, and fall back on Computer Management or Command Prompt if Settings fails.
If you still need to let visitors use the PC, create a standard user account for them and remove it when they are done.
Was this guide helpful?

About the Author
Richard
Tech Writer, IT Professional
Richard is a writer at Geek Rewind who turns complex IT tasks into clear, step-by-step guides. He draws on years of hands-on experience in system administration and enterprise IT operations, focusing on Windows, Linux and WordPress: the problems people actually run into, and the fixes that work. His server and WordPress guides come from systems he runs himself. Richard builds and maintains the platform behind Geek Rewind, from its Ubuntu servers and Nginx configuration to its custom WordPress plugins. Many new tutorials start with readers' questions, and he's always glad to answer them in the comments.


No comments yet — be the first to share your thoughts!