How to Create a Password Reset Disk for Windows 11

A password reset disk for Windows 11 is a USB flash drive that lets you unlock your PC if you forget your password. It works only for local accounts, not for profiles linked to a Microsoft email address. It is a small backup, but it is the only way to get back into a local account without a reset or reinstall.
Making this disk ahead of time takes less than two minutes. It can save you from losing access to your files or having to reinstall Windows. You can make it on Home or Pro, because the wizard is part of the classic Control Panel .
Create a password reset disk by plugging in a USB drive, opening Control Panel , clicking User Accounts, and selecting “Create a password reset disk.” Follow the Forgotten Password Wizard prompts, enter your current password, and save the reset data to the USB.
Latest Update
Preparing to make a password reset disk in Windows 11 requires a blank USB flash drive and access to your local user account. Sign into the exact user account you want to protect before you start. Windows will not let you create a recovery disk for another account, or after you are already locked out.
The key file the wizard writes is tiny, so any USB drive will do, including an old small one. Copy off anything you want to keep first, to be safe. Use a drive you can keep in a safe place, because it will be the one thing that can reset your password.
Create a password reset disk on 🪟 Windows 11
Creating a password reset disk for Windows 11 lets you unlock your local account if you forget your password. You plug in a USB flash drive, open the Control Panel , and run the Forgotten Password Wizard while you still remember your current password. You cannot make this recovery tool after you get locked out of your computer.
Once the disk exists, it keeps working even if you change your password later. You do not need to make a new one each time. You only need a new disk if you want one for a different account.
The setup takes a few deliberate moves. In short, you will:
- Sign in with the local account you want to protect.
- Plug in the USB flash drive.
- Open User Accounts in the Control Panel.
- Start the Forgotten Password Wizard and choose the drive.
- Enter your current password and let the wizard finish.
Sign in to Windows with your local account first. Use the account you want the disk to unlock. If you are signed in with a different account, sign out and switch before you go any further.
Latest Update
Grab a USB flash drive with at least 1 GB of storage that you do not mind erasing. Sign in to your Windows 11 computer using the specific local account that needs the recovery backup.
Plug a USB flash drive into a free port on your Windows 11 device before you open the Control Panel and select User Accounts. If File Explorer or an AutoPlay window pops up, you can close it. The drive only needs to be detected.
- Open the Control Panel.
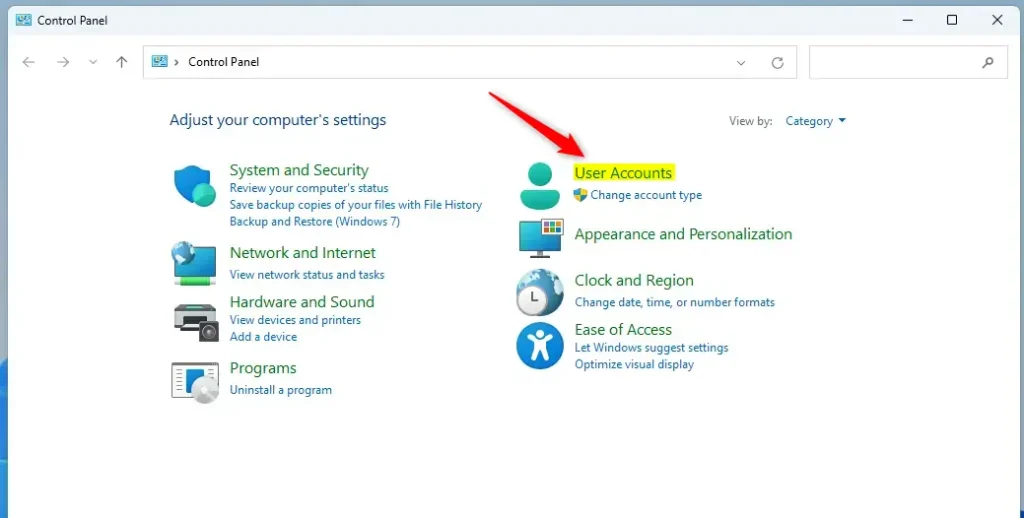
- Click the User Accounts icon.
If the Control Panel is in Category view, you may see User Accounts twice. Clicking either one works. In icon view, there is a single User Accounts icon. The page that opens shows your account name and picture, with account options below.
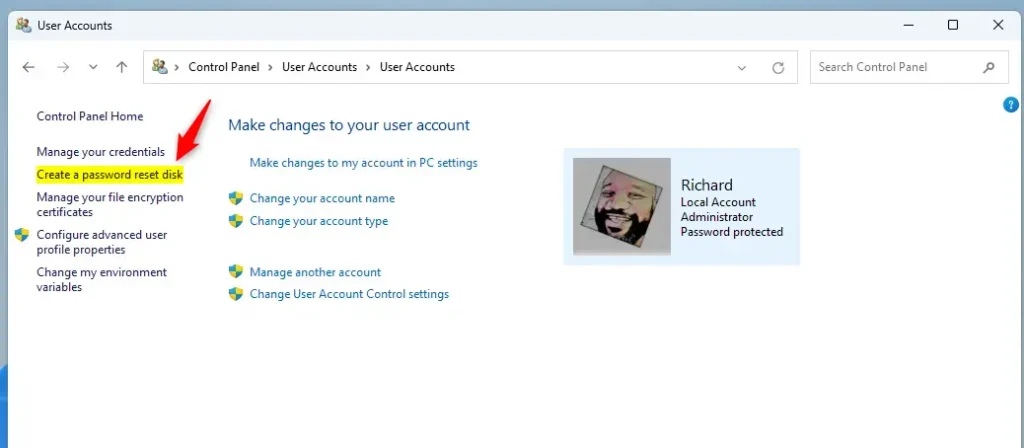
Click the "Create a password reset disk" link in the left pane of the User Accounts window (Control Panel User Accounts User Accounts). Logging in with a Microsoft account hides this specific option. If you do not see the link, check that you are signed in with a local account, not a Microsoft account.
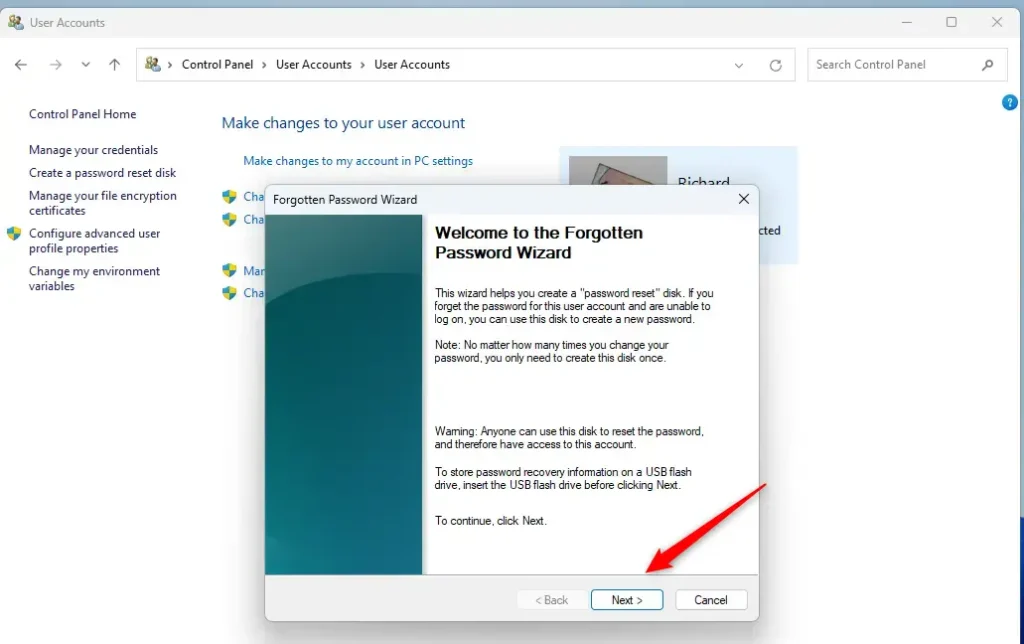
The Forgotten Password Wizard should open in a new window.
Click Next inside the "Forgotten Password Wizard" window. The next screen asks you which drive you want to use.
Open the drop-down list and select the USB disk you set aside for password recovery. Then click Next. If your drive is missing from the list, close the wizard, unplug the drive and plug it back in, then start again from the Create a password reset disk link. Check the drive letter carefully so you do not pick the wrong one.
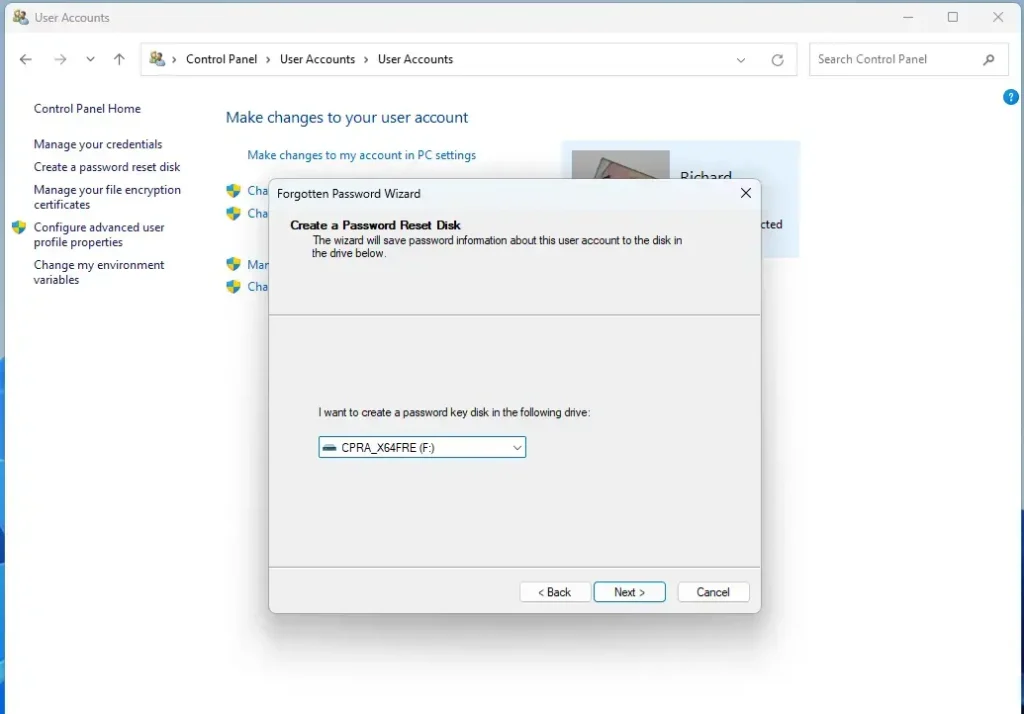
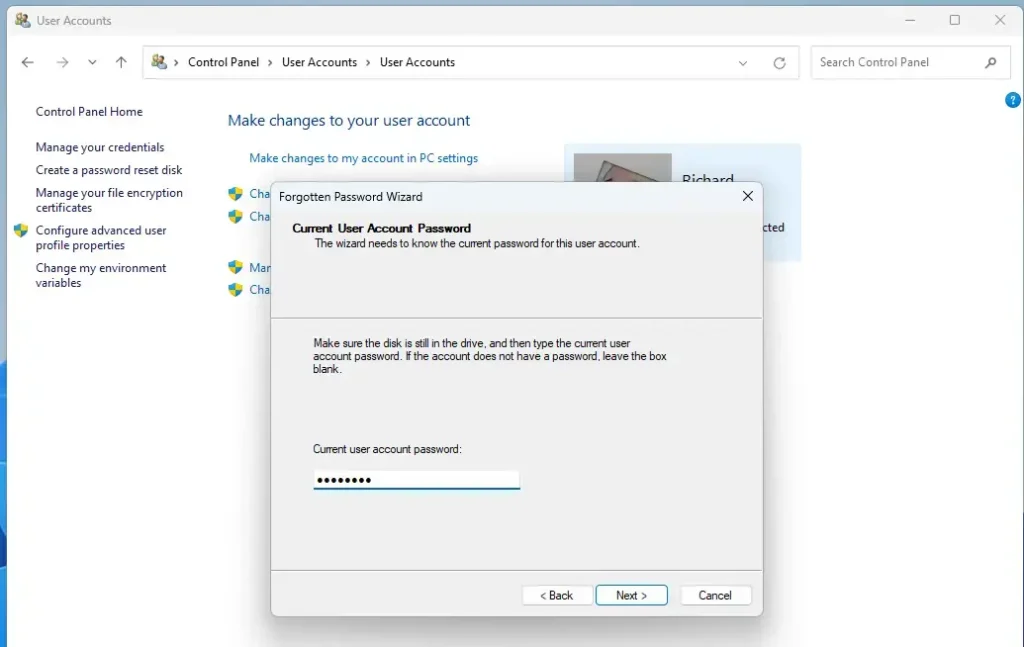
Type your current password in the box on the following screen and click Next. If your account has no password, leave the box empty. A wrong password produces an error and the wizard will not continue until you enter the right one.
Wait for the progress bar to reach 100% complete, then click Next. Click the Finish button to wrap up the wizard. Windows closes the window, and the disk is ready to use.
What If My Password Reset Disk Doesn't Work?
If a password reset disk does not work, the cause is usually the wrong USB drive or a Microsoft account in place of a local account. Password reset disks only work for local accounts on the exact computer where you created them. They cannot recover online Microsoft accounts.
Check these things first:
- Make sure you are using the same USB drive you made the disk on, and that it was not erased or reformatted since.
- Confirm that the account is a local account and that you are on the same PC.
- To use the disk, enter a wrong password at the sign-in screen, click Reset password, and follow the wizard with the drive plugged in.
Writing the key file to the USB drive takes only a few moments. Store the flash drive somewhere safe once you finish. Anyone who has the disk can reset your password, so treat it like a spare house key and do not leave it in the PC. Do not overwrite or erase the file on the drive, or the disk will stop working.
Each USB drive holds only one password reset disk. If you want a fresh recovery disk, use a separate USB drive or clear the current one, which destroys the old disk. To undo the whole thing, delete the key file from the drive or format it. That makes the disk useless.
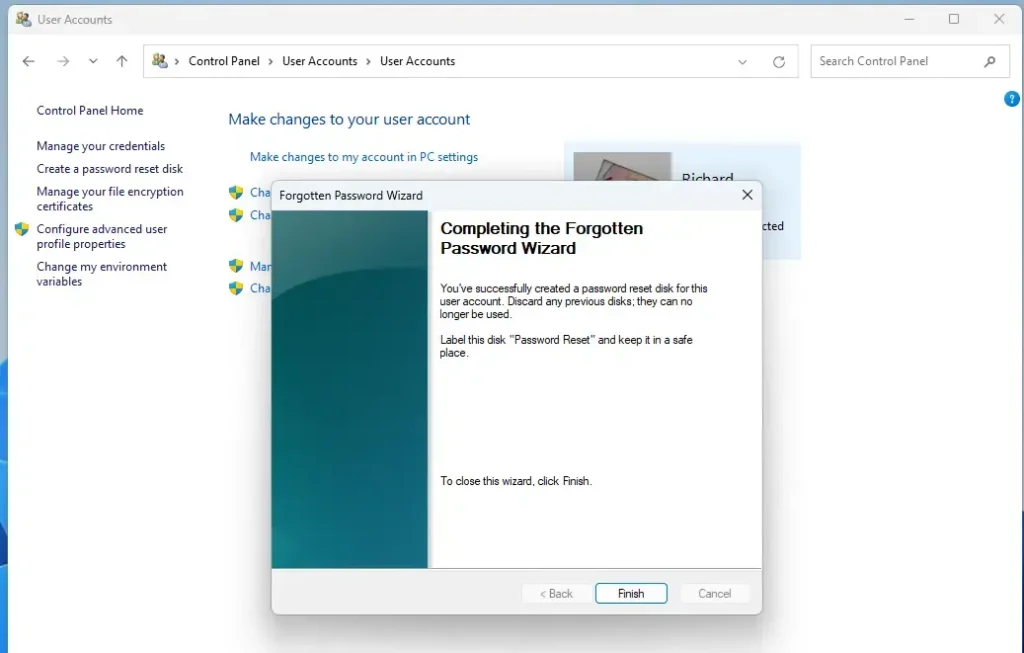
That completes the setup! Label the drive, put it away, and you are covered if you ever forget your password.
Reference:
Conclusion:
- Creating a password reset disk for a local account in Windows 11 is an important precaution in case you forget your password. You have to do it while you can still sign in.
- Remember that this feature is specific to local accounts and cannot be used for Microsoft accounts.
- Following the simple steps outlined in this article, you can easily create a password reset disk using a USB flash drive and the Control Panel.
- Should you ever find yourself locked out of your local account, a password reset disk can save you from a longer recovery or an account reset. Keep it somewhere safe, since anyone holding it can reset your password.
Have a question about this guide?
Answered by AI from this guide. Good questions may be added to this page — please don't include personal details.
Did this guide fix your problem?

About the Author
Richard
Tech Writer, IT Professional
Richard is a writer at Geek Rewind who turns complex IT tasks into clear, step-by-step guides. He draws on years of hands-on experience in system administration and enterprise IT operations, focusing on Windows, Linux and WordPress: the problems people actually run into, and the fixes that work. His server and WordPress guides come from systems he runs himself. Richard builds and maintains the platform behind Geek Rewind, from its Ubuntu servers and Nginx configuration to its custom WordPress plugins. Many new tutorials start with readers' questions, and he's always glad to answer them in the comments.
No comments yet — be the first to share your thoughts!