How to Purge Stored Biometric Signature Databases in Windows 11 Sign-in Options

Windows Hello stores the data it uses to recognise your face or fingerprint in a biometric database on the PC. Removing that data deletes every saved template from the system. That is worth doing before you sell or give away a computer. It also helps when a fingerprint reader or face camera has stopped working properly, because you can wipe the old scans and enroll again from scratch.
On Windows 11 these files live in the system folder 📁C:\
Open Settings , select Accounts, then Sign-in options. Scroll to Facial recognition or Fingerprint recognition and click Remove. Enter your PIN or password to confirm. Windows deletes the biometric template immediately, and the panel shows Set up again instead of Remove.
How Windows Stores Your Face and Fingerprint Data
Windows does not keep photos of your face or images of your fingerprints. When you enroll, it turns the scan into a mathematical template, which is a block of encoded data. It then encrypts that template and stores it in the protected folder mentioned above. Each template is tied to your user account and your device.
On many modern PCs, the matching work and the template protection happen inside dedicated security hardware, such as the TPM or the sensor’s own secure chip. The exact arrangement depends on your hardware. Where it applies, ordinary programs cannot read the data, even with administrator rights.
The practical result is that you cannot browse to these records and open or edit them. You manage them through the built-in Windows tools, which means the Sign-in options page in Settings. You can add, improve or remove a template there, but not view it.
Preparing to Delete Your Biometric Data
Once the biometric data is gone, Windows will fall back to your password or PIN for every sign-in and every identity check.
- Confirm that you know your account password. If you sign in with a Microsoft account, this is your Microsoft account password.
- Confirm that you know your PIN. Type it at the lock screen next time as a test, if you are not sure.
- Check that you are signed in with the account whose data you want to remove. Biometric templates belong to each user separately, so removing yours does not touch anyone else's.
- If other people use the PC, tell them you are changing sign-in settings. That avoids confusion if something looks different on the lock screen.
If you are removing the data because you are selling the PC, deleting biometric data is only one part of the job. You should also reset the whole PC, which wipes your files and accounts. Removing the biometric data first does no harm.
How to Remove Fingerprint and Face Data Using Settings
This is the standard method. It takes a few clicks and needs no administrator tools, although some prompts may ask you to verify who you are.
- Open the Start menu and select Settings. The Settings window opens.

- Click Accounts in the left-hand menu. The account options appear on the right.
- Select Sign-in options from the list on the right. You now see the ways you can sign in, such as face, fingerprint, PIN, security key and password.
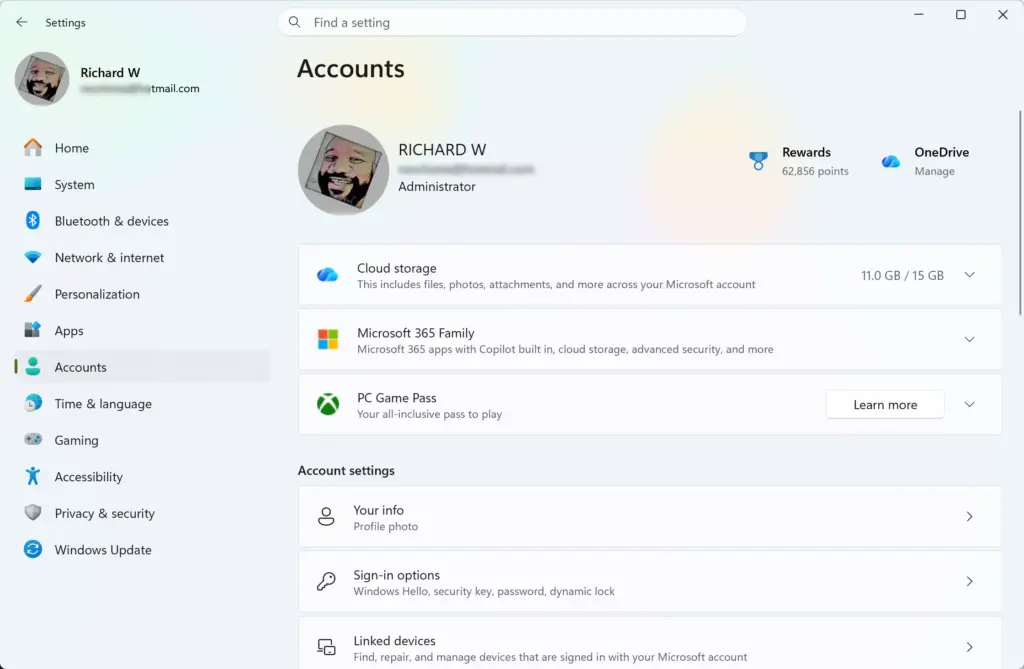
- Scroll down to Facial recognition (Windows Hello) or Fingerprint recognition (Windows Hello). Each one appears only if Windows detects a compatible camera or reader.
- Click the feature you want to remove. Its panel expands and shows the available options.
- Click the Remove button. If Windows asks for your PIN or password, enter it to confirm.
- Check that the panel now offers Set up again instead of Remove. That tells you the data is gone.
There is no undo. To get face or fingerprint sign-in back, click Set up and enroll again whenever you are ready.
If you cannot find the section or the Remove button is missing or greyed out, check these things:
- There may be no compatible camera or fingerprint reader, or its driver may not be working. Check Device Manager and Windows Update.
- Nothing may be enrolled yet, so there is nothing to remove.
- A work or school policy may be managing Windows Hello. In that case your administrator controls it.
Home and Pro editions use the same steps here.
Advanced Management: Using Enhanced Sign-In Security
Enhanced Sign-in Security (ESS) is an extra protection layer in Windows 11. It isolates the face or fingerprint sensor and the matching process from the rest of the operating system, using specialised hardware and software working together. Its goal is to stop malicious software from capturing or tampering with your biometric data as it travels from the sensor to the processor.
Not every PC supports it. It needs compatible hardware and firmware, and the sensor itself must be designed for it. Devices that meet those requirements turn the protection on automatically, so there is normally nothing for you to configure.
To check what your system reports, open Settings, go to Privacy & security, and look at Windows Security. On supported devices, the Sign-in options page may also show a setting for using an external camera or fingerprint reader. Removing your biometric data does not switch ESS off, and re-enrolling later keeps the same protection in place.
Summary
Removing stored biometric data through Sign-in options is a quick, dependable way to protect your privacy. It suits selling a PC, retiring an old account or fixing a misbehaving reader. The built-in Settings app deletes your face and fingerprint templates for good, and you can enroll again at any time.
Take a minute to check your current sign-in options and remove any old or unused face or fingerprint entries. For more help with Windows 11 security, see our other guides on user accounts and system protection.
Was this guide helpful?

About the Author
Richard
Tech Writer, IT Professional
Richard is a writer at Geek Rewind who turns complex IT tasks into clear, step-by-step guides. He draws on years of hands-on experience in system administration and enterprise IT operations, focusing on Windows, Linux and WordPress: the problems people actually run into, and the fixes that work. His server and WordPress guides come from systems he runs himself. Richard builds and maintains the platform behind Geek Rewind, from its Ubuntu servers and Nginx configuration to its custom WordPress plugins. Many new tutorials start with readers' questions, and he's always glad to answer them in the comments.




No comments yet — be the first to share your thoughts!