How to Opt Out of Personalized Recommendations in Windows 11 Recommendations and Offers

Personalized recommendations in Windows 11 are the tips, suggested items and promotional messages that Microsoft shows in the Start menu , the Settings app, File Explorer , the lock screen and notifications. Turning them off stops Windows from using your app and usage data to pitch products, games and cloud services.
The whole job takes a few minutes in the Settings app and works on both Windows 11 Home and Pro. None of it needs a restart, and every change can be reversed by flipping the same switch back on.
Open Settings Privacy & security General and turn off Let apps show me personalized ads by using my advertising ID and Let Microsoft use my diagnostic data for experiences tailored to you. Then go to Settings Personalization Start and disable Show recently added apps, Show most used apps and Show recently opened items. Changes take effect immediately.
Understanding Recommendations and Offers in 🪟 Windows 11
Windows 11 recommendations and offers are built-in features that watch how you use the PC and then suggest apps, files, websites and Microsoft services. They show up in the Start menu , File Explorer , Settings and the lock screen. Microsoft’s reasoning is that they help you find features, but many people find them more distracting than useful.
You will usually notice them when you open Start or Settings and see something you never asked for, such as an ad for an app or a service you have not installed. Common examples include:
- Suggestions to finish setting up your user account.
- Promotions for Microsoft services like cloud storage or office suites.
- Reminders to try out new features built into Windows.
- Lists of recently opened files and apps that clutter your view.
Turning these features off does not break anything. Windows runs the same way, you just stop seeing the promotional content and the history lists. The sections below go through each area in turn.
Step 1Stop Personalized Ads and Tailored Experiences
These stop apps and Windows from using your advertising ID and usage data to target promotions at you. Two of the switches sit under Privacy & security and one is in the diagnostics area, so you may visit two pages.
Follow these steps to turn off tailored experiences:
- Click the Start button on your taskbar and open the Settings app (the gear icon). You can also press the Windows key + I.

Taskbar - In the Settings window, click Privacy & security in the left-hand menu.
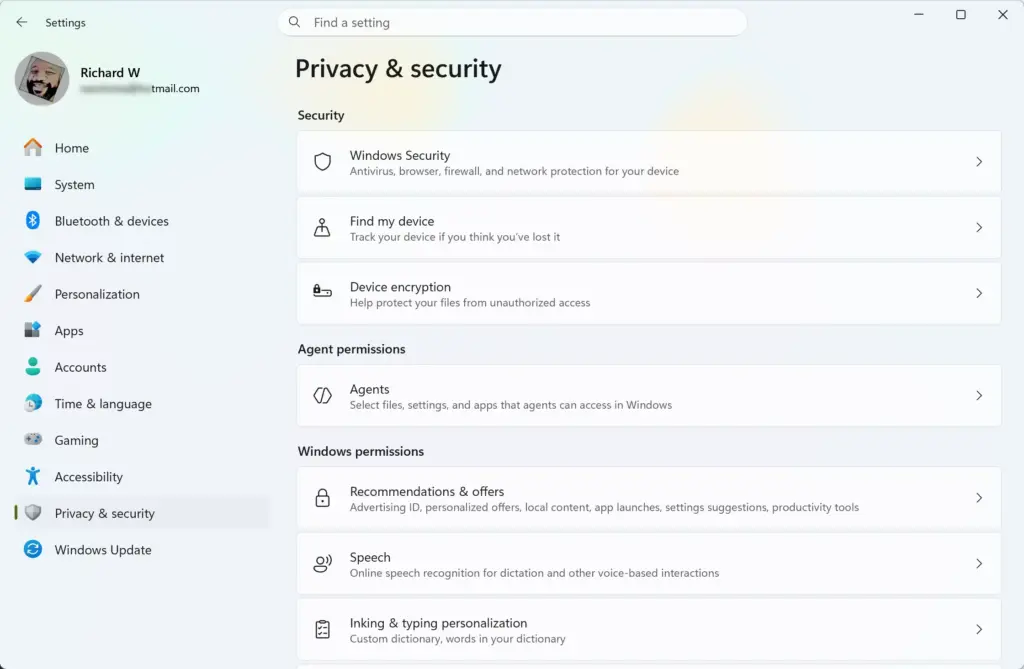
Settings › Privacy & security - On the right side, click General. You should see a list of switches.
- Find Let apps show me personalized ads by using my advertising ID and turn it Off.
- Find Let Microsoft use my diagnostic data for experiences tailored to you and turn it Off. On many current builds this switch is not on the General page. It is called Tailored experiences and sits on the Diagnostics & feedback page, which is covered in the last section below.
- While you are on the General page, also turn off any of these that appear: Let Windows improve Start and search results by tracking app launches and Show me suggested content in the Settings app. The exact list varies a little between Windows 11 versions.
The switches take effect immediately. Windows stops using your habits to target promotions, though you may still see generic, non-personalized tips. To undo any of this, return to the same page and switch the toggle back on.
Step 2Clean Up the Start Menu Recommendations
The Start menu has several settings that control what appears besides your pinned apps. Turning off the toggles for recently added apps, most used apps and recommended items removes most of the clutter and the suggestions.
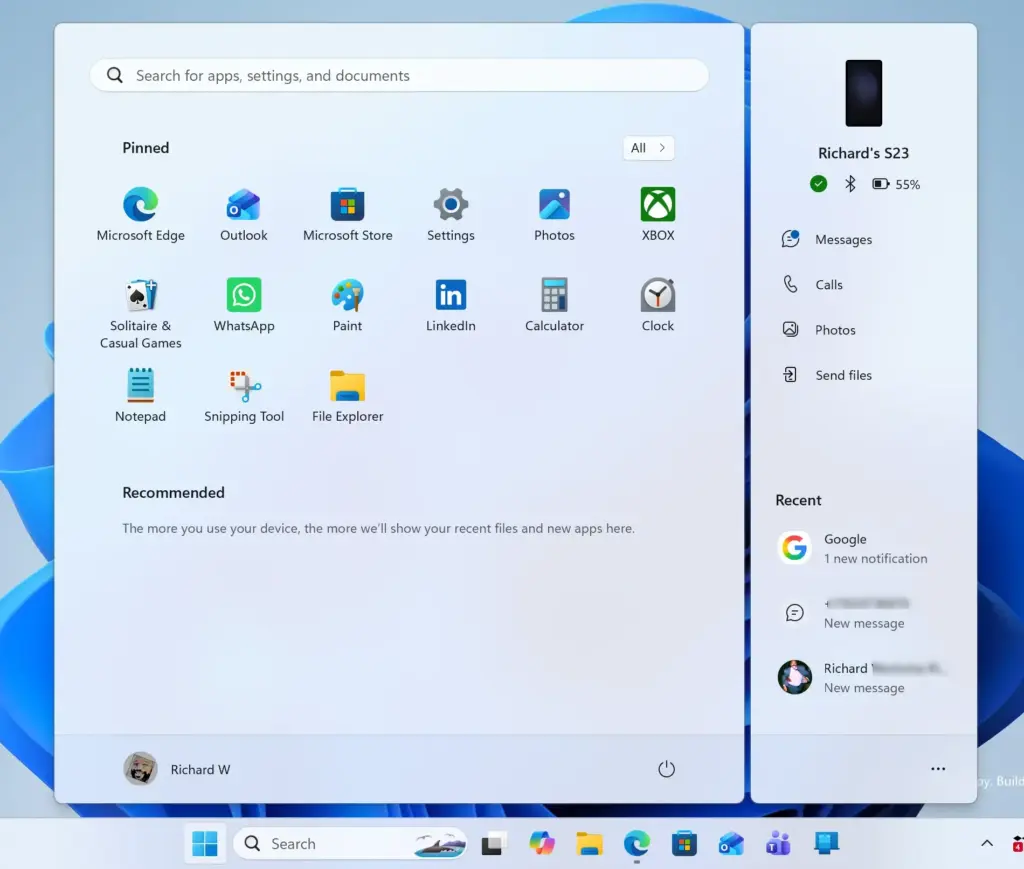
Follow these steps to clean up your Start menu:
- Open the Settings app from your Start menu.

Settings - Click Personalization in the left-hand menu.
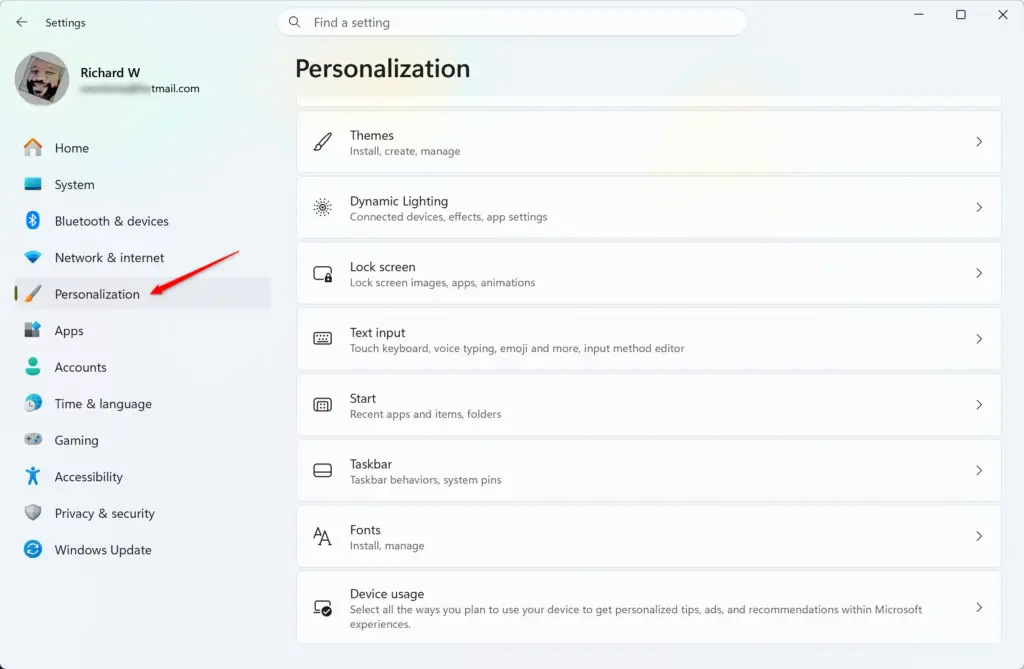
Settings › Personalization - On the right side, click Start. The page lists several toggles and a layout choice.
- Find the options that show recently added apps, most used apps and recently opened items. The wording differs slightly between Windows 11 versions. Typical labels are Show recently added apps, Show most used apps and Show recently opened items in Start, Jump Lists, and File Explorer. Newer builds also have toggles for website recommendations and for tips, shortcuts and new apps.
- Turn off the switch next to each of these options. Items disappear from the Start menu right away.
- Optionally, set Layout to More pins to give your pinned apps more room and shrink the Recommended area.
Your Start menu will now be built around your pinned apps. The Recommended section may still appear as an empty block on some builds. That is normal, and the layout setting above reduces how much space it takes. To restore anything, turn the matching switch back on.
Step 3Turn Off Tips and Notifications in Settings
Windows can also send pop-up tips and full-screen setup prompts that promote Microsoft products and new features. These are controlled from the notification settings.
Follow these steps to stop promotional notifications:
- Open the Settings app.
- Click System in the left-hand menu.
- On the right side, click Notifications.
- Scroll all the way down to the bottom of the list and click to expand the Additional settings section.
- Uncheck Show me the welcome experience after updates.... The full label is longer and varies by build.
- Uncheck Suggest ways to get the most out of Windows and finish setting up this device.
- If you see Get tips and suggestions when using Windows, uncheck that too.
Windows will no longer show full-screen setup pages after updates, and the pop-up tips will largely stop. If you ever want them back, tick the same boxes again.
Step 4Hide File Explorer Recommendations and Ads
File Explorer keeps lists of recent files and frequently used folders, and it can show sync provider notifications that promote cloud storage. You can switch these off in the Folder Options window.
Follow these steps to clear out File Explorer recommendations:
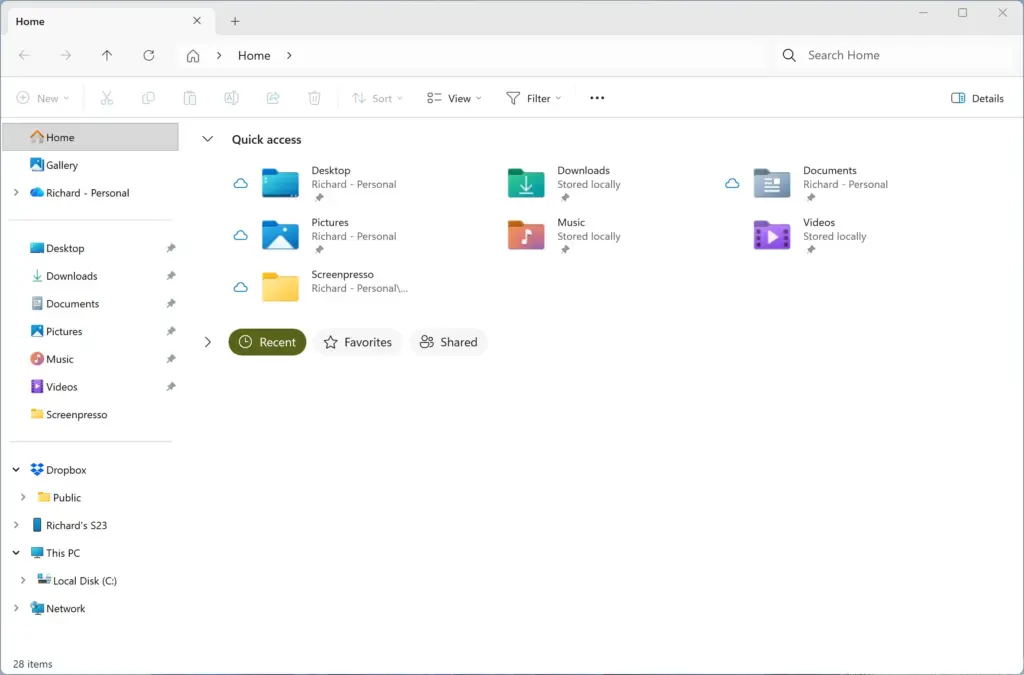
- Open File Explorer from your taskbar.
- Click the three dots (...) in the top toolbar to open the menu, then click Options. The Folder Options window opens.
- On the General tab, look down to the Privacy section.
- Uncheck Show recently used files and Show frequently used folders. If Show files from Office.com is listed, uncheck it as well.
- Click the Clear button next to Clear File Explorer history to wipe out past data.
- Click the View tab and scroll through the Advanced settings list. Uncheck Show sync provider notifications to hide the cloud storage banners.
- Click Apply and then OK.
File Explorer will stop suggesting files and showing cloud promotions, and your old history is cleared. If the Home page still shows a recent section, close and reopen File Explorer to refresh it. Re-ticking the boxes reverses the change.
Advanced Tip 1: Stopping Lock Screen Spotlight Tips
Windows spotlight rotates lock screen pictures and can add fun facts, tips and links to web content. Switching the lock screen to a fixed picture or a slideshow gives you a clean screen.
Here is how to change it:
- Open the Settings app.
- Click Personalization in the left-hand menu.
- On the right side, click Lock screen.
- Find the drop-down menu next to Personalize your lock screen.
- Change it from Windows spotlight to Picture or Slideshow. A preview of the new lock screen appears above the drop-down.
- If Get fun facts, tips, tricks, and more on your lock screen appears below your choice, uncheck it.
From now on your lock screen shows only the picture you chose, with no marketing text. You can go back to Spotlight at any time from the same drop-down.
Advanced Tip 2: Managing Optional Diagnostic Data
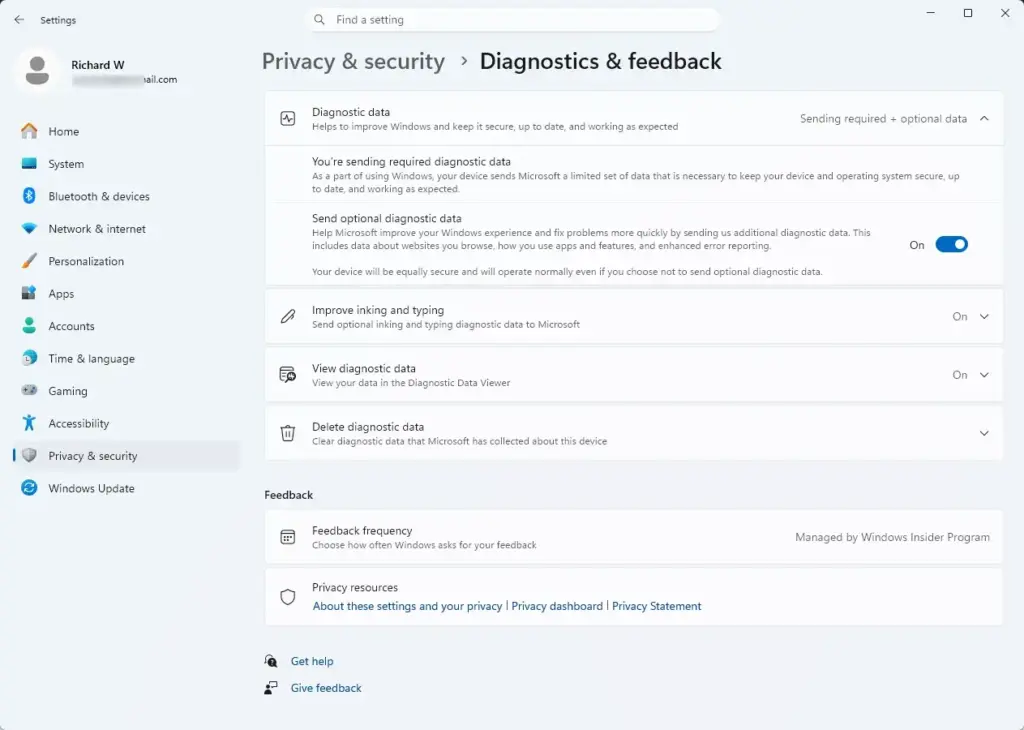
Diagnostic data is the usage information Windows sends to Microsoft. Limiting it to the required level reduces the data that can feed personalized suggestions.
- Open the Settings app.
- Click Privacy & security.
- Click Diagnostics & feedback.
- Find the Diagnostic data section.
- Change the setting from Full diagnostic data to Required diagnostic data. On current Windows 11 builds this appears as a toggle called Send optional diagnostic data. Turn it Off to stay on required data only.
- Scroll down on the same page and turn off Tailored experiences if you did not find it on the General page earlier.
Required data covers only the basics needed to keep the device secure and up to date. It cuts out the detailed app usage information that fuels personalized offers. Windows 11 Home and Pro both let you choose between required and optional data, and you cannot turn off required data completely. If the toggle is greyed out, your PC is probably managed by an organization or you are not signed in as an administrator.
Summary
Opting out of personalized recommendations in Windows 11 takes a handful of switches across the privacy, personalization, system and File Explorer settings. Turn off tailored experiences and advertising ID, hide Start menu suggestions, stop promotional notifications, clear File Explorer history, replace Windows spotlight, and limit diagnostic data. Together these stop most of the targeted suggestions and ads on your PC, and you can reverse any of them from the same settings pages.
Have a question about this guide?
Answered by AI from this guide. Good questions may be added to this page — please don't include personal details.
Did this guide fix your problem?

About the Author
Richard
Tech Writer, IT Professional
Richard is a writer at Geek Rewind who turns complex IT tasks into clear, step-by-step guides. He draws on years of hands-on experience in system administration and enterprise IT operations, focusing on Windows, Linux and WordPress: the problems people actually run into, and the fixes that work. His server and WordPress guides come from systems he runs himself. Richard builds and maintains the platform behind Geek Rewind, from its Ubuntu servers and Nginx configuration to its custom WordPress plugins. Many new tutorials start with readers' questions, and he's always glad to answer them in the comments.
No comments yet — be the first to share your thoughts!