How to Show or Hide Recently Opened Items in Windows 11

Showing or hiding recently opened items in Windows 11 helps you keep your PC tidy and protect your privacy.
Recently opened items are files, folders, and apps that Windows 11 remembers and shows you to quickly access your work. Windows 11 usually keeps track of your last 50 recently used files.
These show up in places like the Start menu’s Recommended list, pop-up menus for apps, and File Explorer. You can turn this feature off to stop Windows from recording and showing your recent activity.
This control helps you manage what information Windows keeps about your PC use and keep things private.
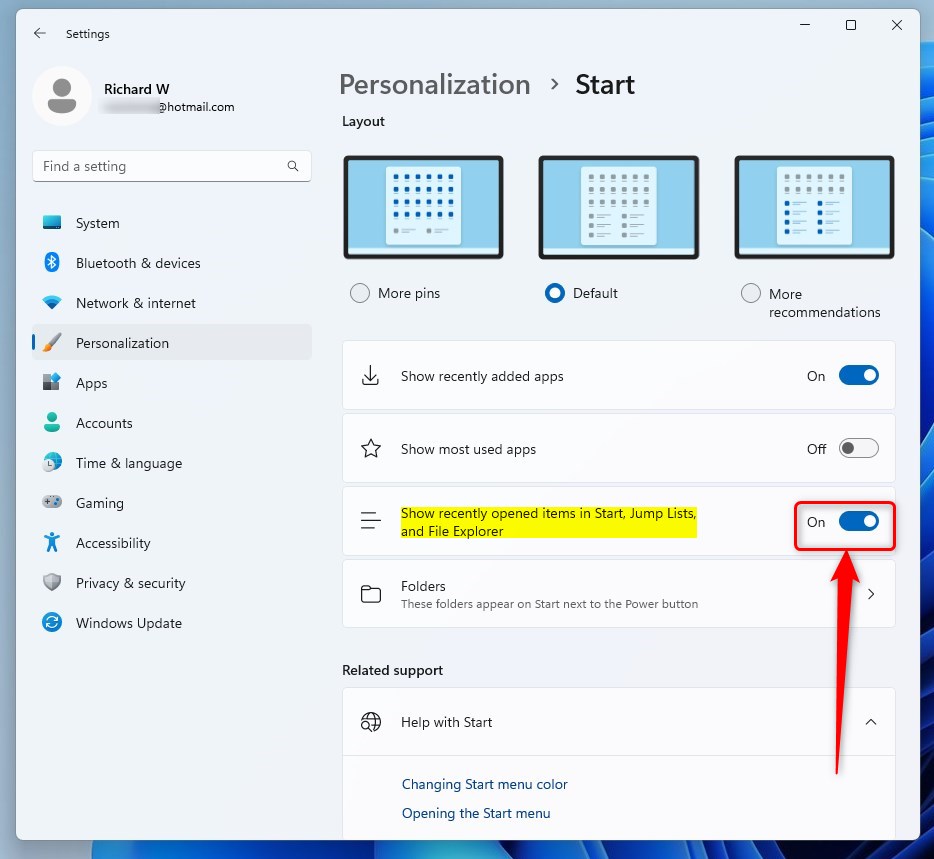
Go to Settings > Personalization > Start and toggle off “Show recently opened items in Start, Jump Lists, and File Explorer.” This prevents Windows from displaying your recent files, folders, and apps.
Managing Recent Items via Settings
You can manage recently opened items in Windows 11 through the Settings app. This lets you choose whether to display a list of files you’ve recently accessed, helping keep your Start menu and File Explorer organized.
Windows Settings controls the recently opened items feature. You can manage this setting to show or hide recent files and folders that appear in File Explorer and the Start menu. This helps keep your workspace tidy and focused on current tasks.
- Open the Settings app by pressing Windows key + I or by searching for it in the Start menu.

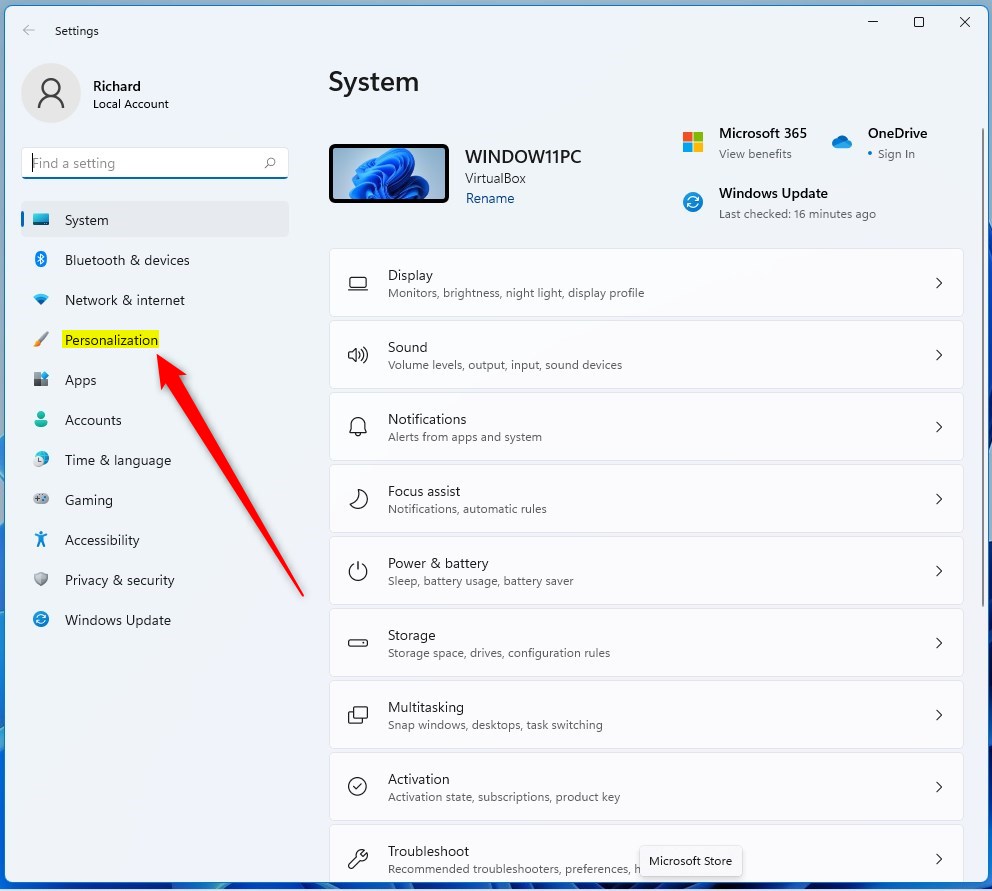
2. In the Settings app, click Personalization on the left side.
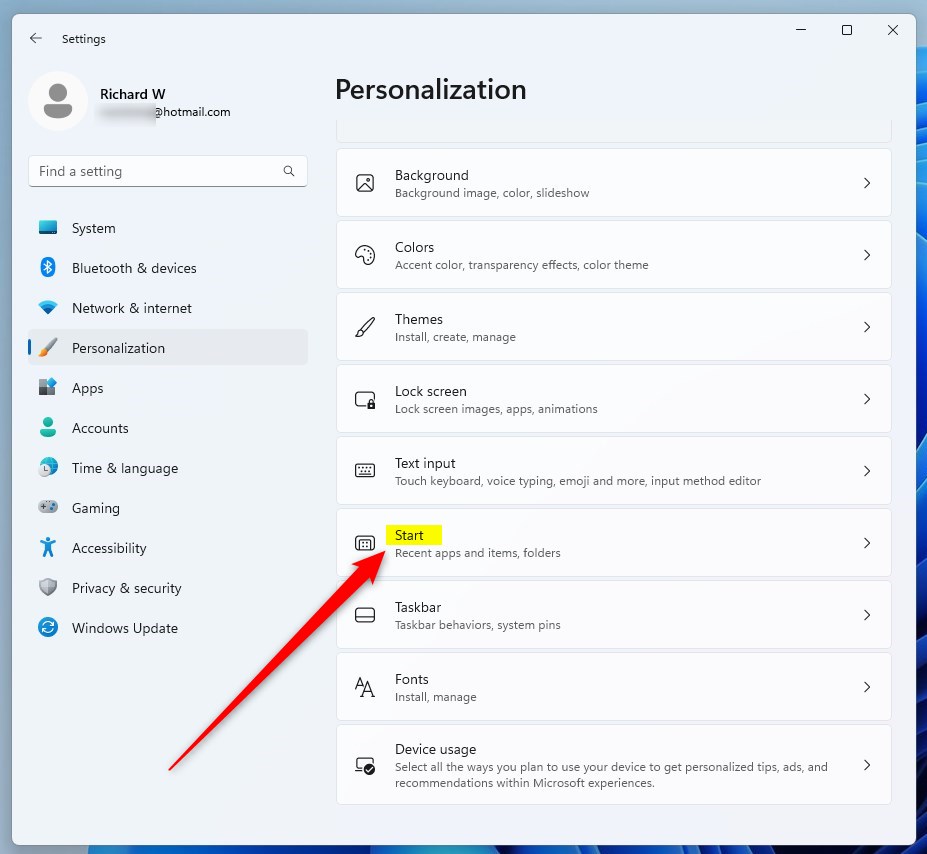
3. On the right side, click on the Start tile.
4. Locate the switch labeled Show recently opened items in Start, Jump Lists, and File Explorer. Toggle this switch to On to enable it or Off to hide your recent items.
Troubleshooting: Why are my recent files not showing up in 🪟 Windows 11?
If your recent files aren’t showing up in Windows 11, it’s usually because a privacy setting is turned off or the tracking history isn’t refreshing. First, check that the option to show recent items is turned on in your privacy settings.
Recent files might not appear if privacy settings are off or if cache files have become corrupted. First, ensure the “Show recently opened items” toggle in Settings > Personalization > Start is set to On. If the toggle is already on, clear your Activity History. Go to Settings > Privacy & security > Activity history and click Clear. Clearing your Activity History resets how Windows tracks your activities.
Advanced Control: Registry Editor and PowerShell
Administrator privileges are required to use these methods for showing or hiding recently opened items in Windows 11. Editing the Windows registry, which is a database holding low-level settings, can lead to system issues if errors occur.
Using Registry Editor
Using Registry Editor
The Registry Editor provides a way to control recently opened items in Windows 11. This advanced method allows for manual hiding or showing of recent documents through specific registry value changes, offering more granular control.
To force this setting:
- Press Windows key + R, then type regedit and press Enter.
- Navigate to:
HKEY_CURRENT_USER\Software\Microsoft\Windows\CurrentVersion\Policies\Explorer - If the
NoRecentDocsHistorykey doesn’t exist, right-click on Explorer, select New > DWORD (32-bit) Value, and name it NoRecentDocsHistory. - Set its value to 1 to hide recent items, or 0 to show them.
Using PowerShell
Using PowerShell
Set-ItemProperty -Path 'HKCU:\\Software\\Microsoft\\Windows\\CurrentVersion\\Policies\\Explorer' -Name 'NoRecentDocsHistory' -Value 1. This achieves the same result as the registry edit but via the command line.Managing Recent Items via Group Policy
Windows 11 Pro users with admin rights can manage recent items using Group Policy. This tool lets you control whether your computer keeps a history of recently opened documents for all user accounts from one place.
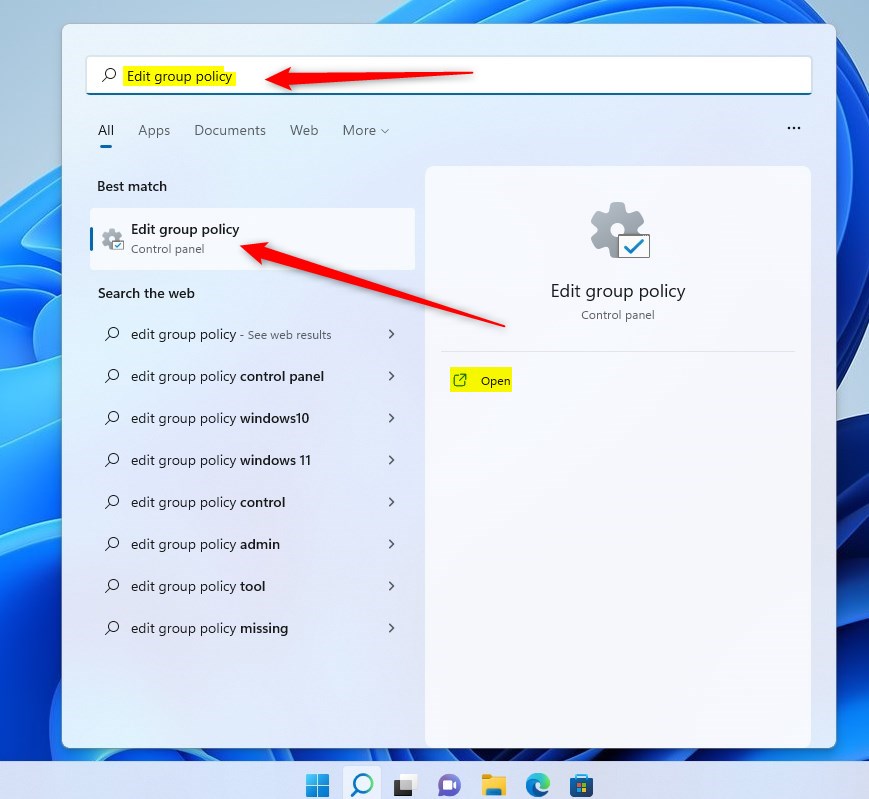
- Open the Start menu, search for Edit group policy, and select it.
2. In the Local Group Policy Editor, go to: Computer Configuration\Administrative Templates\Start Menu and Taskbar.
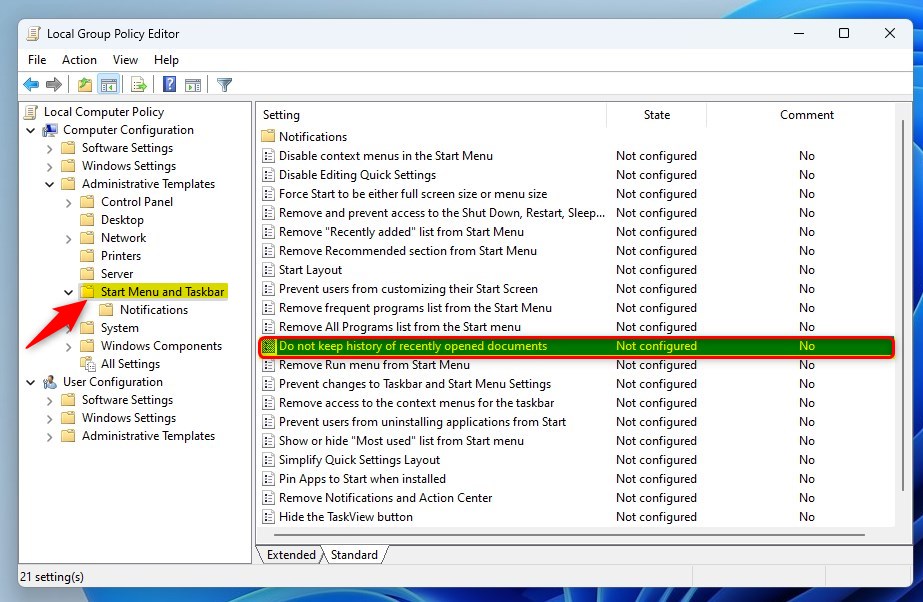
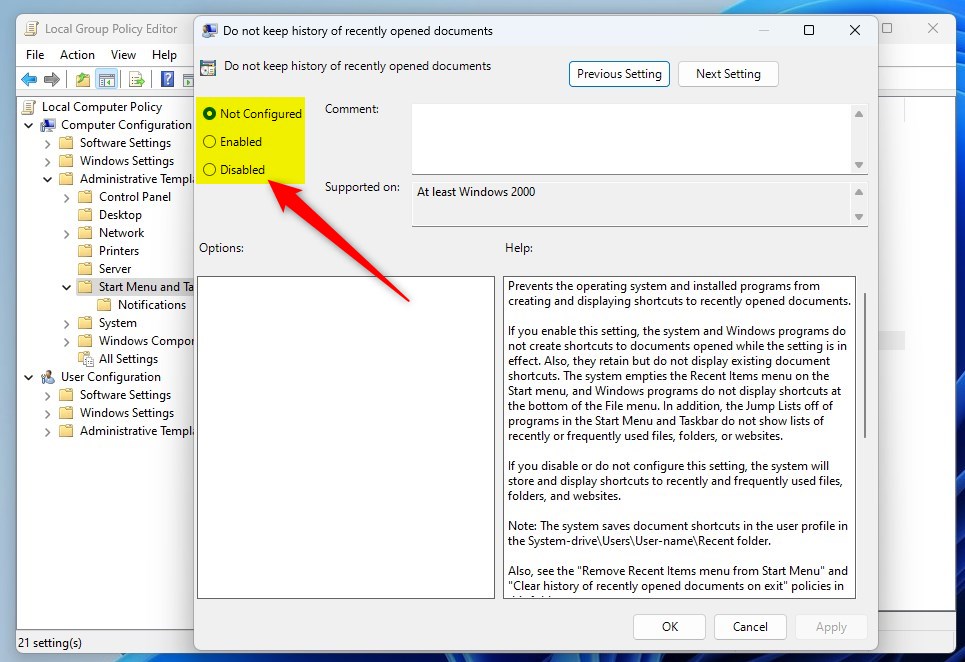
3. Find Do not keep a history of recently opened documents and double-click it. Select ‘Enabled’ to hide your history, ‘Disabled’ to show it, or ‘Not Configured’ to stick with Windows’ default settings.
Summary
Windows 11 tracks your activity to help you work faster by showing recent files in places like Jump Lists and the Recommended section. You can easily turn this feature on or off using Settings, Registry Editor, or Group Policy.
How do I clear my recent file history in 🪟 Windows 11?
To clear your recent file history, go to Settings > Privacy & security, then select Activity history. Click the ‘Clear’ button next to ‘Clear activity history’. This will remove the list of files and folders you’ve recently opened, resetting your recent items view in the Start menu and File Explorer.
What is the difference between Quick Access and Recent Files?
Quick Access is a list of folders you pin to File Explorer to keep them handy, no matter how often you use them. Recent Files, on the other hand, is a dynamic list that Windows automatically updates with the files you’ve opened most recently on your computer.
Was this guide helpful?

About the Author
Richard
Tech Writer, IT Professional
Richard, a writer for Geek Rewind, is a tech enthusiast who loves breaking down complex IT topics into simple, easy-to-understand ideas. With years of hands-on experience in system administration and enterprise IT operations, he’s developed a knack for offering practical tips and solutions. Richard aims to make technology more accessible and actionable. He's deeply committed to the Geek Rewind community, always ready to answer questions and engage in discussions.


[…] The Start menu in Windows 11 has three sections: Pinned, All apps, and Recommended – which contains a list of recently added apps and opened items. […]