Set Up File History on Windows 11: A Complete Guide

This article describes the steps to set up File History in Windows 11.
Open Settings, go to System, then Storage, and select File History. Choose a drive to back up to and turn on File History. You can then select additional folders to include in your backups.
When you enable or turn on File History in Windows, it will automatically back up your Folders (Documents, Music, Pictures, Videos, and Desktop) within your Windows profile (C:Users<Username>).
Your OneDrive offline folders will also be included with File History backups.
File History uses journaling, an NTFS feature that keeps track of file changes on the system’s drives. Whenever a change is made on the system’s drives, the file journal is updated, determining which files and folders must be backed up.
Using this information, File History knows which files and folders to back up to the destination specified during the setup process.
Before you can use File History, you must first determine the destination. File History supports externally connected drives, such as a USB drive, or you can save to a drive on a network.
Below is how to set up File History on Windows 11
How to set up File History on 🪟 Windows 11 to back up your files to USB or network
As described above, When you enable or turn on File History in Windows, it will automatically back up your Folders (Documents, Music, Pictures, Videos, and Desktop) within your Windows profile (C:Users<Username>).
Below is how to set up File History on Windows 11.
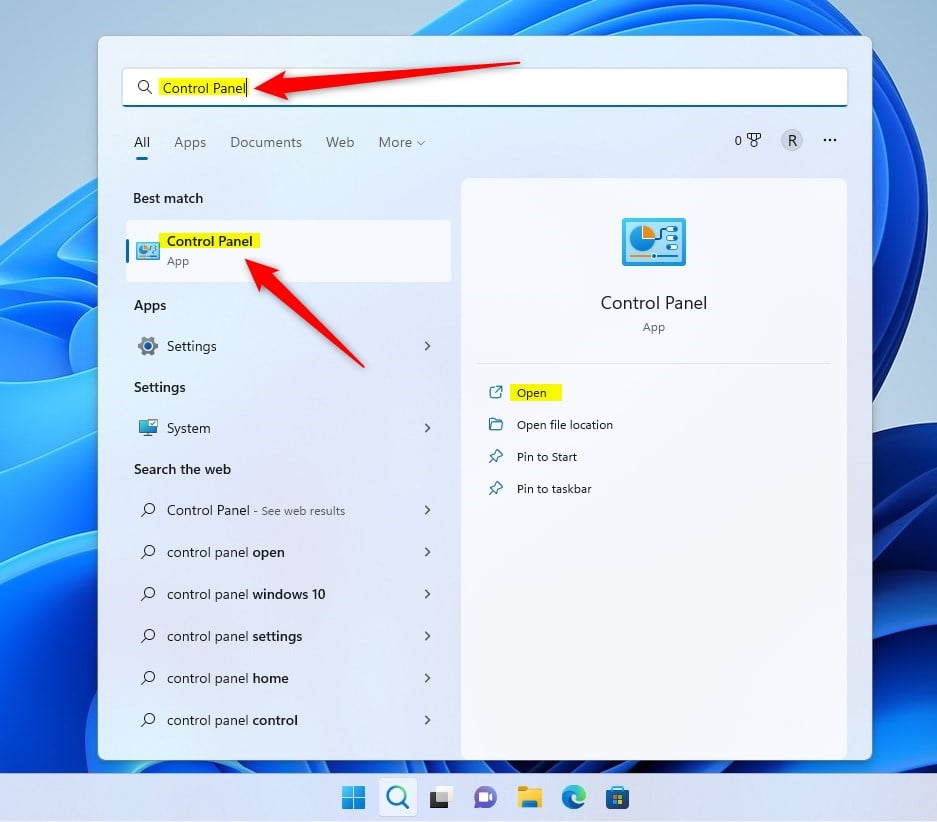
First, open the Control Panel app.
You can do that by clicking on the Start menu button and searching for “Control Panel.” Then, under Best match, select the Control Panel app.
Within the Control Panel app, navigate to the path System and Security -> File History.
Control PanelSystem and SecurityFile History
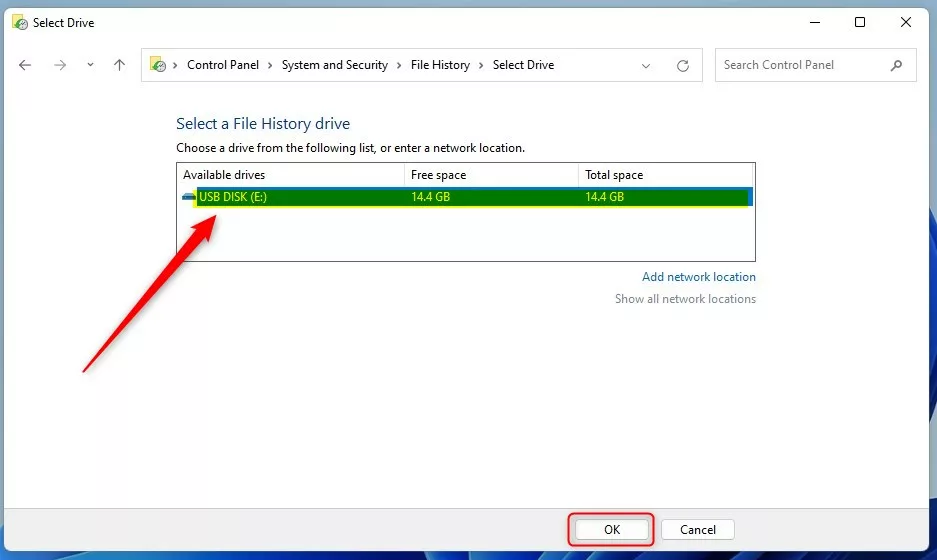
You must have an external USB or network drive to use File History. If none are available, File History will not be enabled.
On the Control Panel -> System and Security -> File History settings page, click the “Select drive link” on the left.

Select the external drive, add a network location you want to use, and click OK.
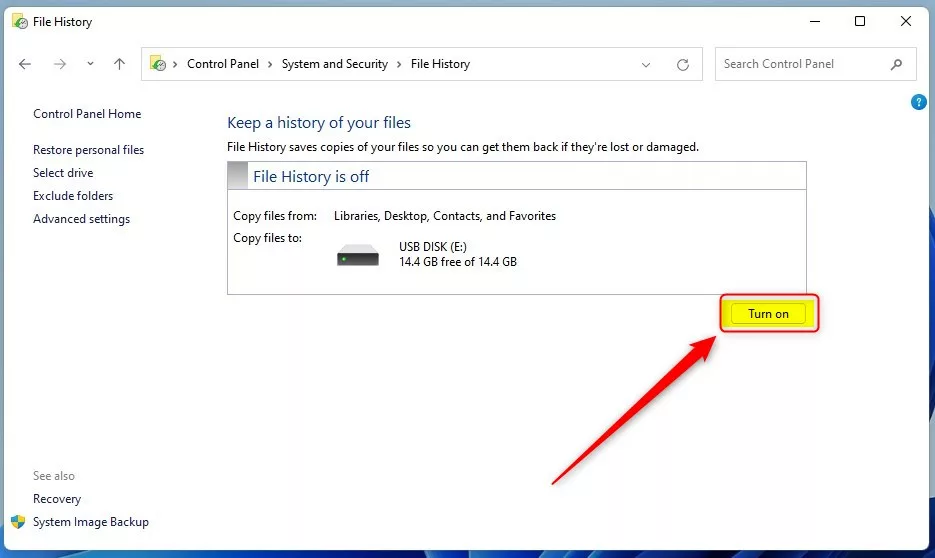
After selecting the drive or location, you will be taken back to the previous window. On there, click the Turn on button to enable File History.
As mentioned above, only files in your profile are automatically backed up. Click the Exclude folder link on the left to add or remove folders from File History.
ex: C:Users<Username>
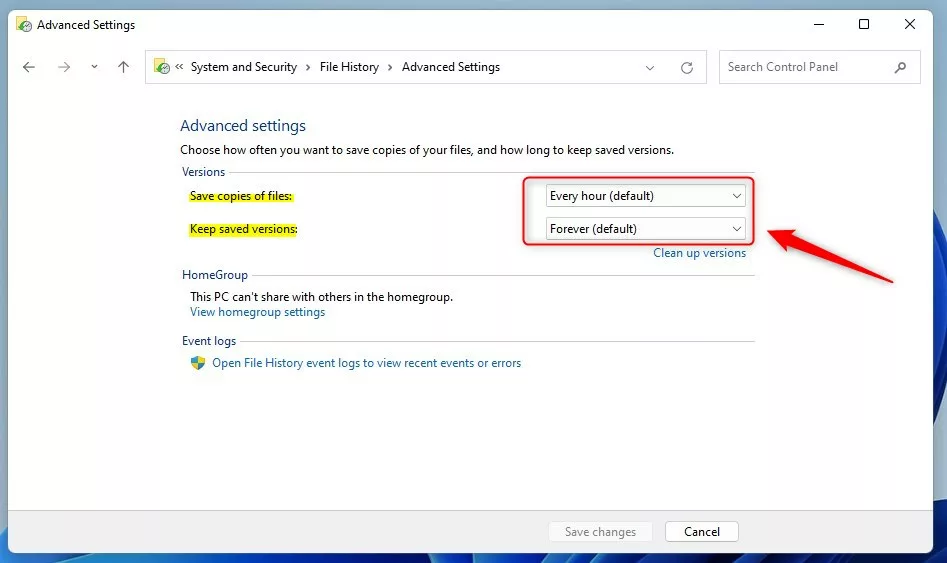
On the Control Panel -> System and Security -> File History -> Advanced Settings page, you can choose how often you want to back up file and folder changes and how long to keep them.
Once all is done, click on the Run now link to begin backing up your files immediately.
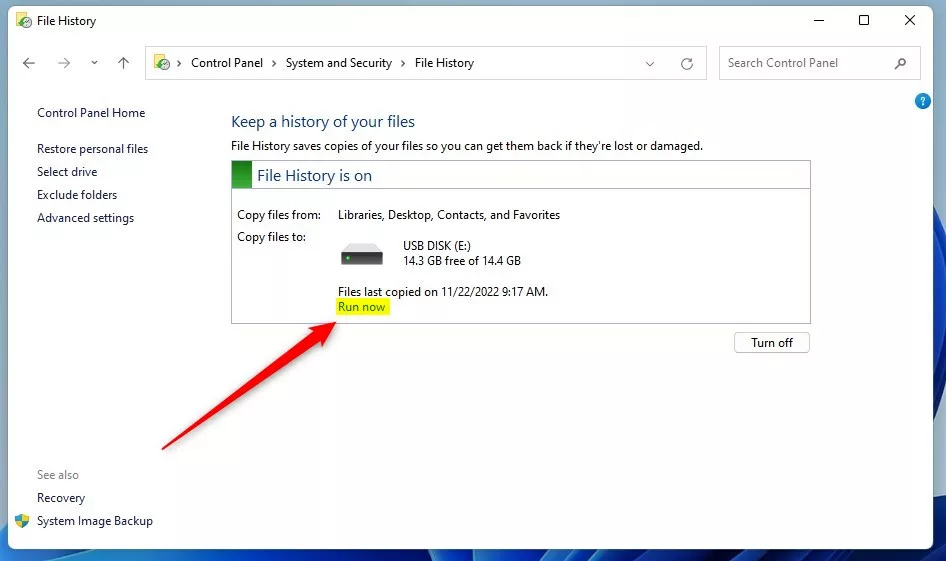
File History will stop and not run if the external drive is removed. When you reinsert the drive, File History will back up all the files and folders that were changed since the last successful backup.
That should do it!
Conclusion:
- Enabling File History on Windows 11 automatically backup key folders within your Windows profile, including Documents, Music, Pictures, Videos, Desktop, and OneDrive offline folders.
- File History uses journaling to track file changes on the system’s drives and determine which files and folders to back up to the specified destination.
- To set up File History on Windows 11, you’ll need to select an external USB drive or network location within the Control Panel’s System and Security settings and configure the backup frequency and retention settings on the Advanced Settings page.
- Once configured, File History will automatically back up your files based on the chosen settings, providing an easy and reliable way to safeguard your important data on Windows 11.
Was this guide helpful?

About the Author
Richard
Tech Writer, IT Professional
Richard, a writer for Geek Rewind, is a tech enthusiast who loves breaking down complex IT topics into simple, easy-to-understand ideas. With years of hands-on experience in system administration and enterprise IT operations, he’s developed a knack for offering practical tips and solutions. Richard aims to make technology more accessible and actionable. He's deeply committed to the Geek Rewind community, always ready to answer questions and engage in discussions.

[…] File History is a built-in tool that saves copies of your files. It backs up your home folder, including your Documents, Music, Pictures, Videos, and Desktop. These files are stored in your profile folder at C:UsersUsername. […]