How to Reset File History in Windows 11
Resetting File History in Windows 11 returns its settings to their default setup by deleting specific configuration files.
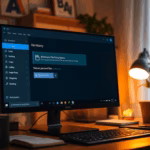
File History is a handy Windows tool that automatically saves copies of your personal files, like documents and photos, to another drive or network location. It lets you go back to older versions of files or recover things you might have accidentally lost.
These settings are located in the folder `📁C:\Users\\AppData\Local\Microsoft\Windows\FileHistory`. Deleting the files inside this folder removes all your saved backup preferences and past backup information.
When File History runs next, it will set itself up again with the default options. This is a good fix if File History is not working correctly, seems stuck, or shows errors.
Open Command Prompt as Administrator, stop the File History service, and delete the contents of the C:UsersGenericUserAppDataLocalMicrosoftWindowsFileHistory folder. Restart your computer to rebuild the configuration and reset File History. You will need to reconfigure your backup drive afterward.
Before You Begin
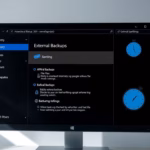
- Ensure your external backup drive is connected.
- Check that you have administrative rights on your PC.
- Verify that no other backup software is currently running.
How to Reset File History
You can reset File History in Windows 11 by clearing out its old backup folders. The Command Prompt or Terminal removes existing backup data, effectively starting File History fresh. It’s a way to fix issues if your current backups aren’t working correctly or if you want to begin a new backup set.
- Open the Command Prompt or Terminal app with Admin privileges.
- Stop the File History service by typing the following command and pressing Enter:
if exist "%UserProfile%\AppData\Local\Microsoft\Windows\FileHistory" RD /S /Q "%UserProfile%\AppData\Local\Microsoft\Windows\FileHistory"- Navigate to the Configuration folder at 📁C:\Users\GenericUser\AppData\Local\Microsoft\Windows\FileHistory and delete its contents.
- Restart your computer to allow the Windows service (fhsvc) to rebuild the configuration.
Troubleshooting Failed Resets
If the reset doesn’t work, check the permissions on your external drive. Right-click the drive, select Properties, and ensure your user account has ‘Full Control’ under the Security tab. If the service remains stuck, check the Task Manager to ensure the File History service is not hanging in the background.
Summary
Resetting File History in Windows 11 helps fix issues by clearing out old settings and returning the tool to its default state.


No comments yet — be the first to share your thoughts!