How to Restore Files with Windows 11 File History
You restore files in Windows 11 using the built-in File History feature.
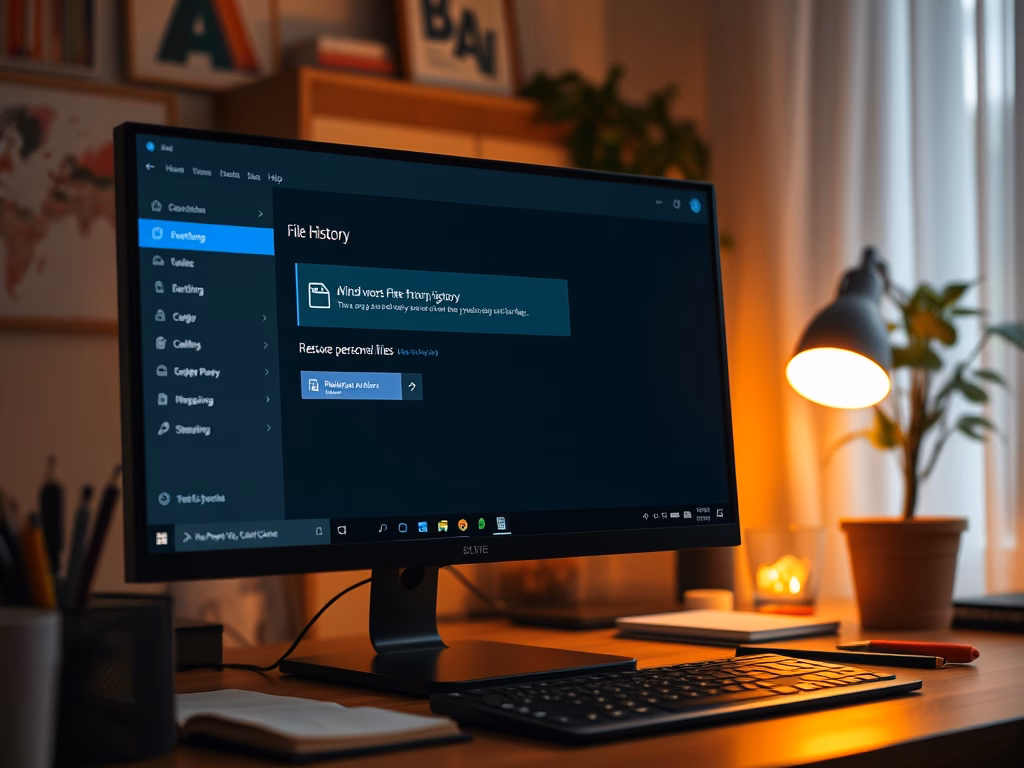
File History acts as an automatic backup tool, continuously saving copies of your important personal files to an external drive or network location. This lets you recover previous versions of documents, pictures, and other data if they become corrupted, accidentally deleted, or lost.
This feature is available in Windows 11 Home and Pro editions. You can access File History by navigating to Settings > System > Storage > Advanced storage settings > File History.
You can recover specific versions of your files from a particular date and time. File History backs up folders within your Libraries (Documents, Music, Pictures, Videos, Desktop) and any other locations you add.
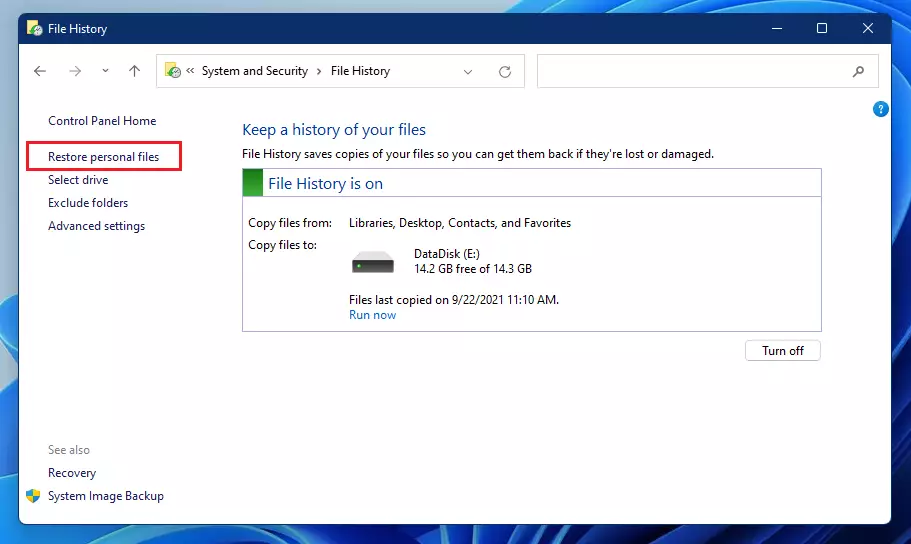
Restore personal files in Windows 11 by opening Control Panel, navigating to System and Security, then File History, and selecting Restore personal files. Browse through saved versions using the arrows and click the green Restore button to recover your files.
How to Restore Your Files
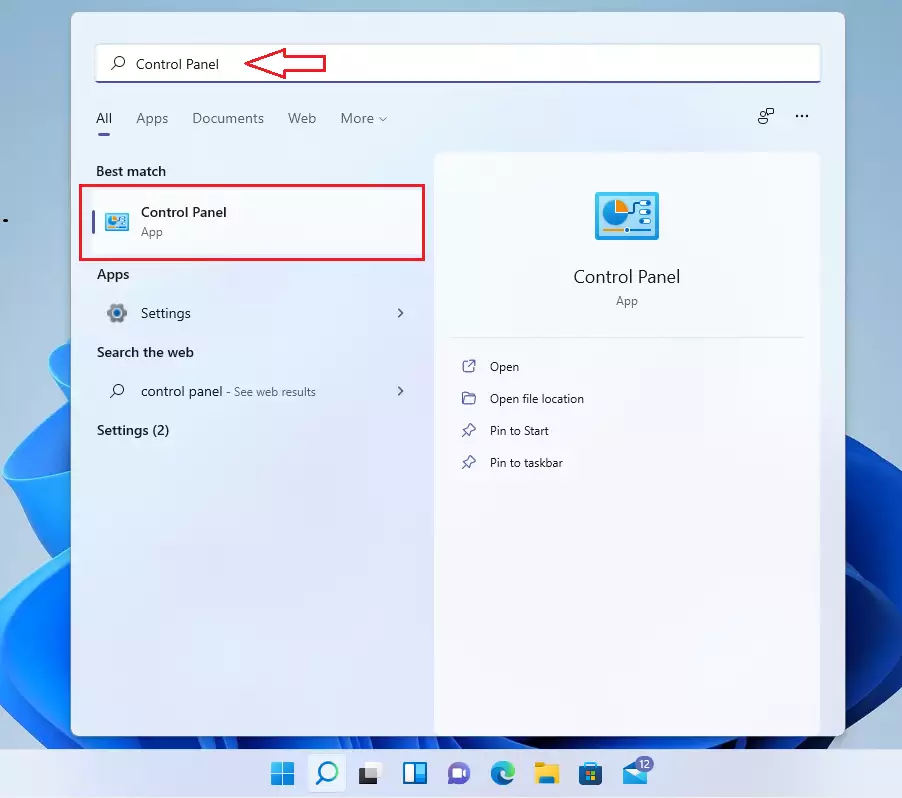
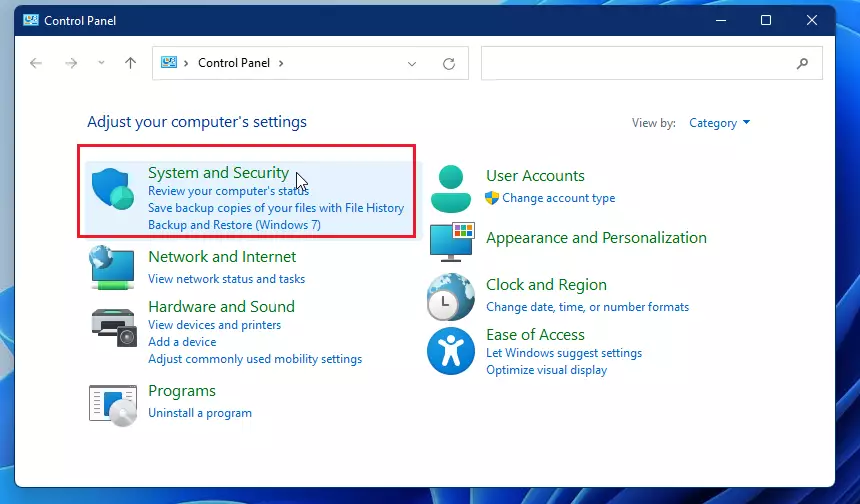
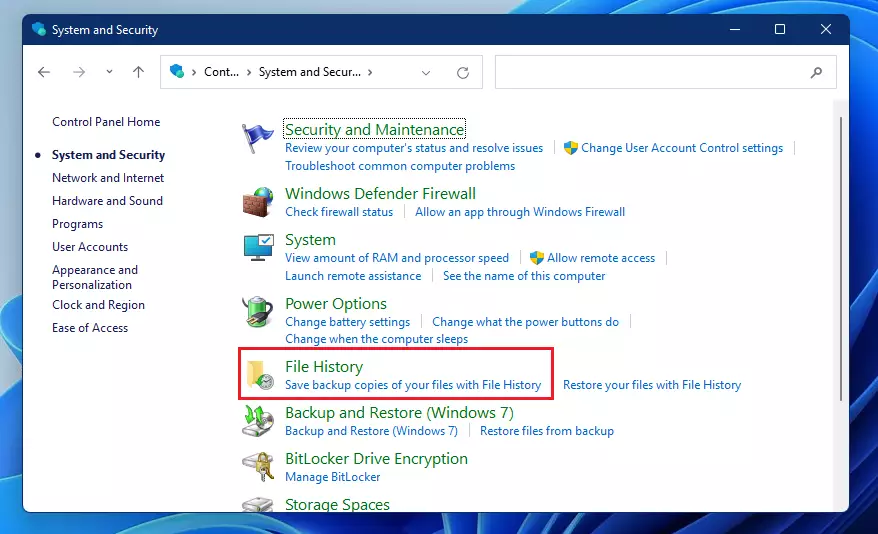
Restoring files in Windows 11 with File History is straightforward when you’ve lost documents or photos. This tool lets you quickly get back older versions of your files. To start, open the Control Panel, go to System and Security, then select File History, and finally click the Restore personal files link.
- Click the Start menu, search for Control Panel, and open it.
- Click on System and Security.
- Select File History.
- Click the link that says Restore personal files.
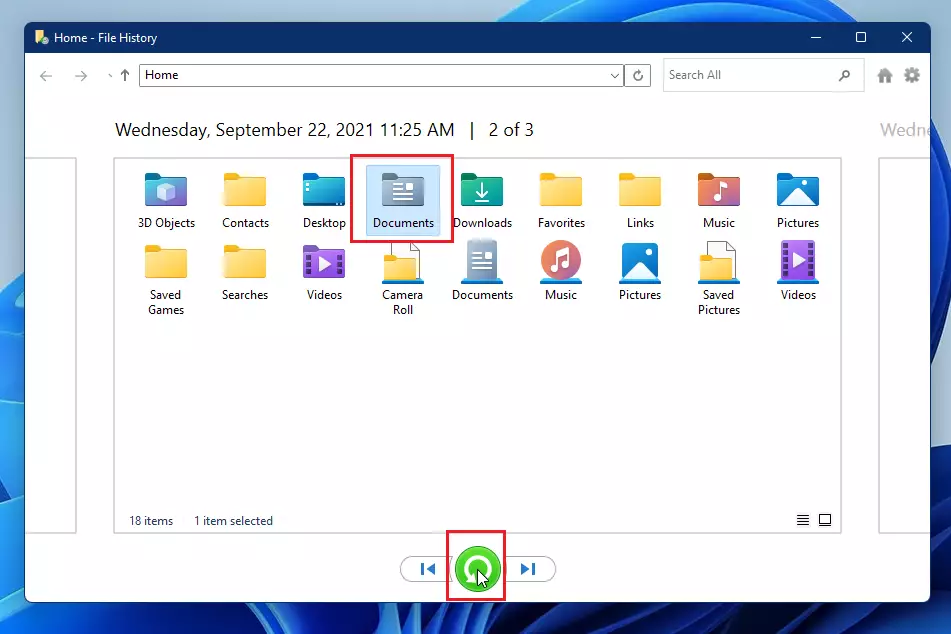
- Use the Previous or Next arrows at the bottom of the window to look through your saved versions. Find the date and time that contains the file you need.
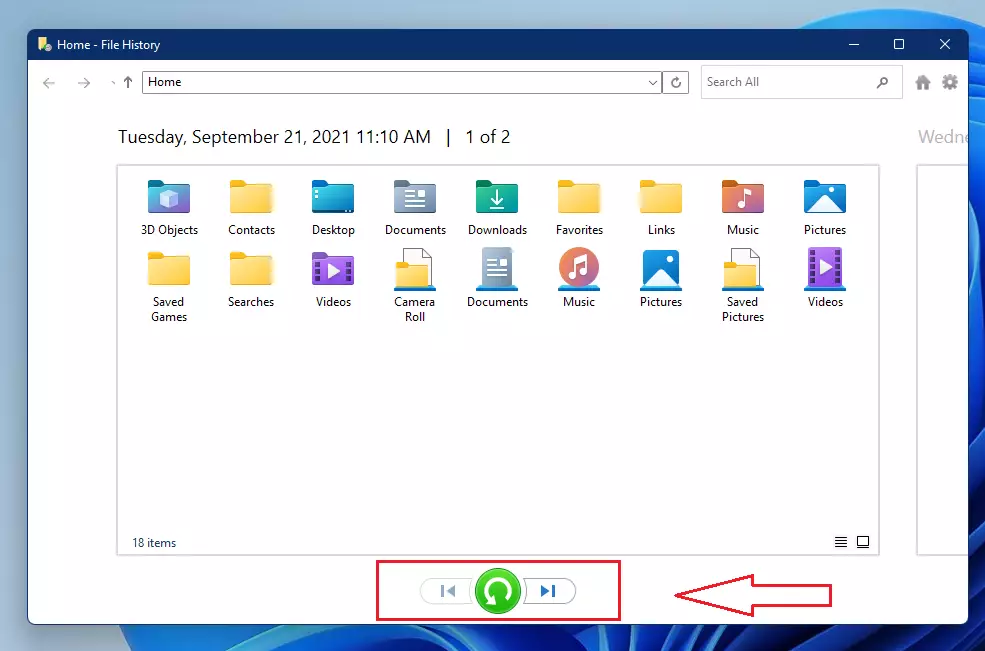
- Click the green Restore button to bring the file back to its original spot.
Handling Duplicate Files
When you restore files in Windows 11 and a copy already exists, you get simple options to manage it. You can choose to replace the current file with the backup, skip restoring that specific file, or compare the two versions to decide which one to keep.
- Replace the file: This deletes your current file and replaces it with the backup.
- Skip this file: This stops the restore process for that specific file.
- Compare info: This lets you look at the file sizes and dates to see which version is newer.
Restoring files using Windows 11 File History does not require administrative privileges when users work within their own accounts. This feature safeguards personal data by creating backup copies. File History automatically saves versions of files in libraries, on the desktop, and in the Contacts and Favorites folders.
Summary
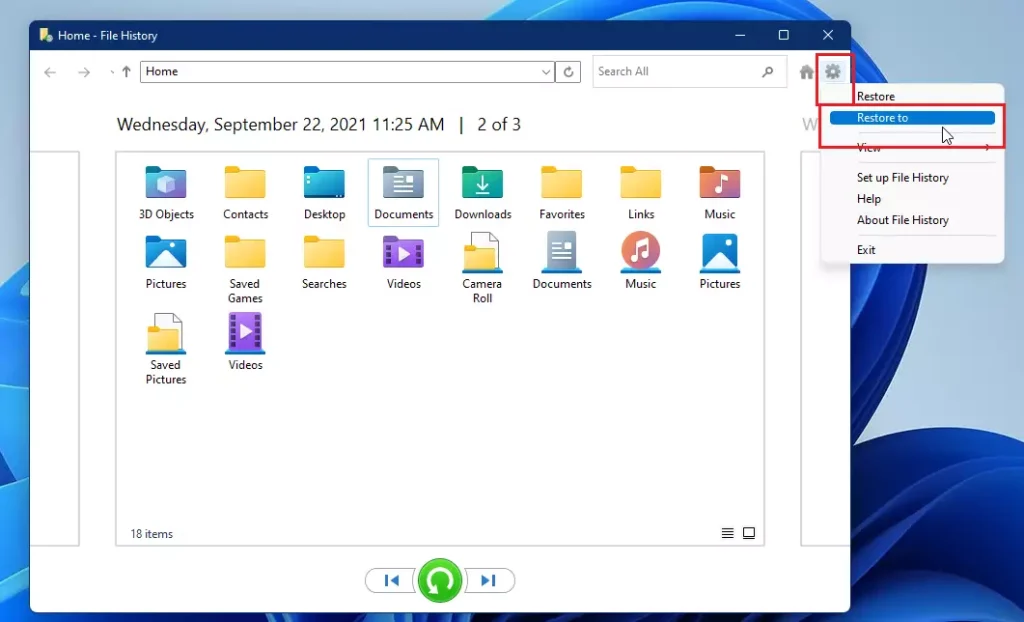
Windows 11 File History offers a simple way to recover lost or damaged documents and photos. It lets you view different versions of your files before restoring them, giving you control over what you bring back. You can choose to put files back to their original location or save them somewhere new.- File History is a simple way to recover lost or damaged documents.
- It allows you to look at different versions of your files before restoring them.
- You can choose to put files back where they were or save them in a new location.
- If a file already exists, you have options to compare or skip the restore process.
Was this guide helpful?

About the Author
Richard
Tech Writer, IT Professional
Richard, a writer for Geek Rewind, is a tech enthusiast who loves breaking down complex IT topics into simple, easy-to-understand ideas. With years of hands-on experience in system administration and enterprise IT operations, he’s developed a knack for offering practical tips and solutions. Richard aims to make technology more accessible and actionable. He's deeply committed to the Geek Rewind community, always ready to answer questions and engage in discussions.


No comments yet — be the first to share your thoughts!