How to Choose Default Apps in Windows 11
This tutorial shows you how to set default apps in Windows 11. Default apps open specific file types and links automatically when you use them.
Open Settings, go to Apps, then Default apps. Search for the app you want to set as default and click it. You can then assign its file type associations. Alternatively, right-click a file, select “Open with,” choose your app, and click “Always.
Why This Matters
A default app is the program Windows uses to open a file or link type when you double-click it. For example, your default browser opens when you click a web link.
The defaults you choose only apply to your account. Other users on your computer won’t be affected.
What Happens When Done
Setting your Windows 11 default apps tells your computer which program to use when you open a file or click a link. When you click a photo, your computer opens it in your favorite photo app. Similarly, clicking a web link launches your preferred browser. Default apps make using your computer smoother because Windows knows exactly which programs you want to use.
Reference: Change Default Apps in Windows – Microsoft Support
Windows 11 build 23419 Starting with Windows 11, Microsoft updated the “Open with” dialog box to match Windows 11’s design. The dialog now respects light and dark themes. You can now change your default app with one click.
Microsoft added a new Settings link (ms-settings:) which uses a URI scheme (Uniform Resource Identifier scheme) to help apps send you directly to the right location to change defaults.
Recent updates to Windows 11 (builds 22631.5549 and 26100.4484) include changes for setting browser defaults:
- New file and link types get set for the new default browser automatically
- The new default browser pins to the Taskbar and Start menu (unless you uncheck the boxes)
- There's now a one-click button for browsers to change your .pdf default
Windows 11 builds 26120.4162 and later show recommendations from the Microsoft Store in the "Open with" dialog. These apps have a Store icon next to them.
In the latest builds (26220.7344 and later), apps from the Microsoft Store now appear directly in the Open With dialog. You no longer need to go to the Microsoft Store separately.
Option 1Choose Default App Using the Context Menu
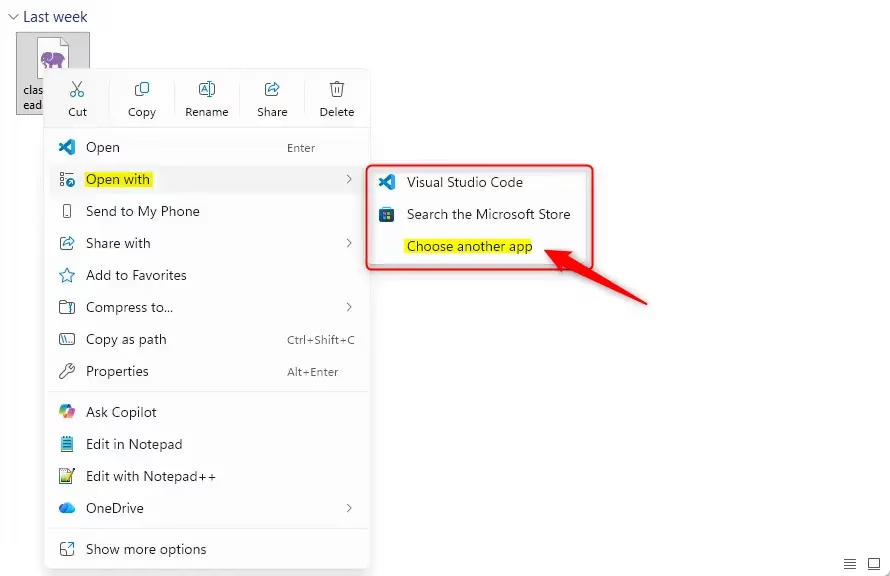
Setting a default app for a specific file in Windows 11 is possible using the right-click menu. Right-click the file, select 'Open with,' then choose the app you want to use. If the app isn't listed, select 'Choose another app' to find it, ensuring that file opens correctly every time.
- Right-click or press and hold on a single file. Click Open with.
- Choose one of these options:
- If no default app exists, only Open with appears in the menu.
- Click an app (like Notepad) to open the file "Just once" with that app. Go to step 4.
- Click Choose another app and go to step 3.
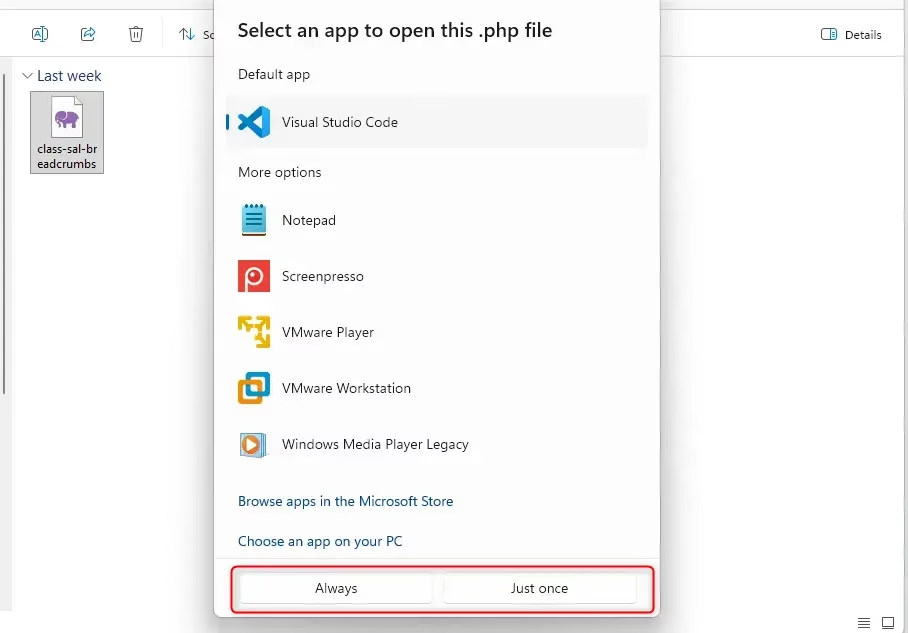
- Choose an app using one of these methods:
- If this file type already has a default app, you'll see it listed under Default app.
- Select a listed app and click Always (to set as default) or Just once (to use once only).
- Click Browse apps in the Microsoft Store to find and install an app. Return to step 1 to select the new app.
- Click Choose an app on your PC. Browse for an app file (.exe, .pif, .com, .bat, or .cmd). Click Open, then click Always or Just once.
- The file now opens with the app you selected.
Option 2Choose Default App Using File Properties
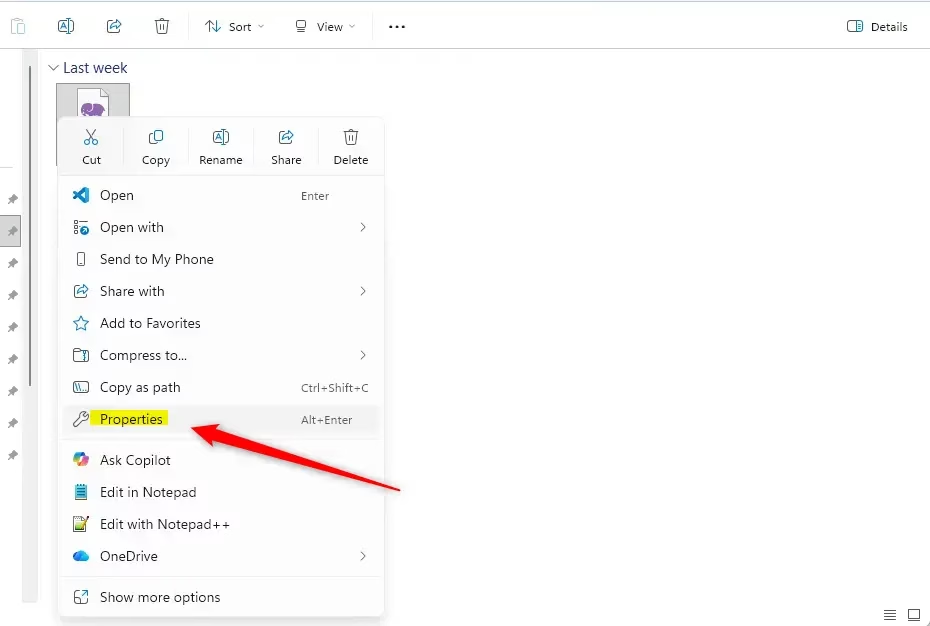
Changing the default app for a specific file type, like all your .pdf documents, is also possible through the file's Properties. Right-click on any file of that type, choose 'Properties,' and then you'll see an option to change which app opens it. This lets you pick your preferred program, ensuring files open the way you like.
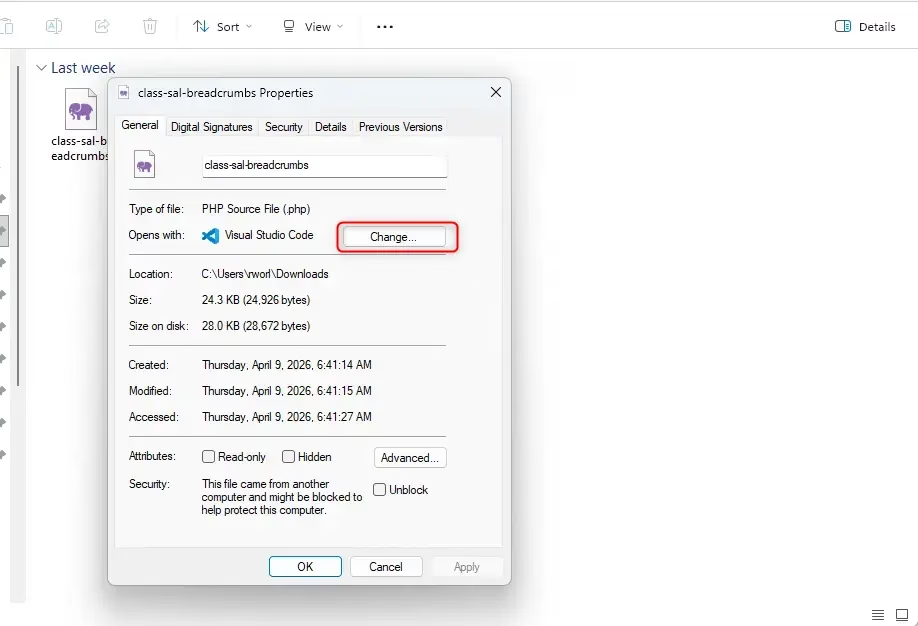
- Right-click or press and hold on a single file. Click Properties.
- In the General tab, click the Change button next to Opens with. If this file type has a default app, you'll see it listed next to Opens with.
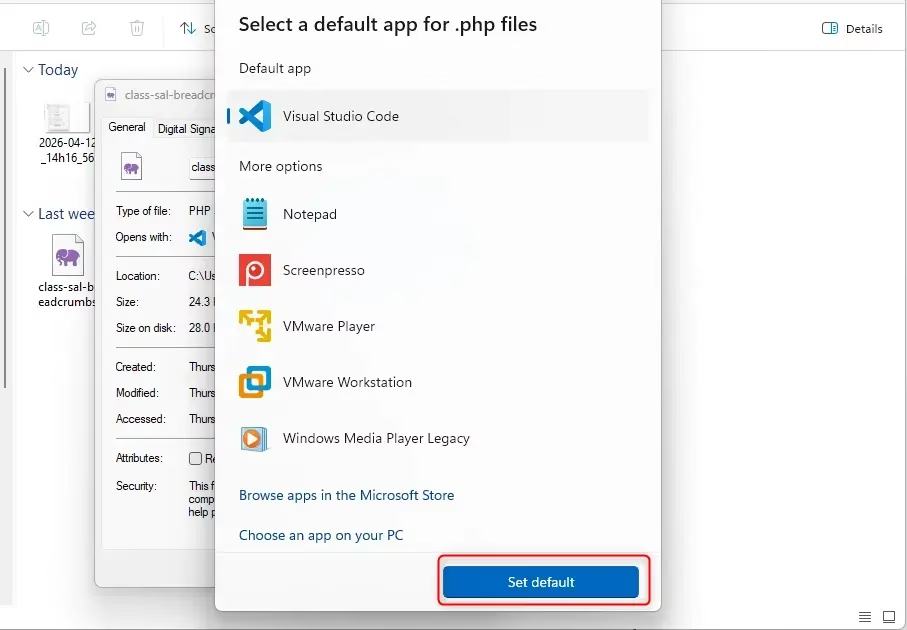
- Choose an app using one of these methods:
- If a default app already exists, you'll see it listed under Default app.
- Select a listed app and click Set default to set it as the default app.
- Click Browse apps in the Microsoft Store to find and install an app from the Microsoft Store. Return to step 2 to select the new app.
- Click Choose an app on your PC. Browse for an app file (.exe, .pif, .com, .bat, or .cmd). Click Open, then click Set default.
Option 3Choose Defaults by App in Settings
You can set default apps for specific programs in Windows 11 using the Settings app. Open Settings, click 'Apps,' and select 'Default apps.' Find your desired app, such as your preferred photo editor, and view all the file and link types that photo editor handles. You can then set that photo editor as the default for those specific types.
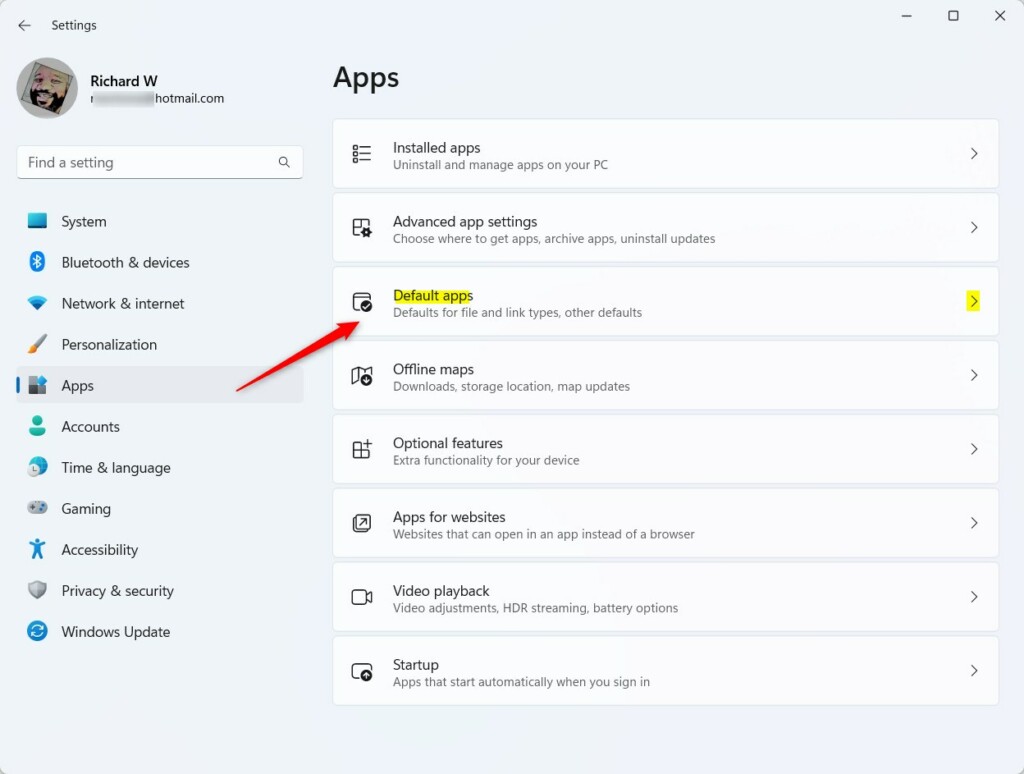
- Open Settings (press Win+I). Settings
- Click Apps on the left, then click Default apps on the right. Open Default apps settings
- Search or scroll for the app (like Notepad) you want to set defaults for. Click it.
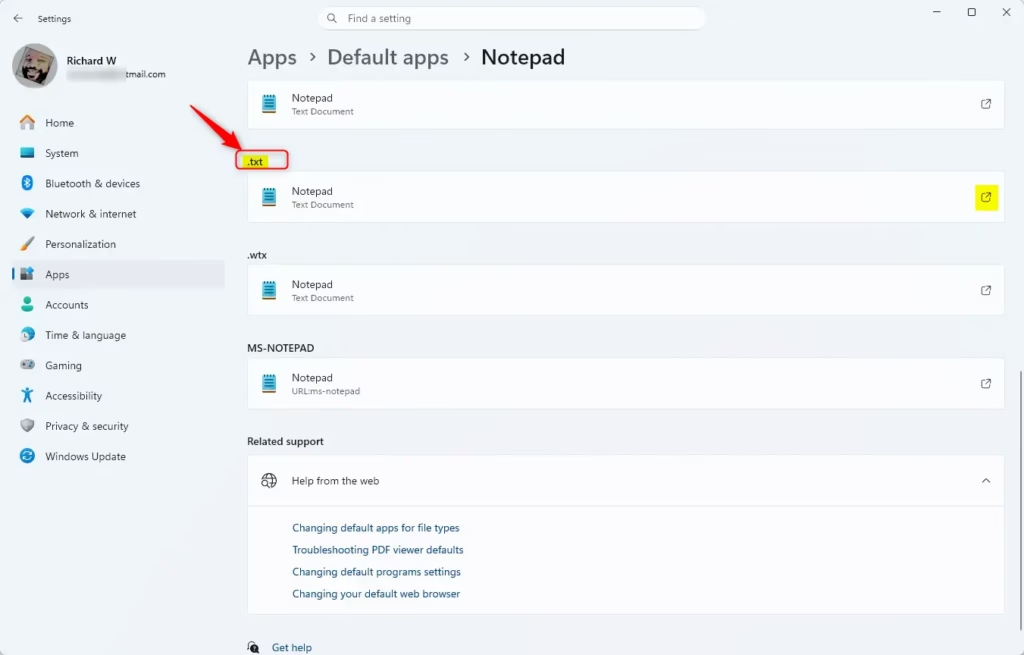
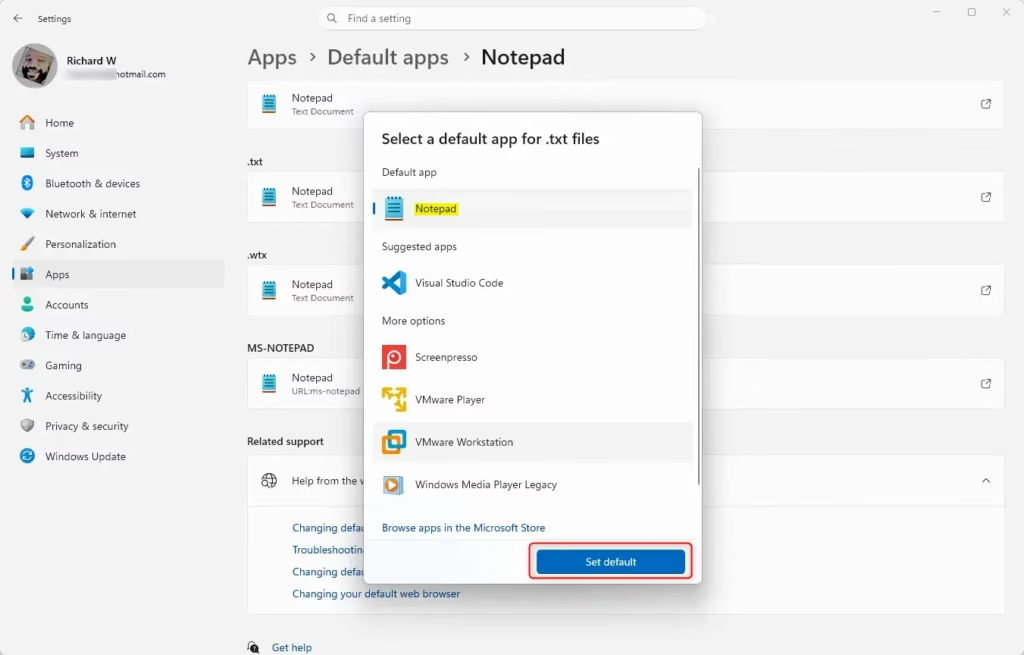
- Click the file or link type (like .txt) you want to set a default app for. The current default app for that type shows below the file type.
- Choose an app using one of these methods:
- If a default app already exists, you'll see it listed under Default app.
- Select a listed app and click Set default.
- Click Browse apps in the Microsoft Store to find and install an app. Return to step 2 to select the new app.
- Click Choose an app on your PC. Browse for an app file (.exe, .pif, .com, .bat, or .cmd). Click Open, then click Set default.
- Close Settings when finished.
Option 4Choose Defaults by File Type in Settings
To change the default app for a specific kind of file, such as all .txt documents or .jpg images, in Windows 11, use the 'Choose defaults by file type' option in Settings. After opening Settings and going to 'Default apps,' you can find this option at the bottom. This lets you pick which program opens every file with a certain extension.
- Open Settings (press Win+I).
- Click Apps on the left, then click Default apps on the right. Open Default apps settings
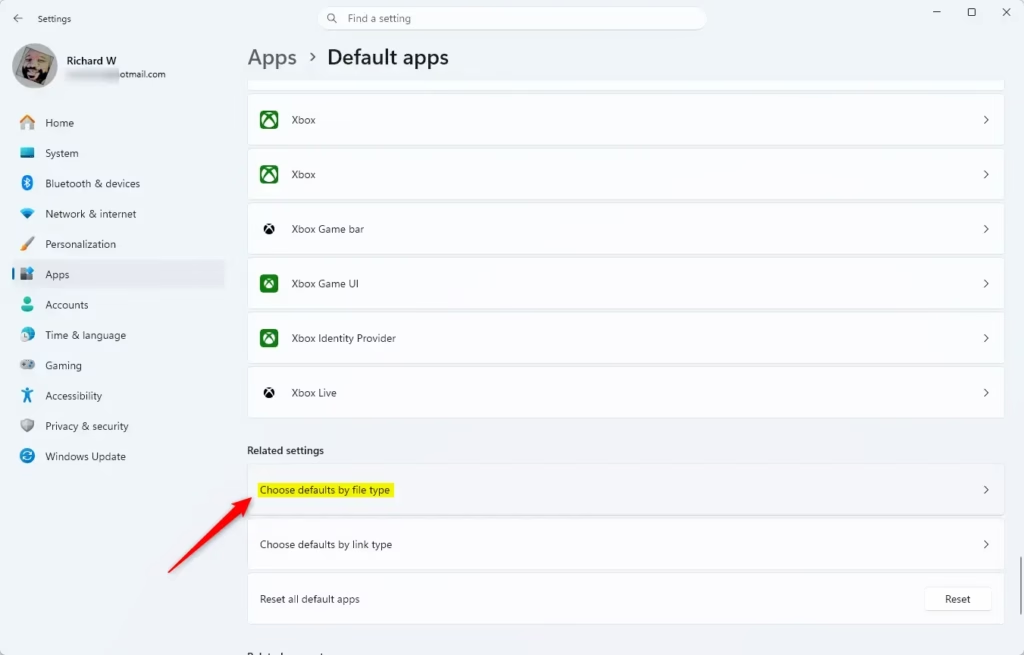
- Click Choose defaults by file type at the bottom of the right side.
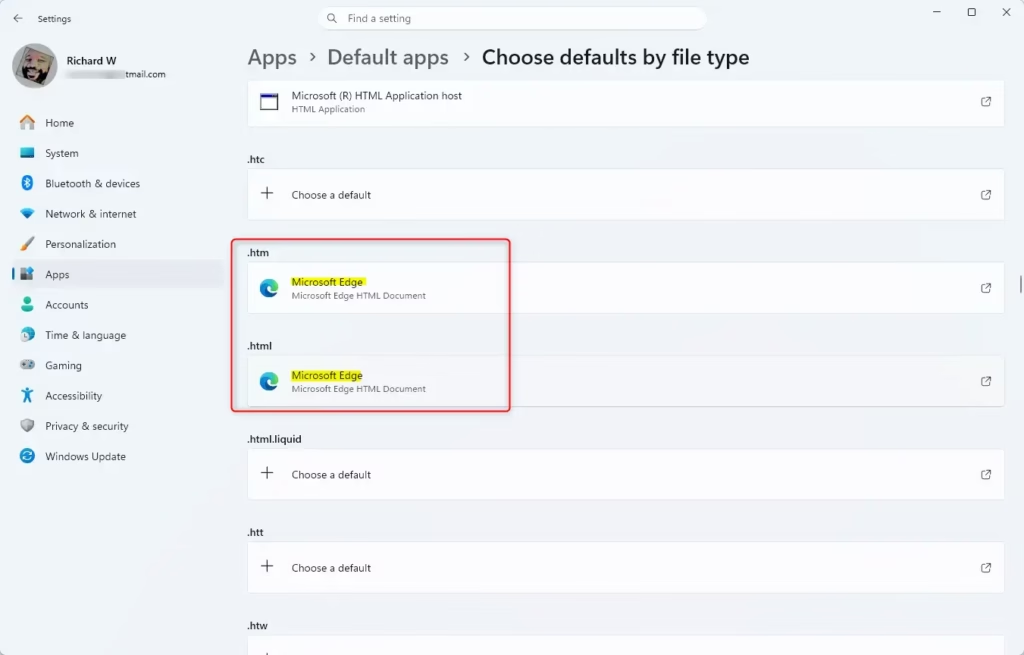
- Search or scroll for a file type (like .txt).
- Choose an app using one of these methods:
- If a default app already exists, you'll see it listed under Default app.
- Select a listed app and click Set default.
- Click Browse apps in the Microsoft Store to find and install an app. Return to step 4 to select the new app.
- Click Choose an app on your PC. Browse for an app file (.exe, .pif, .com, .bat, or .cmd). Click Open, then click Set default.
- Close Settings when finished.
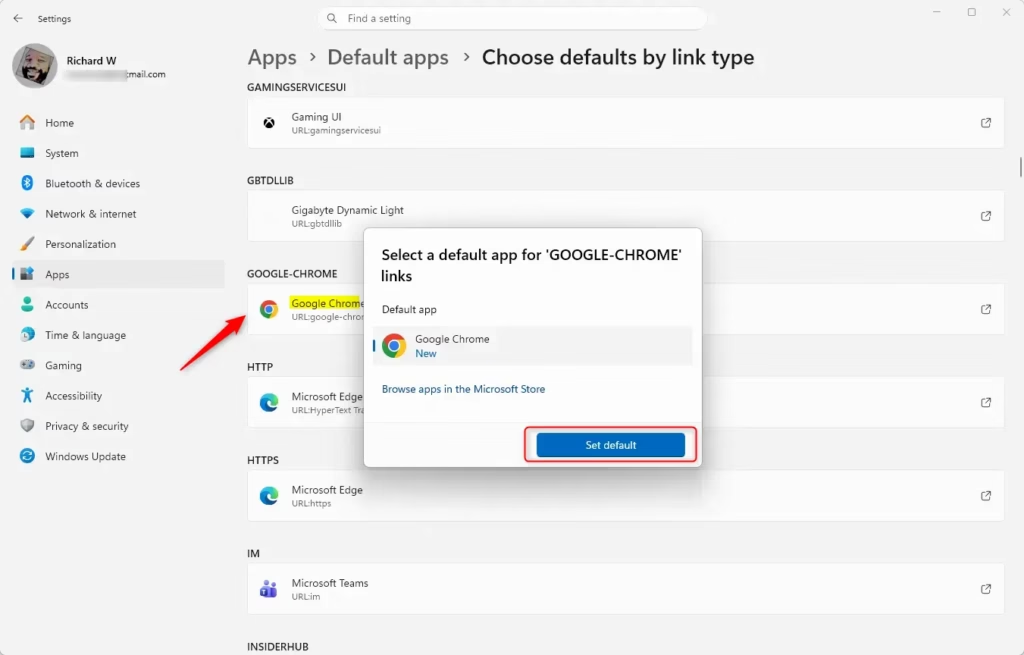
Option 5Choose Defaults by Link Type in Settings
You can choose which app opens specific kinds of links, like email links (MAILTO) or web links, in Windows 11 by going to the 'Default apps' settings. After opening Settings and navigating to 'Default apps,' look for the 'Choose defaults by link type' option. This lets you ensure that clicking on an email address opens your preferred email client, for example.- Open Settings (press Win+I). Settings
- Click Apps on the left, then click Default apps on the right. Open Default apps settings
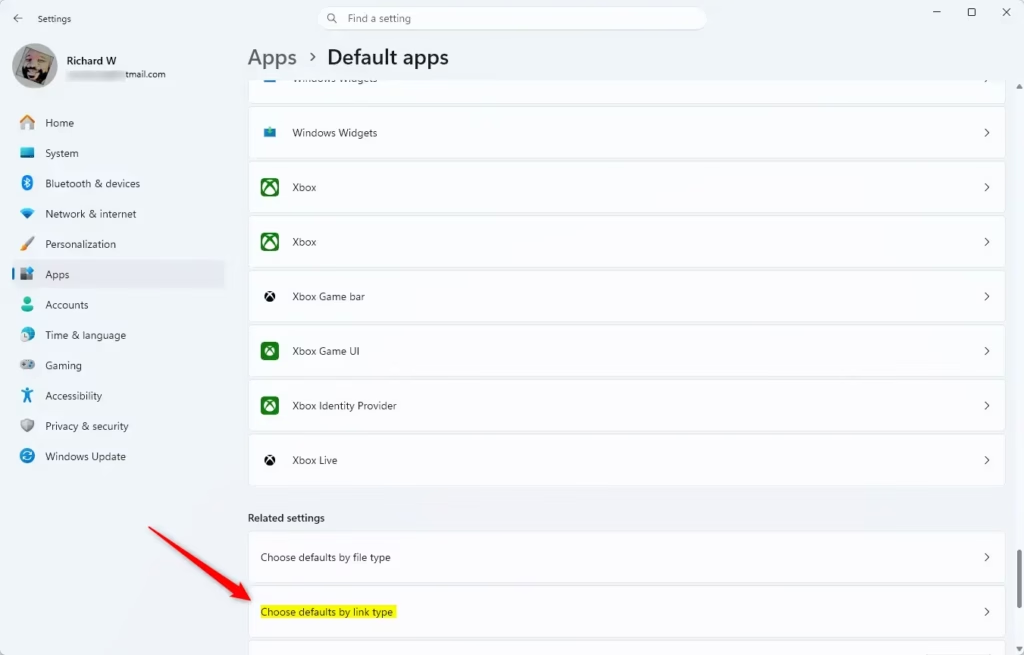
- Click Choose defaults by link type towards the bottom of the right side.
- Search or scroll for a link type (for example: "MAILTO") you want to choose defaults for, and click on the link type (for example: "MAILTO"). The current default app (for example: "Mail") for a link type will show under the link type.
- Perform one of the following actions to select an app:
- If this link type has a default app currently assigned to it, the default app (for example: "Notepad") will show under Default app.
- Select a listed app to open the file with, and click Set default to open with and set as default app.
- Click Browse apps in the Microsoft Store to select, download, and install an app from the Microsoft Store. You will need to go back to step 2 to select the new app from the Microsoft Store.
- When finished, you can close Settings if you like.
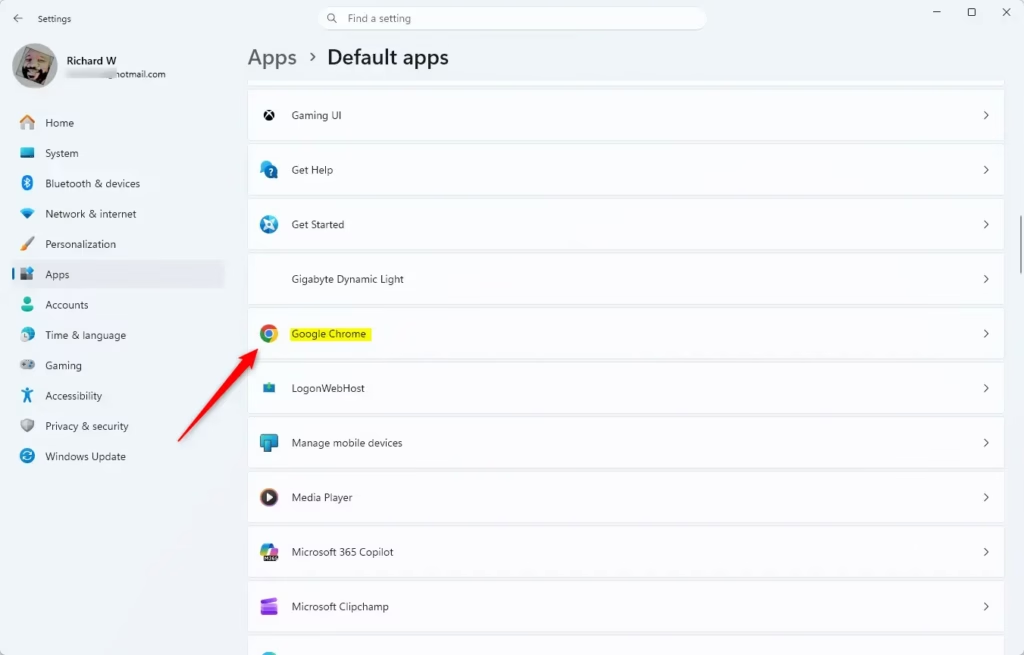
Option 6Choose Default Web Browser in Settings
Setting your preferred web browser as the default in Windows 11 is possible in the 'Default apps' settings. After opening Settings and clicking 'Apps,' then 'Default apps,' you can find your browser listed. Clicking on it allows you to change the default for web browsing, ensuring all web links open in the browser you want.
- Open Settings (press Win+I). Settings
- Click Apps on the left, then click Default apps on the right. Open Default apps settings
- Click on the web browser (for example: "Google Chrome", "Mozilla Firefox", "Microsoft Edge", etc.) you want to set as the default web browser.
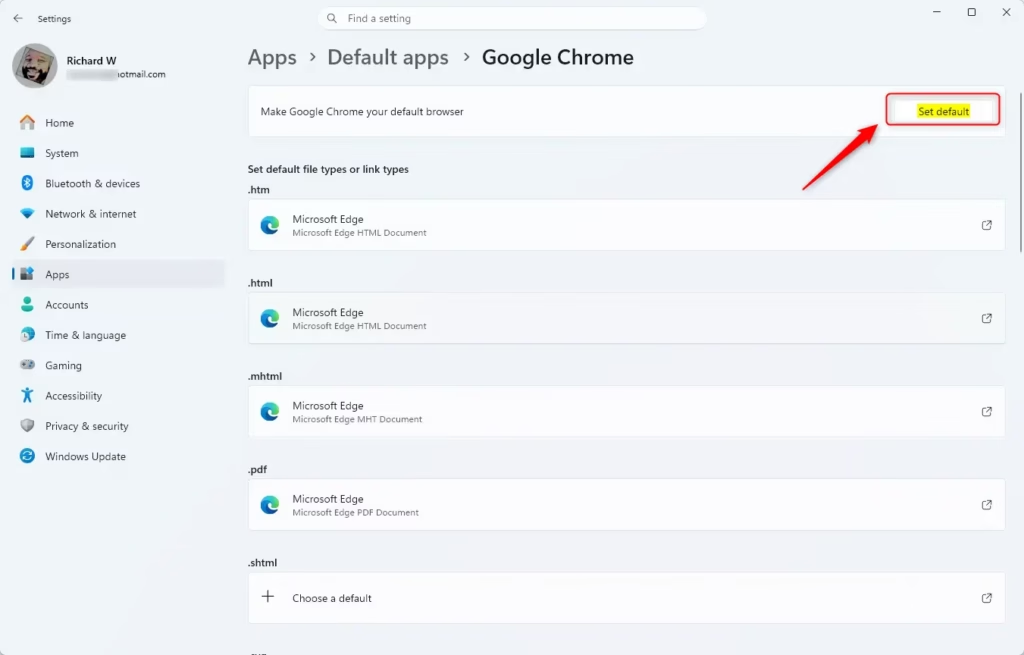
- Click the Set default button at the top. You will see a check mark indicating it has been set as the default web browser for your account.
- You can now close Settings if you like.
Summary
Windows 11 offers multiple ways to pick which apps open your files and links, whether you want to change just one or manage all your defaults at once.
What are the default 🪟 Windows 11 apps?
Default Windows 11 apps are the pre-selected programs the operating system uses to open specific file types or web links automatically. Examples include Microsoft Edge for web browsing, Photos for image viewing, or Notepad for text files. You can customize these selections to ensure your preferred software handles specific tasks.
What does "default apps" mean in settings?
In Windows 11 settings, 'default apps' refers to the list where you tell your computer which program should automatically open certain types of files or links.
How do I change the default app that opens a file?
To change the default app for a file, right-click it, pick 'Open with,' then select 'Choose another app,' and make sure to check the box that says 'Always use this app.'
How to see default apps in Windows?
You can see your current default apps in Windows by opening the Settings menu (press Win + I) and going to Apps, then clicking on Default apps.
Was this guide helpful?

About the Author
Richard
Tech Writer, IT Professional
Richard, a writer for Geek Rewind, is a tech enthusiast who loves breaking down complex IT topics into simple, easy-to-understand ideas. With years of hands-on experience in system administration and enterprise IT operations, he’s developed a knack for offering practical tips and solutions. Richard aims to make technology more accessible and actionable. He's deeply committed to the Geek Rewind community, always ready to answer questions and engage in discussions.


[…] How to Choose Default Apps in Windows 11 […]