How to Lock Windows 11 Proxy Settings for Security


Locking proxy settings in Windows 11 stops other people from changing how your internet connection works on shared computers and family PCs. A proxy server is a middleman computer that handles your web traffic. If someone points your PC at the wrong proxy, or turns off one you rely on, your traffic can be redirected, filtered or exposed. Locking the settings closes that gap.
This guide shows two methods. The Local Group Policy Editor is a built-in tool in Windows 11 Pro, Enterprise and Education. The Registry Editor works on every edition, Home included. Either one takes only a few steps, and you can undo both.
Lock Windows 11 proxy settings by enabling “Prevent changing proxy settings” in the Local Group Policy Editor or by creating a Proxy DWORD value in the Registry Editor. These actions prevent unauthorized modifications to your internet connection.
Why Lock Proxy Settings?
When proxy settings are locked, nobody can change how your computer connects to the web from the Settings app. That includes other users on the PC and anyone who sits down at it while you are away. Apps that try to change the setting through the normal Windows controls are blocked too.
What Happens When Done?
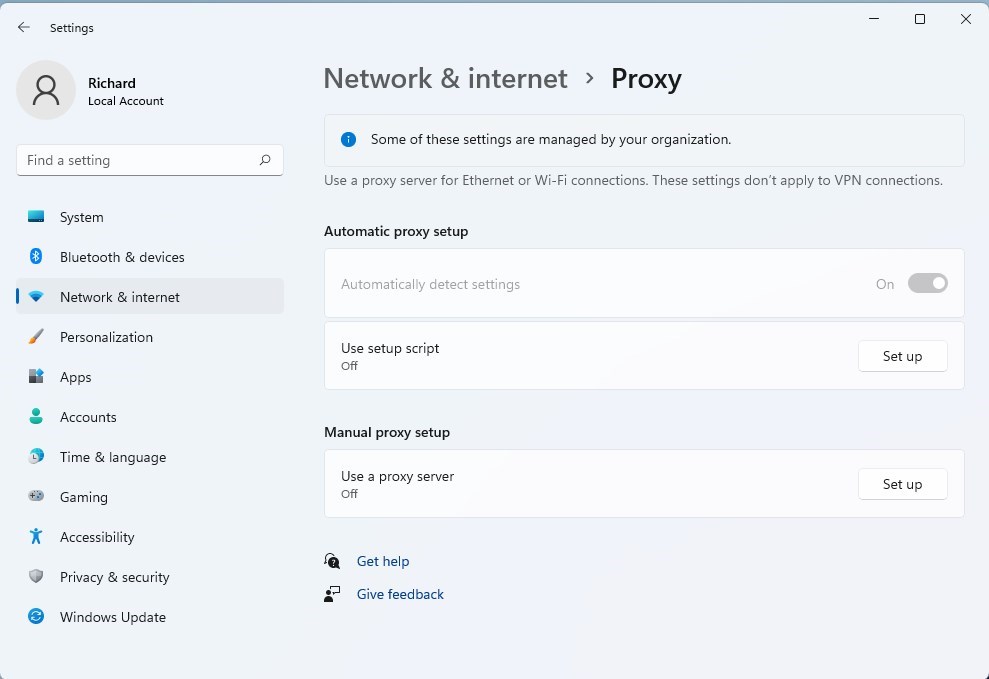
Once the lock is applied, the proxy settings in the Windows Settings app appear greyed out. People can still open the page and look at it, but they can’t turn the proxy on or off or edit the configuration. Network administrators use this restriction to enforce the same connection policy across many devices.
If the settings are still editable after you apply the lock, sign out and back in, or restart the PC, and check again.
Before You Begin
Check your edition before you start. The Group Policy method needs Windows 11 Pro, Enterprise or Education. Windows 11 Home does not include the Local Group Policy Editor, so the search in the next section finds nothing. To see which edition you have, go to Settings System About and look under Windows specifications. On Home, skip to the Registry method further down. You also need to be signed in with an administrator account for either method.
Locking Proxy Settings via Group Policy
With Group Policy, you open the Local Group Policy Editor from the Start menu, go to the network settings folder and enable one restriction policy. This stops other users and apps from changing your network connection details on Windows 11 Pro, Enterprise or Education. The steps below go through it one at a time.
Start by opening the Local Group Policy Editor:
- Click the Start button.
- Type "Edit group policy" in the search box.
- Select Edit group policy from the results. The Local Group Policy Editor opens, with a folder tree on the left.
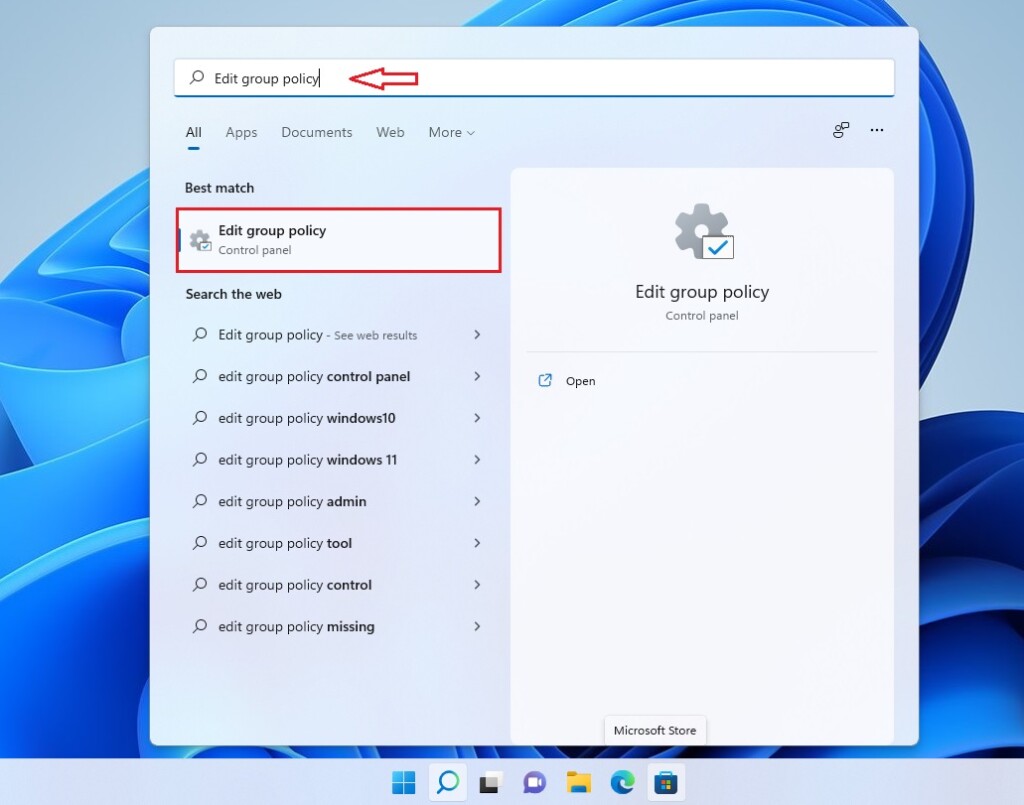
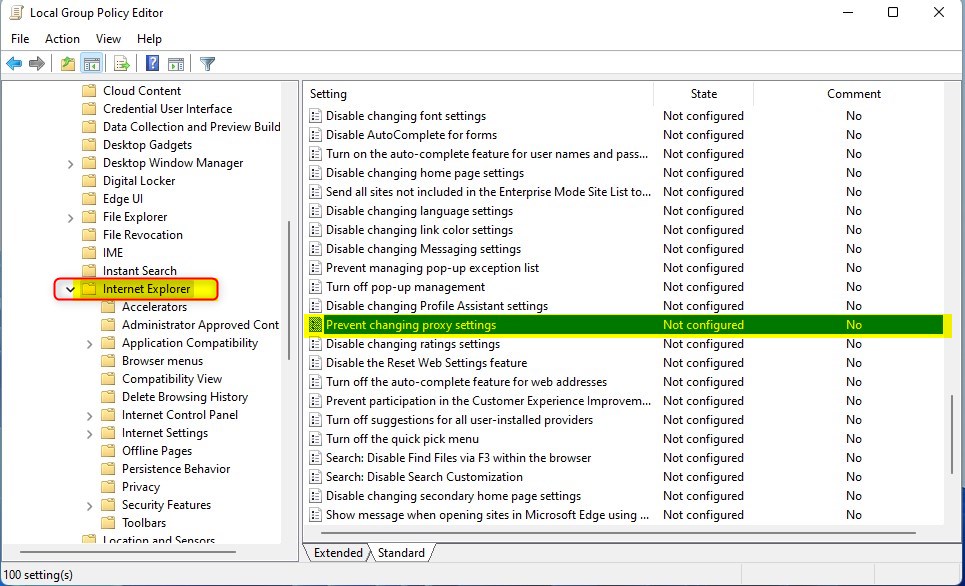
In the window that opens, expand the folders in the left pane and follow this path:
User Configuration Administrative Templates Windows Components Internet Explorer
Click the last folder in that path. The right pane now lists the policies stored there. Find the setting named Prevent changing proxy settings and double-click it to open its configuration options. The list is long, so click the Setting column header to sort it alphabetically and find the entry faster.
In the new window, select the Enabled option at the top left. The window title shows the name of the policy, so you can confirm you opened the right one.
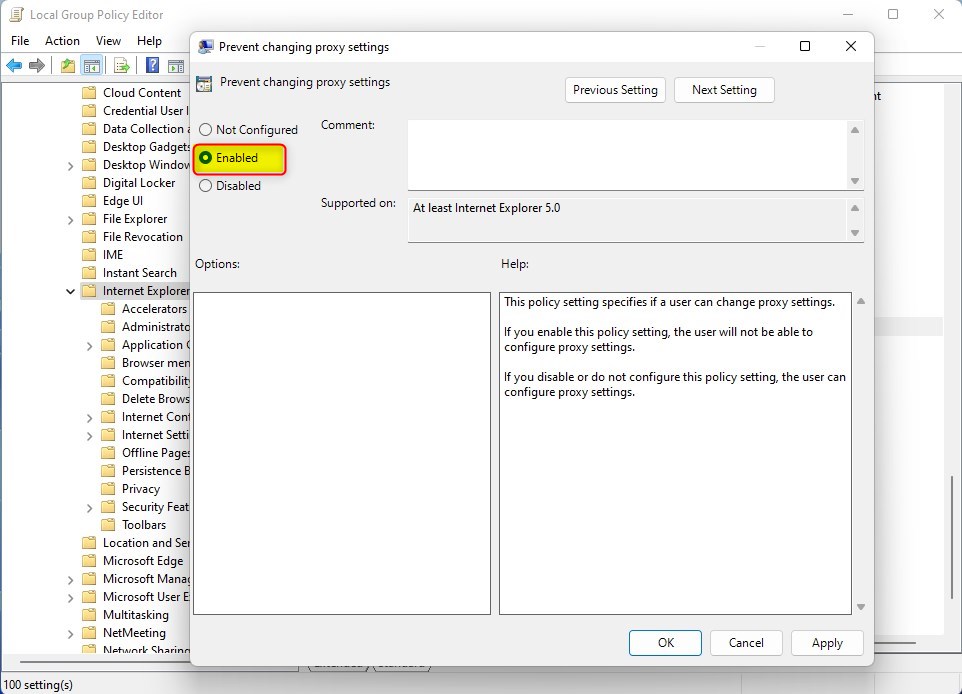
Click OK, then close the editor. The policy should now show as Enabled in the right pane. If the proxy page in Settings doesn't grey out right away, sign out and back in.
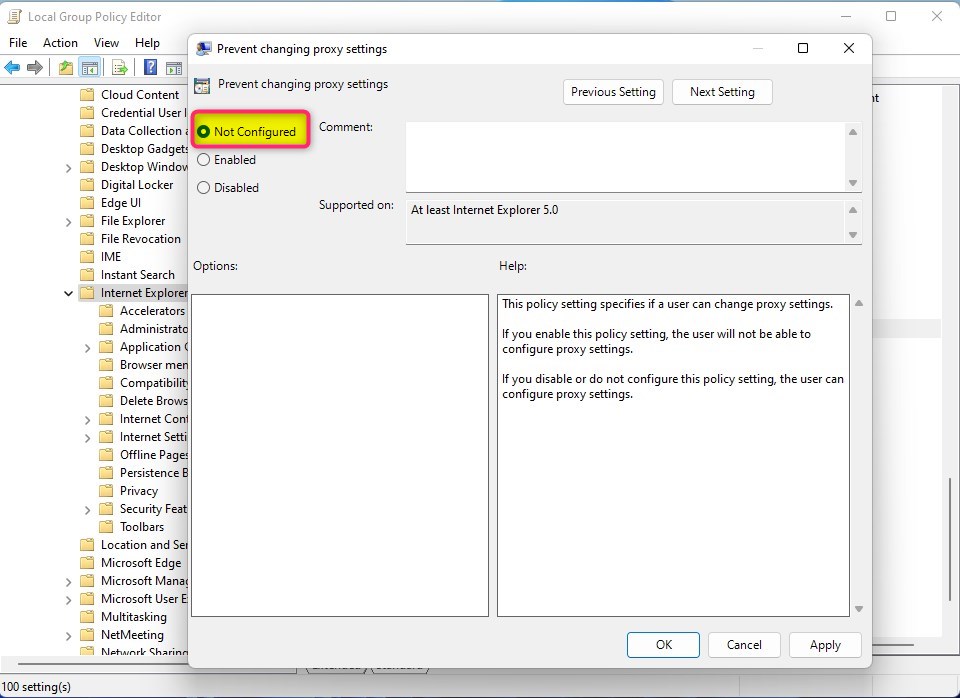
To undo the lock, follow the same path, open the same policy and select Not configured instead. Then click OK.
Locking Proxy Settings via Registry
The Registry method locks proxy settings on Windows 11 Home, where the Group Policy Editor isn't available. It also works on Pro and Enterprise. You open the Registry Editor, create a policy key under the Microsoft software folder, and add the restriction value by hand.
Editing the registry incorrectly can cause problems, so make a restore point or back up the registry first. In Registry Editor, File Export saves a copy you can import later.
Open the Registry Editor and navigate to this path:
HKEY_CURRENT_USER\Software\Policies\Microsoft
Now create the key and value. If a folder with one of these names already exists, don't create it again. Just open it and continue with the next step.
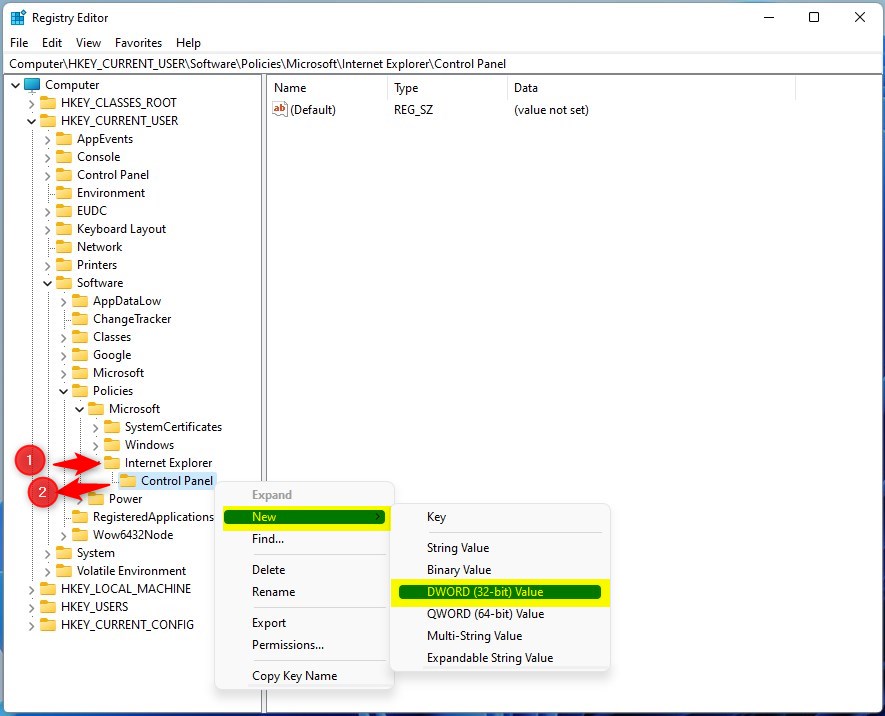
- Right-click the Microsoft folder and choose New Key. Name the new folder Internet Explorer.
- Right-click the Internet Explorer folder, choose New Key, and name it Control Panel.
- Right-click the Control Panel folder, choose New DWORD (32-bit) Value, and name it Proxy. The new value appears in the right pane.
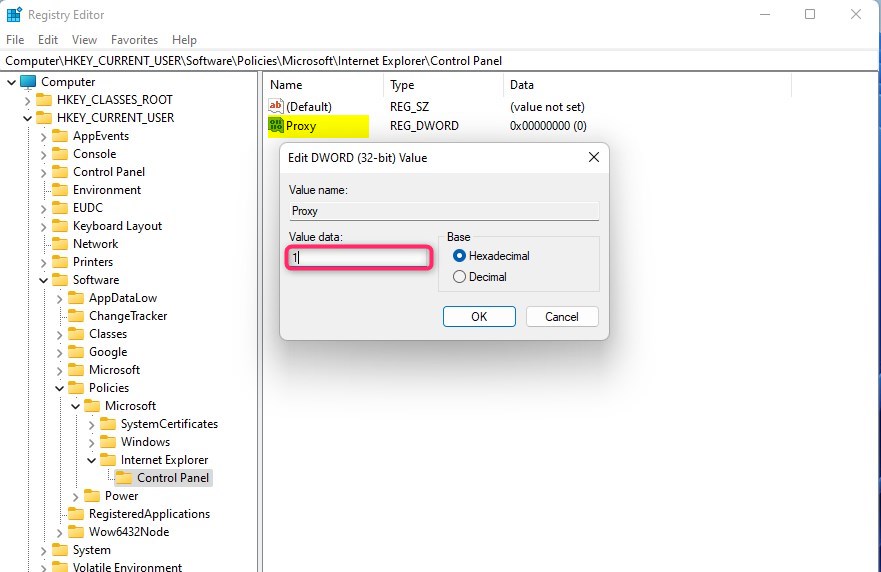
Double-click the new Proxy value, set the Value data to 1, and click OK. The value now shows that number in the Data column.
Close the Registry Editor. The proxy settings are now locked. Sign out and back in, or restart the PC, if the Settings page still lets you make changes.
To undo this, go back to the same key and delete the Proxy value. Right-click it and choose Delete.
Verification and Troubleshooting
After locking proxy settings, check that the change took effect. You can open Settings and look for greyed-out proxy options, or open the Command Prompt and run the command shown below. If the settings still look unlocked, confirm you used an administrator account, then recheck the policy or registry value and sign out and back in.
Summary
Locking proxy settings in Windows 11 keeps your internet connection secure and in line with company rules, because nobody can change the settings without permission. Use Group Policy if you have Pro, Enterprise or Education, and the registry if you have Home. Both can be reversed at any time.
Was this guide helpful?

About the Author
Richard
Tech Writer, IT Professional
Richard is a writer at Geek Rewind who turns complex IT tasks into clear, step-by-step guides. He draws on years of hands-on experience in system administration and enterprise IT operations, focusing on Windows, Linux and WordPress: the problems people actually run into, and the fixes that work. His server and WordPress guides come from systems he runs himself. Richard builds and maintains the platform behind Geek Rewind, from its Ubuntu servers and Nginx configuration to its custom WordPress plugins. Many new tutorials start with readers' questions, and he's always glad to answer them in the comments.


i tried both, and settings menu cannot open after the policy applied