How to Keep Printed Documents in the Print Queue on Windows 11

By default, the print queue on Windows 11 removes a job as soon as it finishes printing. If you turn on Keep printed documents, Windows holds on to finished jobs in the queue. That gives you a short history of what you printed, and you can send a job to the printer again without opening the original file.
The setting is in your printer’s properties and takes about two minutes to change. It is useful if you track paperwork or print the same reports on a regular basis. It applies per printer, so you need to turn it on for each printer you want it for.
Open Settings Bluetooth & devices Printers & scanners, select your printer, click Printer properties, go to the Advanced tab, and check Keep printed documents. The option works only when Spool print documents so program finishes printing faster is selected.
Why Use This Feature?
Keeping printed documents in your queue helps you:
- Print the same document again without hunting for the file. Right-click the job in the queue and choose Restart.
- Keep a short-term backup of what you’ve sent to the printer, which helps if the original file was moved or deleted.
- Check your print history to see what was printed, and when.
Method 1Using the Settings App
The Settings app is the quickest way to turn this on, and it works on both Home and Pro editions. It leads you to the same printer properties dialog you would get from the old Control Panel . Once the option is on, Windows saves each print job in the queue after it prints, so you can reprint it later.
If you use a standard account, Windows may ask for an admin password.
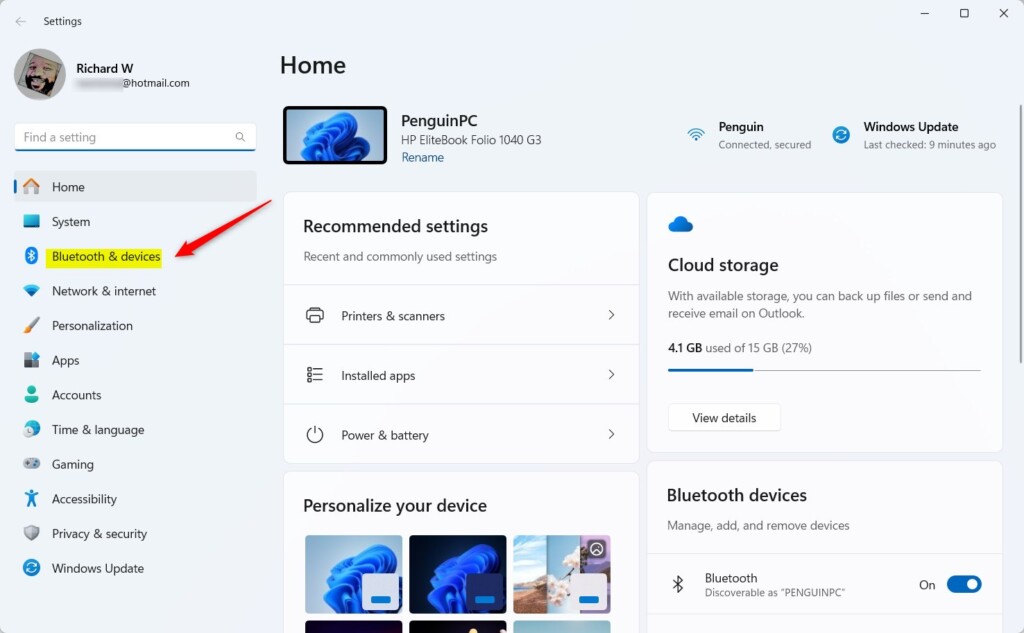
- Open the Settings app by clicking the Start menu and selecting Settings. Or press
Windows key + Ion your keyboard. The Settings window opens. - In the Settings window, click Bluetooth & devices on the left side.
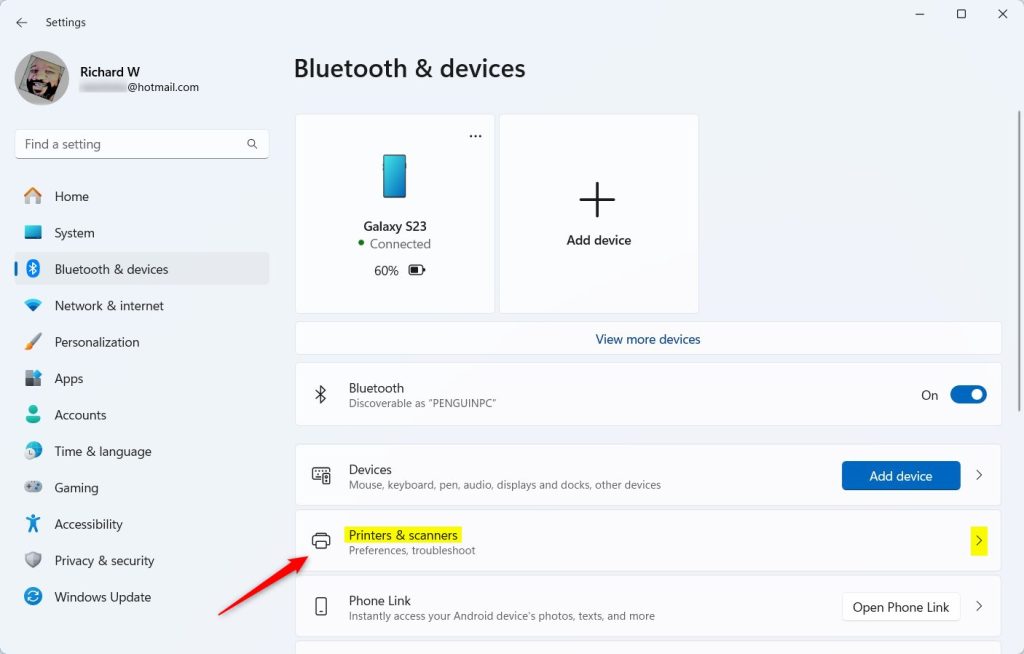
- On the right side, click Printers & scanners. You will see a list of the printers installed on your PC.
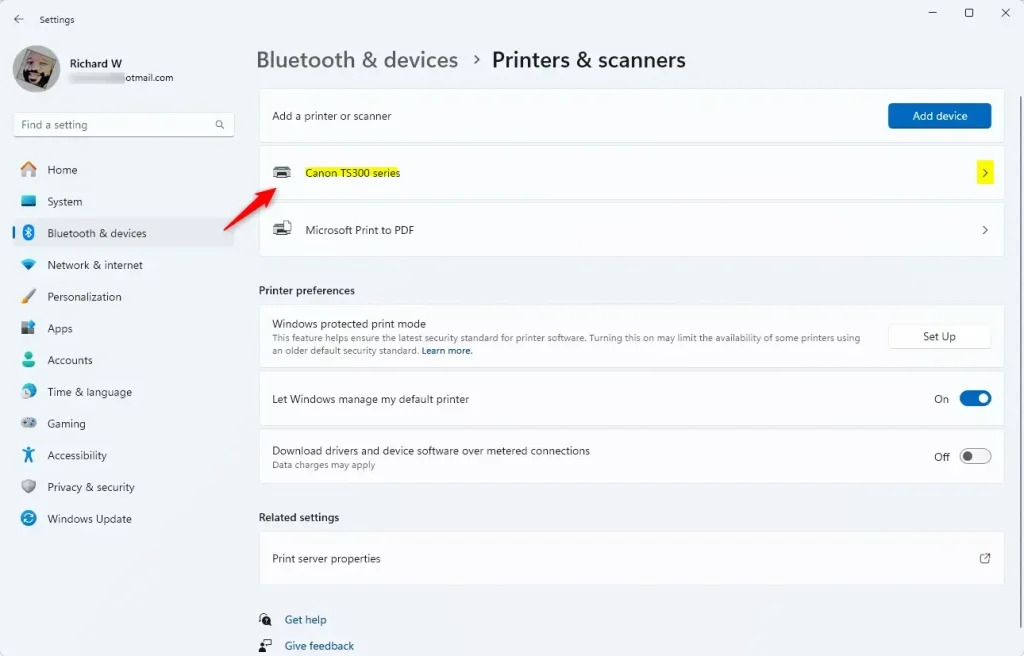
- Select the printer you want to change from the list. Its settings page opens.
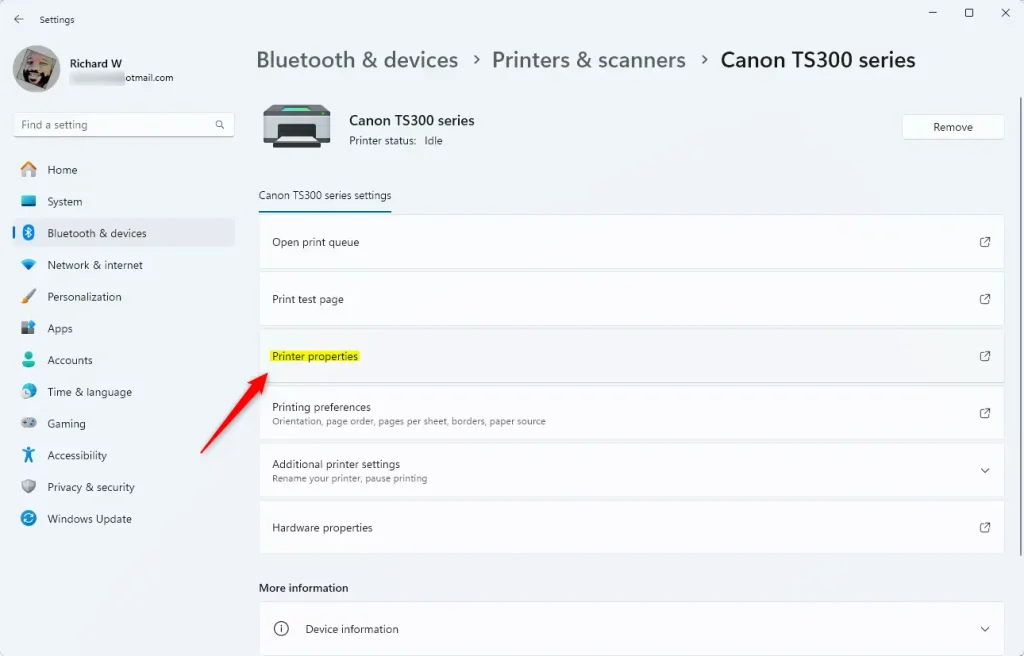
- Click Printer properties. A separate properties window for that printer appears.
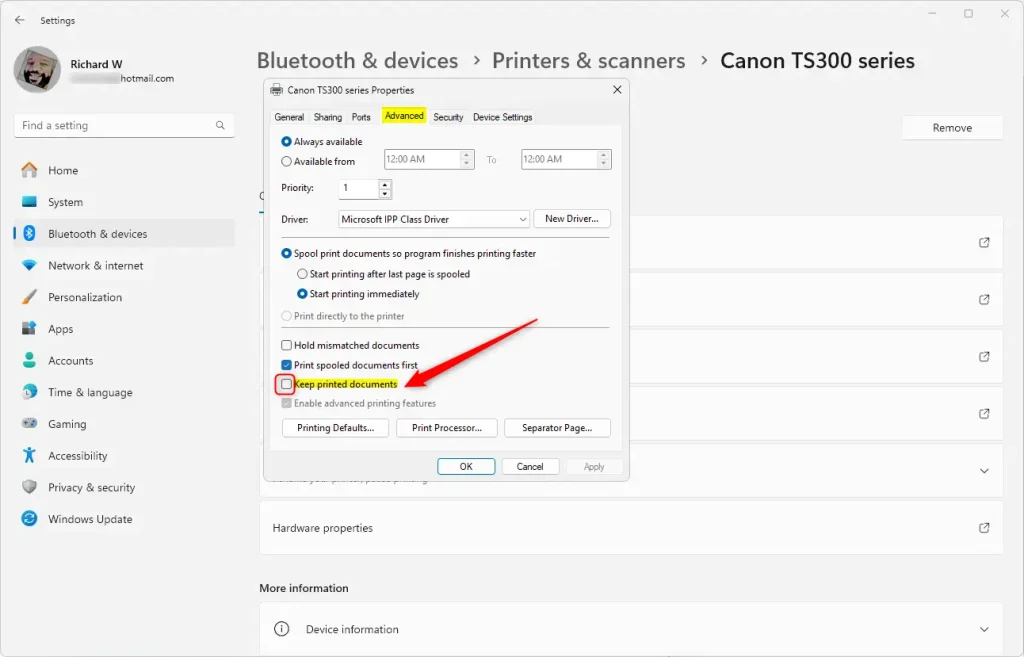
- In the new window, click the Advanced tab.
- Check the box for Keep printed documents to turn it on. Uncheck it to turn it off. If the box is greyed out, look just above it. The option only works when Spool print documents so program finishes printing faster is selected. It is unavailable when Print directly to the printer is selected. If the whole tab is locked, you need an administrator account.
- Click Apply, then OK, to save your changes. Then close the Settings app. No restart is needed. The next job you print will stay in the queue with a status of Printed. Jobs printed before you turned the option on will not appear.
Method 2Using Print Management
This method suits you if you manage several printers or want tighter control over your print history. You will need administrator access to open the tool and change printer settings.
Print Management is not included in Windows 11 Home. It is available in Pro, Enterprise and Education. If it does not open on one of those editions, the Print Management component may need to be added from the optional features in Settings. If you are on Home, use the Settings method above instead.
- Press
Windows key + Rto open the Run window. - Type
printmanagement.mscand press Enter. This opens Print Management. ⚠️ Admin privileges may be required. If a User Account Control prompt appears, approve it or enter an administrator password. - In the left panel, expand Custom Filters and click All Printers. Every printer known to this PC appears in the middle pane.
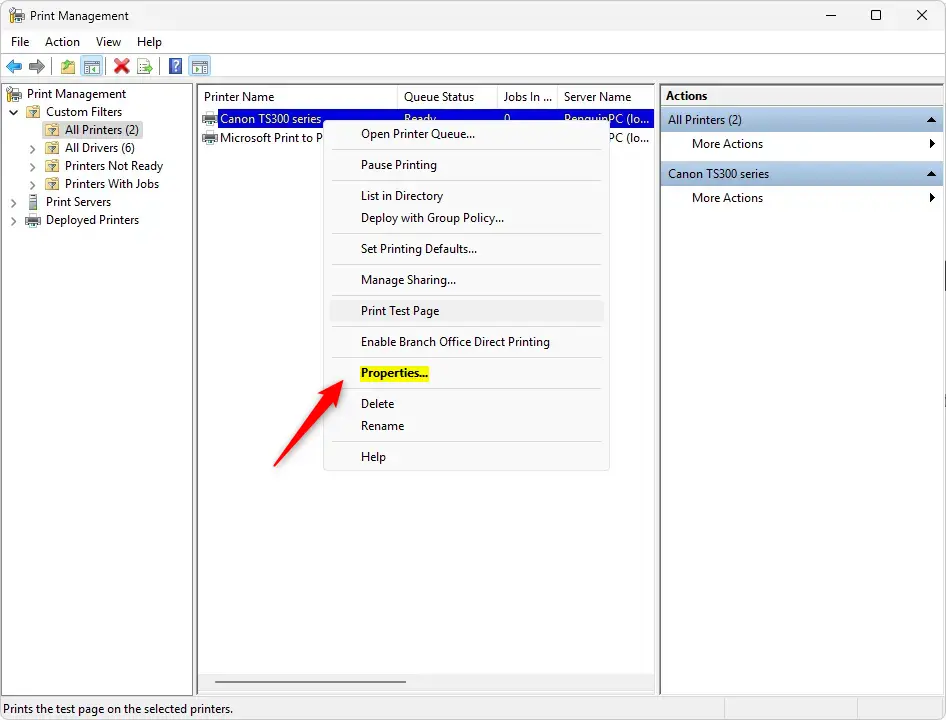
- Find your printer in the list. Right-click it and select Properties. The printer's properties window opens.
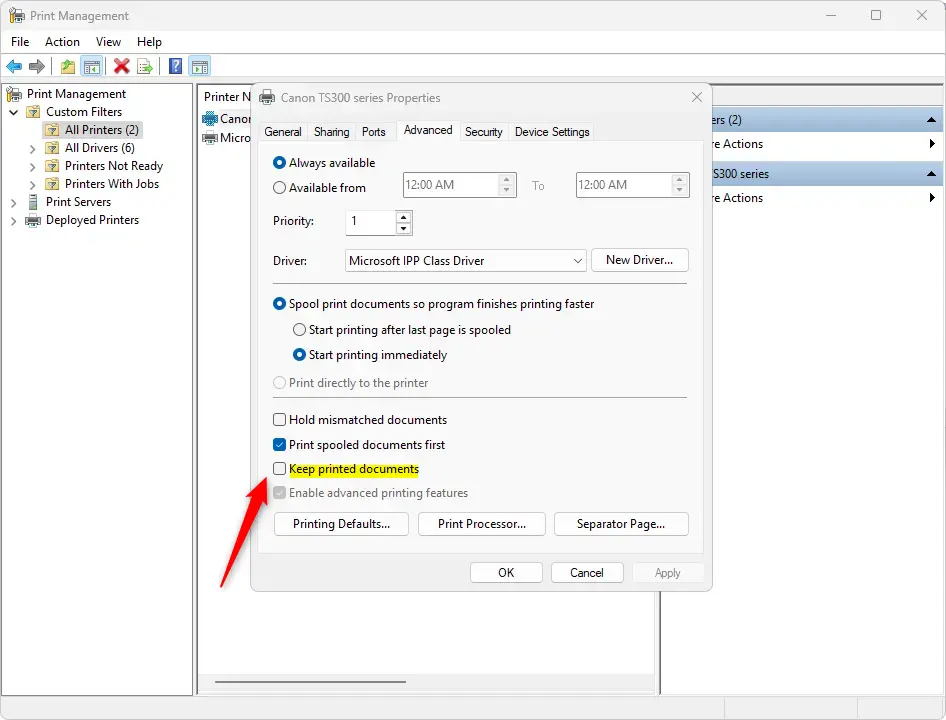
- Go to the Advanced tab.
- Check the box for Keep printed documents to turn it on, or uncheck it to turn it off. If the box is greyed out, make sure Spool print documents so program finishes printing faster is selected, because the option does not work with direct printing.
- Click OK and close Print Management. The change takes effect for the next job you print, and no restart is needed.
Summary
Keeping printed documents in the queue saves a temporary copy of every print job, which you can use to reprint later. You can turn the feature on or off from either the Settings app or the Print Management tool, whichever suits you. Either way, you can reprint files without opening the original programs.
Finished jobs stay in the queue until you remove them, so the list can grow over time. To clear it, open the print queue, right-click a job and choose Cancel. Or turn Keep printed documents off again when you no longer need the history.
In short, open your printer's properties, go to the Advanced tab and check or uncheck Keep printed documents.
Print queue management on Windows 11 helps you work more efficiently and keep track of your print jobs. With this setting on, completed jobs no longer vanish from the list as soon as they reach the printer, and you can check or repeat them whenever you need to.
Was this guide helpful?

About the Author
Richard
Tech Writer, IT Professional
Richard is a writer at Geek Rewind who turns complex IT tasks into clear, step-by-step guides. He draws on years of hands-on experience in system administration and enterprise IT operations, focusing on Windows, Linux and WordPress: the problems people actually run into, and the fixes that work. His server and WordPress guides come from systems he runs himself. Richard builds and maintains the platform behind Geek Rewind, from its Ubuntu servers and Nginx configuration to its custom WordPress plugins. Many new tutorials start with readers' questions, and he's always glad to answer them in the comments.


No comments yet — be the first to share your thoughts!