How to View a Printer’s Print Queue in Windows 11

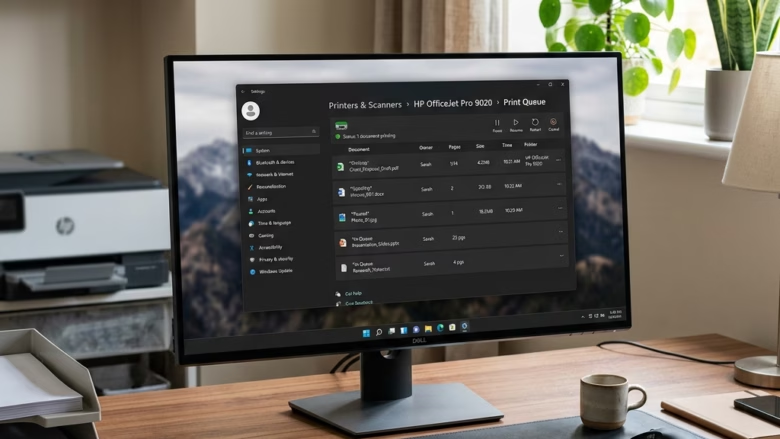
The print queue in Windows 11 lists every document waiting to print on your machine. Opening it lets you check whether a job is stuck, watch the progress of an active print, or cancel a document that refuses to print.
You can open the queue from the Settings app, which is the route covered here. While a job is printing, a small printer icon usually also appears in the taskbar ’s notification area , and double-clicking it opens the same queue window. Either way, it takes a few clicks, and it is the first thing to check when a document gets stuck or fails to print.
Open Settings Bluetooth & devices Printers & scanners, click your printer’s name, then click Open print queue. The window shows all documents waiting to print, their status, and lets you cancel stuck jobs.
The Start Menu is Your Friend
Start in the Settings app. You open it from the Start menu .
- Click the Start button (the Windows icon) on the taskbar . The Start menu opens.
- Click the Settings icon, which looks like a gear. If you don’t see it, click All apps and choose Settings from the list. The Settings window opens.
Going to Printers & Scanners
Now go to the printer list. Windows keeps all information about printers and scanners in one place.
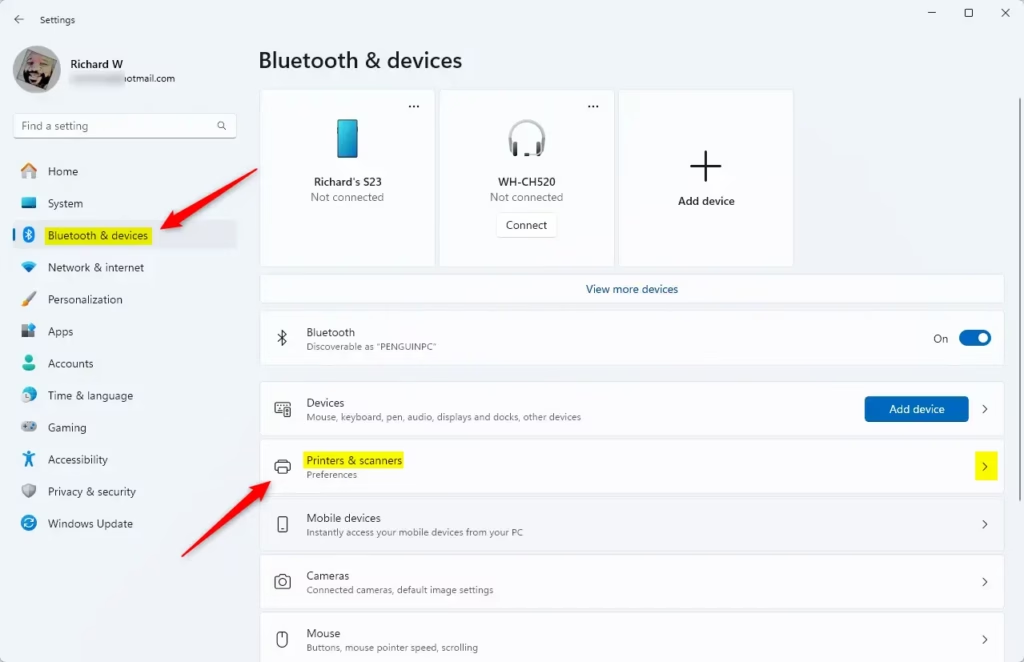
- In the Settings window, look at the menu on the left side.
- Click Bluetooth & devices.
- On the right side, click Printers & scanners. You should now see a list of the printers Windows knows about.
If your printer is missing from the list, the queue can’t be opened from here. Check that the printer is powered on and connected, then use the Add device button at the top of the page.
Opening the Print Queue
The print queue shows the documents waiting for a printer. Once you are on the right Settings page, a few more clicks bring up the list so you can manage the jobs.
Choosing Your Printer
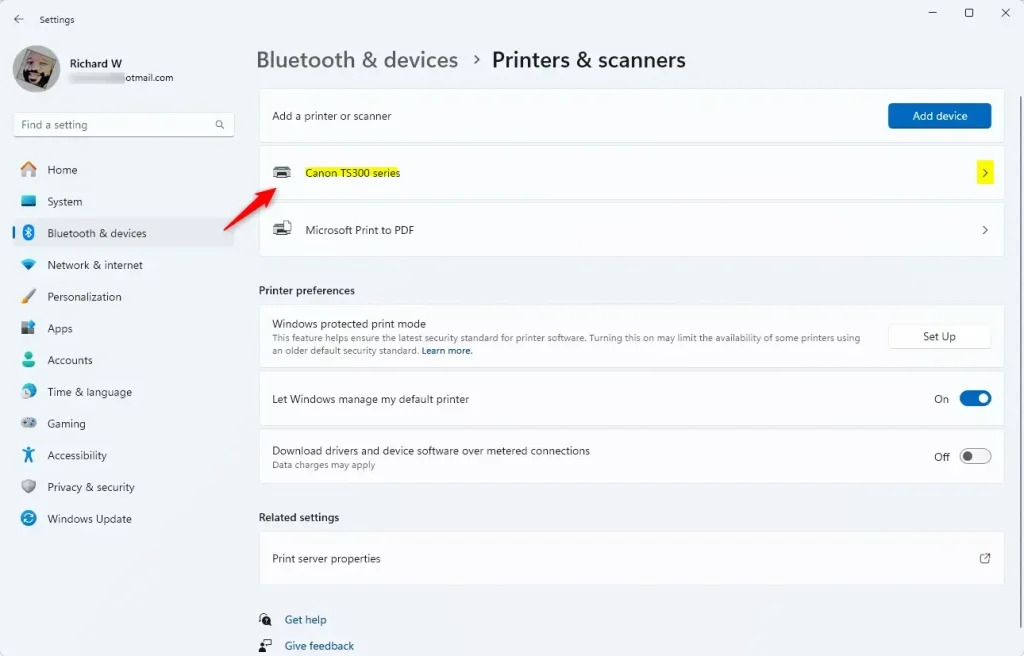
The Printers & scanners page lists every available printer. Click the name of the printer you want to check. Each printer has its own queue, so pick the one you actually sent the document to.
The "Open Print Queue" Button
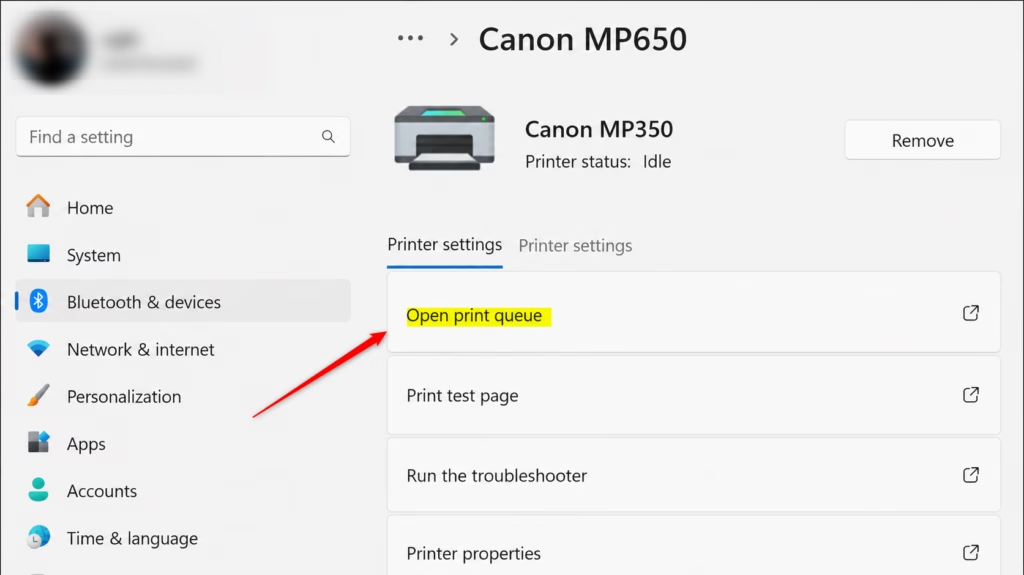
- Click the printer's name. A new page opens with more details about that printer.
- Find and click the Open print queue button. A new window appears.
That window shows all documents waiting to print or currently printing. If the window is blank, nothing is queued for that printer.
Understanding the Print Queue Window
You manage print jobs directly from the Print Queue window. The next sections explain what you see there and what you can do with it.
What You'll See
The queue shows every document waiting to print, along with the file name, current status, owner and page count. Reading this list tells you whether a job is printing normally, paused or stuck, so you know what to fix. The columns mean the following:
- Document Name: The name of the file you tried to print.
- Status: What is happening with the job. Common statuses are "Printing," "Spooling" (Windows is getting the document ready), "Error," or "Deleting." A job that sits on "Spooling" or "Error" for a long time is usually the one blocking the rest.
- Owner: Which user sent the job.
- Pages: How many pages are in the document.
- Submitted: When the job was sent.
- Port: How your printer is connected.
Some columns may be hidden if the window is narrow. Widen the window to see them all.
No Jobs? No Problem!
An empty list means no jobs are waiting. The printer is ready or has finished, which is the normal state. If you sent a document and the list is empty but nothing printed, the problem is probably the printer itself (paper, ink, connection) rather than the queue.
Checking the Right Printer
If you have more than one printer, use the Printer menu at the top of the Print Queue window to look for other devices and view their queues. You can also close the window, go back to Printers & scanners, and open the queue of a different printer from there.
Managing Your Print Jobs
You control print jobs from inside the queue window. You don't need to change anything in Settings.
Canceling a Print Job
Cancelling a stuck job or an accidental print takes very little effort.
- In the Print Queue window, find the job you want to remove.
- Right-click the document.
- Select Cancel. Windows may ask you to confirm; if so, click Yes.
If it stays on "Deleting" for a long time, the job is stuck. Restart the Print Spooler as described near the end of this tutorial.
Pausing or Resuming Printing
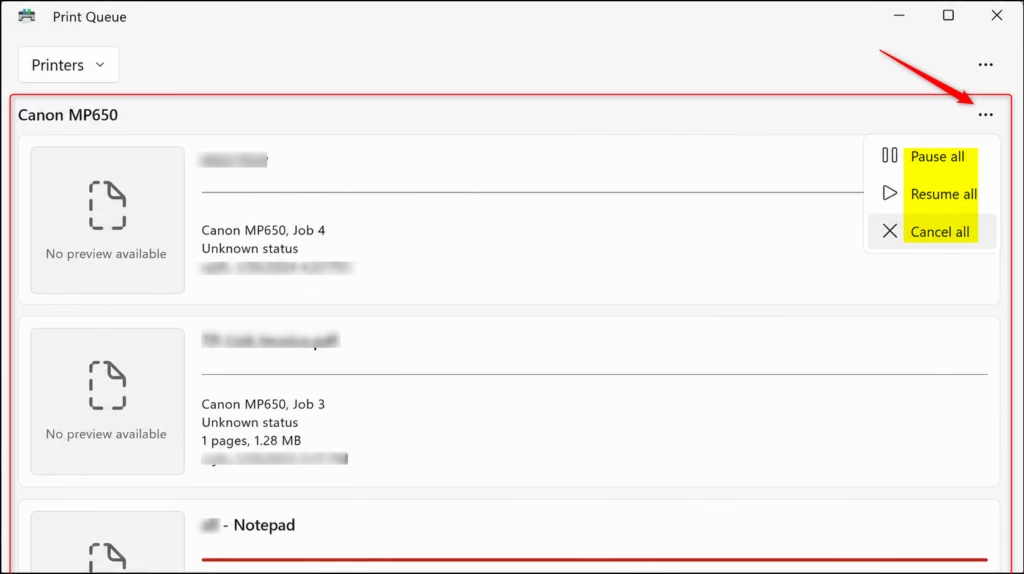
You can pause all printing from the queue. This stops the printer temporarily, so you can add paper or clear a paper jam without losing your place in line.
- In the Print Queue window, open the Printer menu at the top.
- Click Pause Printing. The status now shows that the printer is paused.
- To resume, open the Printer menu again and click Pause Printing a second time. The pause is turned off and the jobs continue.
Canceling All Documents
If something is badly wrong, you can cancel every job at once.
- In the Print Queue window, click the Printer menu.
- Select Cancel All Documents.
- Confirm the prompt if Windows asks.
Every waiting job is permanently removed, and you will have to send the documents again.
Restart the Print Spooler Service
The Print Spooler is the background service that manages print jobs. Restarting it often clears stubborn errors, especially when documents refuse to print or won't delete. You do this from the Windows Services app: find the spooler in the list and restart it. You may need administrator rights, and Windows may ask for approval.
- Press Windows key + R on your keyboard. The Run box opens.
- Type
services.mscand press Enter. The Services window opens. - Scroll down and find Print Spooler.
- Right-click Print Spooler and select Restart.
- If that doesn't work, right-click it again and select Properties. Click Stop, wait a few seconds, and then click Start.
You don't need to restart the PC. Once the service is running again, try printing once more. Any jobs that were stuck will usually be gone, so resend them if needed.
Summary
Knowing how to check and manage the print queue is a useful skill. It makes printing easier to understand and lets you troubleshoot common problems yourself. When a document goes missing, you now know where to look.
Was this guide helpful?

About the Author
Richard
Tech Writer, IT Professional
Richard is a writer at Geek Rewind who turns complex IT tasks into clear, step-by-step guides. He draws on years of hands-on experience in system administration and enterprise IT operations, focusing on Windows, Linux and WordPress: the problems people actually run into, and the fixes that work. His server and WordPress guides come from systems he runs himself. Richard builds and maintains the platform behind Geek Rewind, from its Ubuntu servers and Nginx configuration to its custom WordPress plugins. Many new tutorials start with readers' questions, and he's always glad to answer them in the comments.




No comments yet — be the first to share your thoughts!