How to Let Windows 11 Set the Last Printer Used as the Default Printer

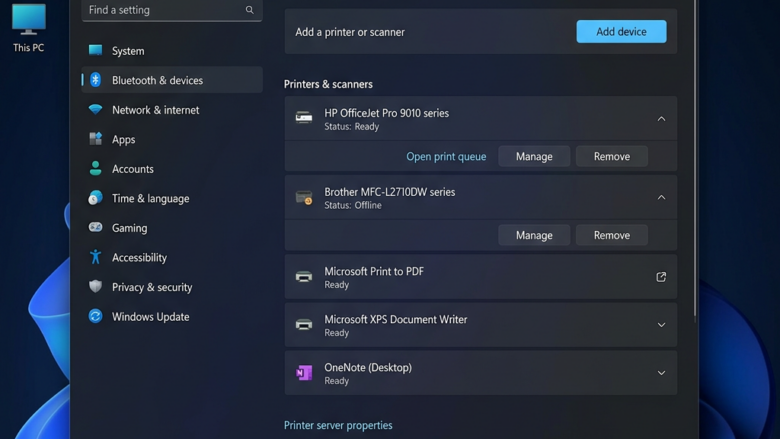
The Let Windows manage my default printer setting in Windows 11 switches your default printer to the one you used last. That helps if you move between a home office, a work desk and a wireless label maker, because print jobs stop going to a printer you are no longer near.
You can turn this on in under 30 seconds from the Settings app. It is available on both Windows 11 Home and Pro, and it needs no restart or administrator rights.
Open Settings Bluetooth & devices Printers & scanners, scroll down to Printer preferences, and set Let Windows manage my default printer to On. Windows then automatically makes your last-used printer the default for each new print job.
Make Windows Your Printing Helper
Letting Windows pick your last-used printer saves time when you switch between locations and hardware. You no longer have to open a printer list and click Set as default each time you change where you work.
It suits laptops best, and any PC that prints to more than one device. If you only ever use one printer, you gain nothing from it and can leave it off.
The change takes two short stages: open the printer settings page, then switch the option on. The steps below follow that order.
Option 1Windows Picks the Last Printer Used
This setting saves you from changing your default printer by hand every time you switch devices. Windows remembers which printer handled your last job and sends later print jobs there automatically.
While the setting is on, Windows controls the default, so you can't pick a permanent default yourself. The Set as default button is greyed out or missing for each printer. If you need a fixed default, turn this setting off first.
Step 1Open Printer Settings
- Press the Windows key to open the Start menu.
- Select the gear icon to open Settings. The Settings window opens with a list of categories on the left.
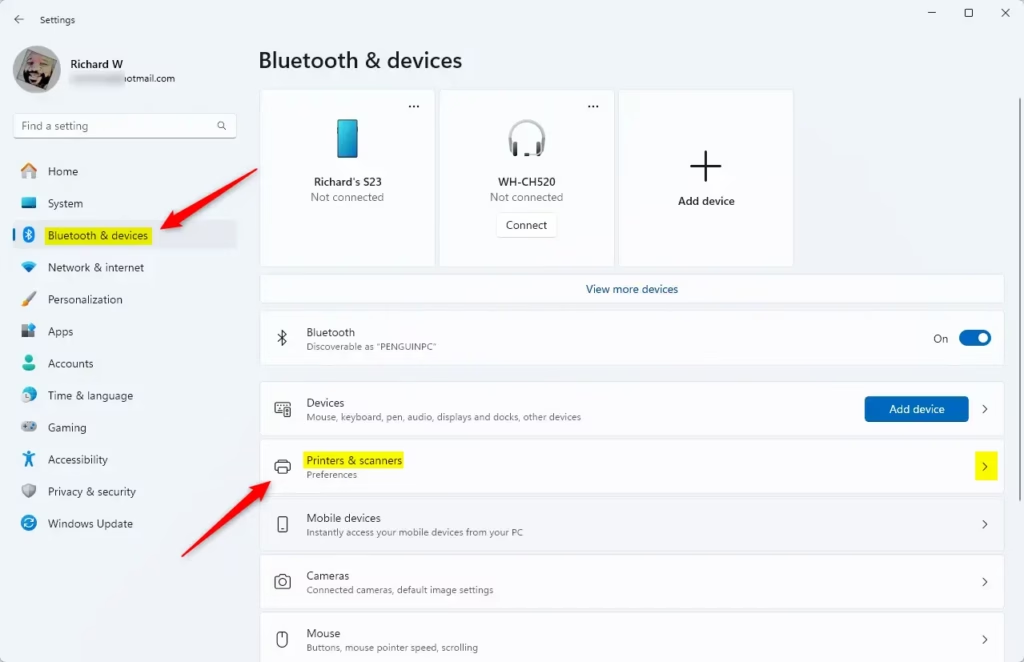
- Choose Bluetooth & devices from that list.
- Select Printers & scanners. You should now see every printer Windows knows about, plus an Add device button at the top.
If you prefer the keyboard, Windows + I opens Settings directly.
Step 2Let Windows Manage Your Default Printer
- Scroll down the Printers & scanners page until you reach the Printer preferences area.
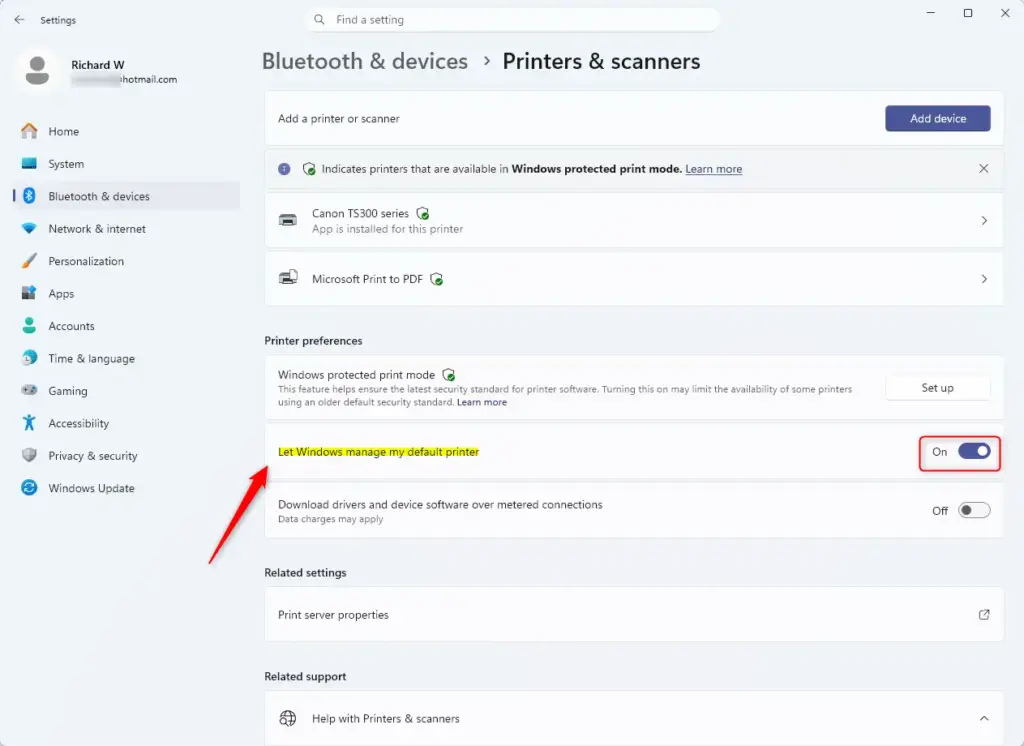
- Find the switch labeled Let Windows manage my default printer.
- Set the switch to On. It shows as on when the switch is filled with colour and the label beside it reads On.
The change applies straight away, and there is no Save or Apply button. If the option is missing, check that you are on Windows 11 and have the latest updates installed. Some managed work PCs also hide or lock the setting through organisation policy, so ask your IT team if it is greyed out there.
Step 3Confirm the Setting
Once the option is on, your PC selects the printer you last printed to as the default for your next print job. To check it, print a test page from a second printer. Then go back to Settings Bluetooth & devices Printers & scanners That printer should now show Default under its name.
Reference:
Summary
Your PC now routes print jobs to whichever device you used last.
To undo it, follow these steps:
- Open Settings Bluetooth & devices Printers & scanners
- Scroll down and set Let Windows manage my default printer to Off.
- Select the printer you want, then select Set as default. The button is available again now that Windows no longer manages the default.
Was this guide helpful?
100% of readers found this helpful (2 votes)

About the Author
Richard
Tech Writer, IT Professional
Richard is a writer at Geek Rewind who turns complex IT tasks into clear, step-by-step guides. He draws on years of hands-on experience in system administration and enterprise IT operations, focusing on Windows, Linux and WordPress: the problems people actually run into, and the fixes that work. His server and WordPress guides come from systems he runs himself. Richard builds and maintains the platform behind Geek Rewind, from its Ubuntu servers and Nginx configuration to its custom WordPress plugins. Many new tutorials start with readers' questions, and he's always glad to answer them in the comments.


… liked this!