How to Enable or Disable Shared Experiences in Copilot

Shared experiences let Copilot work with Bing, Edge, and MSN (Microsoft’s news and information site). Your activity in those apps can shape what Copilot suggests, and your Copilot chats can shape what you see in them.
Say you chat with Copilot about vacation ideas. Bing and MSN may then show travel news and content that fits your plans. Copilot works the other way too. It can use your interests and hobbies to suggest related ideas.
Shared experiences are turned on by default. You need to sign in with a personal Microsoft account to use them. That same sign-in also unlocks chat history, image creation, longer conversations, and voice in Copilot.
You can turn shared experiences on or off for your Microsoft account in Windows 11, on the Copilot website, in the Copilot app, or in Microsoft Edge.
To turn shared experiences in Copilot on or off, open Copilot Chat settings in the Copilot app, on copilot.com, or in the Copilot panel in Microsoft Edge, then select Personalization and switch the shared experience setting. It is on by default. Both methods change the same account-wide setting.
Option One
Turn On or Off Shared Experiences in Copilot from the Copilot app and web
- Open the copilot.com site, or open the Copilot app on Windows 11.
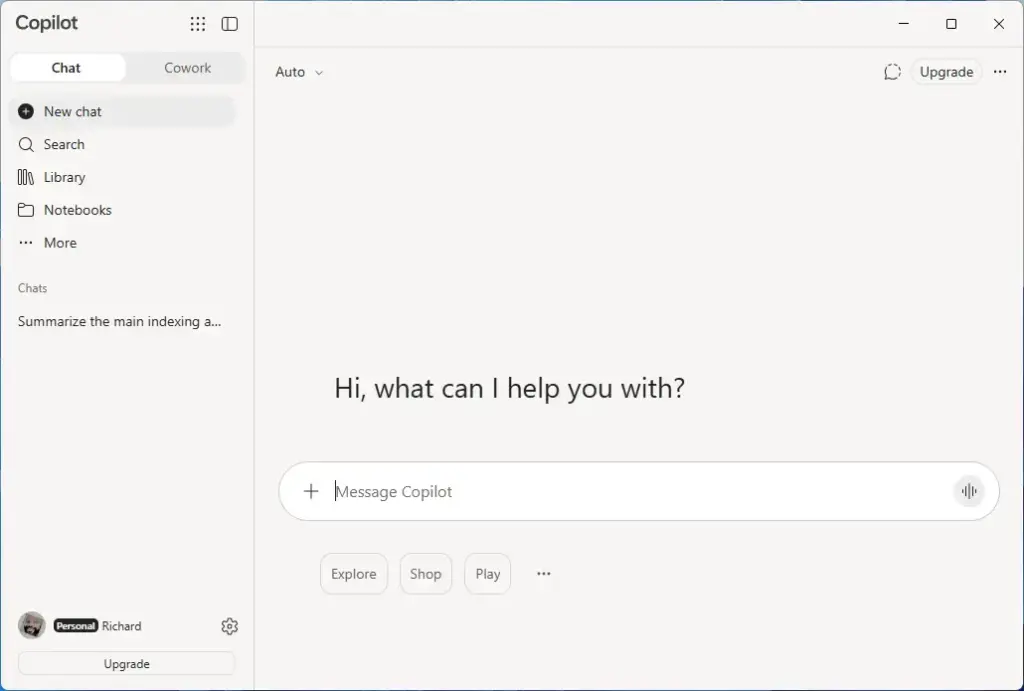
- Sign in with your Microsoft account, if needed.
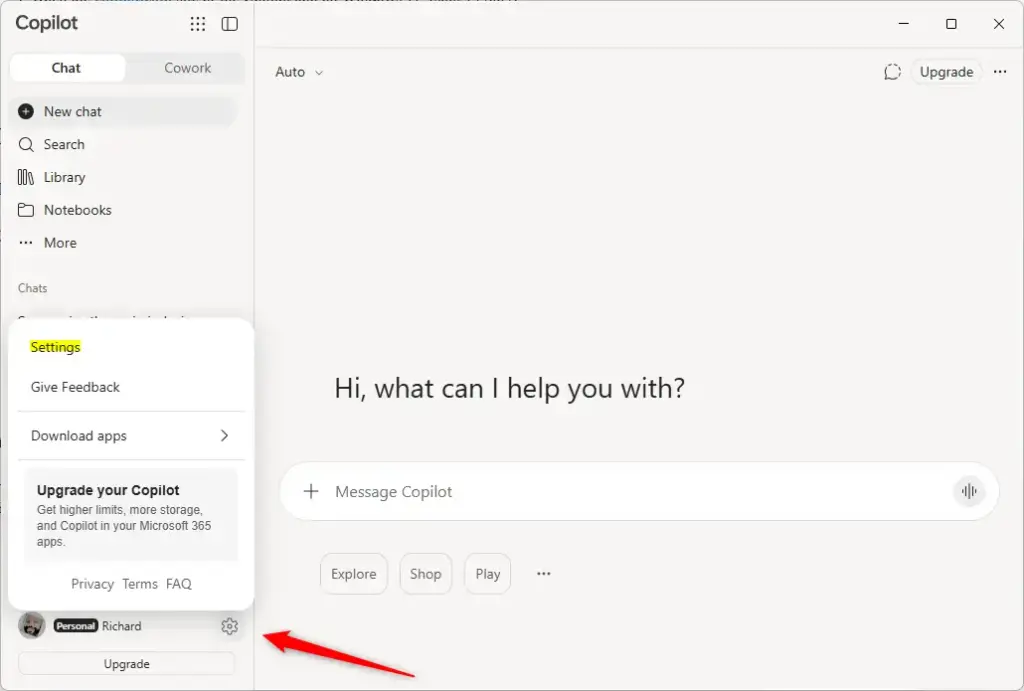
- Open Copilot Chat settings.
- Select Personalization on the left side of Chat settings.
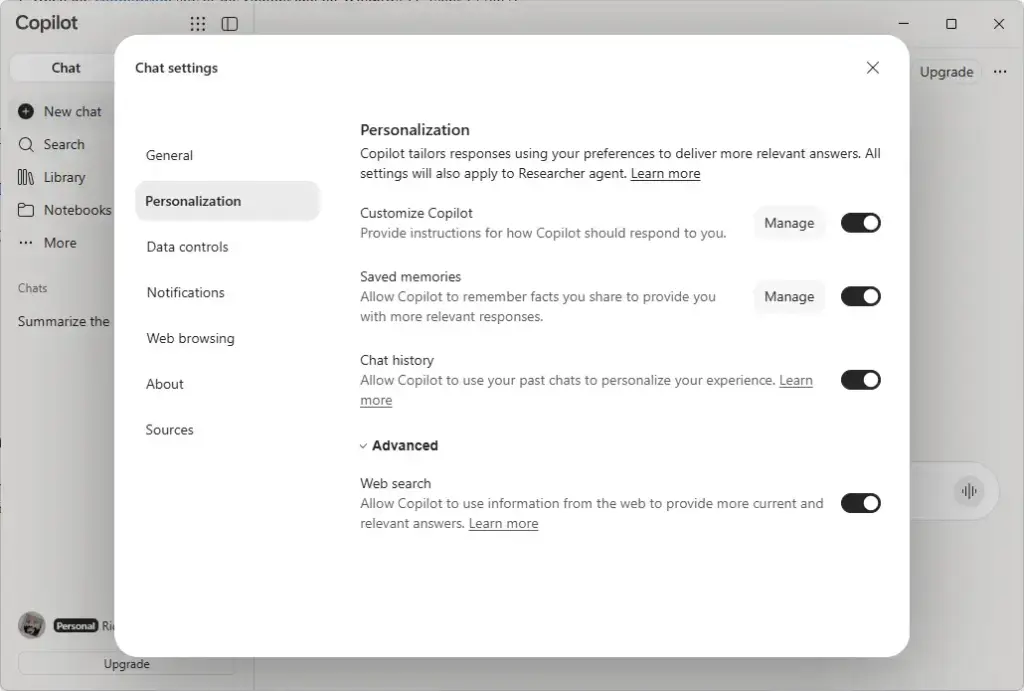
- Turn the shared experience setting on (the default) or off.
Option Two
Turn On or Off Shared Experiences in Copilot from Microsoft Edge
Use this method to change the setting from the Copilot panel in Edge.
- Open Microsoft Edge.
- Sign in to Edge with your Microsoft account, if needed.
- Select the Copilot Chat icon on the toolbar.
- Select the Settings and more (3 dots) button, then select Chat settings.
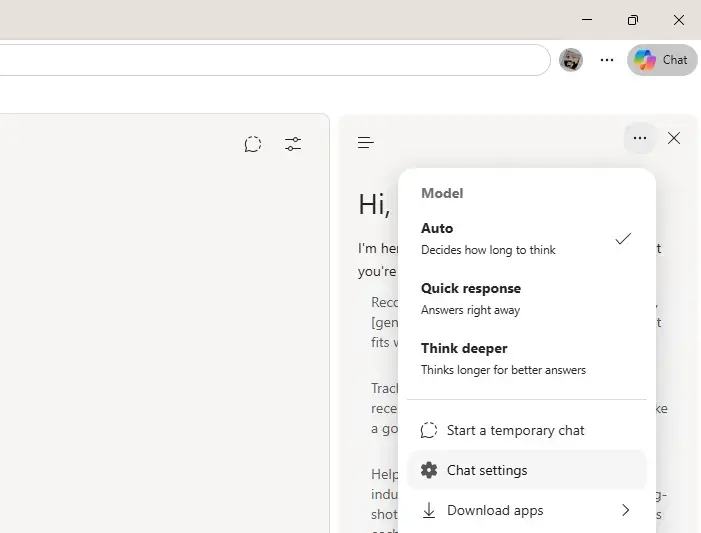
- Select Personalization in Chat settings.
- Turn the shared experience setting on (the default) or off.
What to do next
Both methods change the same setting, so you can use either one to switch it back on.
How can I disable connected experiences in Office 365?
Open any Office app, such as Word, and select File, then Options. Choose Trust Center, then Trust Center Settings, then Privacy Options. Under Privacy Settings, clear the box next to Turn on optional connected experiences, then select OK. Office admins can also manage this setting for all users with Group Policy or Cloud Policy.
Can Microsoft to do be shared?
Yes. Open the list you want to share in Microsoft To Do, select Share, then type the email address of the person you want to invite. That person needs a Microsoft account to view and edit the list. Both of you can then add, change, and check off tasks on the same list.
How to enable Copilot vs?
Open Settings, select Personalization, then select Taskbar. Under Taskbar items, turn on the Copilot switch to show the Copilot button. Select that button to open Copilot. Sign in with your Microsoft account if Copilot asks you to, because that unlocks chat history and longer conversations.
How do I restrict access to Copilot Studio?
Admins control Copilot Studio access in the Power Platform admin center. Assign or remove Copilot Studio licenses in the Microsoft 365 admin center. Use security roles in each environment to limit who can create agents, and restrict who can publish or share them.
Was this guide helpful?

About the Author
Richard
Tech Writer, IT Professional
Richard is a writer at Geek Rewind who turns complex IT tasks into clear, step-by-step guides. He draws on years of hands-on experience in system administration and enterprise IT operations, focusing on Windows, Linux and WordPress: the problems people actually run into, and the fixes that work. His server and WordPress guides come from systems he runs himself. Richard builds and maintains the platform behind Geek Rewind, from its Ubuntu servers and Nginx configuration to its custom WordPress plugins. Many new tutorials start with readers' questions, and he's always glad to answer them in the comments.



No comments yet — be the first to share your thoughts!