How to Show the Language Bar on Your Desktop or Taskbar in Windows 11
You can show the Language Bar in Windows 11 to quickly switch between installed input languages and keyboard layouts.
The Language Bar is a small toolbar that pops up on your screen, usually on the taskbar or desktop. It lets you switch languages with ease.
This feature is a lifesaver if you often type in more than one language, like switching between English and Spanish for your documents or emails.
Displaying the Language Bar in Windows 11 involves a few clicks within the Settings app. But what exactly is the Language Bar?
What is the Language Bar?
The Windows 11 language bar is a tool that makes it simple to switch between different keyboard layouts on your computer. This helps you type in other languages or use special characters when you need them. When you add a new language to Windows, it also adds the correct keyboard layout for typing.
When you add a new language, Windows also adds the keyboard layout for it. You can add more keyboard layouts if you want.
If you have more than one keyboard or language, you can switch between them using the Language Bar or by pressing Win + Spacebar.
Option 1Show Language Bar Using Windows Settings
- Open Settings by pressing
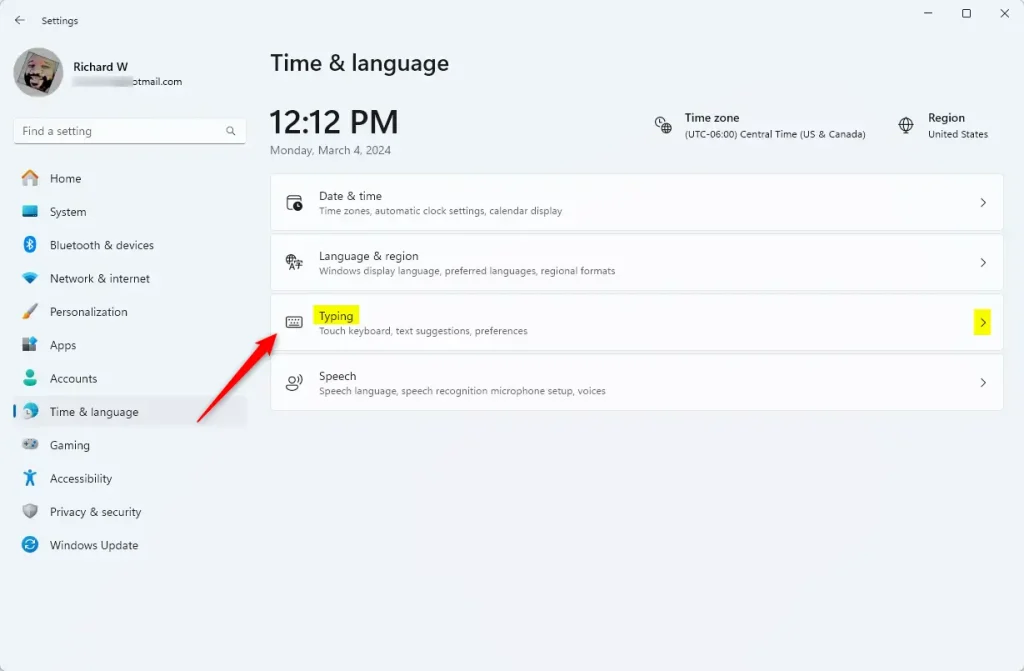
Win + I. - Click Time & language on the left side.
- Click Typing on the right side.
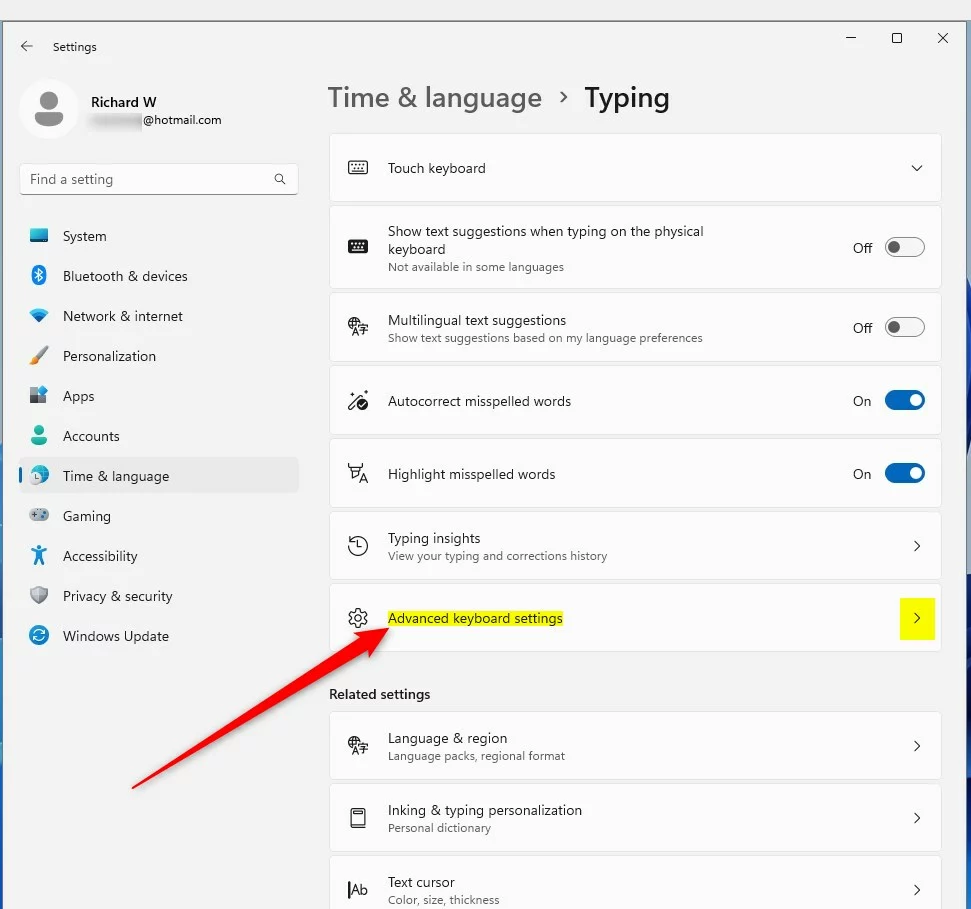
- Scroll down and click Advanced keyboard settings.
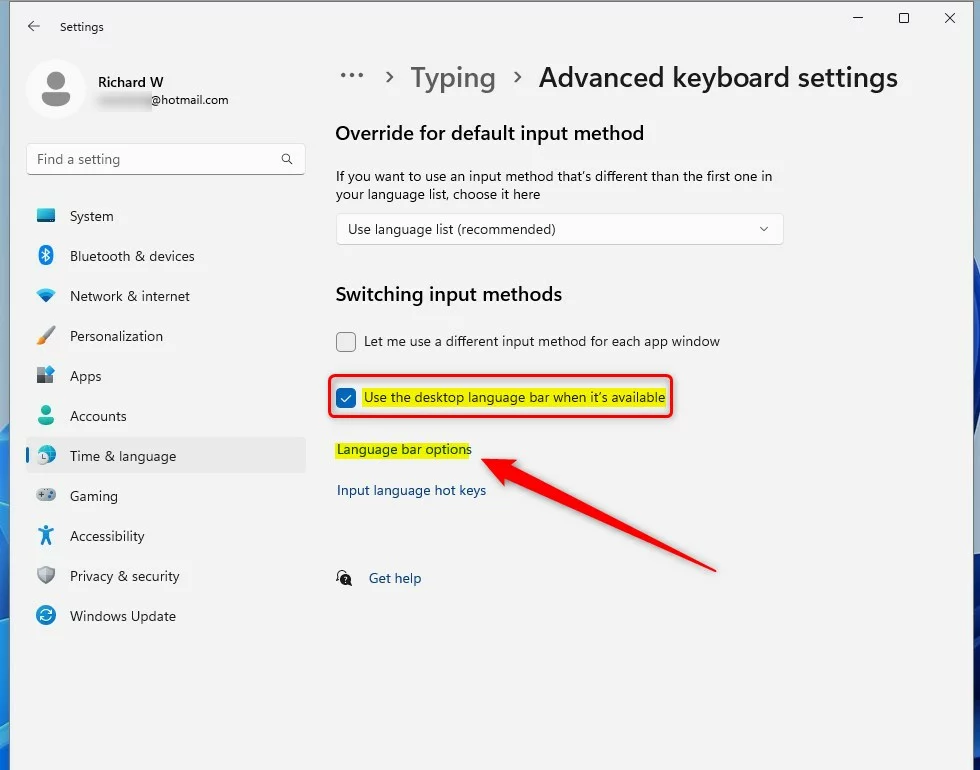
- Check the box for Use the desktop language bar when it’s available if you want the bar on your desktop.
- Uncheck it if you want the language bar to appear on the taskbar (this is the default setting).
- You can now close Settings.
You can show the language bar on your Windows 11 computer using the built-in Settings app. First, open Settings by pressing the Windows key and the I key together. Then, go to Time & language, click on Typing, and select Advanced keyboard settings to find the option.
Option 2Show Language Bar Using PowerShell
If you like using commands, here’s how to do it with PowerShell:
- Open Windows Terminal by right-clicking the Start button and choosing it.
- Make sure you select the Windows PowerShell tab.
- Copy and paste one of the commands below depending on what you want:
Show Desktop Language Bar
Showing the language bar directly on your Windows 11 desktop gives you quick access to switch between typing methods. This makes it easy to change your keyboard layout anytime. However, turning on the desktop language bar means you won’t be able to use a different typing language for each app window.
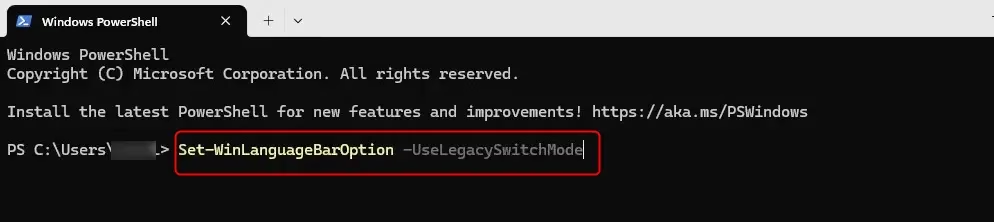
The Windows 11 language bar, if missing from the taskbar, can be restored using a PowerShell command. This PowerShell command resets the language bar to its default settings, making the language bar visible again on the taskbar.
Set-WinLanguageBarOption -UseLegacySwitchModeAfter running your command, you can close Windows Terminal.
Here are pictures of how it looks in PowerShell:
Summary
- The Language Bar makes it easy to switch between keyboard languages on your Windows 11 PC.
- You can type special letters and characters in different languages by changing your keyboard layout.
- Switch languages quickly using the Language Bar or the shortcut keys
Win + Spacebar. - You can choose to show the Language Bar on your desktop or taskbar using Settings or PowerShell commands.
- This helps if you use more than one language and want to type comfortably.
The language bar in Windows 11 helps you easily switch between keyboard languages, allowing you to type special letters and characters. You can choose to display the language bar on your desktop or taskbar through Windows Settings or PowerShell for quick access. Remember, you can also switch languages using the shortcut keys Windows key + Spacebar.
How do I bring back the language bar in 🪟 Windows 11?
Bringing back the Windows 11 language bar to your taskbar is straightforward; you just need to adjust a setting in the advanced keyboard options within Windows Settings.
What is the language bar hotkey on 🪟 Windows 11?
Use Windows + Spacebar to change the keyboard language. Hold down the Windows key and press the Spacebar to switch to the next language in the list until you get to the keyboard layout you want.
Was this guide helpful?

About the Author
Richard
Tech Writer, IT Professional
Richard, a writer for Geek Rewind, is a tech enthusiast who loves breaking down complex IT topics into simple, easy-to-understand ideas. With years of hands-on experience in system administration and enterprise IT operations, he’s developed a knack for offering practical tips and solutions. Richard aims to make technology more accessible and actionable. He's deeply committed to the Geek Rewind community, always ready to answer questions and engage in discussions.


No comments yet — be the first to share your thoughts!