How to Change the Layout of the On-Screen Keyboard in Windows 11


To change the on-screen keyboard’s screen layout in Windows 11, click the Nav or General key on the keyboard itself. You don’t need to open any settings, and the change happens right away.
The On-Screen Keyboard is a built-in virtual keyboard that lets you type with your mouse, a pen or a touch screen. It’s useful when a physical keyboard is missing, broken or hard to use. This guide covers the two layouts you can switch between, what each one is good for, and how Windows remembers your choice.
Click the “General” or “Nav” key directly on the On-Screen Keyboard to switch between layouts. The OSK remembers your last selection, offering a full keyboard or a simplified navigation view.
Understanding the OSK Layout Options
The On-Screen Keyboard offers two main layouts: “General” and “Nav.” General is the full typing keyboard. Nav is a cut-down set of keys for moving around. The two are interchangeable, so you can use whichever fits the task and switch back at any time.
The General Layout
The General layout works like a physical keyboard. It shows the usual keys for letters, numbers and symbols. Use it whenever you need to type emails, documents or anything else with a lot of characters. It’s the layout you’ll normally see the first time you open the On-Screen Keyboard.
The Nav Layout
The Navigation (Nav) layout is a simplified design with the essential keys: Tab, Enter, Spacebar and the arrow keys. It suits people who mainly use the On-Screen Keyboard to move around Windows or pick options, and it can make that faster. Because there are fewer keys, you won’t be able to type a full sentence in this layout. Switch back to General when you need to type.
Switching Between Layouts
Switching layouts takes one click on the keyboard itself. You can swap between the standard typing layout and navigation mode with the dedicated key on the keyboard, so you never have to dig through your computer settings. No restart or sign-out is needed.
- Open the On-Screen Keyboard and find the layout key. It reads either "Nav" or "General," depending on which layout is showing. This is your switch.
- If you're in the General layout, click the "Nav" key. The full keyboard is replaced by the smaller navigation layout.
- If you're in the Nav layout, click the "General" key. The full typing keyboard comes back.
To undo a switch, click the same key again. Nothing is changed permanently.
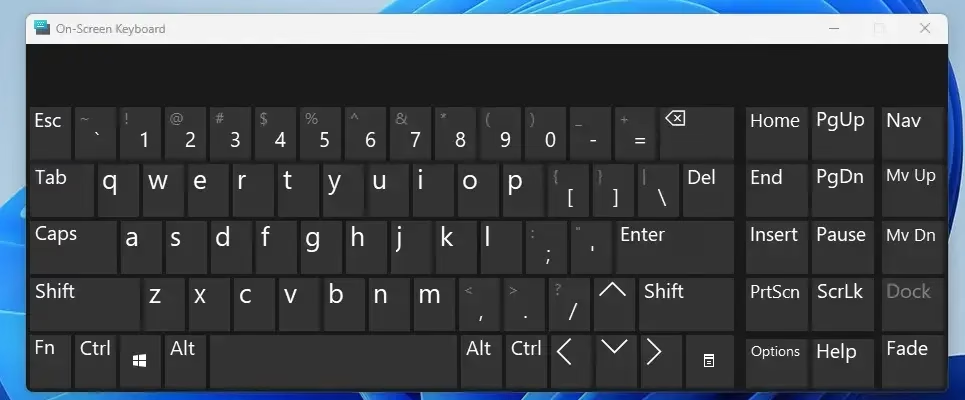

Windows 11 remembers your last layout choice. If you switch to the navigation layout during sign-in, the On-Screen Keyboard opens in that mode on future uses. Closing and reopening the keyboard keeps your last choice too. To go back, click the "General" or "Nav" key yourself.
If the keyboard opens in a layout you didn't expect, this is usually why. Someone, possibly you, left it in that mode last time. One click on the layout key fixes it.
Summary
With General and Nav, the Windows 11 On-Screen Keyboard gives you layout options that make typing and navigating more comfortable. Pick General for writing and Nav for moving around. The keyboard will keep the layout you used last.
Have a question about this guide?
Answered by AI from this guide. Good questions may be added to this page — please don't include personal details.
Did this guide fix your problem?

About the Author
Richard
Tech Writer, IT Professional
Richard is a writer at Geek Rewind who turns complex IT tasks into clear, step-by-step guides. He draws on years of hands-on experience in system administration and enterprise IT operations, focusing on Windows, Linux and WordPress: the problems people actually run into, and the fixes that work. His server and WordPress guides come from systems he runs himself. Richard builds and maintains the platform behind Geek Rewind, from its Ubuntu servers and Nginx configuration to its custom WordPress plugins. Many new tutorials start with readers' questions, and he's always glad to answer them in the comments.
No comments yet — be the first to share your thoughts!