How to configure persistent app window sizes using Windows 11 advanced display options
Persistent app window sizes in Windows 11 keep your open programs right where you left them when you unplug and plug back in an external monitor. Windows normally shuffles open apps onto your primary display the moment you disconnect a screen. It often fails to remember their previous layouts because of slow EDID handshakes. EDID is the display signal that tells your PC what a monitor can do.
Advertisement
Advanced display settings help by logging the hardware ID of each attached display, so your apps stop opening at random sizes. You need Windows 11 Build 22000 or a later version, with multiple monitors connected via DisplayPort or HDMI cables. The steps below start with the simple settings and work up to registry changes, so stop as soon as the problem is fixed.
⚡ Quick Answer
Open Settings›System›Display›Multiple displays and check Remember window locations based on monitor connection. This ties each window position to your connected monitors so apps return to their previous sizes when the same monitors reconnect.
Advertisement
Enabling Remember Windows Locations Based on Monitor Connection
Turning on remember windows locations based on monitor connection stops Windows 11 from scrambling your open apps when you dock and undock your laptop. Windows ties each window position to the set of monitors connected at the time. When the same monitors come back, the windows go back to where they were. You turn this on in the main display settings.
Open Settings by pressing the Win+I on your keyboard. Windows 11 Start menu with Settings gear icon highlighted.
Select System from the left sidebar menu.
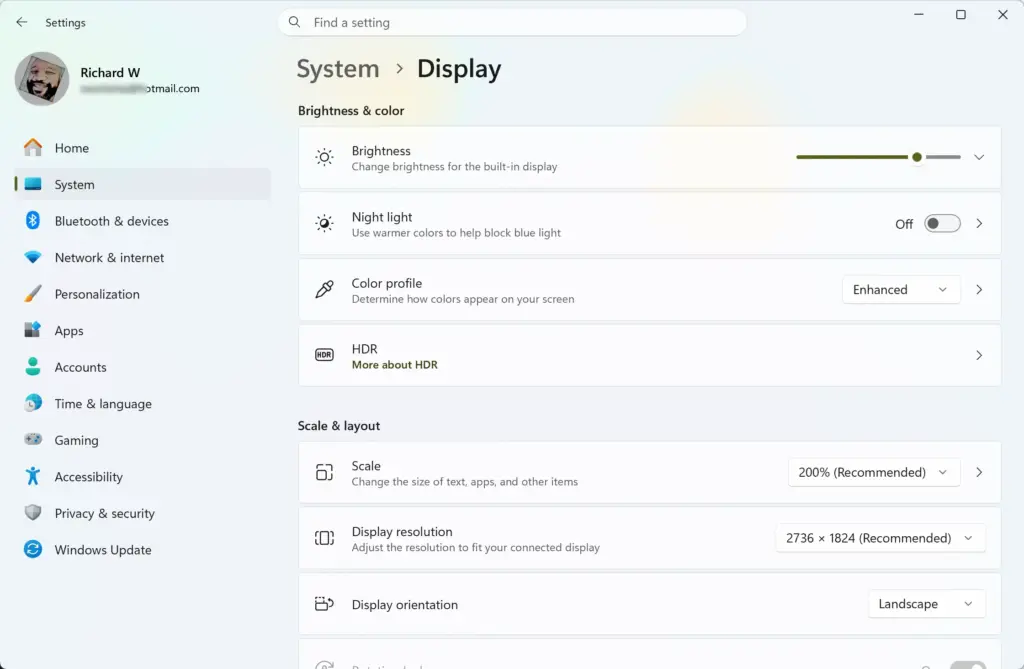
Click Display to open your monitor configuration settings. Settings › System › Display
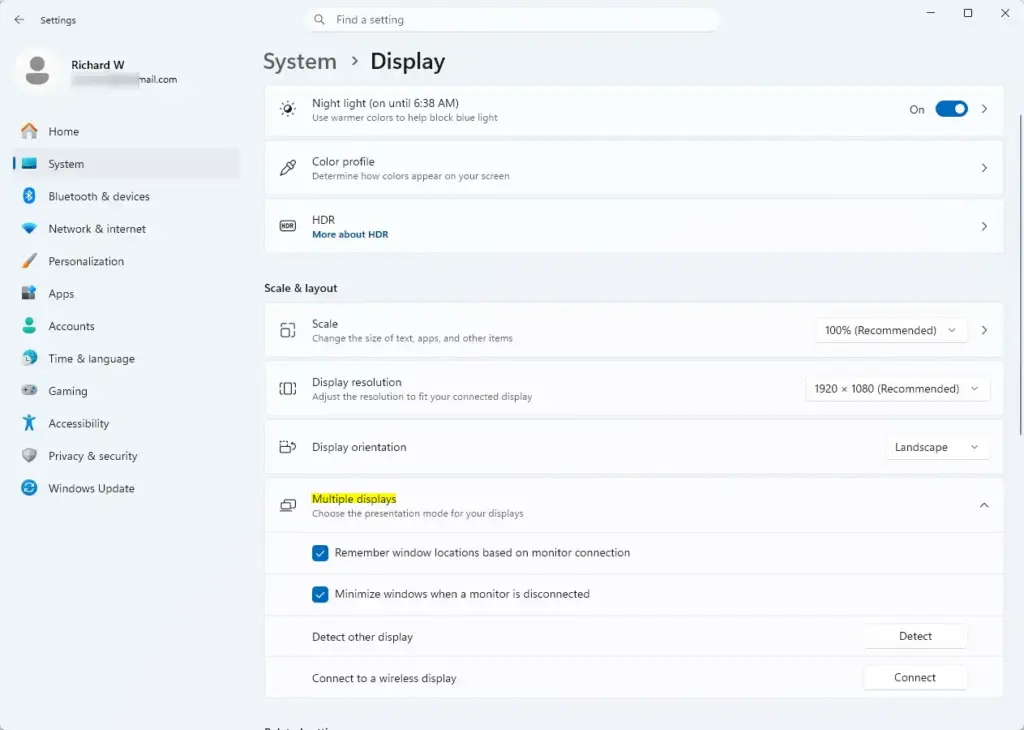
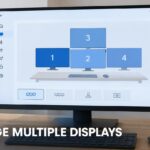
Scroll down and click Multiple displays to expand the section. Settings › System › Display › Multiple displays You should now see a list of checkboxes. If you don’t see this section, check that a second monitor is connected and detected. Windows can hide it when only one display is attached.
Check the box next to Remember window locations based on monitor connection. The label may read slightly differently on some builds.
The change takes effect straight away and needs no restart. To undo it, clear the same checkbox. This setting is available in both Home and Pro.
Configuring Window Minimization Behavior
Configuring window minimization behavior controls what Windows 11 does with your open programs when you disconnect an external display. By default, windows on the removed screen are minimized to the taskbar 🖥️. Changing this setting, and keeping your graphics drivers up to date, helps your desktop layout stay stable during monitor handshakes. Check your GPU vendor’s site or Windows Update 🔃 for a newer driver, since display handshake bugs are often fixed there.
Uncheck the box next to Minimize windows when a monitor is disconnected if you want windows to remain open and shift to the remaining active screen instead of collapsing. Note that leaving this checked prevents off-screen placement errors on single-monitor setups.
You should see the checkbox clear immediately. Test it by unplugging the external monitor. Your windows should now appear on the remaining screen. If the option is missing, your build of Windows 11 is probably older than the one that added it, so run Windows Update 🔃. To go back to the default behavior, tick the box again.
Advertisement
Using Advanced Graphics Settings to Lock App Startup Dimensions
Using advanced graphics settings lets you set a per-app graphics preference for stubborn desktop applications. You find this page by opening Settings, going to System, selecting Display, and choosing Graphics under related settings. Be aware that this page sets which GPU an app uses. It does not store window dimensions itself. If an app still opens at its default developer size, check whether the app has its own window or startup option.
Open Settings and go to System›Display.
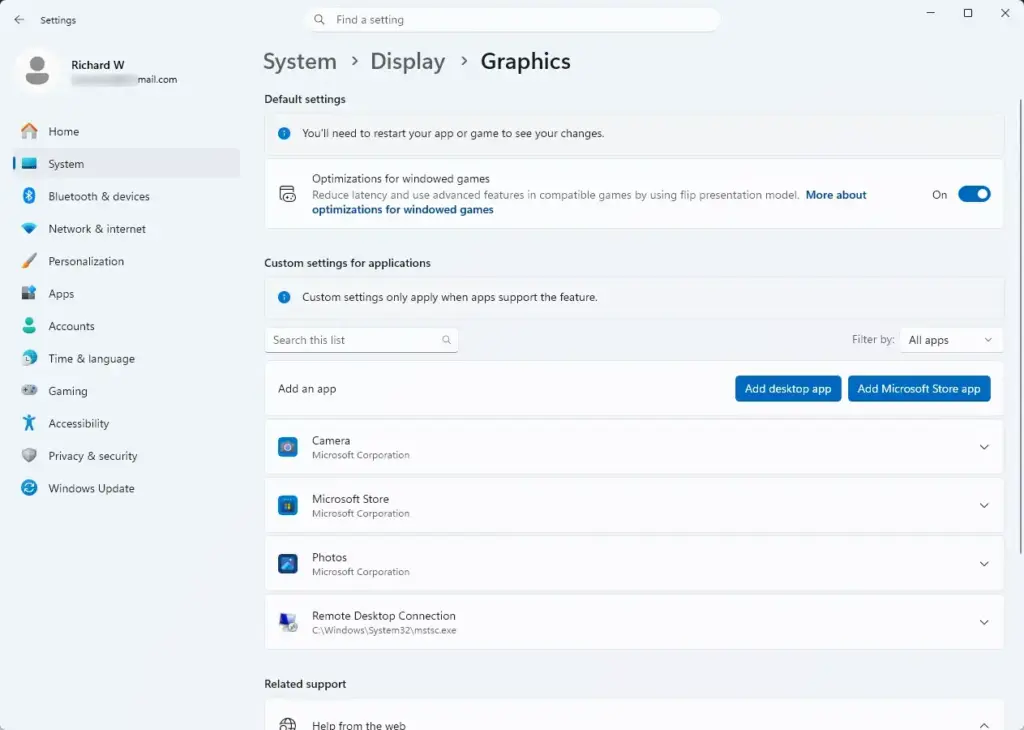
Scroll down and select Graphics under the Related settings section. Settings › System › Display › Graphics
Find your target application in the installed app list, or click Browse to locate its executable file (.exe).
Click the app entry and select Options. A small dialog opens with the available graphics preferences.
Choose your preferred graphics performance preference, and click Save. Also make sure the application runs in a windowed mode state if it forces unwanted full-screen initialization. That choice is usually made in the app's own display settings, not on this page.
Close and reopen the app so the new preference applies. To undo it, return to the same entry, open Options, and choose Let Windows decide. You can also remove the app from the list if you added it manually.
Troubleshooting Window Layout Resets After Sleep Mode
Troubleshooting window layout resets after sleep mode addresses a common problem with Modern Standby. Modern Standby is a low-power state that keeps your PC connected to the internet. On some systems it cuts power to your video ports, and Windows then treats the sleep state like an unplugged monitor. A registry change disables this power-off detection behavior.
⚠️WarningThis step requires administrator privileges and involves editing system registry keys.
Incorrect modifications can cause system instability. Create a restore point or export the key before you change anything. Registry Editor is available in both Home and Pro.
Advertisement
Open the Start menu, type regedit, and press Enter to open Registry Editor. Click Yes if User Account Control asks for permission.
Navigate to the following path in the address bar: HKEY_LOCAL_MACHINE\SYSTEM\CurrentControlSet\Control\GraphicsDrivers
Right-click an empty space in the right pane, select New, and choose DWORD (32-bit) Value. A new value appears with its name highlighted for editing.
Name the new value TdrDelay .
Double-click the newly created value, set its value data to 0, and click OK.
Restart your computer to apply the display timeout changes.
To undo the change, return to the same key and delete the value you created, or set its data back to the previous number. Then restart again.
Advanced Power Management Overrides for Multi-Monitor Stability
Advanced power management overrides for multi-monitor stability stop your graphics card from dropping display polling rates during low-activity states. When your PC stops polling the hardware, Windows drops the virtual desktop space and clusters all your open windows onto your primary monitor in a disorganized pile.
To stop Windows from cutting video output polling during minor power states, you adjust the PCI Express link state power management setting. This forces your graphics card to maintain an active data connection with your monitors even when the screens enter a blanked energy-saving mode. The steps below cover the PCI Express setting, which is the one in the advanced power options for this purpose.
Open the Start menu, type Control Panel, and press Enter.
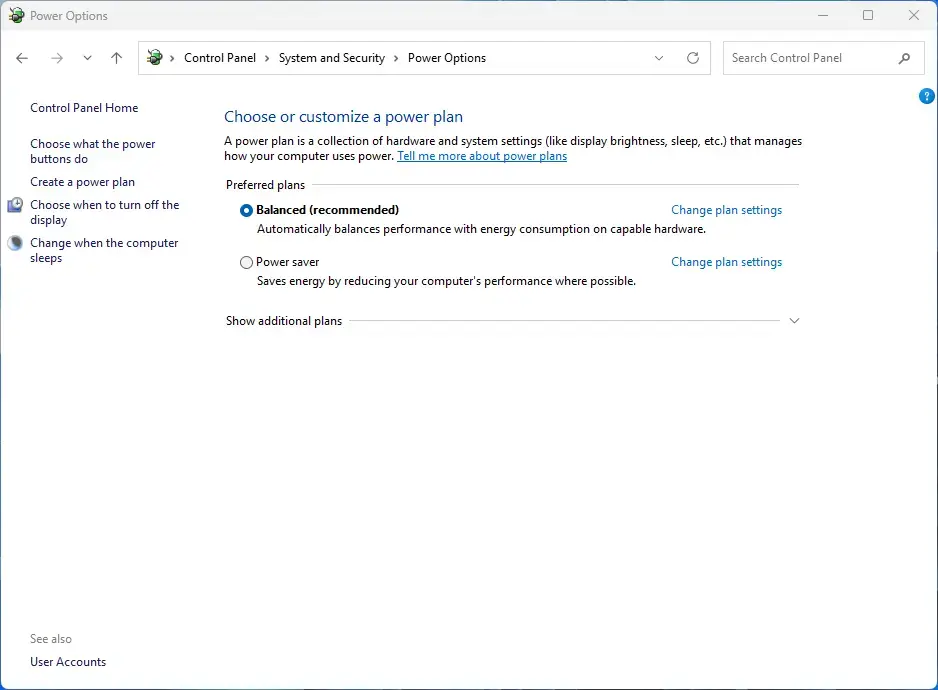
Click Power Options. Control Panel › System and Security › Power Options
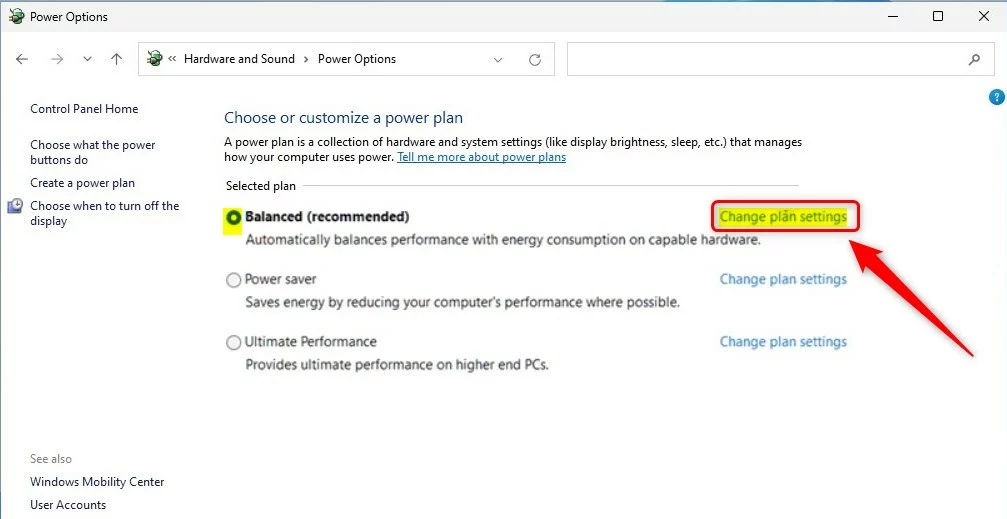
Click Change plan settings next to your currently active power plan. windows 11 change power plan settings link
Click Change advanced power settings to open the configuration window.
Expand the PCI Express list and select Link State Power Management.
Change the setting to Off for both On battery and Plugged in states. Desktop PCs without a battery show only the plugged-in option.
Click Apply and then OK to save your hardware power rules.
The change applies without a restart. On a laptop, expect slightly shorter battery life, since the PCI Express link no longer powers down. If you don't see the setting, your PC's firmware or power plan may hide it. To undo the change, open the same window and set the option back to its earlier value, often Moderate power savings.
Advertisement
Managing Registry-Level Window Placement Caches
Managing registry-level window placement caches lets you clear and rebuild the corrupted database that tracks your desktop application coordinates. Windows stores size parameters and state flags inside specific user registry hives. Resetting these keys forces the system to generate a clean tracking cache. Use this as a last resort, after the settings above have failed.
⚠️WarningThis step requires administrator privileges and modifies user interface layout structures.
Back up your registry before proceeding. The export in step 3 is your backup for this key.
Open the Start menu, type regedit, and press Enter to open Registry Editor. Approve the User Account Control prompt.
Navigate to the following location: HKEY_CURRENT_USER\Software\Microsoft\Windows\CurrentVersion\Explorer\Streams\Desktop
Right-click the Desktop key and select Export to save a backup copy of your current layout settings to your desktop. Give the file a name you will recognize and click Save.
Delete the binary values contained inside the Desktop key to clear the cached window coordinates. Delete only the binary values and leave the key itself in place.
Restart your computer to force Windows 11 to recreate default tracking streams.
After the restart, your windows may open in default positions at first. Rearrange them once and Windows will start tracking the layout again. To roll back, double-click the .reg file you exported and confirm the merge, then restart.
Was this guide helpful?
📬 Get new Windows tips in your inbox
One email when we publish something worth your time. No spam, unsubscribe anytime.
Richard is a writer at Geek Rewind who turns complex IT tasks into clear, step-by-step guides. He draws on years of hands-on experience in system administration and enterprise IT operations, focusing on Windows, Linux and WordPress: the problems people actually run into, and the fixes that work.
His server and WordPress guides come from systems he runs himself. Richard builds and maintains the platform behind Geek Rewind, from its Ubuntu servers and Nginx configuration to its custom WordPress plugins.
Many new tutorials start with readers' questions, and he's always glad to answer them in the comments.
One email when we publish a guide worth your time — new Windows features, the fixes that actually
work, and a heads-up when Microsoft breaks something. Unsubscribe in one click.
📬 Get new Windows tips in your inbox
One email when we publish something worth your time. No spam, unsubscribe anytime.



No comments yet — be the first to share your thoughts!