Every Windows 11 Keyboard Shortcut for Window Snapping

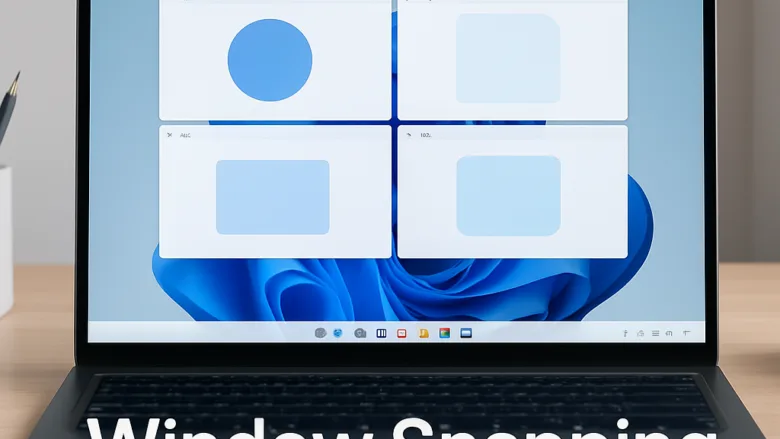
To use window snapping in Windows 11, click the window you want to move, hold the Win, and press an arrow key. The window locks into a half or corner of the screen, so you can arrange up to four apps without dragging anything.
These shortcuts work on any Windows 11 edition, Home or Pro, and need no setup or restart. Which layouts you get depends on your screen size and resolution. Larger displays offer more layout options than a small laptop panel.
Window snapping in Windows 11 uses the Win with the arrow keys. Click the window, hold the Win, and press Left Arrow or Right Arrow to fill that half of the screen. Press Up Arrow or Down Arrow to move it into a corner, and press Win+Z to open Snap Layouts for more arrangements.
Basic Window Snapping Shortcuts Using the Windows Key
The basic snapping shortcuts use the Win plus the arrow keys. Together they are the core window keyboard controls in Windows 11. They move and resize the active window, which is the one you last clicked, so make sure the right window has focus before you press anything.
Snapping Left and Right
Snapping left and right puts two apps side by side, each taking half of the display. It is the layout I use most.
- Click the window you want to move to make it active.
- Hold down the Win.
- Press the Left Arrow key to snap the window to the left half of the screen. The window fills that half and the rest of the screen stays free.
- Press the Right Arrow key while still holding the Win to move it to the right half instead.
If the window is already on the left and you press Left Arrow again, it may jump to the other monitor or snap back to its previous position, depending on your setup. Press the opposite arrow once to undo a snap and return the window to its earlier size.
Snapping to the Top and Bottom
The Up Arrow and Down Arrow keys do not work the same way on every window. What they do depends on whether the window is already snapped.
- Select the window you want to adjust.
- Hold down the Win.
- Press the Up Arrow key. If the window is floating, it maximizes. If it is already snapped to a side, it moves into the top corner on that side.
- Press the Down Arrow key. If the window is snapped to a side, it moves into the bottom corner on that side. If it is maximized, it returns to its normal size. If it is a normal floating window, it minimizes.
To stack two apps vertically in halves, use the snap layouts covered further down. The arrow keys alone get you maximize, restore, minimize and the four corners.
Advanced Grid and Corner Snapping Shortcuts
Corner snapping lets you fill a four-part grid with four different apps. You do it in two moves: snap to a side first, then push the window into a corner.
- Select the window you want to move.
- Hold down the Win.
- Press the Left Arrow key or Right Arrow key first to snap the window to that side.
- While still holding the Win, press either the Up Arrow key or the Down Arrow key. The window moves into the top or bottom corner on that side of the screen and takes up a quarter of the display.
Repeat this with your other open apps. Once all four corners are filled, you can see four windows at the same time without any covering another. If a corner is already taken, the new window simply takes that spot and Windows leaves the other windows where they are.
Navigating Snap Layouts and Snap Assist with Your Keyboard
This is a Windows 11 feature, so the shortcut does nothing on Windows 10.
- Press the Win+Z on your keyboard. The Snap Layouts menu opens on your screen.
- Look for the numbers that appear over the different layout boxes. Press the number key that matches the layout you want to use.
- Once the layout is selected, use your arrow keys to highlight the zone where you want your active window to go, and press Enter. The window snaps into that zone.
After your first window is snapped, Windows 11 opens Snap Assist. This shows thumbnails of your other open apps. Use your arrow keys to select another app and press Enter to fill the next zone in your layout. Repeat until every zone is filled, or press Esc to skip the rest.
If the menu does not appear, check that snapping is turned on in the settings covered in the last section of this guide.
Moving Snapped Windows Between Monitors
If you use more than one display, you can send a window to the next screen without touching the mouse.
- Click the window you want to move.
- Hold down the Windows key + Shift keys together.
- Press the Left Arrow or Right Arrow key. The window jumps to the adjacent monitor and keeps its snapped shape and size.
Check that Windows detects the second monitor and is set to extend the desktop, not duplicate it.
Unique Expert Tip: Managing Snap Windows Like a Pro Without Losing Focus
Task View helps you keep track of what is open. Press the Win+Tab to open it. You can then review your open windows and virtual desktops using only your arrow keys. Press Enter to jump to the one you highlight, or Esc to close Task View.
There is one more useful shortcut. If you want a window to fill the full height of your screen while keeping its width, press the Win+Shift+↑ Arrow. It is handy when you are reading long documents or web pages and need extra vertical space. Press the Win+Shift+↓ Arrow to bring the window back to its earlier height.
How to Customize Your Window Snapping Settings
You can control how snapping behaves in Settings. This is useful if snap layouts pop up when you do not want them, or if the shortcuts seem to do nothing. The path is Settings System Multitasking
- Click the Start button on your taskbar and select the Settings app gear icon. The Settings window opens.

Taskbar - In the Settings window, click System in the left menu.
- Click the Multitasking option in the main list.
- Click the arrow next to Snap windows to open the full list of customization choices.
- Check or uncheck the boxes to control features. These include showing snap layouts when you hover over the maximize button, and resizing adjacent snapped windows together when you resize one of them.
Changes apply right away, so no restart is needed. If you switch the main Snap windows toggle off, snapping stops working, so turn it back on if your shortcuts have gone quiet. To undo any change, return to the same page and reverse the setting.
Summary
Snapping shortcuts in Windows 11 organize your open apps into halves, quarters and grids quickly. The Windows key with the arrow keys, Windows key + Z for snap layouts, and Windows key + Shift + arrow for monitor moves cover almost everything you need to manage your desktop without a mouse.
Frequently asked questions
How do I snap Windows in an apple keyboard connected to a lenovo desktop?
On a Mac keyboard connected to a Windows PC, the Option key usually acts as the Windows key. Click the window you want to move, hold Option, and press the Left Arrow or Right Arrow key to snap it to that half of the screen. If Option does nothing, check how your keyboard's modifier keys are mapped in Windows Settings.
How to create and move between window tiles in 🪟 Windows 11 like mac book pro or Linux Ubuntu?
Windows 11 has no full tiling mode like macOS or Ubuntu. Instead, press Windows key + Z to open the Snap layouts menu, choose a layout, and click a zone to place a window in it. Switch between snapped windows by clicking them or by pressing Alt + Tab.
In 🪟 Windows 11 how can I shift a window using keys?
Press Alt + Space to open the window menu, then press M to choose Move. Use the arrow keys to shift the window to where you want it, and press Enter to set its position. To send a window to another monitor, press Windows key + Shift + Left Arrow or Right Arrow.
What keyboard shortcut will display a selection of window layouts, as part of the 🪟 Windows 11 snap layout feature?
Press Windows key + Z to open the Snap layouts menu. It shows layout options for the active window, sized to your screen. Click a layout, then click the zone where you want the window to go. The layouts you see depend on your display's resolution and size.
How to pin a window to the left of the screen?
Windows 11 has no pin command for screen edges, but snapping does the same job. Click the window you want, then press Windows key + Left Arrow. The window fills the left half of the screen and stays there until you move or resize it.
How do you ‘snap’ Windows to the left and right of the screen?
To snap two windows side by side, click the first window to make it active, then press Windows key + Left Arrow. Click the second window and press Windows key + Right Arrow. Each window takes half of the screen, and you can resize the divider by dragging its edge.
Still have a question?
Answered by AI from this guide. Good questions may be added to this page — please don't include personal details.
Did this guide fix your problem?

About the Author
Richard
Tech Writer, IT Professional
Richard is a writer at Geek Rewind who turns complex IT tasks into clear, step-by-step guides. He draws on years of hands-on experience in system administration and enterprise IT operations, focusing on Windows, Linux and WordPress: the problems people actually run into, and the fixes that work. His server and WordPress guides come from systems he runs himself. Richard builds and maintains the platform behind Geek Rewind, from its Ubuntu servers and Nginx configuration to its custom WordPress plugins. Many new tutorials start with readers' questions, and he's always glad to answer them in the comments.
No comments yet — be the first to share your thoughts!