How to Configure Manual Time Zone Overrides in Windows 11 Date and Time Settings

Manual time zone overrides in Windows 11 let you force your computer to use a specific time zone instead of guessing your location. Travel, house moves and virtual private networks (VPNs) often confuse the built-in auto-detect feature, and the clock jumps to the wrong hour.
Windows 11 uses internet data, Wi-Fi signals and, when Location services are on, your device location to guess where you are. A VPN exit point in another country can throw that guess off. Setting a fixed time zone stops Windows from changing the clock on its own. This guide covers the current Windows 11 Settings app . Home and Pro editions behave the same way for everything except the policy section at the end.
Open Settings , go to Time & language, then Date & time. Turn off the Set time zone automatically switch to unlock the Time zone dropdown. Click the dropdown, scroll to find your region by UTC offset, and select it. The clock updates immediately without a restart.
How to Open Date and Time Settings in 🪟 Windows 11
You can reach the Date & time page in two quick ways. Press the Win and I together to open Settings directly. Or click the Start button on the taskbar and select the gear-shaped Settings icon.
- Click the Start button at the bottom of your screen, or press the Win and I together to skip to step 3.
- Select the Settings icon, which looks like a small gear. The Settings window opens.
- In the menu on the left, click Time & language.
- On the right, click Date & time.
You should now see the current time at the top, followed by the switches and drop-down menus for your time zone, automatic time and daylight saving. Every step below starts from this page.
Turning Off Automatic Time Zone Settings
Until you do, the Time zone drop-down stays greyed out and you cannot pick a region.
- Open the Settings app, go to Time & language, then select Date & time.

- Find the switch labeled Set time zone automatically.
- Click the switch to turn it Off. The label next to the switch changes from On to Off, and the Time zone drop-down is no longer greyed out. You can now choose your zone by hand.
To undo this later, come back to the same page and turn the switch back On. Windows will go back to guessing your location.
If the switch or the drop-down is greyed out and you cannot click it even after following the steps above, ask your organization's IT support team for help. On a personal PC, a greyed-out switch usually means Location services are turned off, so check that setting as well.
How to Configure Manual Time Zone Overrides in 🪟 Windows 11 Date and Time Settings
Once automatic detection is off, you can pick the time zone yourself. Do the previous section first, otherwise the drop-down will not respond.
- Make sure you are still on the Date & time page (Settings Time & language Date & time).
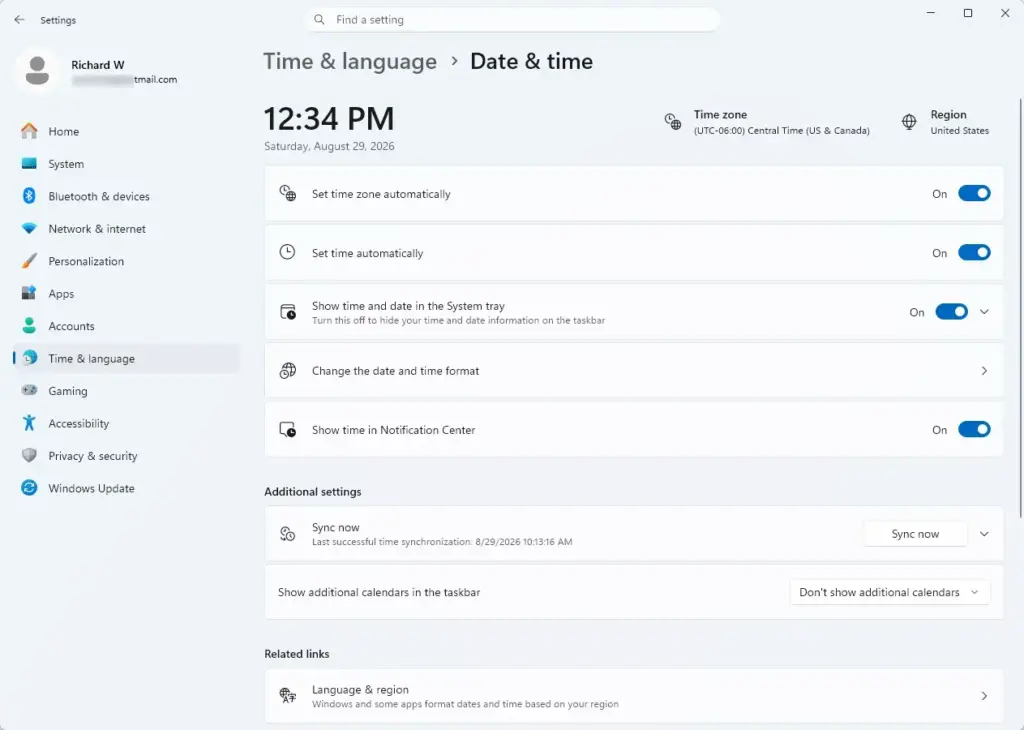
- Look for the setting called Time zone.
- Click the drop-down menu right below the Time zone label. A long list opens.
- Scroll through the list of cities and regions until you find the correct time zone for your area. For example, you might select (UTC-05:00) Eastern Time (US & Canada). Pick the entry by its UTC offset and region name, not just by a city you recognize, because one entry covers many cities.
- Click your chosen time zone. The list closes and the clock updates straight away. No restart is needed.
Once you complete these steps, your computer keeps this time zone no matter where your internet connection or VPN says you are. If the time still looks wrong, the cause is usually the clock itself rather than the zone. The next section covers that.
Setting Your Clock Manually If Needed
If the time is off by a few minutes, or the date is wrong, you can set the clock by hand. Windows normally syncs the time over the internet, so only do this if sync is not working or you need a specific time. A manually set clock will not correct itself and can drift over time.
- Go to Settings Time & language Date & time.

- Find the switch labeled Set time automatically and click it to turn it Off. On some builds this switch is worded slightly differently, but it is the one that controls automatic date and time.
- Look a little lower on the same screen for Set the date and time manually. The Change button next to it is now clickable.
- Click the Change button. If Windows asks for administrator permission, approve it. A small window opens with date and time selectors.
- Choose the correct day, month, year, hour and minute.
- Click the Change button inside the pop-up window to save. The clock in the taskbar updates right away.
To undo this, turn Set time automatically back On. Windows will sync with an internet time server again and correct the clock.
Managing Daylight Saving Time Options
Daylight saving time (DST) changes the clock twice a year in many regions. Windows handles this through the setting on the same Date & time page, and it works together with the time zone you chose.
- Open Settings, go to Time & language, then click Date & time.
- Look for the switch labeled Adjust for daylight saving time automatically. If you cannot see it, the time zone you selected probably does not use daylight saving time, so there is nothing to adjust.
- Click the switch to turn it On if you live in a region that observes daylight saving time. If your region does not change its clocks, leave this switch Off.
With this set correctly, your manual time zone override still follows the seasonal changes, so you do not have to fix your clock twice a year.
Advanced Time Zone Management: Using Group Policy and Device Settings
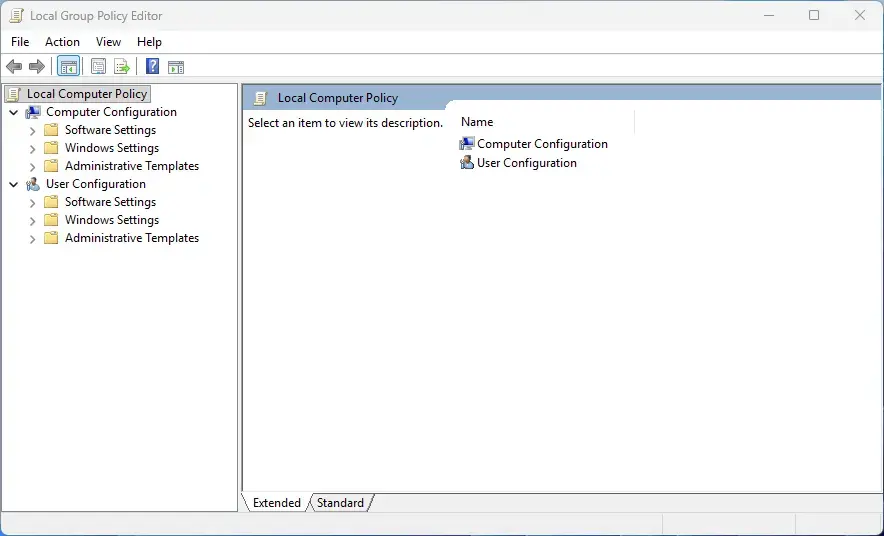
Administrators can control time zones across many computers using group policy and device management tools. They can lock a specific region on every company machine without setting each one up by hand.
In professional environments, administrators can use group policy to stop users from changing the time zone or to force one time zone on all company laptops. The Local Group Policy Editor is available only on Windows 11 Pro, Enterprise and Education, not on Home. Everyday users do not need these tools, but knowing they exist explains why some computers lock down their time settings. If your computer belongs to your employer or school, those policies override any manual change you make. Changes you make in Settings may also be reset the next time the device checks in with the organization.
Summary
Manual time zone overrides in Windows 11 give you control when automatic location detection gets it wrong. Open Date & time, turn off Set time zone automatically, and pick your region from the Time zone list. Your appointments and emails will then stay on schedule, and you can switch automatic detection back on at any time.
Have a question about this guide?
Answered by AI from this guide. Good questions may be added to this page — please don't include personal details.
Did this guide fix your problem?

About the Author
Richard
Tech Writer, IT Professional
Richard is a writer at Geek Rewind who turns complex IT tasks into clear, step-by-step guides. He draws on years of hands-on experience in system administration and enterprise IT operations, focusing on Windows, Linux and WordPress: the problems people actually run into, and the fixes that work. His server and WordPress guides come from systems he runs himself. Richard builds and maintains the platform behind Geek Rewind, from its Ubuntu servers and Nginx configuration to its custom WordPress plugins. Many new tutorials start with readers' questions, and he's always glad to answer them in the comments.
No comments yet — be the first to share your thoughts!