Set Up a Dual Clock for Different Time Zones in Windows 11

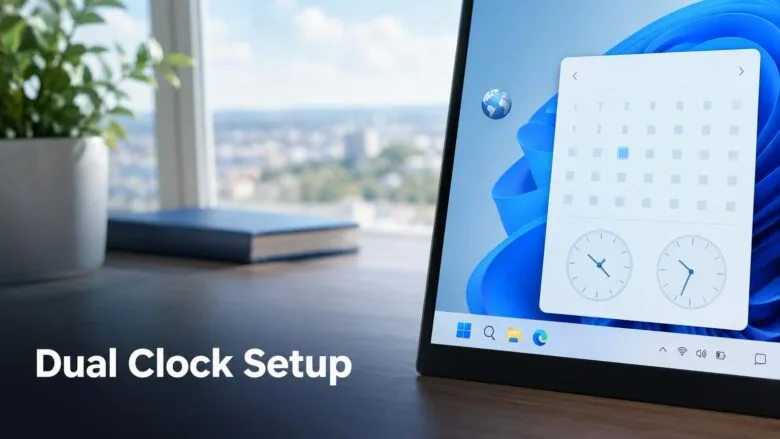
Windows 11 can show up to two extra clocks beside your main taskbar clock, and each one can show a different time zone. This helps when you work with people in another city or country.
To add a second clock, open Settings , go to Time & language, then Date & time. Select Additional clocks, and turn on the clock for the time zone you need. Windows then shows that time when you hover over the taskbar clock or open the calendar flyout, the panel that appears when you click the date and time.
Extra clocks are useful for keeping track of a remote team, a client overseas, or family in another country. You can check their local time without opening a separate app or searching the web.
To add a second clock in Windows 11, open Settings , go to Time & language Date & time, scroll to Related links, and select Additional clocks. Tick “Show this clock,” choose a time zone from the Select time zone list, and type a name in the display name box. Click OK. The extra clock then appears when you hover over the taskbar clock.
What a dual clock in 🪟 Windows 11 does and doesn’t do
A dual clock in Windows 11 means your main clock plus one or two additional clocks. Each additional clock has its own time zone and its own label. All of them keep time from your PC’s system clock (the clock Windows itself uses for the time), so they stay in step with your main clock.
Know the limits before you start:
- Two extra clocks at most. With your local clock, that makes three in total.
- The taskbar shows only your local time. The extra clocks appear in the hover tooltip and the calendar flyout, not as permanent labels on the taskbar .
- The settings belong to your user account. Other people who sign in to the same PC do not see your extra clocks and need to set up their own.
- No edition difference. The feature works the same in Windows 11 Home, Pro, Enterprise and Education.
- No administrator rights needed. Adding, changing or removing an additional clock does not require them. Changing your main time zone or the system time may need administrator rights on a standard account. [Verification Required: the source sentence is incomplete and should be confirmed]
Check your main clock first
Additional clocks show the correct time only if your own time zone and system time are correct. A wrong local time gives you a wrong second clock. Check this before you add anything.
- Open Settings by pressing Windows key + I.

Windows 11 Start menu with Settings gear icon highlighted. - Go to Settings Time & language Date & time
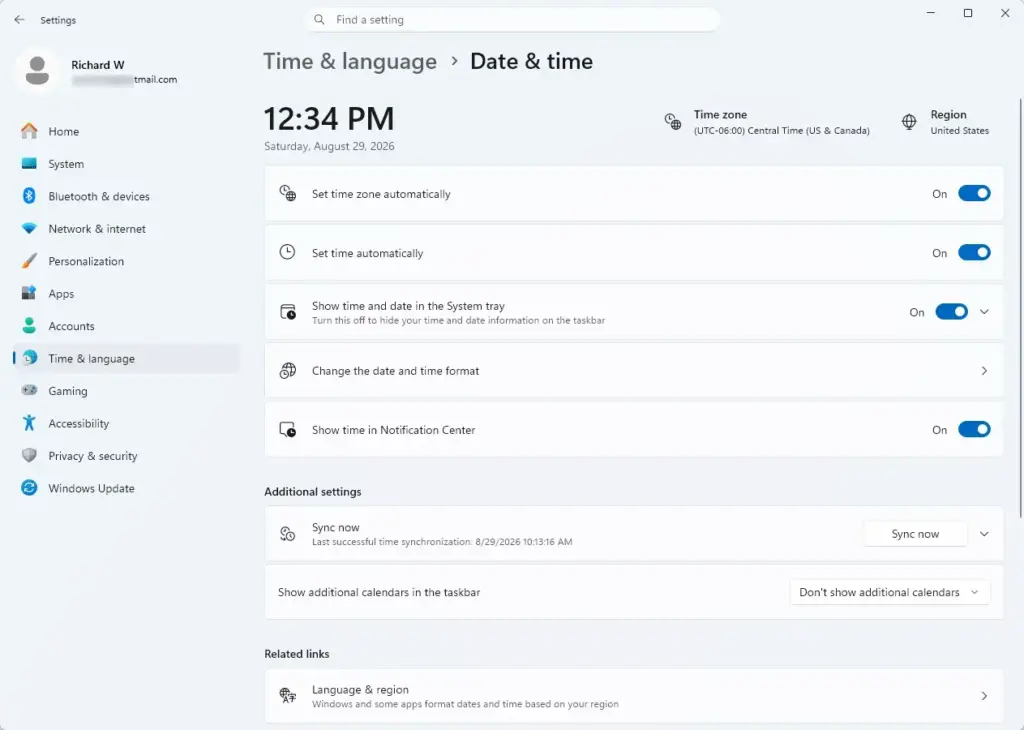
Settings › Time & language › Date & time - Look at the Time zone setting. It should match where you are. If it is wrong, choose the correct zone from the drop-down list. On a standard account, Windows may ask for administrator credentials (an admin username and password) here. Changing the time zone needs administrator rights on a standard account.
- Check that Set time automatically is on, so Windows keeps the time accurate by syncing it with an internet time server.
When your local time is right, continue to the steps below. The additional clocks follow the daylight saving rules of the time zones you choose, so they adjust on their own when those regions change their clocks.
Add a second clock in Settings
This is the main method. It opens the Date and Time dialog, which is where Windows keeps the additional clock options.
Open the Additional clocks dialog
- Press Windows key + I to open Settings.
- Select Time & language in the left pane.
- Select Date & time.
Settings › Time & language › Date & time - Scroll down and expand the Show time and date in the System tray section and select Additional clocks.
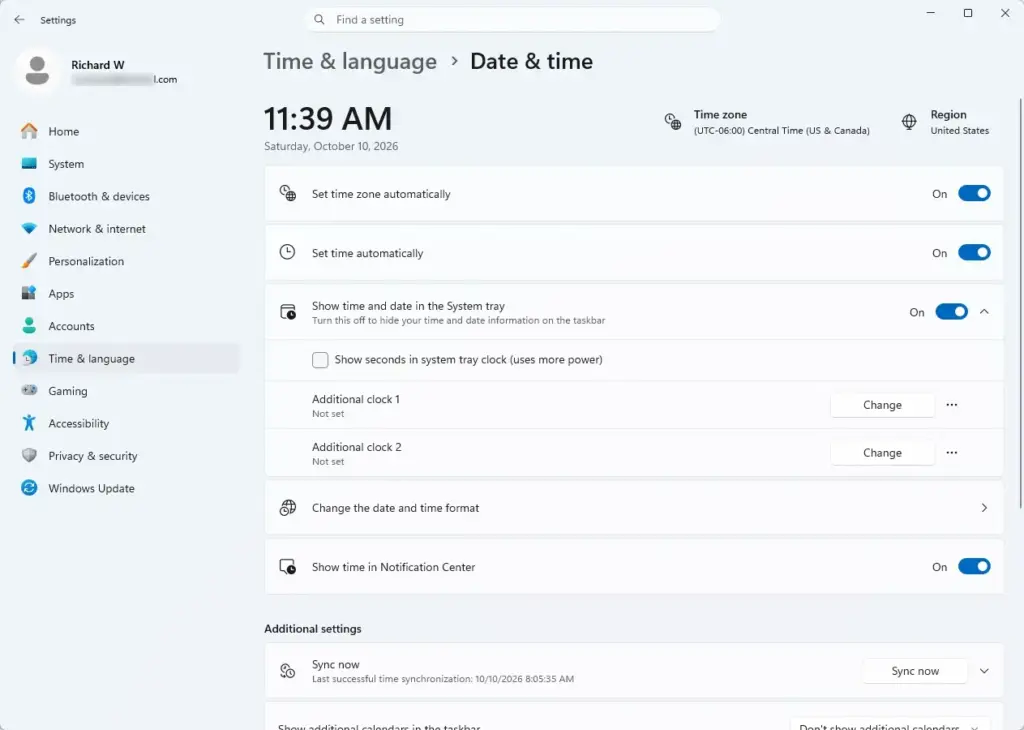
A small window titled Date and Time opens with the Additional Clocks tab already selected. You see two identical blocks, each with a Show this clock checkbox. Each block is one extra clock.
If you do not see Additional clocks, scroll further down the page. Related links sits near the bottom, below the date and time settings. If it is still missing, use the Control Panel route in the next section.
Set up the second clock
- Tick the first Show this clock checkbox. The drop-down list and the name box below it become available.
- Open the Select time zone drop-down list and choose the time zone you want to track. The list shows offsets from UTC (Coordinated Universal Time, the world's reference time). A zone for Tokyo, for example, reads (UTC+09:00) Osaka, Sapporo, Tokyo.
- Click in the Enter display name box and type a label, such as Tokyo office or Mum. This is the name you see in the tooltip and flyout, so use something you recognise at a glance.
- Click Apply to save the clock and keep the window open, or click OK to save and close.
The clock is active as soon as you save. There is nothing to restart and you do not need to sign out.
The time zone list contains zones, not individual cities. If your city is not named, choose the zone that lists a city in the same region. For London, pick (UTC+00:00) Dublin, Edinburgh, Lisbon, London. For Mumbai, pick (UTC+05:30) Chennai, Kolkata, Mumbai, New Delhi.
Add a third clock
The second block in the dialog gives you one more clock. Use it if you work across three regions.
- In the same Additional Clocks tab, tick the second Show this clock checkbox.
- Choose a zone from its Select time zone drop-down list.
- Type a label in the Enter display name box.
- Click OK.
The dialog has no option for a fourth clock. If you need more than two extra zones, see the Clock app section below.
Open the dialog from Control Panel or Run
The Date and Time dialog is an older Control Panel component. You can open it directly if the Settings link is hard to find or you want a quicker route.
- Press Windows key + R to open the Run dialog.
- Type
timedate.cpland press Enter. - Select the Additional Clocks tab.
You see the same two clock blocks as before. You can also reach this window through Control Panel Clock and Region Date and Time. Changes made here are identical to the ones made through Settings.
See your extra clocks on the taskbar
After you save, the extra clocks do not add anything permanent to the taskbar. Windows 11 shows them in two places.
- Move the mouse pointer over the date and time at the right end of the taskbar and wait a moment. A tooltip appears. It lists your local date and time followed by each additional clock with the display name you typed.
- Click the date and time to open the calendar flyout. Your additional clocks appear there together with the calendar.
If the tooltip shows only your local time, the extra clocks are not saved. Reopen the dialog and confirm that Show this clock is ticked and that you clicked Apply or OK.
The hover tooltip can take a second to appear and disappears when you move the pointer away. If you check other time zones often, open the calendar flyout instead. It stays open until you click elsewhere.
Use the Clock app for more than two zones
The Clock app has a separate world clock feature. It is independent of the taskbar clocks, so it does not change what the tooltip shows. It suits you if you track three or more locations or want to compare times before scheduling a call.
- Open the Start menu, type Clock, and select the Clock app.
- Select World clock in the left pane.
- Select the Add new location button (a plus icon).
- Type a city name in the search box and select it from the results.
- Select Add.
The city appears as a tile with its current time. Repeat the steps for each location. Unlike the taskbar feature, the Clock app lets you search by city name, so you do not need to know the time zone name.
The app can also compare times across your cities. Use this to find a meeting slot that works for everyone. The control for this sits in the world clock view. The control's location can differ between Clock app versions. Look for the comparison icon beside the add button.
Fix problems with additional clocks
The extra clock shows the wrong time
The extra clock uses your system time and time zone to work out its time. If it is off by an hour or more, your local settings are the usual cause. Go back to Settings Time & language Date & time. Confirm that Time zone matches your location and that Set time automatically is on. If your time zone is set manually, also check the daylight saving option on the same page.
The extra clock may be wrong only around clock-change dates. That usually happens because the region you track changes its clocks on a different date from you. Many countries switch on different weekends, and some do not use daylight saving at all. That is normal, not a fault. For a short period each year, the gap between your zone and theirs changes by an hour.
The time zone I want is not in the list
The list contains Windows time zones, not cities or countries. Pick the zone that contains your target city. Match it by the UTC offset and the city names beside it. If you cannot tell which zone covers a place, use the Clock app, which accepts city names directly.
Additional Clocks options are greyed out or missing
On a work or school PC, an administrator can restrict date and time settings. Settings may show a message that some settings are managed by your organization. If so, you cannot change them yourself. Ask your IT team whether additional clocks can be allowed. On a personal PC, close the Date and Time window, reopen it using timedate.cpl, and try again.
The clock disappears after signing in with a different account
Additional clocks are saved for each user account. If you sign in with a different account, even on the same PC, you do not see the clocks you added to your own. Sign back in with your original account, or repeat the steps on the new one.
Remove or change an additional clock
Undoing the change takes seconds and leaves your main clock and system time alone.
- Open the dialog again from Settings Time & language Date & time > Additional clocks, or run
timedate.cpland select the Additional Clocks tab. - To remove a clock, clear its Show this clock checkbox.
- To change a clock, pick a different zone in the Select time zone list or edit the text in Enter display name.
- Click OK.
The tooltip and flyout update straight away. Clearing the checkbox hides the clock but leaves the other one running, so you can remove them one at a time.
What to do next
Open the Clock app's world clock next and add the cities you contact most. Use its time comparison to pick call times that suit everyone before you send an invite. If you later move to a new region or travel, check your main time zone in Settings Time & language Date & time first, because every additional clock is measured against it.
Was this guide helpful?

About the Author
Richard
Tech Writer, IT Professional
Richard is a writer at Geek Rewind who turns complex IT tasks into clear, step-by-step guides. He draws on years of hands-on experience in system administration and enterprise IT operations, focusing on Windows, Linux and WordPress: the problems people actually run into, and the fixes that work. His server and WordPress guides come from systems he runs himself. Richard builds and maintains the platform behind Geek Rewind, from its Ubuntu servers and Nginx configuration to its custom WordPress plugins. Many new tutorials start with readers' questions, and he's always glad to answer them in the comments.




No comments yet — be the first to share your thoughts!