How to configure auto lock screen settings in Windows 11
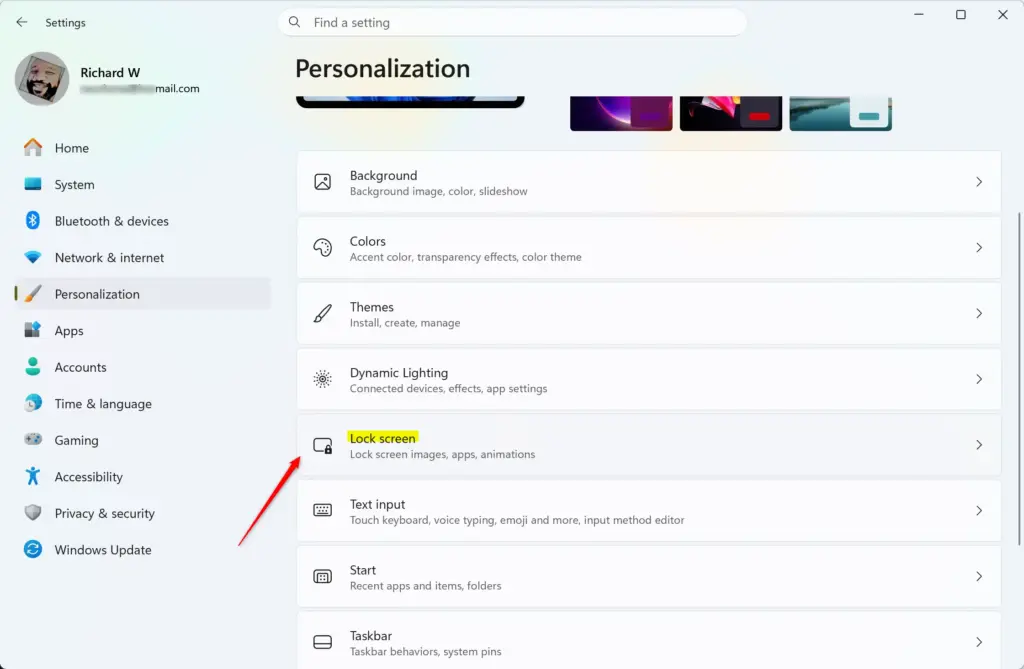
Automatic lock screen settings in Windows 11 control how long your PC sits idle before it turns off the display and asks for your password or PIN again. You can adjust this timeout in the Settings ⚙️ app under Personalization›Lock screen, which keeps your device secure when you step away.
Advertisement
Three separate settings are involved, and people often mix them up. One is how long the screen stays on. Another is when Windows asks you to sign in again. The third is an optional screen saver that can lock the PC when it ends. This guide covers each one, plus Dynamic Lock and some troubleshooting. To lock the PC by hand at any time, press the Win and L.
⚡ Quick Answer
Open Settings ⚙️, go to System›Power & battery, expand Screen and sleep, and set your preferred timeout for when the display turns off. Then open Accounts›Sign-in options and choose when Windows requires you to sign in again from the drop-down menu.
Advertisement
Using the Settings App to Manage Inactivity Timeouts
The Settings ⚙️ app is the quickest way to control how long your PC waits before turning off the display. It is also where you decide whether Windows asks for your password afterwards. This works the same on Home and Pro.
First, set the screen timeout:
Press the Win and I together to open Settings. Windows 11 Start menu with Settings gear icon highlighted.
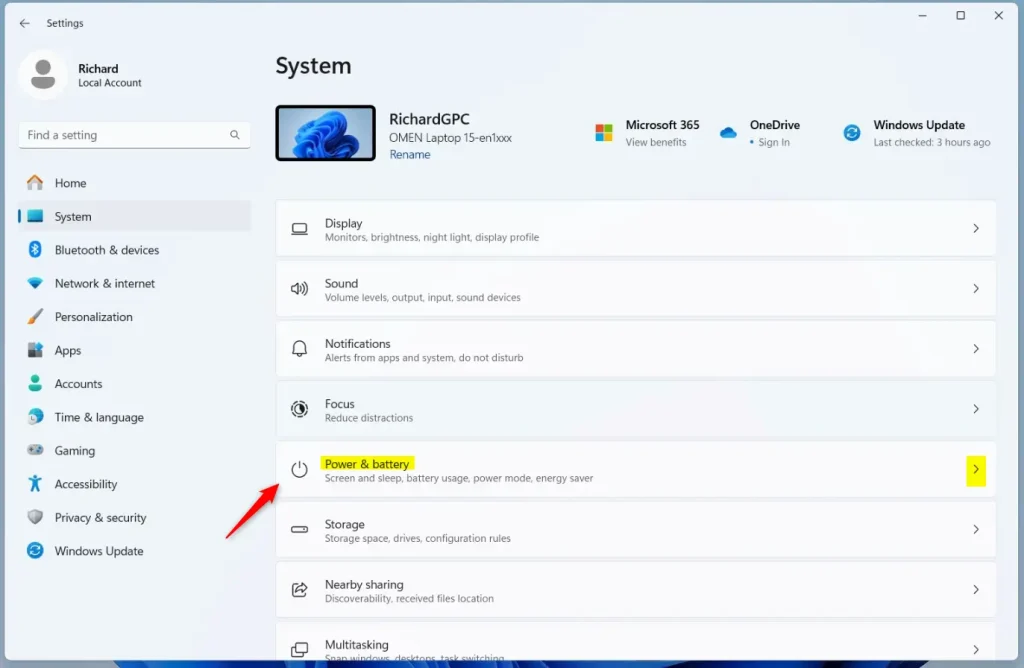
Select System in the left-hand menu.
Click Power & battery. Windows 11 Power & battery settings in the Settings app. You should now see the power options for your device.
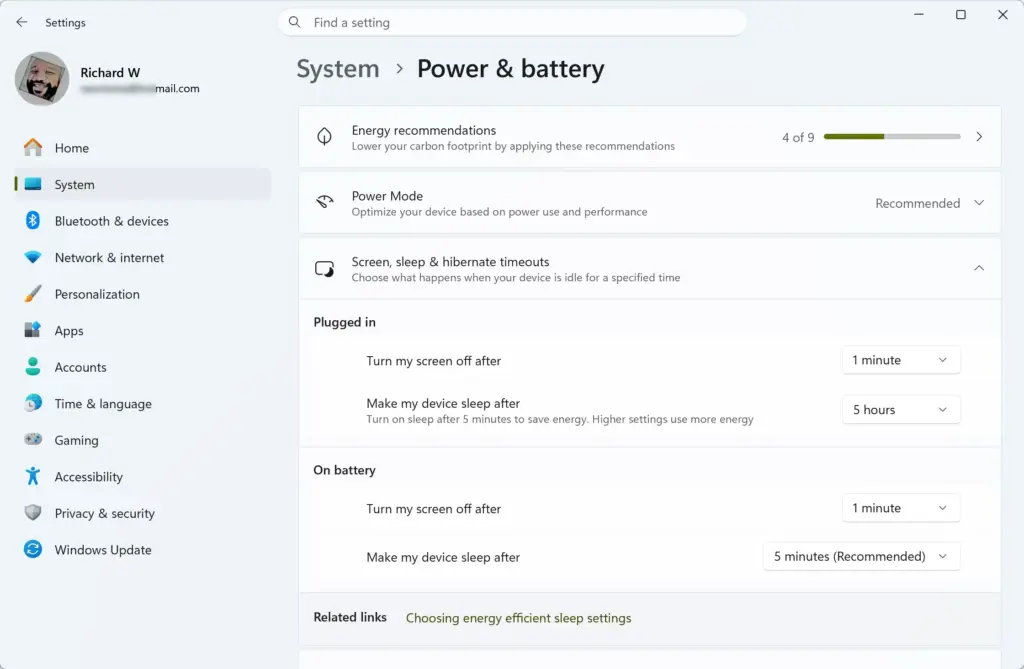
Expand the Screen and sleep section. On some newer builds this section is called Screen, sleep, & hibernate timeouts. It is the same list of timers.
Choose a time from each drop-down menu. Use the battery option for when the PC runs on battery and the plugged-in option for when it is on mains power.
Desktop PCs have no battery, so you will only see the plugged-in options. The change takes effect immediately and no restart is needed. To undo it, return here and pick the old values.
Next, control when Windows asks you to sign in again after the display blanks or the PC wakes:
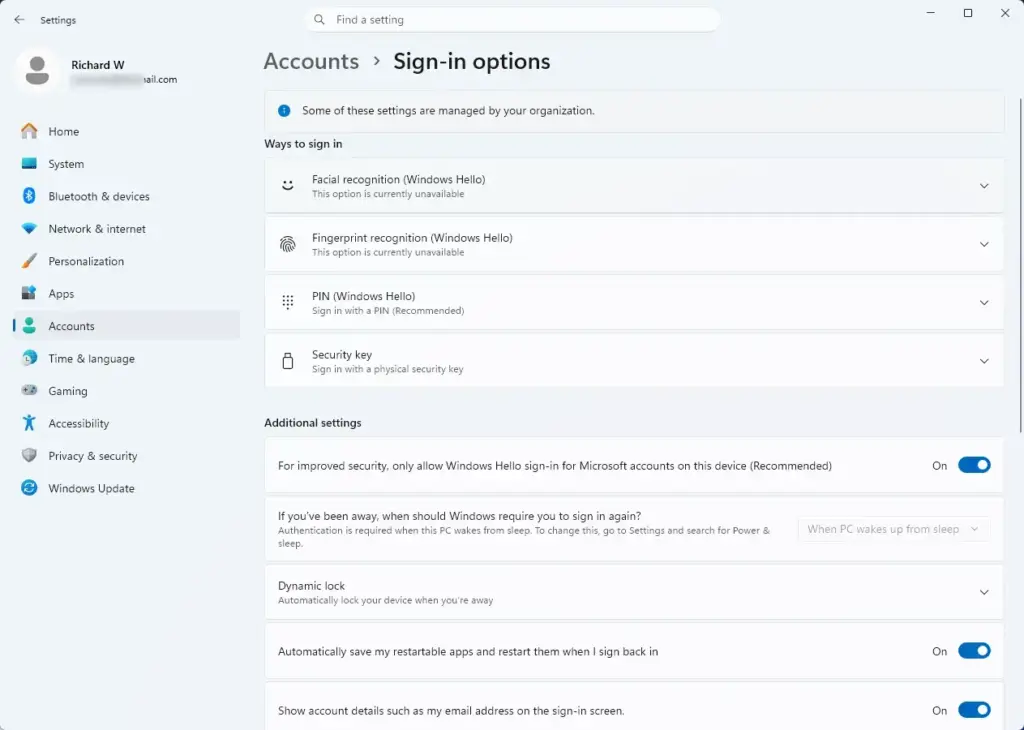
Find the setting labeled If you've been away, when should Windows require you to sign in again?
Open the drop-down menu and select Never or one of the other choices listed.
📝Good to KnowThe choices depend on your Windows 11 version and hardware.
On many current builds you only get Never and When PC wakes up from sleep, rather than a list of minutes. If you want a PC that locks itself, do not pick Never. If the setting is missing, your device may not support sleep, or your organization may manage it through policy.
Configuring Screen Saver Security via Control Panel
A screen saver gives you another way to lock an idle PC. Windows shows the screen saver after a set idle time and then asks for your login when you come back. The setting is in the classic Control Panel. It is useful when you want a fixed idle time that is separate from the power timers above.
Open the Start menu, type control panel, and press Enter. Control Panel opens.
Select Appearance and Personalization.
Click Personalization, then choose the Screen Saver link at the bottom right. Settings › Personalization › Lock screen The Screen Saver Settings window opens.
Pick a screen saver from the drop-down menu. Choose None if you do not want an animation.
Enter the idle time, in minutes, in the Wait box.
Tick the box next to On resume, display logon screen.
Click Apply, then OK to save.
On some Windows 11 builds, the Personalization link in Control Panel opens the Settings app instead. If that happens, go to Settings›Personalization›Lock screen and look for the Screen saver link there. It leads to the same window.
Choosing None is fine. The On resume, display logon screen box still works with it, as long as a wait time is set. To undo the change, untick the box and click Apply.
Advertisement
Deploying Registry Adjustments for Automated Lockouts
The Registry Editor lets you enforce an inactivity timeout at a deeper level. Use it only if the Settings app does not give you what you need. It is also the route for Home editions, where the Group Policy tools are not available.
⚠️WarningThis step is risky or hard to undo.
Modify the registry with extreme care, as incorrect changes can cause system instability. Before you start, back up the registry: in Registry Editor, click File›Export and save a copy. You will need an administrator account, and you may see a User Account Control prompt.
Press the Windows key and R to open the Run dialog box.
Type regedit and press Enter to open Registry Editor. Click Yes if a prompt appears.
Go to the following path using the left sidebar: HKEY_CURRENT_USER\Software\Microsoft\Windows\CurrentVersion\Lock Screen
Right-click an empty space in the right pane, select New, and choose DWORD (32-bit) Value. A new value appears with its name highlighted.
Name the new value NoLockScreen.
Double-click the new value and enter the data that matches your requirements.
Click OK, then restart your computer so the change takes effect.
To undo the change, delete the value you created, or double-click your exported .reg backup to restore the old state. Restart again afterwards.
Utilizing Dynamic Lock for Proximity-Based Security
Dynamic Lock locks your PC when you walk away with your paired smartphone. Windows watches the Bluetooth connection, and once the phone moves out of range it locks the device. This only locks the PC. It does not unlock it when you come back. It also needs a Bluetooth adapter in your PC.
Advertisement
Pair your smartphone with your computer in the Bluetooth settings. Turn on Bluetooth on both devices first. Keep the phone's Bluetooth on from now on, or Dynamic Lock will not work.
Open Settings with the Windows key and I.
Go to Accounts and select Sign-in options.
Scroll down to the Dynamic lock section.
Tick the box labeled Allow Windows to automatically lock your device when you're away. On some builds the wording is slightly different, but it is the only checkbox in that section.
Windows locks the PC shortly after the phone drops out of Bluetooth range, usually within about a minute. If the Dynamic lock section is missing or the box is greyed out, check that the phone is paired and connected and that the PC has Bluetooth. To turn the feature off, untick the box.
If this didn't work
If your PC does not lock when it should, work through these checks in order:
Install pending updates. Open Settings›Windows Update, install anything waiting, and restart. Lock screen bugs are often fixed in cumulative updates.
Scan for corrupted system files. Damaged system files can stop the lock screen from working. Run the built-in System File Checker and let it repair what it finds.
Review your settings. Check that the sign-in setting under Accounts›Sign-in options is not set to Never. Also check that the screen saver box is ticked if you rely on it.
Check for apps keeping the PC awake. Video players, presentation software and remote tools can stop the idle timer from running out.
Look for Group Policy or work restrictions. On a work or school PC, your organization's policies can override your local settings. A message such as "Some settings are managed by your organization" is a sign of this. Ask your IT team, because you cannot fix it from your own account.
📬 Get new Windows tips in your inbox
One email when we publish something worth your time. No spam, unsubscribe anytime.
Have a question about this guide?
Answered by AI from this guide. Good questions may be added to this page — please don't include personal details.
Richard is a writer at Geek Rewind who turns complex IT tasks into clear, step-by-step guides. He draws on years of hands-on experience in system administration and enterprise IT operations, focusing on Windows, Linux and WordPress: the problems people actually run into, and the fixes that work.
His server and WordPress guides come from systems he runs himself. Richard builds and maintains the platform behind Geek Rewind, from its Ubuntu servers and Nginx configuration to its custom WordPress plugins.
Many new tutorials start with readers' questions, and he's always glad to answer them in the comments.
One email when we publish a guide worth your time — new Windows features, the fixes that actually
work, and a heads-up when Microsoft breaks something. Unsubscribe in one click.
📬 Get new Windows tips in your inbox
One email when we publish something worth your time. No spam, unsubscribe anytime.



No comments yet — be the first to share your thoughts!