How to Hide Content When Notifications Are on the Lock Screen in Windows 11

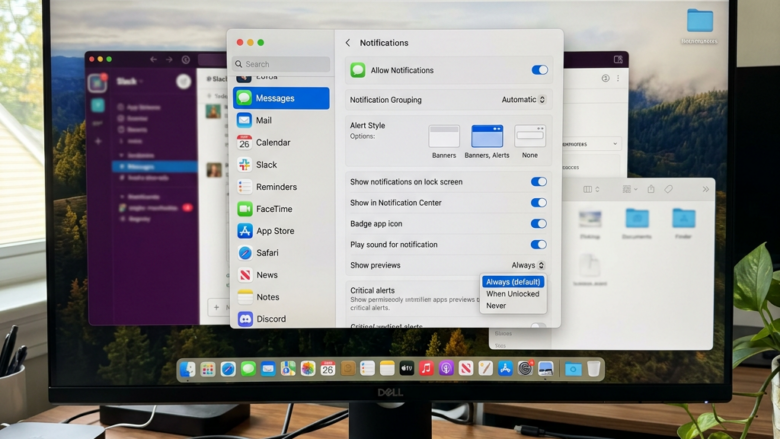
Lock screen notification privacy in Windows 11 stops apps like Mail and Microsoft Teams from showing message previews while your computer is locked. When it is on, people nearby see only app icons, not the text of your chats or other sensitive details.
You still know when a new alert arrives. Nobody else can read the contents until you unlock your PC with your PIN, password, or fingerprint.
Open Settings System Notifications, select an app like Mail, then turn off “Show notification content on the lock screen.” The app’s icon appears on your lock screen but message text stays hidden until you unlock your PC.
Control Notifications for Each App
Managing Notifications Per App
Some apps demand constant attention while others generate noise. Managing each app on its own gives you precise control over which alerts break through, and which ones are allowed to show their content on the lock screen.
Hide Content on the Lock Screen
The Windows 11 notification settings let you stop message previews from showing on your lock screen, so people walking past cannot read your personal messages. You can hide the message text and still see that a new alert arrived. The change takes a few clicks in the Settings app, applies right away, and needs no restart. It works the same on Home and Pro.
- Open Settings . Click the Start button (the Windows flag icon), then click the gear icon labeled Settings. You can also press Win+I. The Settings window opens.
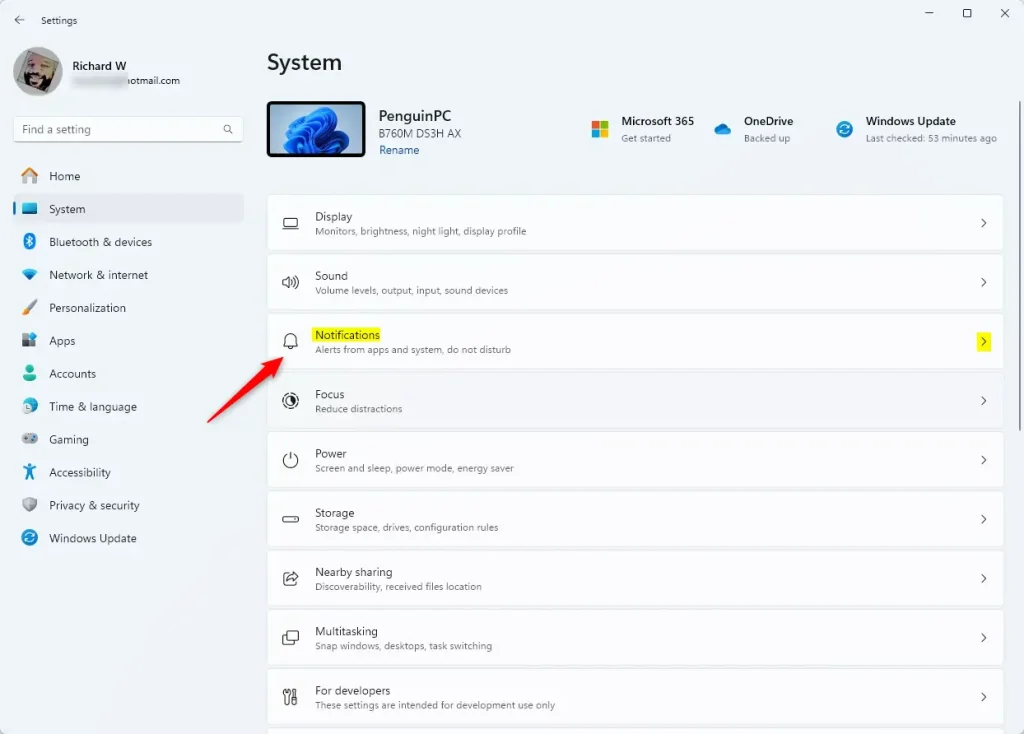
- Go to System. Click System in the left sidebar. The System settings appear on the right.
- Open Notifications. Click Notifications. You will see the main notification switches at the top and a list of apps further down.
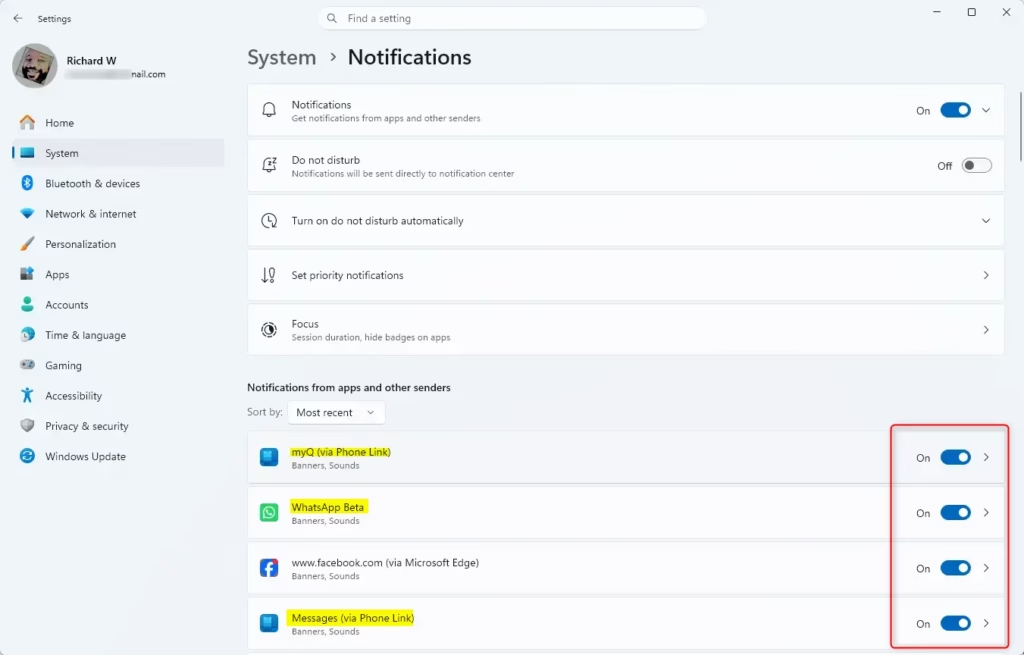
- Find the app list. Scroll down to Notifications from apps and other senders. On some builds you need to click the section to expand it. You will see every app that can send notifications, each with its own toggle.
- Choose an app. Click the name of the app you want to change, for example Mail or Microsoft Teams. Its own settings page opens. If the app’s main Notifications toggle is off, the other options are hidden or greyed out, so turn it on first if you still want alerts.
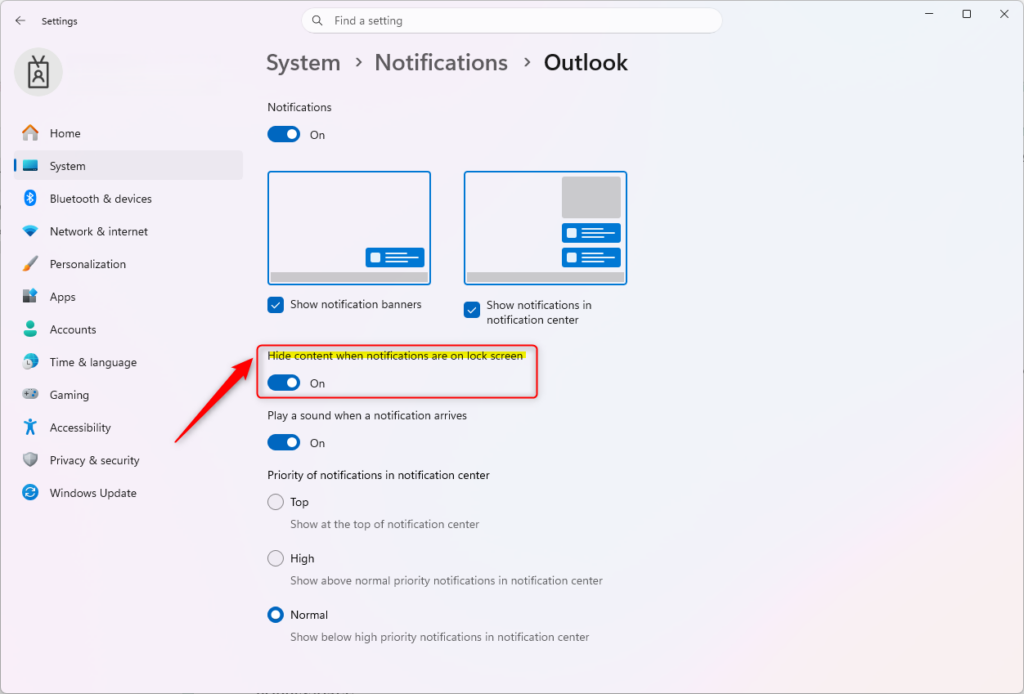
- Change the lock screen setting. Look for the lock screen option. The original wording is “Show notification content on the lock screen,” shown as a toggle. Turn the toggle Off to hide content on the lock screen. Turn it On to show content. The label differs between Windows 11 versions. Some builds show a checkbox such as Hide content when notifications are on the lock screen, and there you tick the box to hide the content. If you cannot find the option for an app, check that you are on a current build of Windows 11 and that the app itself allows notifications.
- Repeat for other apps. Go back to the app list and repeat steps 5 and 6 for each app that handles private information.
For email and messaging apps, keep this setting Off for your lock screen. To undo the change for any app, return to its page and switch the setting back.
Setting this per app keeps your lock screen private. You still see that messages are coming in, but the full text and sender names stay hidden from anyone glancing at your screen.
Reference:
Summary
Go to Settings System Notifications to fine-tune the behavior of each app. Hiding sensitive information whenever the computer locks is an effective way to protect your personal data.
Have a question about this guide?
Answered by AI from this guide. Good questions may be added to this page — please don't include personal details.
Did this guide fix your problem?

About the Author
Richard
Tech Writer, IT Professional
Richard is a writer at Geek Rewind who turns complex IT tasks into clear, step-by-step guides. He draws on years of hands-on experience in system administration and enterprise IT operations, focusing on Windows, Linux and WordPress: the problems people actually run into, and the fixes that work. His server and WordPress guides come from systems he runs himself. Richard builds and maintains the platform behind Geek Rewind, from its Ubuntu servers and Nginx configuration to its custom WordPress plugins. Many new tutorials start with readers' questions, and he's always glad to answer them in the comments.
No comments yet — be the first to share your thoughts!