How to Show or Hide Notifications for Each App in the Notification Center in Windows 11

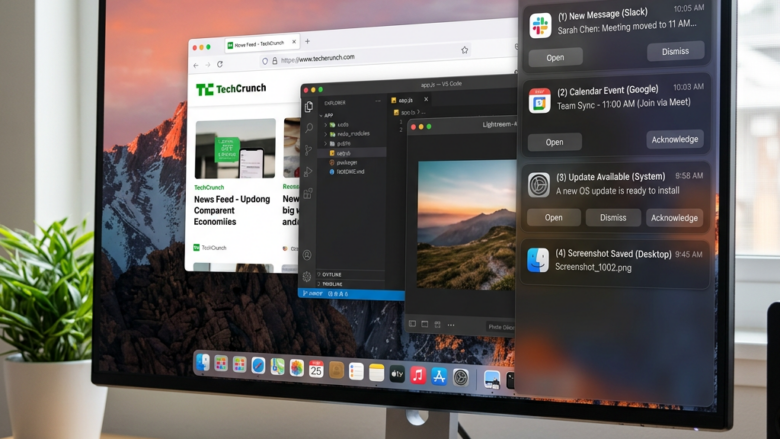
Notification Center in Windows 11 gathers alerts from your apps in one place, so your desktop stays free of constant pop-ups. You can control which programs send alerts through each app’s own settings. That lets you silence a noisy game and keep your email reminders.
Open Settings System Notifications, scroll to Notifications from apps and other senders, click the app name, and toggle Show notifications in notification center on or off. Changes apply immediately without restarting Windows.
What is the Notification Center?
Notification Center works like a message board for app alerts and updates. Everything lands in one spot, so you can read it later even if you missed the pop-up. In Windows 11 you open it by clicking the date and time at the right end of the taskbar . The calendar and your notifications appear together in that panel.
This shortcut works in current Windows 11 versions. If nothing happens on an older build, click the date and time instead.
Control Notifications for Each App
Windows lets you change notification settings for every app separately. For each one you decide whether it can send alerts at all, whether a banner pops up on screen, and whether the alert is kept in Notification Center. This tutorial focuses on the last option: getting alerts into Notification Center, or keeping them out.
These settings work the same on Windows 11 Home and Pro.
Step 1Go to Notification Settings
All notification settings live in the Settings app. The steps below open the main Notifications page, where you can turn alerts on or off for each app.
- Click the Start button. It's usually in the bottom-left corner of the taskbar, or in the center if you use the default Windows 11 layout.
- Click the Settings cogwheel icon. The Settings window opens.
- In Settings, click System in the left-hand list.
- On the right side, click Notifications. The Notifications page opens, with its toggles and a list of apps.
You can also right-click Start and choose Settings, then follow steps 3 and 4.
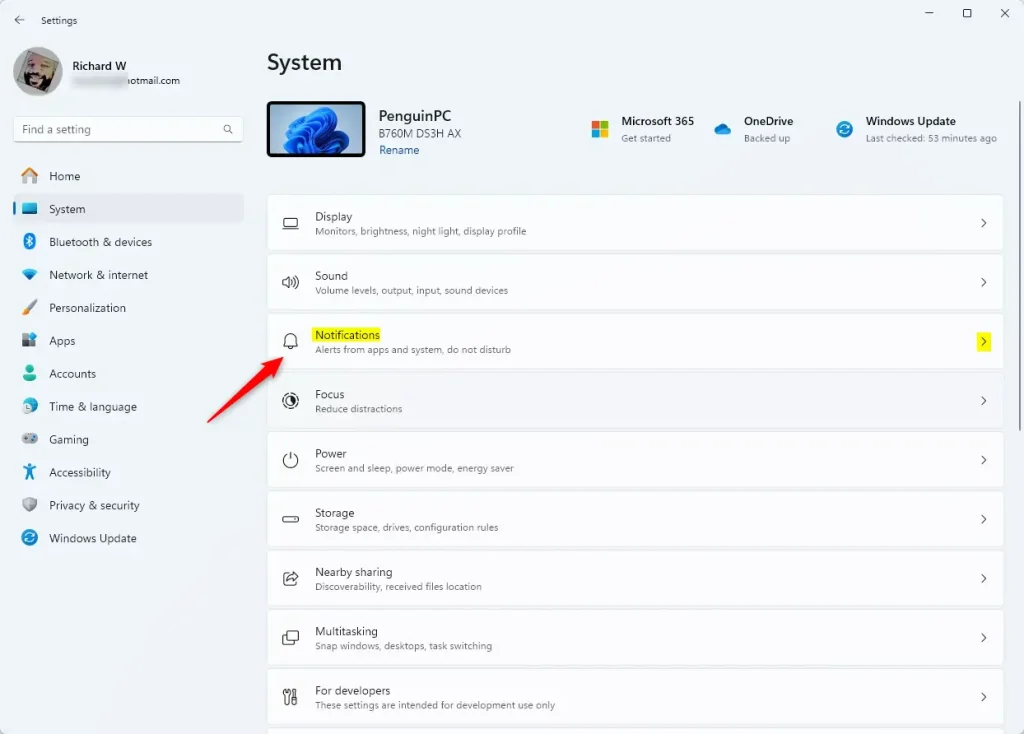
This page is your central hub for alerts. At the top, the Notifications toggle switches every alert on or off at once. Below it you may see a Do not disturb toggle. With Do not disturb on, banners are suppressed, but the alerts still collect quietly in Notification Center. For finer control, use the per-app settings described next.
Only an administrator can change those.
Step 2Find App Settings
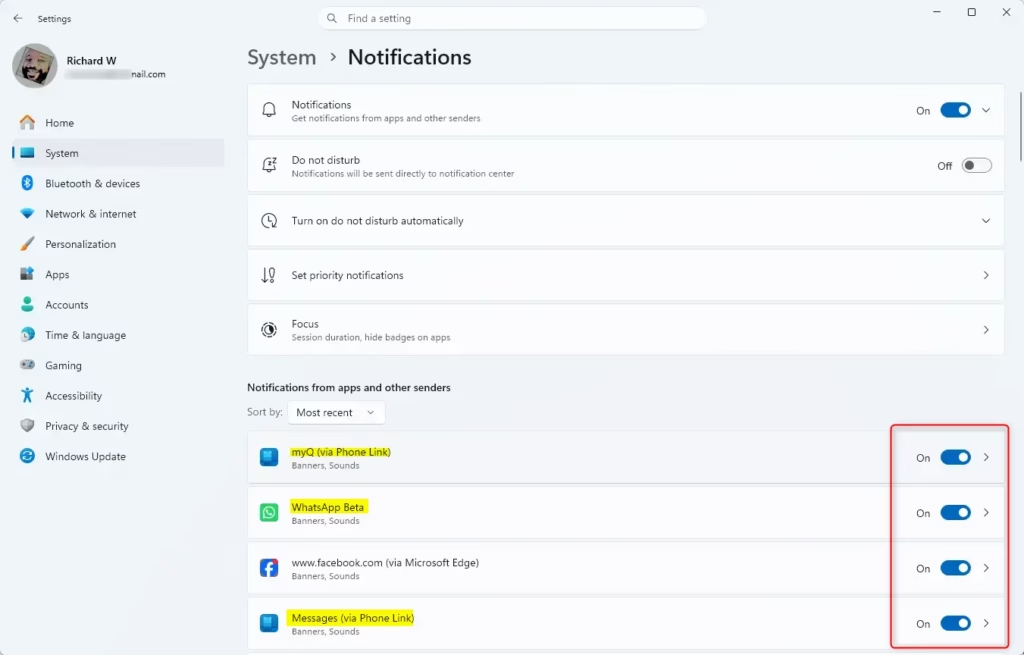
- On the Notifications page, scroll down to the section called Notifications from apps and other senders.
- Look through the list below it. Each app that can send notifications has its own name, icon and on/off toggle.
An app may be missing from the list. Many apps only appear after they have sent their first notification, so open the app, use it for a while, and check again.
Step 3Change "Show notifications in notification center"
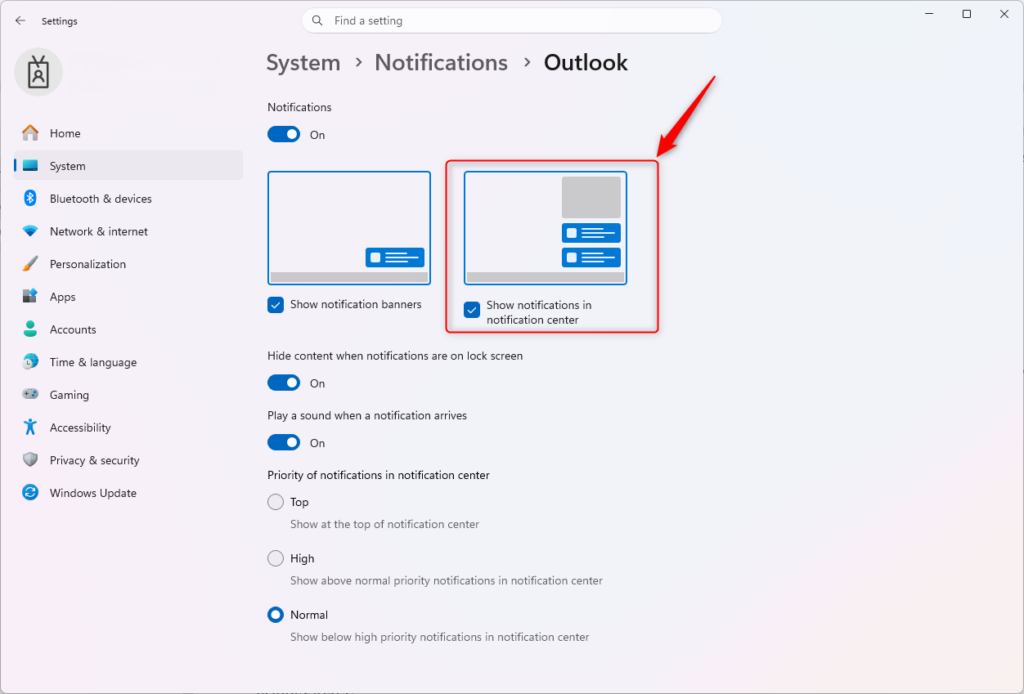
The setting you need for each app is Show notifications in notification center. It decides whether that app's alerts are kept in Notification Center after they appear. Turn it on for apps whose messages you want to review later. Turn it off for apps that only add clutter.
- In the app list, click the app's name, not just its toggle. The settings page for that app opens.
- Make sure the Notifications toggle at the top of the page is on. If it is off, the other options are hidden because the app can't send anything.
- To keep alerts from this app in Notification Center, tick the Show notifications in notification center box. The box shows a check mark.
- To hide them from Notification Center, clear that box.
Changes apply immediately. You don't need to restart Windows or the app. To undo a change, return to the same page and set the box back.
Practical Tip: Choose settings by how much the app matters to you.
- Important apps (work email, chat): turn on both Show notification banners and Show notifications in notification center. You get an instant alert, and it is saved for later.
- Less important apps: turn off banners but keep Show notifications in notification center on. You can read the alerts when you choose.
- Noisy apps: turn off the app's Notifications toggle completely if it only creates noise.
Reference:
Summary
You have full control over how and where Windows notifications appear. Go to Settings System Notifications to adjust each app. Keep Show notifications in notification center on, and you can always review alerts you missed. You can also turn off distracting pop-up banners without losing the alerts themselves.
Did this guide fix your problem?

About the Author
Richard
Tech Writer, IT Professional
Richard is a writer at Geek Rewind who turns complex IT tasks into clear, step-by-step guides. He draws on years of hands-on experience in system administration and enterprise IT operations, focusing on Windows, Linux and WordPress: the problems people actually run into, and the fixes that work. His server and WordPress guides come from systems he runs himself. Richard builds and maintains the platform behind Geek Rewind, from its Ubuntu servers and Nginx configuration to its custom WordPress plugins. Many new tutorials start with readers' questions, and he's always glad to answer them in the comments.
No comments yet — be the first to share your thoughts!