How to Free Up Space by Moving SoftwareDistribution Folder

The SoftwareDistribution folder stores the updates Windows 10 and Windows 11 download before installing them. It often grows past 20GB, which quickly fills a small C: drive. The folder is at 📁C:\
Moving the folder to a secondary drive or partition frees that space while Windows Update keeps working normally. It also stops low-disk-space warnings without breaking your update history. This is a workaround, not an official Windows setting, so follow the steps in order. If you only need a few gigabytes back, try Disk Cleanup first. Choose Clean up system files, then tick Windows Update Cleanup.
To move the SoftwareDistribution folder, create a folder such as 📁E:\
When to use this method
Consider moving the SoftwareDistribution folder when the main C: drive stays almost full, especially on a small SSD. It makes the most sense when these things are true:
- You have already run Disk Cleanup or Storage Sense and the drive is still short on space.
- The other drive or partition is internal, always connected, and formatted as NTFS.
- The other drive has several gigabytes free, because the folder will keep growing with each update cycle.
Risks and Considerations
If your secondary drive disconnects, Windows Update stops working until you reconnect it.
For that reason, don’t use a USB or other removable drive. Create a restore point or back up important data before you start, so you can undo the change if something goes wrong.
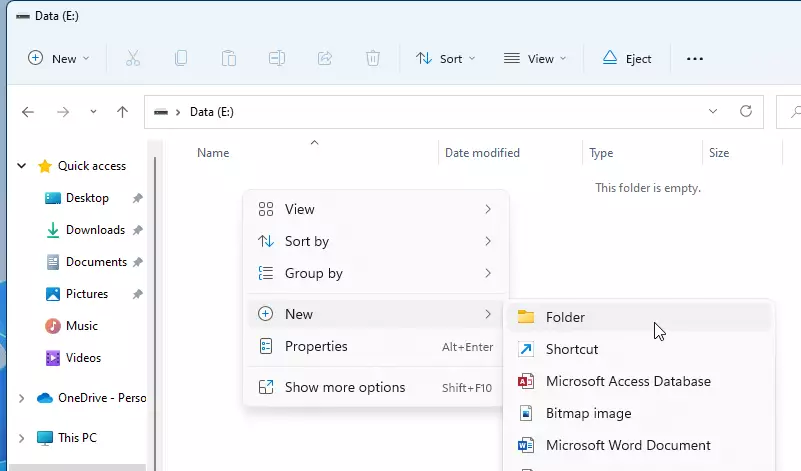
Step 1Create a New Folder
Creating a new folder on a different drive is the first step in moving the SoftwareDistribution folder. Pick a drive with plenty of free storage and create a folder there. Name it something clear like NewSoftwareDistribution so you can find it during setup. This guide uses 📁E:\
- Open File Explorer and click This PC.
- Open the drive you want to use. You should see its contents, which may be empty.
- Right-click an empty area and choose New Folder A new folder appears with its name highlighted.
- Type NewSoftwareDistribution and press Enter.
To check that the drive uses NTFS, right-click it in This PC and choose Properties. The General tab shows the file system.
This command builds a symbolic link (an advanced shortcut that points Windows to a new file path). This ensures Windows Update continues working properly after you move the folder. Running mklink /j C:\Windows\SoftwareDistribution E:\NewSoftwareDistribution establishes this necessary link.
The link can't be created while a real folder with the same name still exists at C:\Windows\SoftwareDistribution. That is why the rename step comes first in the sections below.
Step 2Stop the Windows Update Services
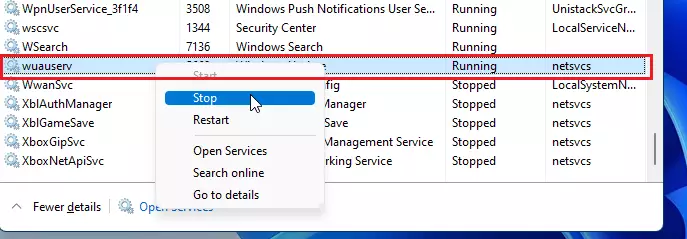
Stopping the Windows Update services prevents Windows from locking the files you need to move. With the services stopped, you can copy and rename the folder without file-in-use errors.
- Click Start and type cmd.
- Right-click Command Prompt and choose Run as administrator.
- Click Yes if User Account Control asks for permission. The window title should now begin with "Administrator".
- Run the stop commands shown below.
This step is vital for clearing storage without file-in-use errors. Each service should report that it stopped successfully. If a service takes a moment to stop, wait for the prompt to return before you continue.
net stop wuauserv
net stop bits
This action halts both the wuauserv (Windows Update) and bits (Background Intelligent Transfer Service) services, ensuring no files remain locked. Leave this Command Prompt window open, because you will use it again shortly.
Step 3Rename the Old Folder
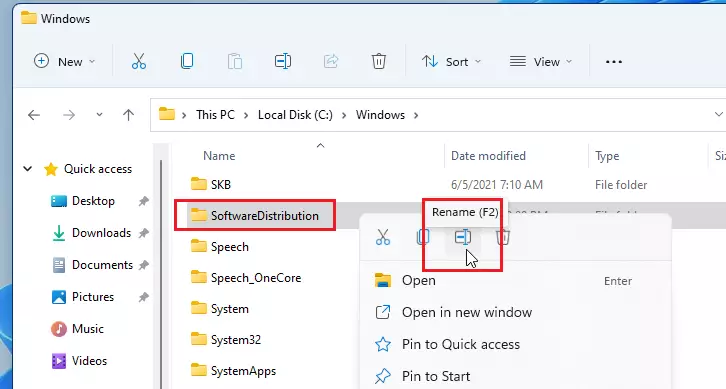
Renaming the original folder clears its path so the link can take its place. It also keeps your files safe until you confirm everything works.
- Open File Explorer and go to C:\Windows.
- Find the SoftwareDistribution folder and right-click it.
- Choose Rename, or select the folder and press F2.
- Type SoftwareDistribution.old and press Enter.
- Click Continue if a prompt asks for administrator permission. Administrative privileges are required for this action.
If Windows says the folder is in use, the services from the previous section are still running. Go back and stop them again. To undo this step before you create the link, rename the folder back to SoftwareDistribution.
Step 4Create a Symbolic Link
Creating a symbolic link (a file pointer that tricks Windows into looking at a new location) lets you move the folder's files without breaking system updates. The junction command links the original path to your new drive, so Windows keeps working normally.
- Switch back to the administrator Command Prompt window. If you closed it, open a new one the same way as before.
- Check that the command shown below points to your new folder, for example E:\NewSoftwareDistribution. Edit the drive letter if yours is different.
- Run the junction command and press Enter.
mklink /j C:\Windows\SoftwareDistribution E:\NewSoftwareDistribution
A confirmation message appears when the junction builds successfully. A shortcut icon emerges on the original folder inside C:\Windows. It should be named SoftwareDistribution and show a small arrow.
If you see a message saying the file already exists, the rename didn't work. Check that the old folder is now called SoftwareDistribution.old, then run the command again.
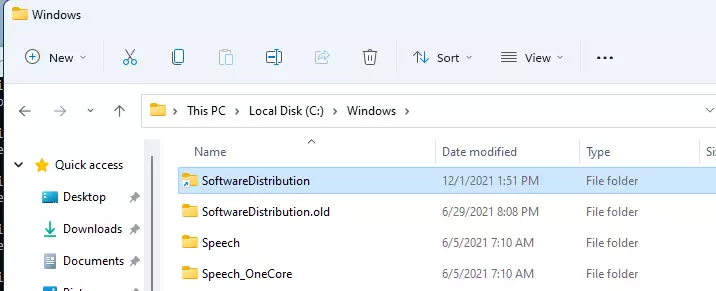
Step 5Move Files and Restart Services
Now copy the contents from the old directory (SoftwareDistribution.old) into the new destination (E:\NewSoftwareDistribution). Then restart the services.
- In File Explorer, open C:\Windows\SoftwareDistribution.old.
- Press Ctrl+A to select everything, then Ctrl+C to copy.
- Open E:\NewSoftwareDistribution and press Ctrl+V. Click Continue if Windows asks for administrator permission.
- Wait for the copy to finish. This can take a while with a large folder.
- Restart the system services by running this command in the administrative Command Prompt window:
net start wuauserv
net start bits
To confirm the change works, open Settings Windows Update and click Check for updates. The check should complete without errors. If it fails, restart the PC and try again.
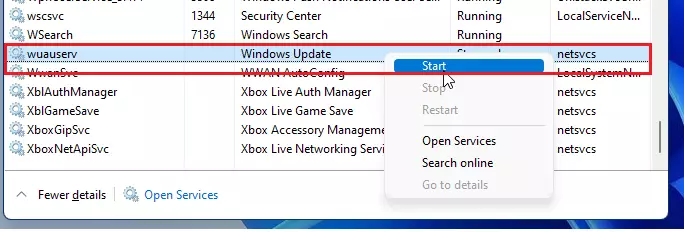
The space on C: is not freed until you delete SoftwareDistribution.old. Wait a few days and install at least one round of updates before you delete it. Keeping it until then gives you a way back if something fails. To undo the whole change, stop the two services, remove the link, rename SoftwareDistribution.old back to SoftwareDistribution, and restart the services.
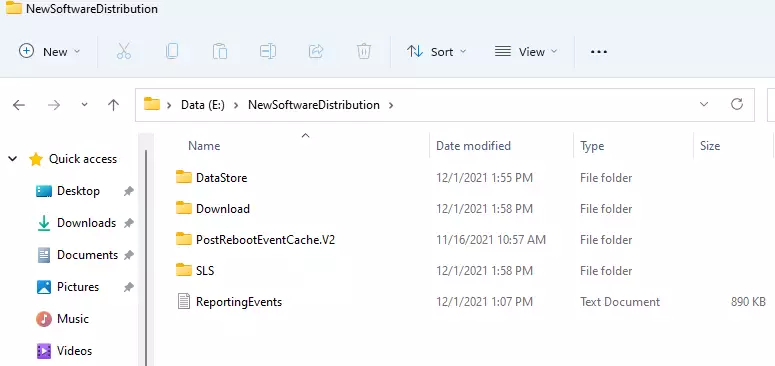
Summary
Moving the update cache reclaims gigabytes of space on a full C: drive. Keep the new drive connected at all times so Windows Update can find its files. Review the official Microsoft documentation for additional details on how Windows handles cache management.
Frequently asked questions
How do I delete Windows Updates to free up space?
Open Disk Cleanup, select your C: drive, and click Clean up system files. Tick Windows Update Cleanup and click OK. This removes old update files Windows no longer needs, and your installed updates stay in place. You can also turn on Storage Sense under Settings, System, Storage to clear them automatically.
How to free up space on computer local disk?
Start with Storage Sense in Settings, System, Storage, and run it now. Then open Disk Cleanup and clean system files. Next, uninstall programs you no longer use and check your Downloads folder for large files. Emptying the Recycle Bin is permanent, so check it first before you empty it.
Why is Windows Installer taking so much space?
Windows Installer keeps copies of installed program files in C:\Windows\Installer so it can repair or remove those programs later. The folder grows as you install and update apps. Do not delete it by hand, because that breaks repairs and uninstalls. Remove unused programs instead, then run Disk Cleanup.
How to free space for updates?
Windows needs free space on the C: drive to download and install updates. Major updates can need 20 GB or more. Run Disk Cleanup with Windows Update Cleanup ticked, turn on Storage Sense, and uninstall apps you no longer use. Move large personal files to another drive to create more room.
Still have a question?
Answered by AI from this guide. Good questions may be added to this page — please don't include personal details.
Did this guide fix your problem?

About the Author
Richard
Tech Writer, IT Professional
Richard is a writer at Geek Rewind who turns complex IT tasks into clear, step-by-step guides. He draws on years of hands-on experience in system administration and enterprise IT operations, focusing on Windows, Linux and WordPress: the problems people actually run into, and the fixes that work. His server and WordPress guides come from systems he runs himself. Richard builds and maintains the platform behind Geek Rewind, from its Ubuntu servers and Nginx configuration to its custom WordPress plugins. Many new tutorials start with readers' questions, and he's always glad to answer them in the comments.
No comments yet — be the first to share your thoughts!