How to Add a Secondary Language Keyboard Layout in Windows 11 Language and Region Settings

Adding a secondary language keyboard layout in Windows 11 lets you type in another language without changing the display language of your computer. Windows keeps the two apart. The display language controls the text in menus, buttons and settings pages. The keyboard layout only decides which character appears when you press a physical key. You can have French characters under your fingers and still read everything in English.
Adding a layout takes about a minute in the Time & language settings. After that, you can switch between installed layouts with the Windows Key + Spacebar shortcut. Installing a new language pack normally needs administrator permission. On a personal PC you are probably the administrator, so this is not a problem. On a school or work computer, an administrator may have blocked language installs, and you may be asked for admin credentials or find the options greyed out.
Open Settings , go to Time & language Language & region, click Add a language, select your language from the list, ensure Basic typing is ticked, and click Install. The new keyboard layout appears in your preferred languages list and you can switch to it with Windows Key + Spacebar.
Check What Languages Are Already Installed in Windows
Before you add anything, check what is already installed. The list in Settings shows every language on the computer. That saves you from downloading a duplicate, and often the layout you want is already there.
Follow these steps to check your current languages:
- Click the Start button on the taskbar and select Settings (the gear icon). You can also press Win+I to open it directly. The Settings window opens.

Taskbar - In the left-hand list, click Time & language. The date, time and language options appear on the right.

Settings › Time & language - Click Language & region.
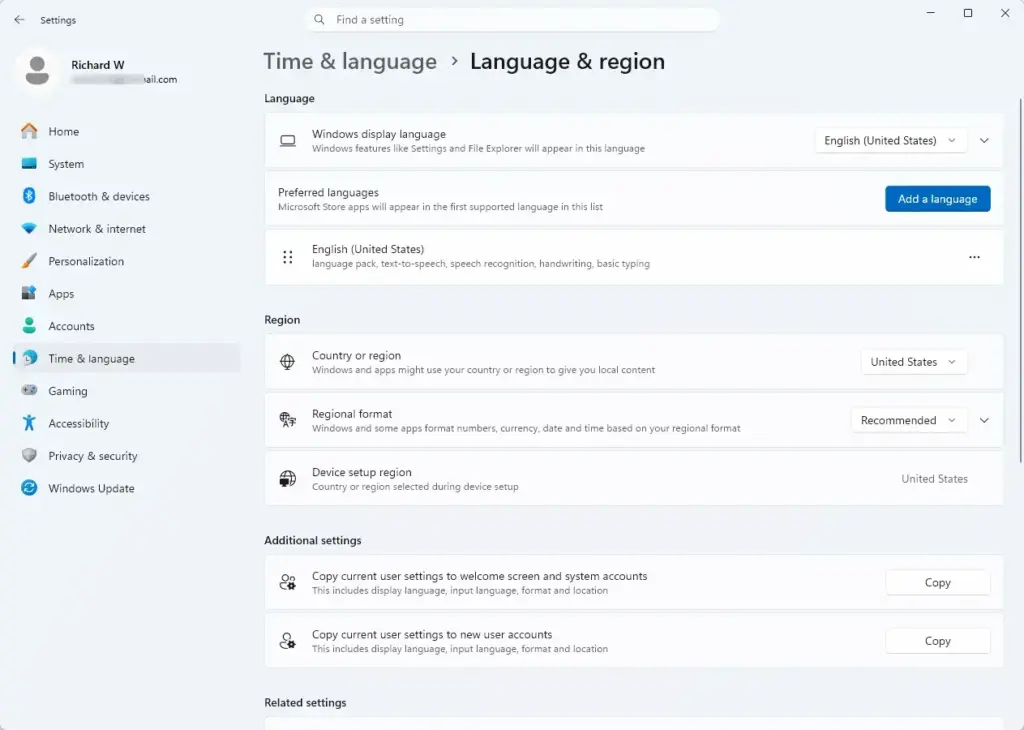
Settings › Time & language › Language & region - Find the section called Preferred languages. Every language currently installed on the computer is listed there.
If the language you want is already in the list, you do not need to download it again. Click the three dots next to it and select Language options. The Keyboards section shows which layouts are installed for that language, so you can check whether the one you need is already there.
How to Add a Secondary Language and Keyboard Layout
To add a secondary keyboard layout, you add the language itself from the Language & region page. You pick the language, choose which optional features come with it, and let Windows install it .
If you are on a standard account, Windows may ask for an administrator password.
Here is how to set up the new language:
- Open the Settings app by pressing Windows Key + I.

Settings - Click Time & language in the left menu.
- Select Language & region.
- Under Preferred languages, click the Add a language button. A window opens with a long list of available languages.
- Scroll through the list, or type the language name in the search box at the top (for example, "French" or "Spanish"). The list narrows as you type.
- Click the language you want to select it, then click Next.
- On the next screen you will see optional features. Tick Install language pack if you want Windows menus to support this language. Make sure Basic typing is ticked, because that installs the keyboard layout. The exact wording and the extra options on this screen can differ slightly between Windows 11 builds.
- Click the Install button.
Windows downloads the language files in the background, so you can keep working. When the download finishes, the new language shows up in your preferred languages list and the keyboard layout is ready to use. Language packs come through Windows Update, so a slow or paused connection will delay the install. If the language has regional variants, such as French (France) and French (Canada), pick the one that matches your physical keyboard.
Change the Windows Display Language
You only need this section if you want menus, settings pages and built-in apps shown in the new language. Adding a keyboard layout does not require it. The display language is a separate setting on the same page.
The language pack must also be installed first, which is why Install language pack matters in the previous section.
Follow these steps to change your Windows display language:
- Open Settings by pressing Windows Key + I.
- Go to Time & language and click Language & region.
- Find the Windows display language dropdown near the top of the page.
- Click the dropdown and select your newly added language from the list. If the language is missing, its language pack has not been installed yet.
- Windows tells you that you need to sign out and back in for the change to take full effect. Save any open work in your other apps, then click the Sign out button.
- Sign back in to your user account. Menus and settings now appear in the language you chose.
To undo this, go back to the same dropdown, select your original language and sign out again. If you only want to type in the secondary language and keep your menus in your native language, skip this section entirely.
Change the Language Used by Microsoft Store Apps and Websites
The order of your preferred languages controls which language Microsoft Store apps and websites try first. Windows shares this list with apps and web browsers, so moving a language up or down changes how text appears across your programs.
To change the priority of your languages for apps and websites:
- Open Settings and go to Time & language Language & region.
- Look at your Preferred languages list. The language at the top has the highest priority.
- If you want apps to try your secondary language before your main language, click the three dots next to the secondary language and select Move up. The language moves one position higher in the list. Repeat if it needs to go higher still.
Apps read the list from top to bottom. If an app supports the first language, it uses that one. If it does not, it moves down to the next language until it finds a match. Moving the secondary language to the top therefore changes more than the keyboard. Some apps and sites will start showing text in that language. If that is not what you want, use Move down from the same three-dots menu to put your main language back on top.
Install Speech Recognition for a Language
If you want to use voice commands or voice typing in your secondary language, install its speech features. They are downloaded from the Language options page for that language.
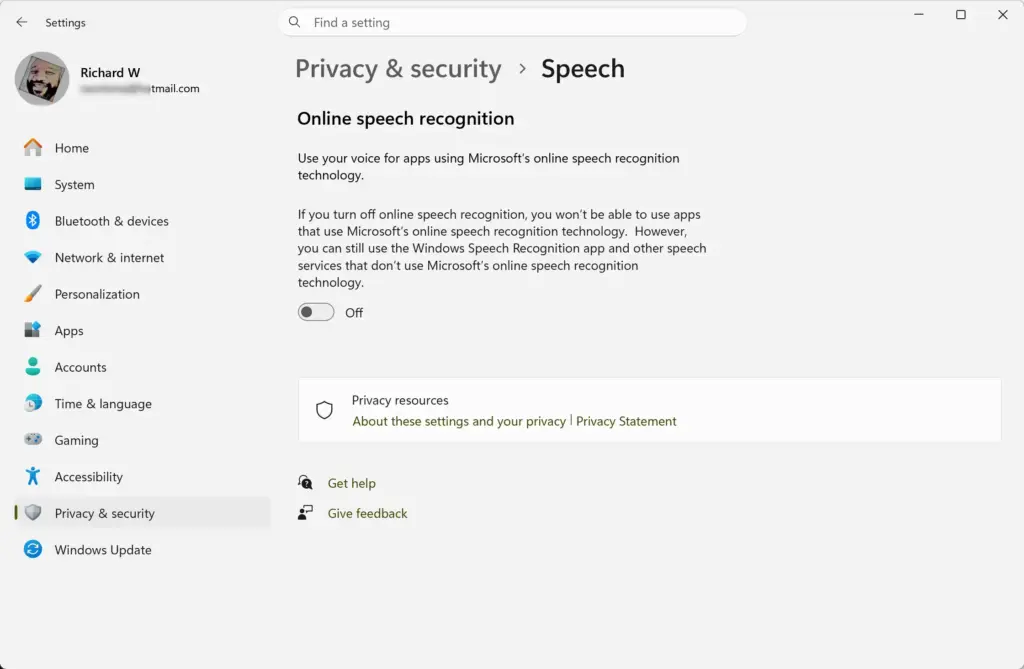
Note: Administrative privileges are required to install speech features. Not every language has speech support, so the option may be missing for less common languages.
Follow these steps to add speech features:
- Open Settings and go to Time & language Language & region.
- Find your secondary language in the Preferred languages list and click the three dots next to it.
- Select Language options. A page opens with the details for that language.
- Scroll down to the Speech section (if available for that language).
- Click the Download button to install speech recognition and text-to-speech features. A progress indicator appears while the files download.
If there is no Speech section, Windows does not offer speech features for that language. Nothing is wrong with your setup.
How to Change and Switch Between Keyboard Layouts
Once two or more layouts are installed, you can switch between them while you type. The Windows Key + Spacebar shortcut works in any app and does not need a menu. You can also use the taskbar indicator.
Here are the easiest ways to switch between your keyboard layouts:
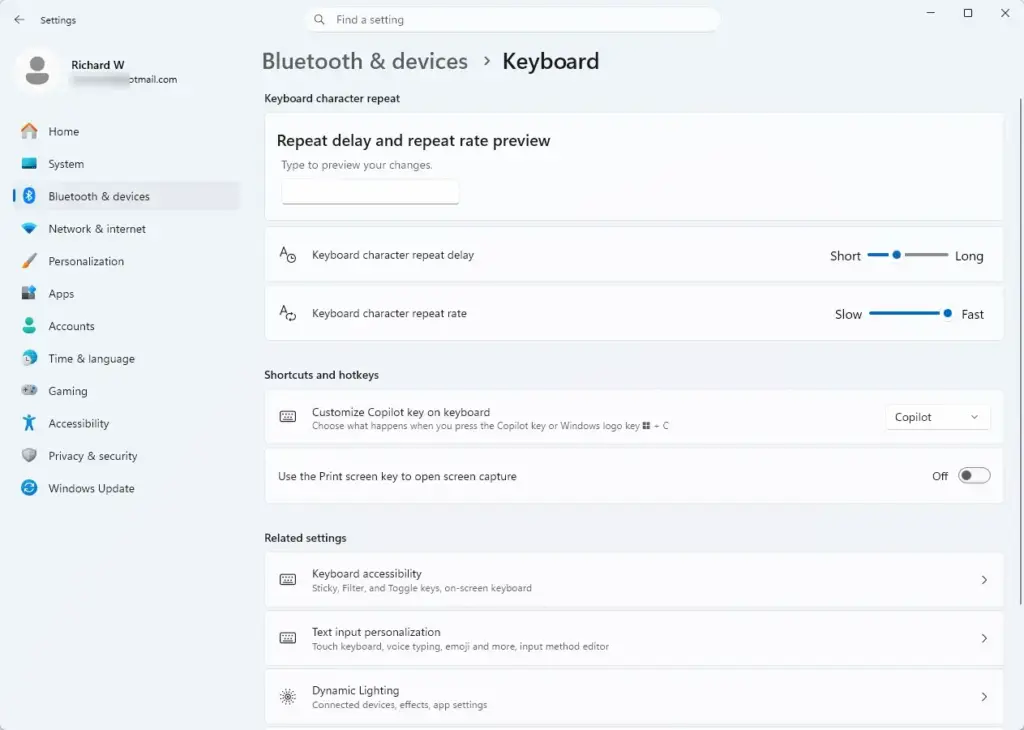
- Keyboard Shortcut: Press and hold the Windows Key, then tap the Spacebar. A small menu pops up showing your available keyboards. Keep tapping the Spacebar while holding the Windows Key until the one you want is highlighted, then let go of both keys. Releasing the keys selects the highlighted layout.
- Taskbar Indicator: Look at the bottom-right corner of your screen, near the clock. You will see a short label for your active keyboard, such as ENG for English or ESP for Spanish. Click it to open a menu and select a different layout. Windows normally shows this label only when more than one keyboard is installed, so you will not see it with a single layout.
Display the Input Language Icon in the Taskbar
If you cannot tell which layout is active, the language bar setting can help. It makes the input language indicator visible while you work. Here is how to turn it on.
Follow these steps to show the language switcher on your taskbar:
- Open Settings and click Time & language.
- Select Typing, then click Advanced keyboard settings.
- Tick the box labeled Use the desktop language bar when it's available. The language bar appears on the desktop when more than one input language is installed.
- Alternatively, click Language bar options and choose how you want the language bar to appear on your desktop.
To undo this, return to the same page and clear the box.
Remove a Language Pack or Keyboard Layout
If you no longer need a language or layout, remove it to keep the switcher menu short. You can remove a whole language, or just one keyboard layout and keep the rest of the language pack.
Note: Administrative privileges are required to remove system language packs.
Follow these steps to remove a language:
- Open Settings and go to Time & language Language & region.
- Find the language you want to remove in your Preferred languages list.
- Click the three dots next to the language name.
- Select Remove from the menu. If this is your current display language, you must switch your display language to something else first, and then you can remove it.
If you only want to remove a single keyboard layout while keeping the language pack:
- Click the three dots next to the language in your Preferred languages list and select Language options.
- Scroll down to the Keyboards section.
- Click the three dots next to the keyboard layout you want to delete, then select Remove.
If you remove something by mistake, add it back using the steps earlier in this guide.
Advanced Tip: Customizing Key Combinations for Quick Switching
If Windows Key + Spacebar does not suit you, you can set a dedicated key combination for switching between input languages. The setting is in the advanced keyboard settings, under Input language hotkeys.
Installing a language pack normally needs administrator rights, as noted above. Adding a keyboard layout to a language that is already installed is less restricted, and a standard account can often do it. Whether your account is allowed depends on how your PC is managed. Windows 11 offers well over 100 languages, so most users will find the layout they need without help from IT.
Follow these steps to set a custom shortcut:
- Open Settings and go to Time & language Typing.
- Click Advanced keyboard settings.
- Click Input language hotkeys. A small, traditional-style Windows dialog opens.
- Click the Advanced Key Settings tab at the top of this window.
- Select Between input languages in the list, then click the Change Key Sequence... button.
- Choose your preferred key combination (such as the grave accent key or one of the listed shortcuts), then click OK.
- Click Apply and then OK to save your changes.
The new shortcut works straight away. To go back, reopen the same window and choose a different sequence.
A quick keyboard shortcut saves time if you switch between two languages all day. With Windows Key + Spacebar, or your own custom shortcut, you can jump between layouts without clicking around the screen. That helps you type faster when you handle multi-language tasks every day.
Troubleshooting: Fixing Common Language and Keyboard Issues
Most problems come from the wrong keyboard variant, a stalled download or a shortcut that another program has taken over. Check the settings below first, and reinstall the language pack if they do not help.
- The keyboard layout is not typing the correct characters: Make sure you selected the exact layout variant for your region. For example, French users might need French AZERTY instead of the Canadian Multilingual standard layout. Open the language's Language options page and check the Keyboards section to verify you added the right one. Remove the wrong layout and add the right one if needed.
- The language pack download is stuck: A weak internet connection can pause language downloads, and so can a paused Windows Update. Go to Settings Time & language Language & region, click the three dots next to the stuck language, and check whether you can retry the download. If not, restart your computer and check again.
- Language switcher shortcut is not working: Go to Advanced keyboard settings and verify that your shortcut keys are set correctly. Third-party apps sometimes take over keyboard shortcuts and stop Windows Key + Spacebar from working. Closing those apps, or checking their shortcut settings, usually solves it. You can also try the taskbar indicator to confirm the layouts themselves are fine.
Summary
Secondary language keyboard layouts in Windows 11 let you type in several languages without changing your main display language. This guide covered how to check installed languages, add a new language and keyboard, switch between layouts, set a custom shortcut and fix common problems, so that typing in more than one language is simple.
Have a question about this guide?
Answered by AI from this guide. Good questions may be added to this page — please don't include personal details.
Did this guide fix your problem?

About the Author
Richard
Tech Writer, IT Professional
Richard is a writer at Geek Rewind who turns complex IT tasks into clear, step-by-step guides. He draws on years of hands-on experience in system administration and enterprise IT operations, focusing on Windows, Linux and WordPress: the problems people actually run into, and the fixes that work. His server and WordPress guides come from systems he runs himself. Richard builds and maintains the platform behind Geek Rewind, from its Ubuntu servers and Nginx configuration to its custom WordPress plugins. Many new tutorials start with readers' questions, and he's always glad to answer them in the comments.
No comments yet — be the first to share your thoughts!