Find Where Windows 11 Stores Your Music Albums

- 25 steps
- Needs administrator rights
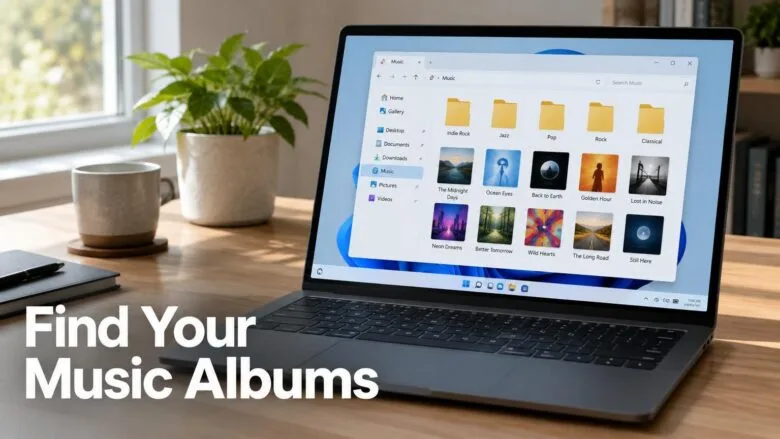
Music albums in Windows 11 are stored in the Music folder of your user profile, at C:\Users\USERNAME\Music, unless you or an app saved them somewhere else. The quickest way to answer “where are my music albums stored” is to open File Explorer and select Music in the left pane.
Windows has no separate album database that holds the files. An album is a set of audio files such as MP3, FLAC or M4A, and apps group them by the tags inside each file. The sections below cover opening the Music folder, finding one track, and tracking down music outside the default folder.
Your music albums are stored in the Music folder of your user profile, at 📁C:\
What Counts as a Music Album in 🪟 Windows 11?
A music album in Windows 11 is a group of audio files that share the same album tag. Tags (also called metadata) are details stored inside the file itself: title, artist, album name, track number, year and often the cover art. Apps such as Media Player read these tags and sort your files into albums, whatever folder the files sit in.
This explains two common surprises. A file with a missing or wrong album tag appears under the wrong album, or under “Unknown album”, even though it sits beside the rest of the album. And two folders on different drives can feed a single album in the app.
Folder layout is a separate matter. Some apps that copy music off CDs (called ripping) create one folder per artist, with one subfolder per album. Music you download from a store or a website usually arrives as a single folder or a zip file, and the layout depends on whoever packaged it.
Where 🪟 Windows 11 Stores Music by Default
The default location is a folder named Music inside your user profile. Every Windows account gets its own, so each person who signs in to the PC has a separate set of albums. Check these locations, from most to least likely. Each item below starts with its path.
C:\Users\USERNAME\Musicis the standard location for your account. Replace USERNAME with your account’s folder name.C:\Users\USERNAME\OneDrive\Musicis where the folder lives if OneDrive folder backup includes Music on your PC. The exact setting depends on your OneDrive configuration.C:\Users\Public\Musicis the shared Music folder that every account on the PC can open.- A folder on another drive, such as an external drive or a second internal drive, if you moved your music there.
None of the steps in this post need administrator privileges. You only need to be signed in to the account whose music you are looking for.
How to Open the Music Folder in File Explorer
This is the fastest way to see your albums. File Explorer shows the folder Windows treats as your Music location, even if you have moved it, so you do not need to know the real path.
- Open File Explorer. Press Win+E, or select the folder icon on the taskbar.
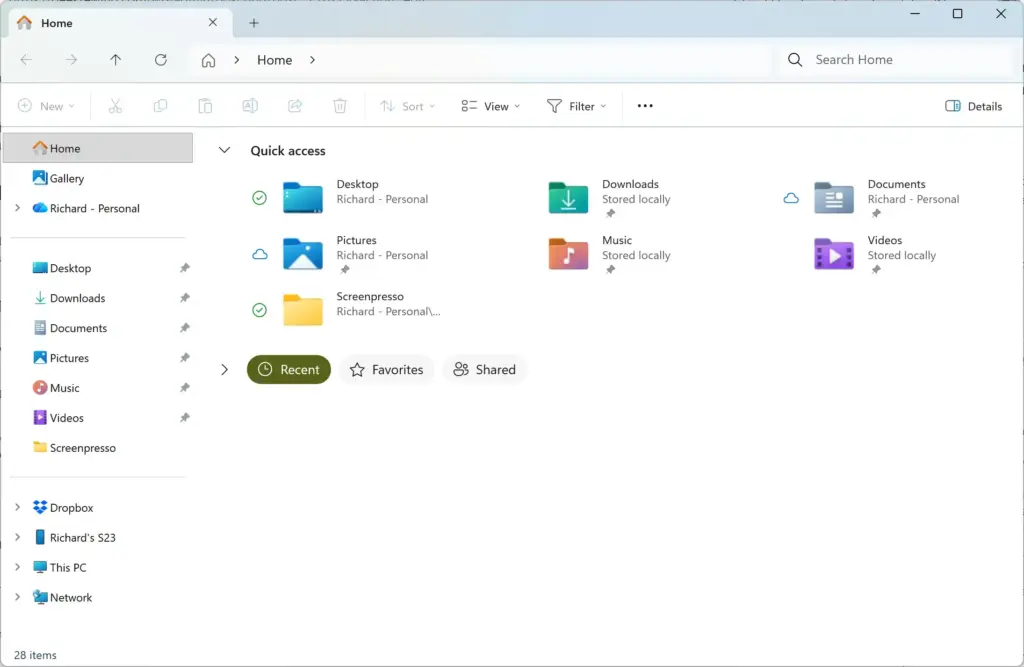
Windows 11 File Explorer showing Dropbox folder in sidebar. - Select Music in the left pane. If you do not see it there, select This PC and double-click Music under Folders.
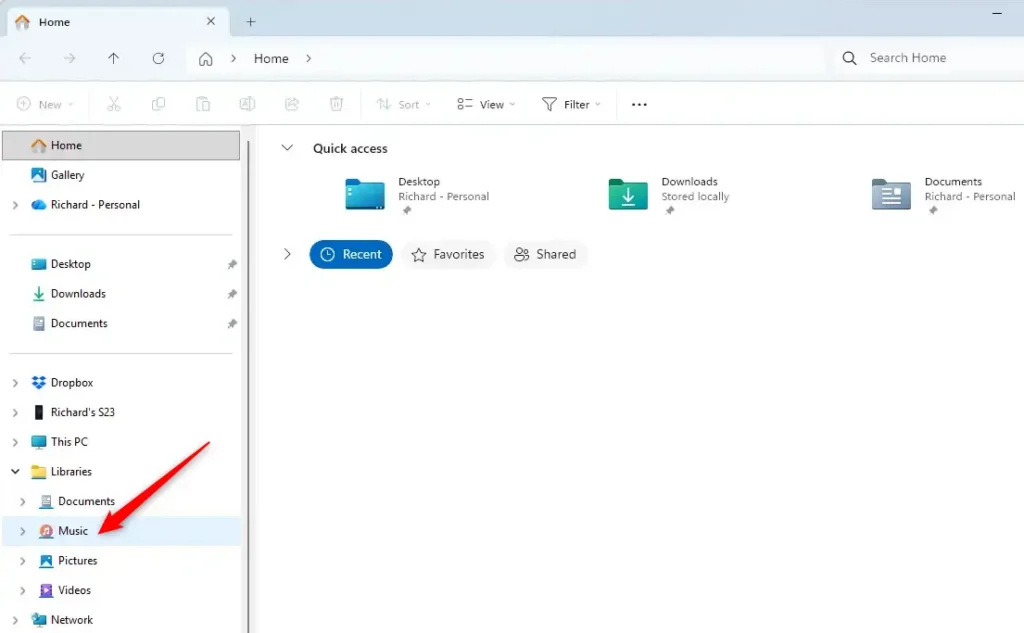
File Explorer - Check the address bar at the top. It shows the real path, for example
C:\Users\USERNAME\Music. Select an empty part of the bar to see the full path as text you can copy.
You should now see your artist folders, album folders or loose audio files. If the folder is empty, skip to the section on why albums may not be where you expect them. For a shorter walkthrough of this one task, see how to find the Music folder in Windows 11.
How to Find the Exact Location of One Album or Track
When Media Player or another app shows an album but you cannot find the files, check a single track’s properties. The Properties window states the folder the file sits in, and that folder is where the album is stored.
- Open File Explorer and search for a song from the album. Type the song title in the search box at the top right of the window and press Enter. Search the Music folder first, then This PC if nothing appears.
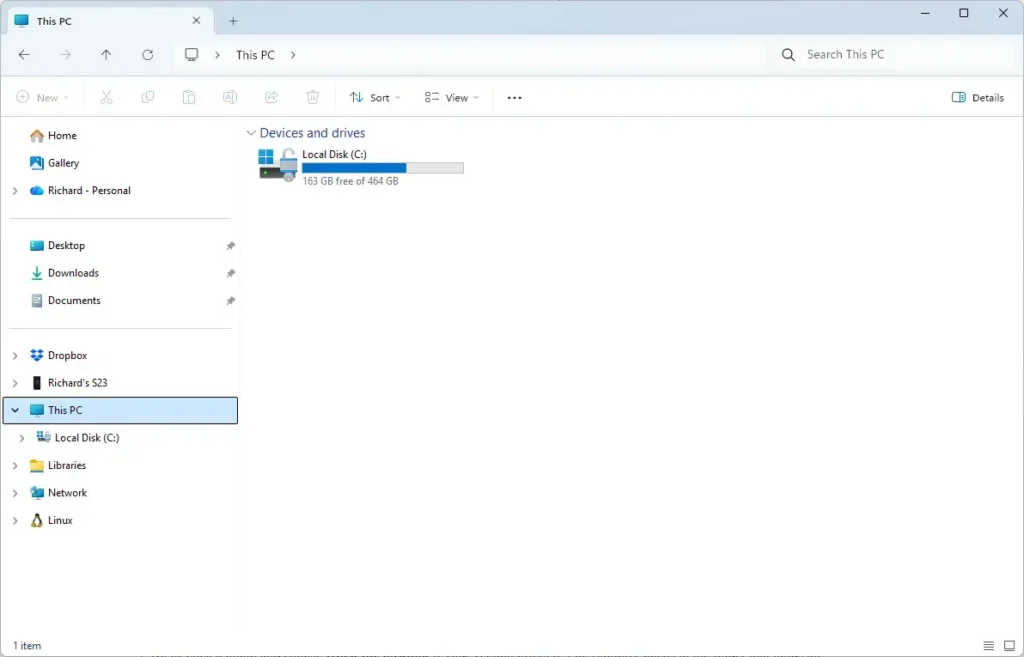
File Explorer - Right-click the song in the results and select Properties. On Windows 11, you may need to select Show more options first, depending on the version.
- Stay on the General tab and read the Location line. It shows the folder that holds the file.
- Select the Details tab to read the tags, including Album, Contributing artists and Track number.
If the search returns nothing, the file may not be on this PC at all. The album could be a streaming download or a cloud-only file, covered below.
How to See Album Names in File Explorer
File Explorer can show the album tag as a column. This helps when you want to check which tracks belong to which album without opening each file’s properties.
- Open the Music folder, or any folder with audio files, in File Explorer.
File Explorer - Select View on the toolbar, point to Show or the layout options, and choose Details. The files now appear in a list with columns.
- Right-click any column heading, such as Name, and select More.
- Tick Album. Tick Contributing artists and Track number too if you want them. Select OK.
- Select the Album column heading to sort the files by album.
A new column appears beside the file names, filled in from each file’s tags. A blank cell means the file has no album tag. Windows can still play the file, but apps will list it as unknown.
How to Find Albums in Media Player
Media Player is the music app in Windows 11 that replaced Groove Music. It builds its library, the list of music it shows, from your Music folder. Albums you see in the app come from the places described above. Open Media Player to see your albums grouped the way the app sorts them.
- Open the Start menu, type Media Player, and select the app from the results.
- Select Music library in the left pane. The app scans your Music folder and lists what it finds.
- Select Albums to group the library by album.
If an album you expect is missing, the files are probably outside the folders the app scans. Open the app’s settings using the gear icon in the left pane, and look for the option that lists the folders the app scans. Menu wording differs between versions of Media Player, so the exact labels may not match what you see. The usual fix is to add the folder that holds the album or to move the album into your Music folder.
If you use Windows Media Player Legacy (the older program, available as an optional Windows feature), select Organize Manage libraries Music to see which folders it watches. That window lists every folder feeding the library.
When Albums Are Not in the Music Folder
Several kinds of music never touch the Music folder. Check these before you assume the files are lost.
Streaming apps and offline downloads
OneDrive and other cloud storage
If OneDrive backs up your Music folder, the folder sits inside your OneDrive folder, and some files may be online-only. An online-only file shows a cloud icon in File Explorer and takes almost no disk space until you open it.
Another drive or another user account
Albums you copied to an external drive or a second internal drive stay on that drive. Open This PC and check each drive for a folder named Music or for your artist folders. If you share the PC, the albums may sit under another account’s profile or in C:\Users\Public\Music. You cannot open another account’s profile folder without that account’s permission or administrator rights.
Files you downloaded but never moved
Browsers save downloads to the Downloads folder by default, not Music. Open Downloads in File Explorer and look for audio files or zip files. Extract any zip file before you move the albums to Music.
How to Search Your Whole PC for Music Files
When you do not know where an album went, search for every audio file on the PC. The search uses the file type, not the name, so it catches albums saved in odd places.
- Open File Explorer and select This PC in the left pane. This tells Windows to search every drive, not just one folder.
- Select the search box at the top right and type this search filter:Code
kind:music - Press Enter and wait. A full-drive search can take a few minutes, and a green progress bar runs along the address bar.
- Select the Album column to sort the results, following the column steps above. Right-click a file and select Open file location to jump to its folder.
The results list every audio file Windows recognises as music. If a drive does not appear in the results, Windows may not have indexed it (built a searchable list of its files). Results from unindexed drives can be slower or incomplete. Search that drive directly instead.
How to Move Your Music Folder to Another Drive
- Create a new folder on the destination drive, for example
D:\Music. Use File Explorer and select New Folder if the folder does not exist yet. - Right-click Music in the left pane of File Explorer and select Properties.
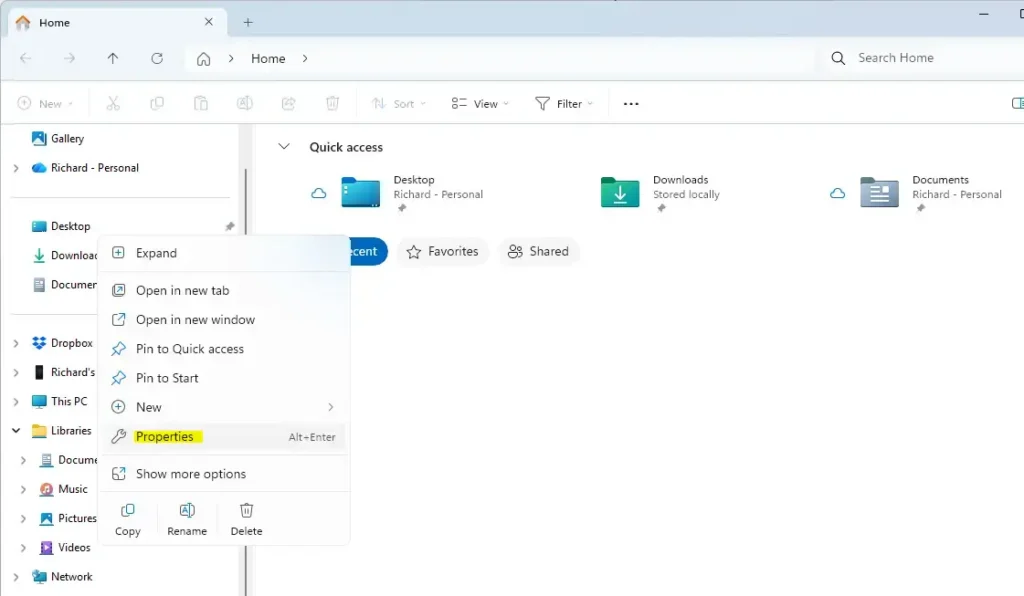
- Select the Location tab. The box shows the current path.
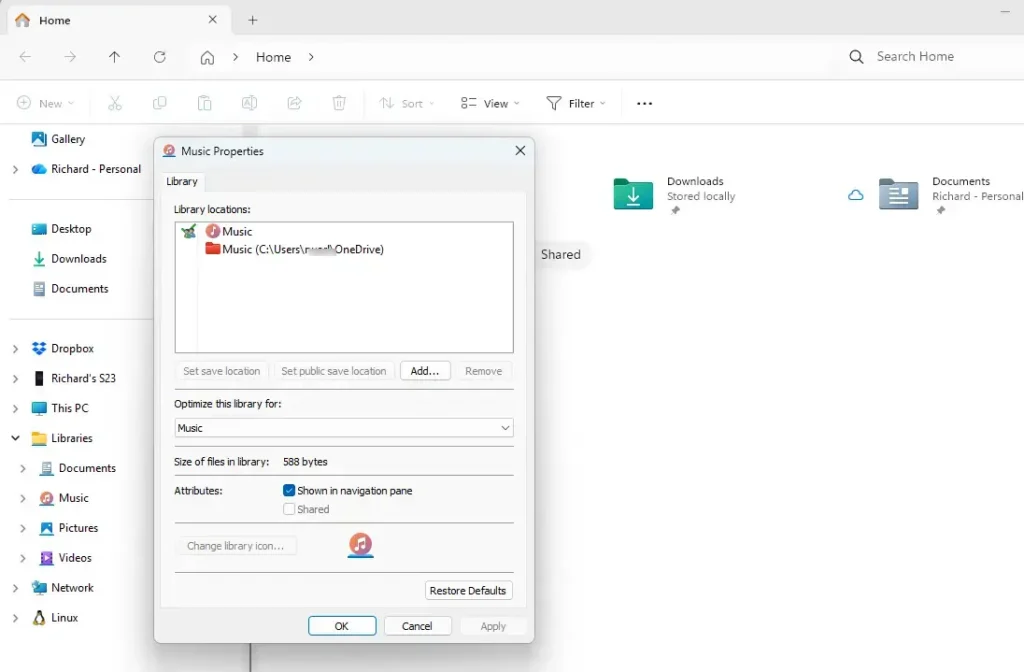
- Select Move, browse to the new folder, and select Select Folder. The new path appears in the box.
- Select Apply. Windows asks whether to move all files from the old location to the new location.
- Select Yes to move your albums with the folder. Select No only if you plan to copy the files yourself. Wait for the move to finish.
File Explorer now opens the new location when you select Music, and apps that follow the Windows Music folder use it too. To go back, open the same Location tab and select Restore Default, then select Apply and choose to move the files back.
If the Location tab is missing, you probably opened a regular folder named Music and not the Windows Music folder. Open the one in the left pane or under This PC instead. If the move fails with an access error, check that the destination drive is connected and has enough free space.
Why the Music Folder Is Missing or Empty
If the Music folder does not appear in the left pane, open This PC and look under Folders. If it is missing there too, type C:\Users\USERNAME\Music in the address bar, replacing USERNAME with your account’s folder name, and press Enter. Windows may have moved the folder, or someone may have unpinned it from the left pane.
An empty Music folder means your albums were never saved there. The most common reasons are a different folder or drive, a streaming service that keeps its own copies, or a different Windows account. If the folder holds only online-only OneDrive files, connect to the internet and open a file to download it.
Also check that the files end in a common audio extension, such as .mp3, .flac, .m4a, .wma or .wav. Windows hides extensions by default, so select View Show File name extensions to see them. Media Player does not play every format, and a file it cannot read still sits in the folder.
What to Do Next
Once you know where your albums sit, copy the Music folder to an external drive or another backup location, because a single copy on one drive is a real risk. If Media Player still misses an album after you add its folder, check the album tags on the Details tab, because wrong tags are the most common cause. To review other data Windows keeps on your PC, see how to purge diagnostic data logs stored locally in Windows 11 privacy settings. If you want to know what else a Microsoft account holds for your PC, see how to clear Windows Backup stored settings from your Microsoft account.
Have a question about this guide?
Answered by AI from this guide. Good questions may be added to this page — please don't include personal details.
Did this guide fix your problem?

About the Author
Richard
Tech Writer, IT Professional
Richard is a writer at Geek Rewind who turns complex IT tasks into clear, step-by-step guides. He draws on years of hands-on experience in system administration and enterprise IT operations, focusing on Windows, Linux and WordPress: the problems people actually run into, and the fixes that work. His server and WordPress guides come from systems he runs himself. Richard builds and maintains the platform behind Geek Rewind, from its Ubuntu servers and Nginx configuration to its custom WordPress plugins. Many new tutorials start with readers' questions, and he's always glad to answer them in the comments.
No comments yet — be the first to share your thoughts!