How to Show Multiple Time Zones on Windows 11

Windows 11 can show up to two extra clocks next to your main clock, so you can check the time in other regions without opening anything. You set them up in the Date & time settings. You don’t need any extra software, and the steps are the same on Windows 11 Home and Pro. No restart is needed.
Step 1Open Windows Settings
Start by opening the Settings app . There are a few ways to get there, and all of them end up in the same place.
- Click the Start button (the Windows icon on the bottom left, or in the centre if your taskbar is centred). The Start menu opens.
- Then click Settings. If you don’t see it in the pinned apps, type “Settings” into the search box at the top of Start. The Settings window opens.
- Or press the Win+I on your keyboard to open Settings straight away. This is the fastest way once you get used to it.
Step 2Go to Date & Time Settings
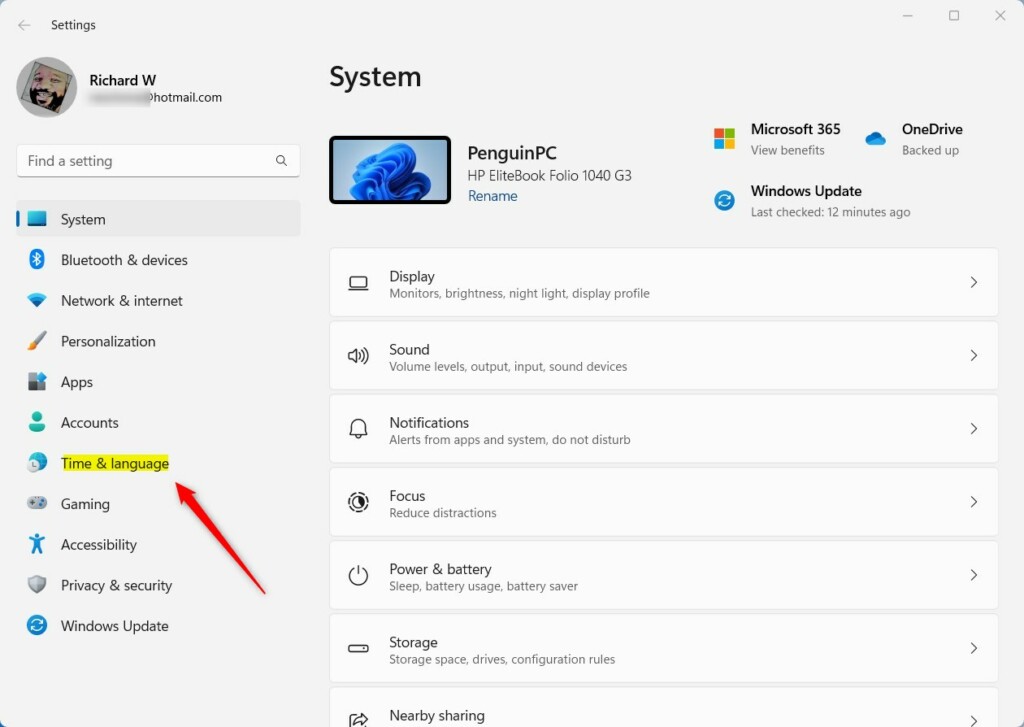
- In Settings, click Time & language in the left menu.
The right side of the window now shows the time and language options.
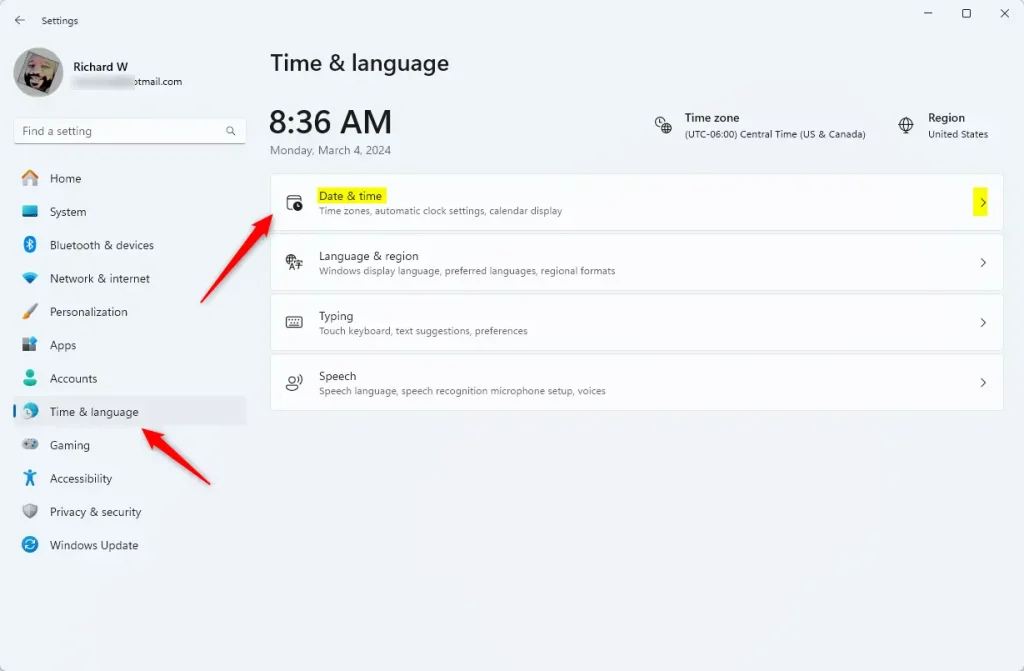
- On the right, click the Date & time box.
You’ll see the page with your current time zone, the Set time zone automatically switch and the date and time controls. Make sure your own time zone is correct here first. The extra clocks are shown in addition to this one.
Step 3Add Extra Clocks for Different Time Zones
You add the extra clocks from the Date & time page. For each one, you choose a time zone and type a display name, so you can tell at a glance which city you’re looking at. You can add up to two this way. If you need more than two, see the Clock app section further down.
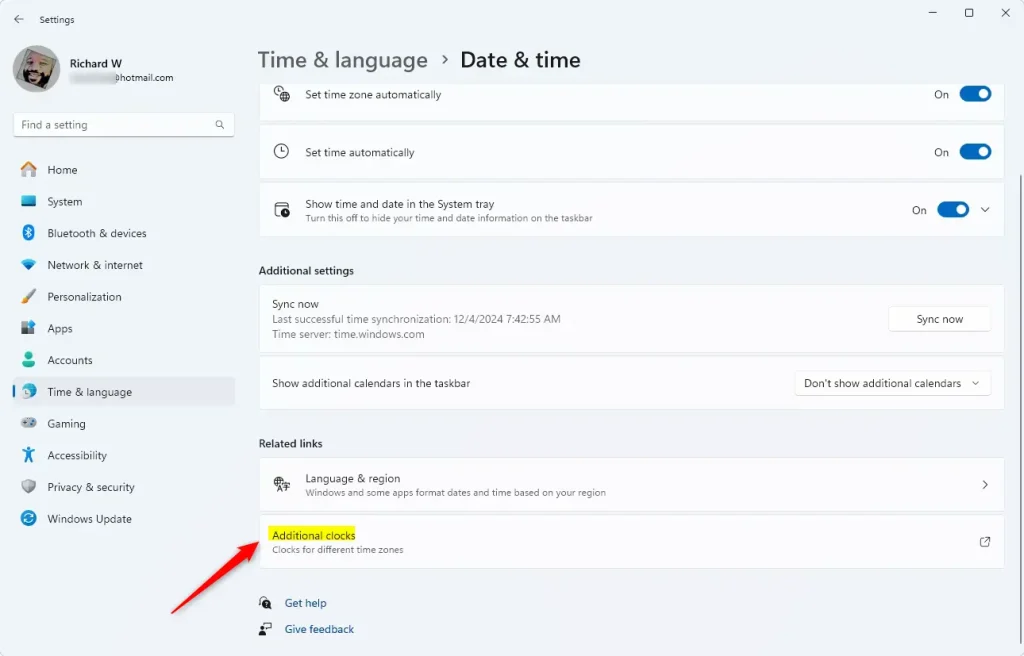
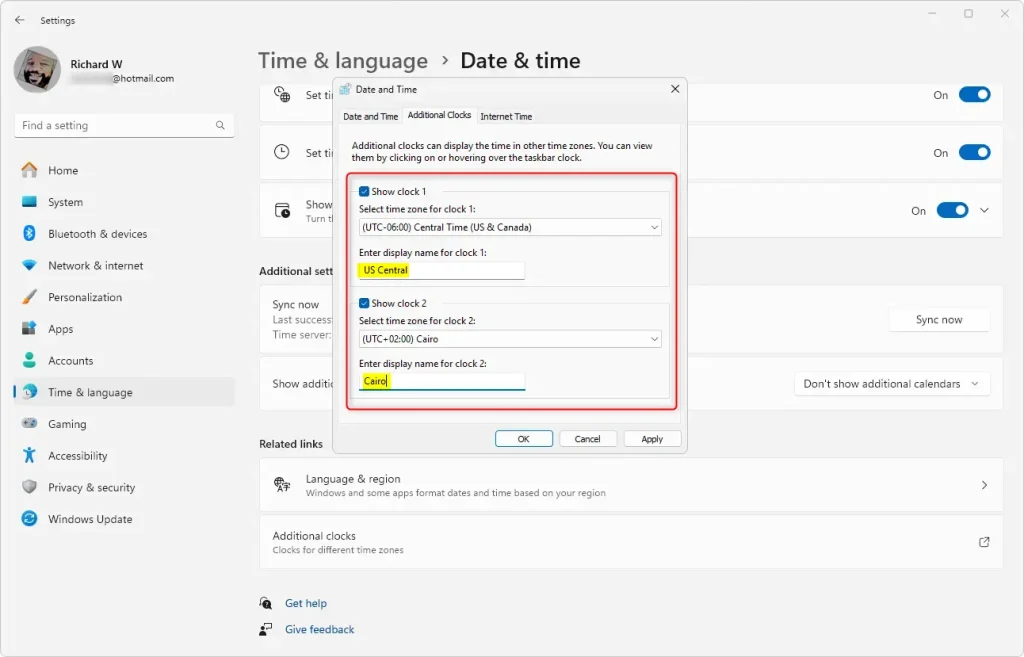
A small Date and Time window appears, open on the Additional Clocks tab. If you can't find the link, scroll all the way to the bottom of the page, and install any pending Windows updates in case your build is out of date.
- Check the box for Show this clock for Clock 1 (and for Clock 2 if you want a second one). The time zone and name fields for that clock become active.
- Pick the time zone you want to see from the Select time zone dropdown menu. The list is sorted by UTC offset, so look for the offset or the city name you need.
- Type a name for the clock in the Enter display name box, like "New York" or "London", so you know which city it is.
- Click OK to save your settings. The window closes and the change takes effect straight away.
Hover the mouse pointer over the clock in the taskbar and a small box appears with your extra clocks, each under the name you gave it. The times show instantly, without opening any menus. Clicking the clock opens the calendar panel, which also lists the extra clocks.
To undo this, go back to the Additional clocks window, clear the Show this clock box for the clock you no longer want and click OK.
Step 4Use the Windows Clock App to See Many Time Zones
If you need more than the two clocks the taskbar allows, use the built-in Clock app. It comes with Windows 11, and its World clock page lets you add as many cities as you like and see them all in one window. If the app is missing, you can get it from the Microsoft Store by searching for "Windows Clock".
- Click Start, then search for and open the Clock app.
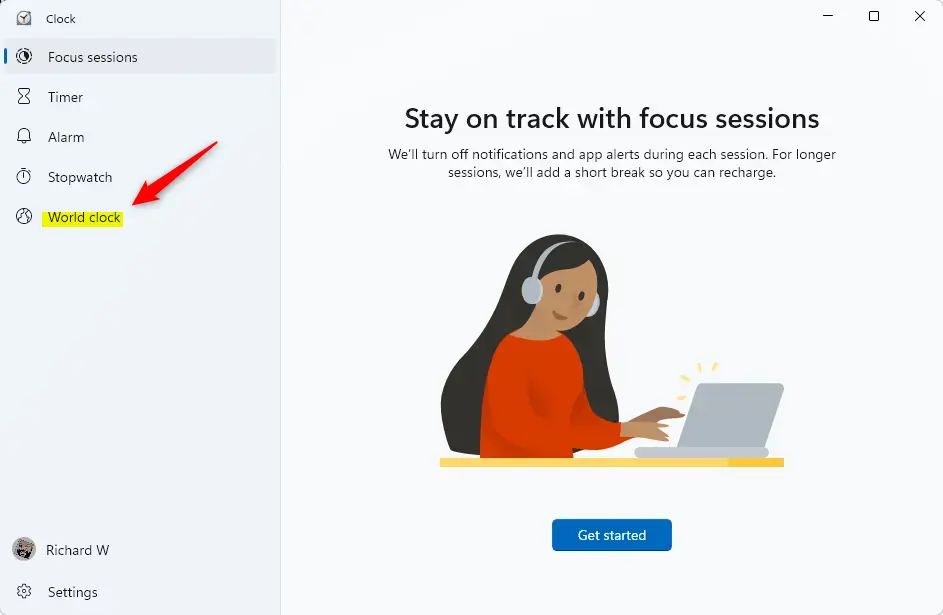
- On the left side, click World clock. The page shows any cities you've already added, or a map if you haven't added any yet.
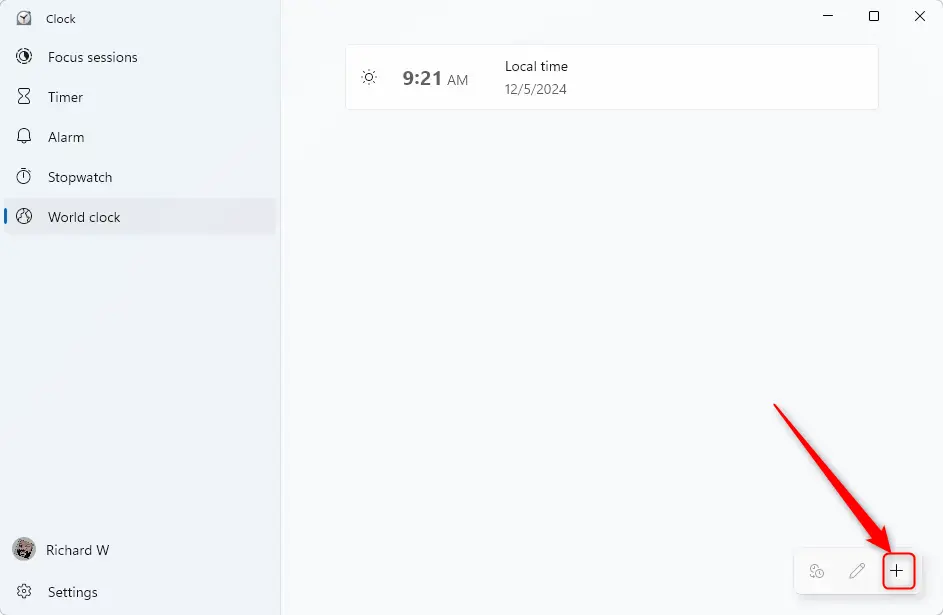
- At the bottom left, click the + button to add cities. A search box opens.
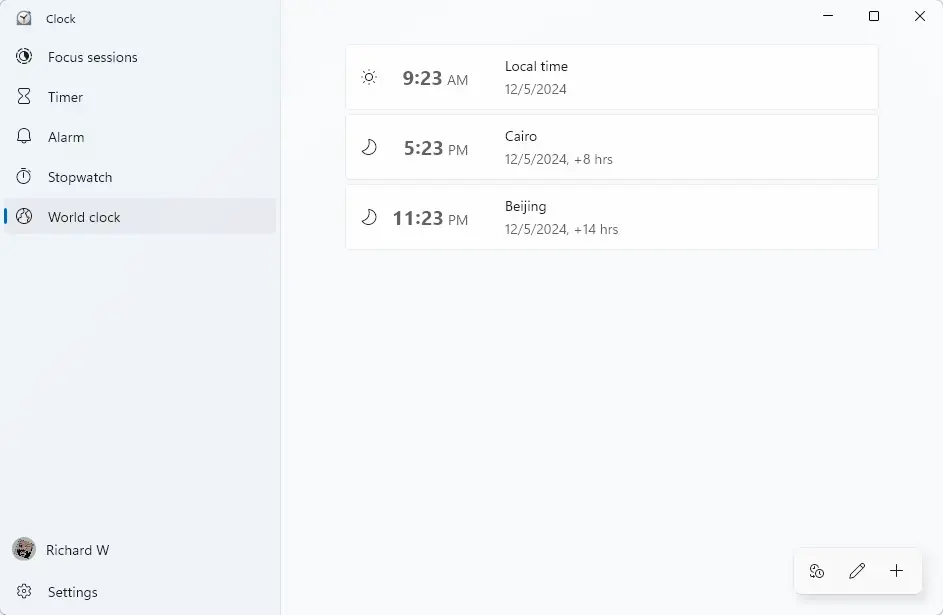
- Type the city or place you want and select it from the results. It then appears on the World clock page with its local time.
- Repeat to add as many as you like. To remove one later, right-click its tile and choose the option to remove it. The Clock app's menus can differ a little between app versions.
Why Use Multiple Time Zones?
- It's easy to check the time for friends, family or coworkers in different places.
- It helps you plan calls and meetings without waking anyone up or missing appointments.
- It's great for travelers who want to keep track of home time and local time.
- It's simple to set up, with just a few clicks.
Summary
Adding multiple time zones takes little effort. Use Additional clocks in Settings for two extra clocks on the taskbar, or the Clock app when you need to track more cities. Both are built into Windows 11, and you can switch either one off again whenever you like.
Have a question about this guide?
Answered by AI from this guide. Good questions may be added to this page — please don't include personal details.
Did this guide fix your problem?

About the Author
Richard
Tech Writer, IT Professional
Richard is a writer at Geek Rewind who turns complex IT tasks into clear, step-by-step guides. He draws on years of hands-on experience in system administration and enterprise IT operations, focusing on Windows, Linux and WordPress: the problems people actually run into, and the fixes that work. His server and WordPress guides come from systems he runs himself. Richard builds and maintains the platform behind Geek Rewind, from its Ubuntu servers and Nginx configuration to its custom WordPress plugins. Many new tutorials start with readers' questions, and he's always glad to answer them in the comments.
No comments yet — be the first to share your thoughts!