How to Use Quick Assist in Windows 11
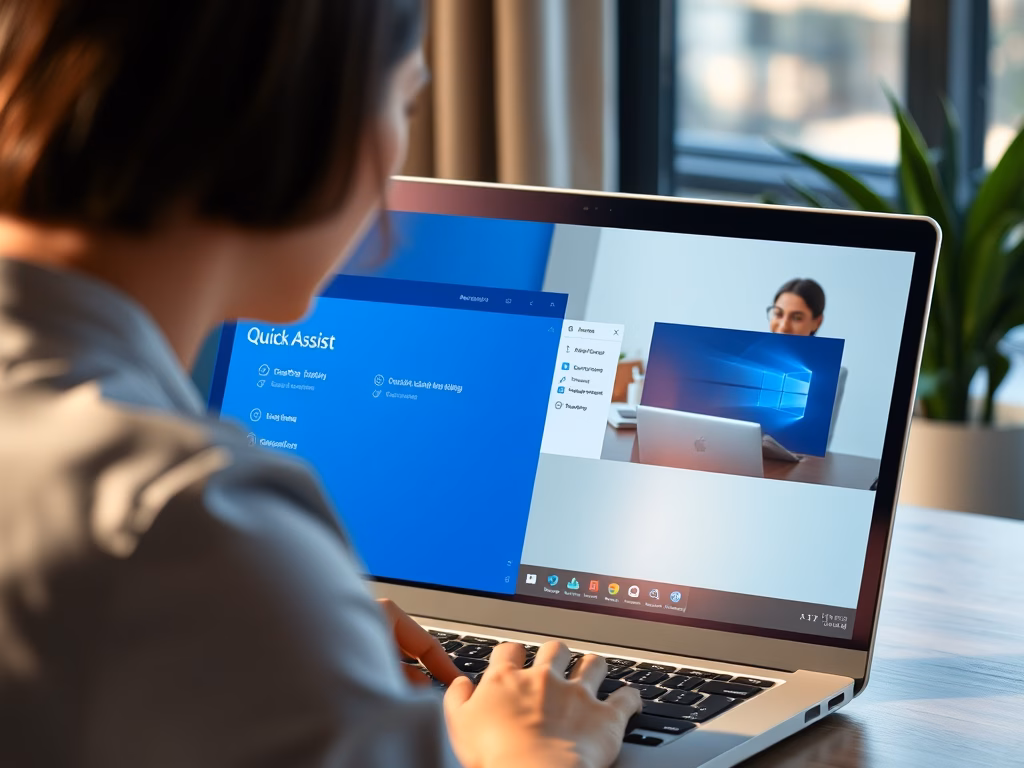
Quick Assist in Windows 11 lets you help someone with their PC remotely or get help yourself.
This tool allows you to see another person’s screen or even take control of their computer to fix problems. It’s a built-in Windows feature perfect for helping family or friends when they have computer trouble.
To use Quick Assist, both computers need to be running Windows 11 and have an internet connection. One person creates a special security code, and the other person enters it to connect.
How to Use Quick Assist
1Open Quick Assist
Opening Quick Assist in Windows 11 can be done a few ways. You can find it by typing ‘Quick Assist’ in the Start menu search bar, or by pressing the Windows key, Ctrl, and Q together to launch it directly.
- Click the Start button (the Windows icon) on the bottom left of your screen. Or press the Windows key on your keyboard.
- Type
Quick Assistin the search box. - Click the Quick Assist app when it appears.
Ctrl + Windows key + Q together to open it faster.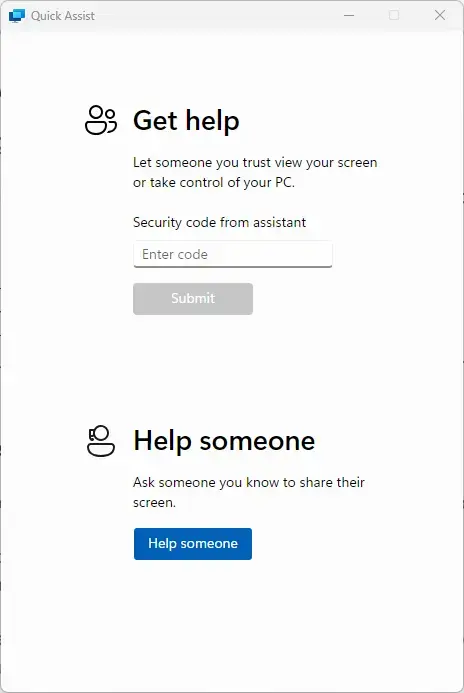
2Start Quick Assist
When you start Quick Assist in Windows 11, you’ll see two options: ‘Get help’ if you need assistance, or ‘Help someone’ if you are providing support. Select ‘Help someone’ if you’re the one providing support.
- Get help – Click this if you want to receive help from someone.
- Help someone – Click this if you want to help another person.
If you’re helping someone else, click Help someone. You may be asked to sign in with your Microsoft account.
3Share the Security Code
When you use Windows 11 Quick Assist to help someone, you’ll get a unique security code. This code is important for the other person to connect to your computer safely, so only share it with the person you are assisting.
The helper uses the security code to connect the person needing assistance. This ensures only authorized access.

Remember, the Quick Assist security code is for the person receiving help only. Never post it online or share it with strangers. This sharing protection keeps your computer safe from unwanted access.
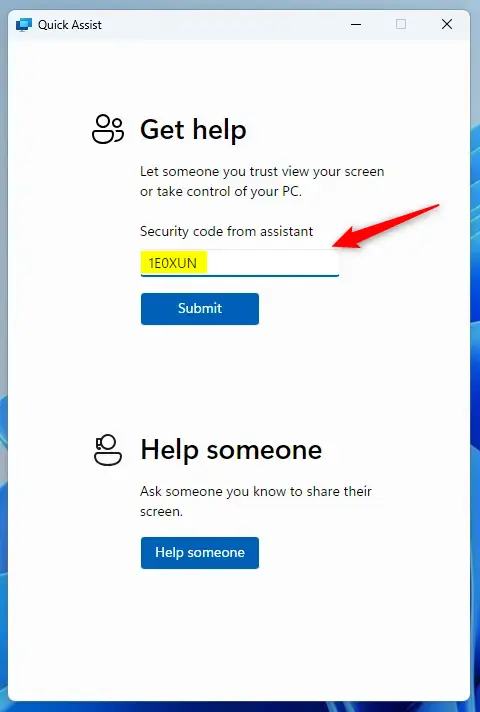
4The Person Getting Help Enters the Code
The person who needs help should open Quick Assist on their Windows 11 PC and select ‘Get help.’ They will then type the six-digit security code you provided into the ‘Security code from assistant’ box and click ‘Submit.’
- Click Get help.
- Type the security code you gave them in the box labeled “Security code from assistant”.
- Click Submit.

5Wait for the Connection to Start
Once the person you’re helping allows the connection, their screen appears on your computer. This Quick Assist feature lets you see what the other person is doing and control their mouse and keyboard, as if you were physically present.
Remote control of a user’s PC allows you to move the other person’s mouse, open programs, and help fix computer problems. This remote control experience simulates sitting directly in front of the other person’s computer.
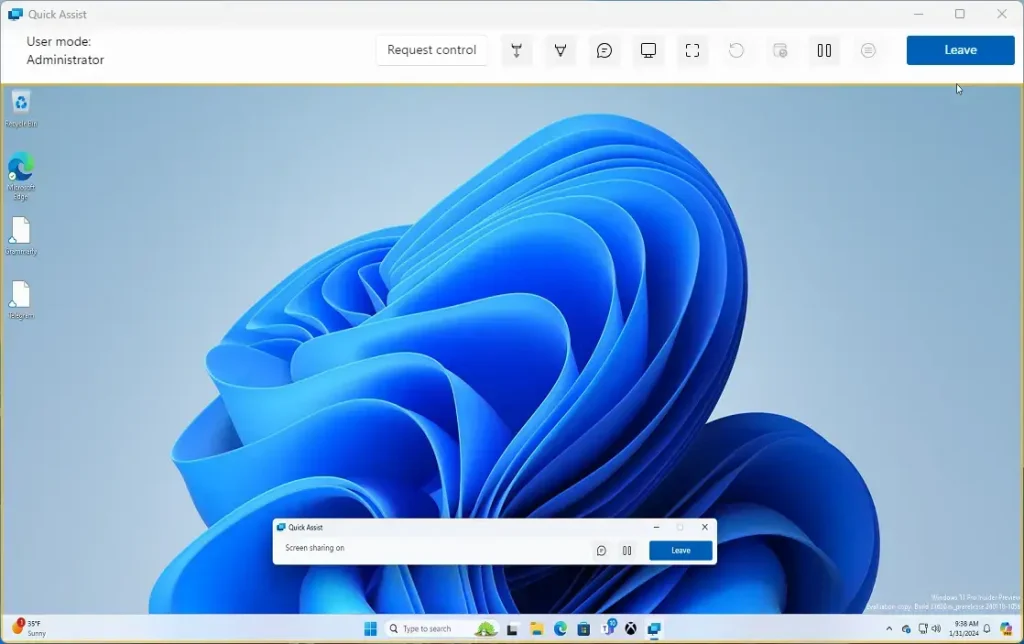
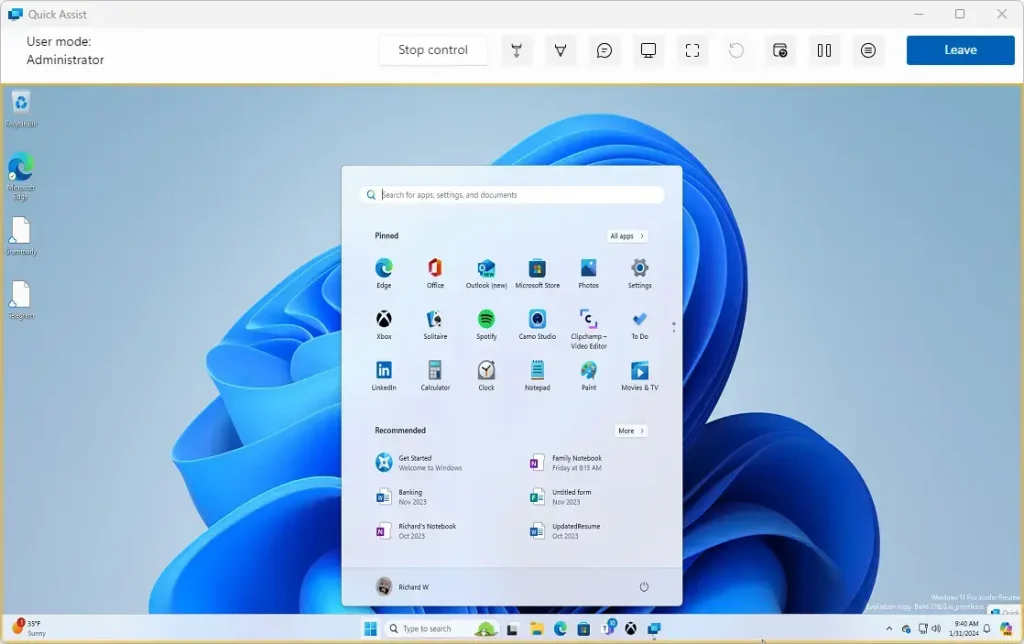
6Use the Quick Assist Toolbar
A small toolbar will appear on your screen with these buttons:
- Pause: Temporarily stop the session.
- Annotate: Draw on the screen to explain things.
- Task Manager: Open Task Manager on the other PC.
- Restart: Restart the other PC and reconnect automatically.
- End: Stop the Quick Assist session.
7Ending the Session
When you’re done helping:
- Click Leave on the Quick Assist toolbar.
- Confirm by clicking End in the pop-up window.
What happens? The connection closes and the Quick Assist window shuts down.
Tips for a Smooth Quick Assist Session
- Make sure both computers have good internet to avoid interruptions.
- Close any private or sensitive windows before sharing your screen.
- Keep talking using phone or chat to explain what you’re doing.
Summary
Windows 11 Quick Assist is a tool for giving or getting remote computer help. It uses a temporary security code to connect two PCs safely, making it possible to troubleshoot issues together.- Quick Assist helps you give or get remote help on Windows 11 computers.
- It uses a secure code to connect safely between two PCs.
- Always keep security codes private and protect your personal information.
- Good communication and strong internet help make the session better.
- Quick Assist is a fast and easy way to help or get help from anywhere in the world.
Should I remove Quick Assist in 🪟 Windows 11?
Yes, you can safely remove Quick Assist from Windows 11 if you don’t plan to use it for remote help, and it can be reinstalled later from the Microsoft Store.
What is the new name for Quick Assist?
In November 2021, Microsoft announced a more business-friendly version of Quick Assist, called Remote Help.
Was this guide helpful?

About the Author
Richard
Tech Writer, IT Professional
Richard, a writer for Geek Rewind, is a tech enthusiast who loves breaking down complex IT topics into simple, easy-to-understand ideas. With years of hands-on experience in system administration and enterprise IT operations, he’s developed a knack for offering practical tips and solutions. Richard aims to make technology more accessible and actionable. He's deeply committed to the Geek Rewind community, always ready to answer questions and engage in discussions.
No comments yet — be the first to share your thoughts!