How to Enable BitLocker with PIN and USB Key in Windows 11
You enable BitLocker with a PIN and USB key in Windows 11 to achieve robust pre-boot authentication for your PC’s sensitive data.
This method combines a physical USB startup key with a numeric PIN, requiring both to be present and correct before your Windows 11 Pro operating system begins to load.
By using this multi-factor authentication approach, you significantly enhance your data security beyond relying solely on a Trusted Platform Module (TPM), which alone can be susceptible to certain hardware exploits.
Once configured, your computer will prompt you to insert the designated USB drive and enter your unique PIN during startup, providing a layered defense for your files.
Enable BitLocker with a PIN and USB key by navigating to Control Panel > System and Security > BitLocker Drive Encryption. Click ‘Change how drive is unlocked at startup’, select ‘Enter a PIN (recommended)’, and then ‘Insert a USB flash drive’. Ensure your TPM is enabled or configure Group Policy if needed.
Prerequisites and TPM Requirements
Before you begin, make sure your computer has a TPM 2.0 chip enabled in your UEFI firmware (your computer’s basic input/output system). If your device doesn’t have a TPM, you’ll need to configure a specific Group Policy (a Windows feature for managing settings) to allow BitLocker without it.
Common Errors: The device cannot use a Trusted Platform Module
Troubleshooting: ‘The device cannot use a Trusted Platform Module’ error. If you see this error, your computer does not have a TPM or it is disabled in the BIOS. You can bypass this by enabling the ‘Require additional authentication at startup’ policy in the Group Policy Editor.
Configuring Group Policy for BitLocker
Changing your computer’s security settings with Group Policy is the first step to setting up BitLocker with a PIN and USB key on Windows 11.
1. Press ⊞ Win+R, type gpedit.msc, and press Enter.
2. Navigate to: Computer Configuration\Administrative Templates\Windows Components\BitLocker Drive Encryption\Operating System Drives.
3. Double-click Require additional authentication at startup.
4. Select Enabled and ensure ‘Allow BitLocker without a compatible TPM’ is checked if needed.
5. Click Apply and OK.
Enable a PIN to Unlock BitLocker
Note: These steps require admin privileges.
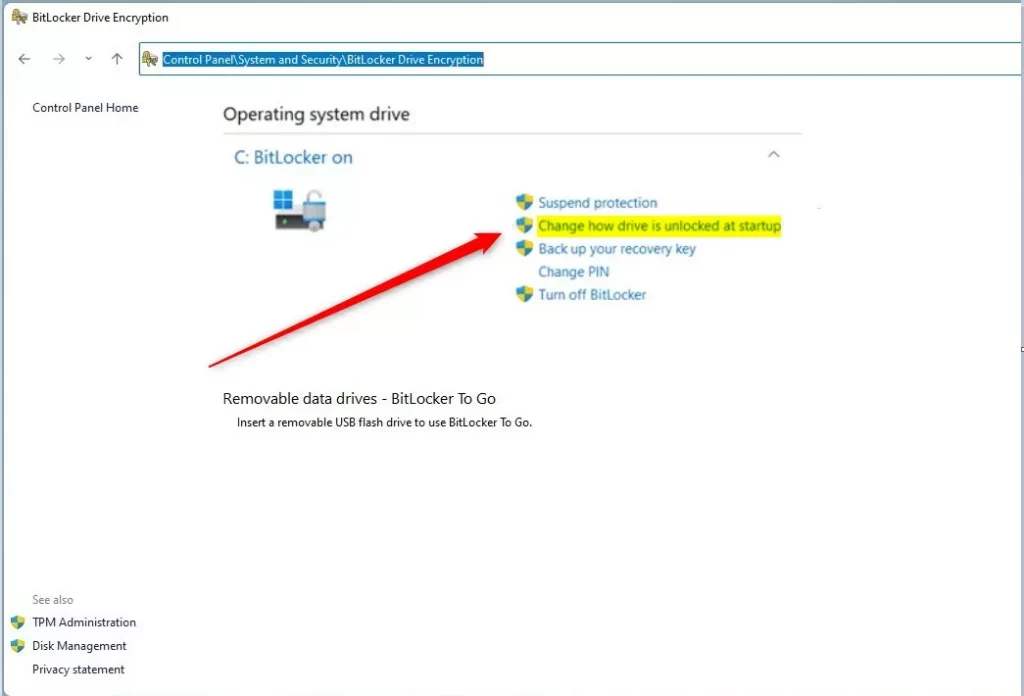
Open the Control Panel and go to Control Panel\System and Security\BitLocker Drive Encryption. Click ‘Change how drive is unlocked at startup’.
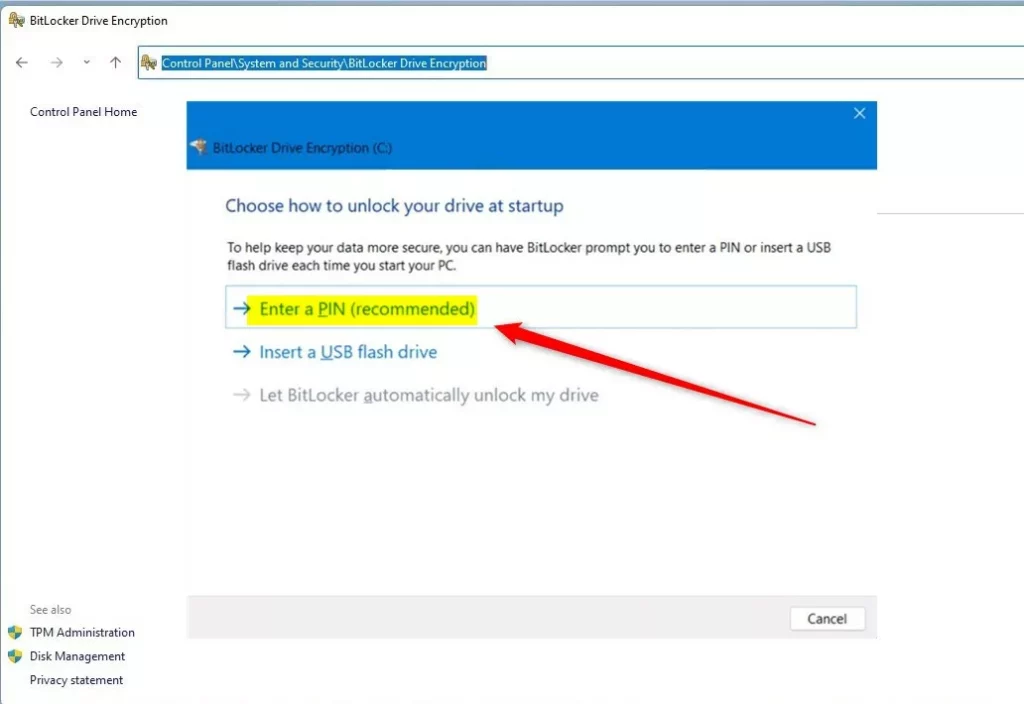
Select ‘Enter a PIN (recommended)’.
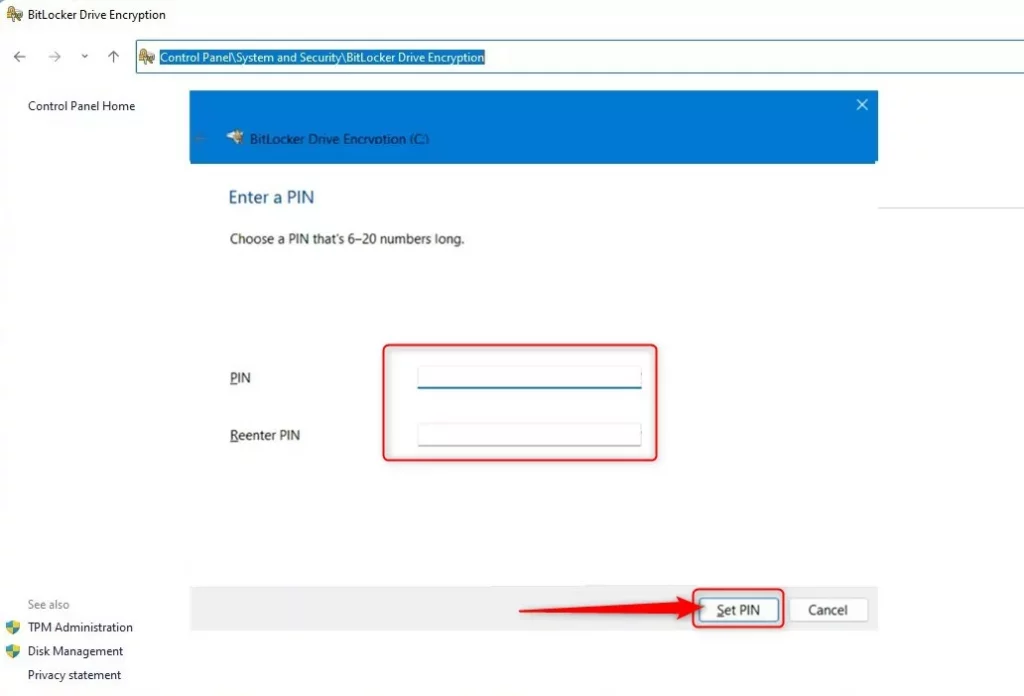
Enter a PIN that’s 6 to 20 numbers long. Confirm it and click ‘Set PIN’.
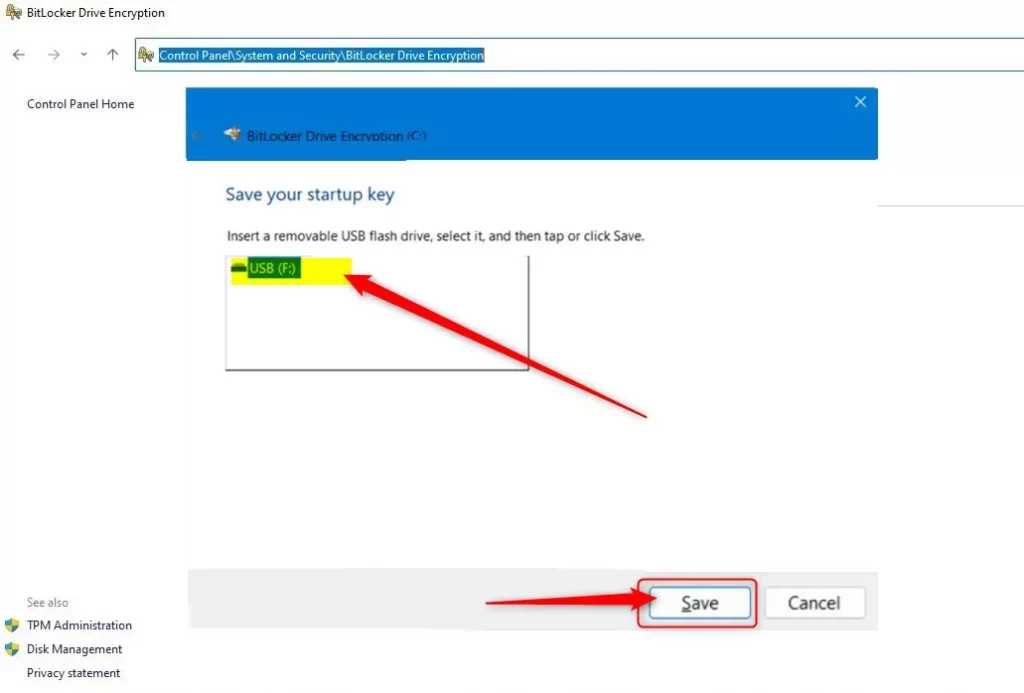
Unlock with a USB Drive at Startup
Note: These steps require admin privileges.
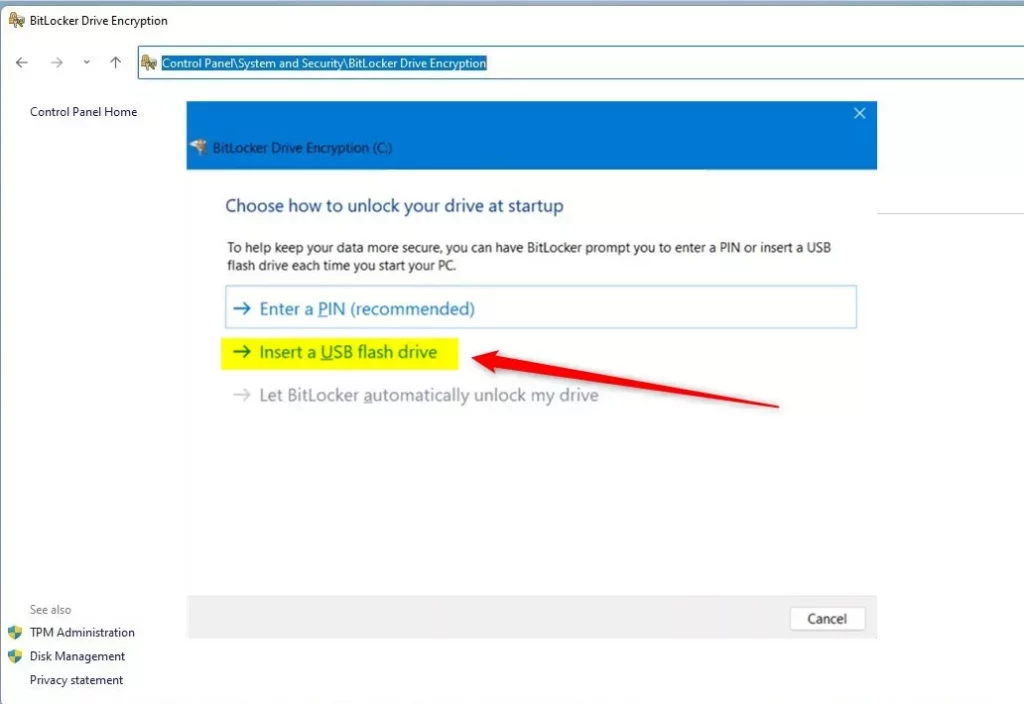
In the same BitLocker menu, select ‘Insert a USB flash drive’.
Choose your USB drive from the list and click ‘Save’.
Ensure the drive is connected during the next reboot to verify the configuration.
Command Line Configuration
For advanced users, you can manage these settings via PowerShell or Command Prompt. Run as Administrator:
manage-bde -protectors -add C: -TPMAndPIN
Summary
You’ve now set up BitLocker with both a PIN and a USB key on your Windows 11 computer, making it much safer from people trying to access it without permission.
Can I use a BitLocker PIN without a TPM chip?
Yes, but you must modify the Group Policy settings first. By enabling the ‘Allow BitLocker without a compatible TPM’ policy in gpedit.msc, you can force Windows to use a USB startup key as the primary authentication method instead of relying on the hardware TPM chip.
Does BitLocker PIN affect Windows Hello login?
No, the BitLocker PIN is entirely separate from your Windows Hello login. The BitLocker PIN is requested before Windows even starts, while your Windows Hello PIN or fingerprint is used to sign into your user account after the operating system has successfully loaded.
Was this guide helpful?

About the Author
Richard
Tech Writer, IT Professional
Richard, a writer for Geek Rewind, is a tech enthusiast who loves breaking down complex IT topics into simple, easy-to-understand ideas. With years of hands-on experience in system administration and enterprise IT operations, he’s developed a knack for offering practical tips and solutions. Richard aims to make technology more accessible and actionable. He's deeply committed to the Geek Rewind community, always ready to answer questions and engage in discussions.


[…] you have set up BitLocker to require users to insert a USB drive that contains a startup key and a PIN at sta… before the computer starts, the steps below show you how to revert to the default […]
[…] users can add additional security by requiring a USB flash drive and a PIN to unlock BitLocker at […]